

Add a border to a slide
You can add a border to a slide for an added element of design in your presentation. While there is not a specific tool in PowerPoint to add a border, there are a couple of ways to accomplish the task: create a simple border by using the outline of a shape, or use Bing Image Search to find and insert a border.
Create a simple border by using the outline of a shape
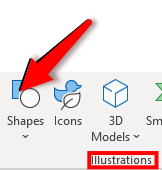
Select the Insert tab, then select the Shapes drop-down menu.

Select a shape from the Rectangles category.
To draw the shape to the size you want, place the cursor at the top-left corner. Hold the left mouse button, and drag the cursor to the bottom right.
To eliminate the background color, select the shape, select the Shape Format tab, then select the Shape Fill drop-down menu. Select No Fill .

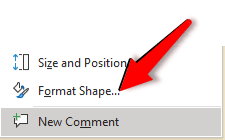
(Optional) Right-click the border and select Format Shape . Use the Format Shape panel on the right to adjust how the border line looks.

Use Bing Image Search to insert a border
You can also search for a new border to use in your presentation. PowerPoint uses a Bing Image Search to locate and download borders. You can search for new border images if you are connected to the Internet.
On the slide where you want to add a border, click Insert > Online Pictures .
Type a search phrase, like line borders or flower borders in the Bing Image Search box, and press Enter.

Select a border image and click Insert to add it to your slide.
Note: The Bing Image Search results bring up images that are licensed under Creative Commons. For more information, see Add clip art to your file .
Add a border to a page
Click Insert , and click the Shapes drop-down menu.

(The Format tab is available on the Ribbon after you select a shape by clicking it.)

To eliminate the background color, click Format , and click the Shape Fill drop-down menu. Click No Fill .

Select the slide you want and click Insert > Shapes > Rectangle .
Tip: To add a border to all your slides, edit the Slide Master .
Click and drag to draw the rectangle so it almost fills the slide.
In the Shape Format tab, click Format Pane .

In the Shape Options pane at the right, under Fill , click No Fill .

In the Format Shape pane, under Line , set the color and line style you want.

Use Bing Images to create a more elaborate border
Search for slide borders on Bing.
Important: Bing gives you access to thousands of Creative Commons licensed images on the Web . Remember, you're responsible for respecting the rights of others' property, including copyright .
Ctrl+click the image you want and click Save Image As to download it.
In PowerPoint, click Design > Format Background .

In the Format background pane at the right, click Fill > Picture or texture fill .

Under Insert picture from , click File , browse for the border you downloaded, and click Insert .
If the picture you loaded doesn't fit your slide, make sure all of the offset values in the Format background pane are set to zero percent (0%).

If you want to use this border for all your slides, click Apply to All .
Move, rotate, or group a picture, text box, or other object
Crop a picture

A small default rectangle is drawn on the slide.
To eliminate the coloring inside the shape, select the Format tab, and select the Shape Fill drop-down menu. Click No Fill .

On the Format tab, select Shape Outline , and choose the color you want for the border.

Select Shape Outline again. Use the Weight and Dashes options near the bottom of the menu to select the line thickness and style you want for your border.
Drag the handles on the shape to size and position the border on the slide.
Type a search phrase, like line borders or flower borders , in the Search box, then press Enter.

Need more help?
Want more options.
Explore subscription benefits, browse training courses, learn how to secure your device, and more.

Microsoft 365 subscription benefits

Microsoft 365 training

Microsoft security

Accessibility center
Communities help you ask and answer questions, give feedback, and hear from experts with rich knowledge.

Ask the Microsoft Community

Microsoft Tech Community

Windows Insiders
Microsoft 365 Insiders
Was this information helpful?
Thank you for your feedback.
Home Blog PowerPoint Tutorials How to Add Border in PowerPoint
How to Add Border in PowerPoint

When designing PowerPoint slides, adding borders to slides or pictures can help add some visual appeal to the presentation. There are different options for adding borders for PowerPoint slides, including shapes and pictures. See the steps below to add borders for slides you are designing yourself and even PowerPoint templates you want to customize.
How to Add Borders for PowerPoint Slides
How to create a custom slide border.
To create custom borders for PowerPoint slides, pick a shape via Insert -> Shapes. In this example, we will use a rectangle to create a border.

Drag the shape over the slide to cover the area you want to use for your border. This will add an overlay shape to the selected area.

Make the shape transparent from the middle by selecting the shape and going to Shape Format -> Shape Fill -> No Fill .

Select a desired color for the shape borders via Shape Format -> Shape Outline . If you want to pick a specific color from your slide, use the Eyedropper tool.

Once the border has been added, it can be further customized. To do this, go to the menus within Shape Outline . For example, you can increase the width of the border via Shape Format -> Shape Outline -> Weight .

To convert your border to sketches or dashes, see the Sketched or Dashes menus within S hape Outline to pick a desired look for your border. If you want to edit Google Slides Templates , similar options are also available in Google Slides for editing borders. However, PowerPoint has more comprehensive features for customizing slide borders.

To give a glow, shadow, soft edges, or other effects to your border, go to Shape Effects via the Shape Format tab and select an effect.

The below image shows an example of a dotted border we created for a PowerPoint slide. As you can see, the border color matches the theme of the graphics of the slide.

How to Add Border for an Image in PowerPoint using Picture Border and Picture Styles
You can use a shape overlay (as shown above) or picture borders or styles to give a border to a picture. To add picture borders, select the image and head over to Picture Format -> Picture Borders . From here, you can select the color and style for your picture.
Like Shape Format , the Picture Format tab also gives weight, sketches, and dashes to be used as a picture border.

To use style presets for your picture, go to Picture Styles via the Picture Format tab. From here, select a style that best matches your preferences.

Like shapes, pictures can also have highlights for borders by adding PowerPoint effects via Picture Format -> Picture Effects .

Below is an example of a picture with dotted PowerPoint borders.

Final Words
Like slide borders, picture borders can be added to stylize individual images according to branding needs and individual preferences to make them more eye-catching. Now that you know how to insert borders in PowerPoint, you can experiment with the various customization features to see how best to use borders for PowerPoint slides.

Like this article? Please share
Design, PowerPoint Tools Filed under PowerPoint Tutorials
Related Articles

Filed under PowerPoint Tutorials • June 11th, 2024
How to Play a Slideshow on PowerPoint
Master one of the key features for presentations. Learn how to play a Slideshow on PowerPoint with our guide.

How to Change a Shape in PowerPoint
Editing PowerPoint shapes doesn’t have to be a complex concept. Learn all the different methods on how to change PowerPoint shapes here.

How to Add Music to PowerPoint
Looking for ways on how to add music to your presentation? Stay tuned for this article on how to add audio files into PowerPoint.
Leave a Reply
How-To Geek
How to make a border or frame on a powerpoint slide.

Your changes have been saved
Email Is sent
Please verify your email address.
You’ve reached your account maximum for followed topics.
How Copilot Can Change the Way You Use Outlook Forever
I still use skype for video calls: here's why, the internet is not forever, so it's time to preserve what you can, quick links, adding a border to a slide using a shape outline, searching for a border via bing image search.
Although there's not a specific command to add a border to a whole slide, there are a couple of ways you can make it happen. One way is to create a border using the outline of a shape. The second is to use the Bing Image Search feature built into PowerPoint to search for and insert a border. Let's see how it's done.
Open up your presentation and select the slide to which you want to add a border.
Switch to the "Insert" tab and then click the "Shapes" button. Select a shape from the Rectangles category. In this example, we're using a basic rectangle with squared edges.

A crosshair symbol displays. Using your mouse, position the crosshair symbol on the upper-left corner of your slide.

Press and drag your mouse to draw a rectangle shape to encompass your whole slide. Release your mouse to finish drawing. If you don't get the positioning right on the first try, you can grab any of the handles on the shape and drag them to resize.

Now that you've got the size of the border right, you'll want to eliminate the background color from the shape. On the "Format" tab, click the "Shape Fill" button and then click the "No Fill" command from the drop-down menu.

By default, your rectangle shape has a thin border, but you can make it thicker if you want. On the Format tab, click the "Shape Outline" button. On the drop-down menu that appears, point to the "Weight" option and then select a thickness for your border. In this example, we're going with a 6 pt thickness. The result is a thick border around your slide.

Want an even thicker border? On that "Shape Outline" drop-down menu, click the "More Lines" command to open the Format Shape pane. In the "Line" section of that pane, you can adjust the adjust the "Width" setting to whatever you like either by entering a point size or clicking on the up and down arrows. In this example, we increased the width to 20 pt.

To add the border to additional slides, select your shape and then click the "Copy" button on the "Home" tab (or just hit Ctrl+C). Switch to a different slide and then click the "Paste" button (or press Ctrl+V).

Rather than adding a simple shape outline for a border, you can also search for a fancier border image. Select the slide where you want to add a border, switch to the "Insert" tab, and then click the "Online Pictures" button.

Enter a search phrase, such as "line borders" or "flower borders" in the Bing Image Search box, and then click "Search" (or press Enter).

Click on a border you like and then click "Insert" to add it to your slide.
That's all there is to it!
We do have another little bonus tip for you. If you're using a background image on your slide and all you want is a white border around it, you don't even need to add a border. You can resize your background image so that it's slightly smaller than your slide. Doing so gives the illusion that's there's a white border around your slides. Take a look:
Pretty neat!
- Microsoft Office
- Office 2016
Home » Microsoft Powerpoint » How to Add Borders to Slides in PowerPoint
How to Add Borders to Slides in PowerPoint
You may be looking for a way to enhance your PowerPoint slides. One would be adding an eye-catching border to make your slide look refined and spectacular.
Borders also make your slides look more organized. While thin borders give the slide a design appeal, broad or pictorial borders will emphasize its definition.
There are two ways you can add borders to slides:
- Using shapes
- Using online pictures
We will show you both methods using simple, step-wise instructions.
Let us begin.
Method #1: Adding Borders Using Shapes
This method uses simple borders using built-in shapes.
Step #1: Open PowerPoint slide
Open an existing slide or a new slide for adding the border.
For this tutorial, we open a new slide.

Step #2: Go to the Insert Menu
Click on the Insert tab in the top menu bar to change the ribbon.

Step #3: Choose a Shape for the Border
In the section Illustrations , click on the Shapes icon.
This opens a menu.
In the Rectangles section, click on a suitable rectangle for creating the border.
We have selected the Rectangle: Rounded Corners shape, you may choose a different shape.

The cursor will change to a cross.
Click the cursor in the top left corner of your intended border.
Drag the handles on the shape and spread it to cover the slide.

Step #4: Format the Shape
Right-click the shape.
This will open a menu.
Click on the tab Format Shape .
This opens a Format Shape dialog box on the right side of the window.
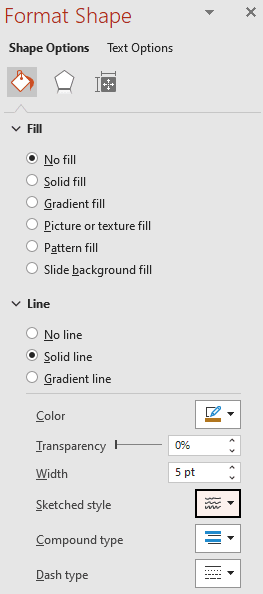
Click on the Fill & Line icon.
In the section Fill , click and select No fill .
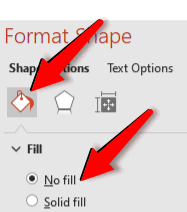
This converts the shape into a border.
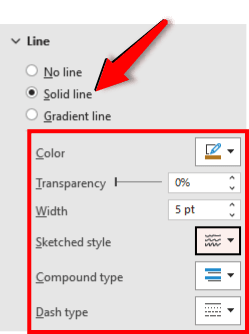
In the section Line , click and select Solid line .
- Click on Color to select a proper color for the border.
- Click on Width and select a proper width for the border.
- Click on Sketched style and select a proper border style.
- Click on Compound type to select a compound border.
- Click on Dash style to select the line type.
The final result may look like this:

Method #2: Adding Borders Using Online Pictures
This method uses online pictures to add as borders.
For this method to work, ensure a working internet connection for your computer.

Step #3: Choose and Insert an Image
In the section Images , click on the Pictures icon.
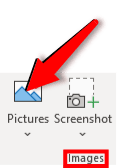
This will open a drop-down menu.
Click on the tab Online Pictures…
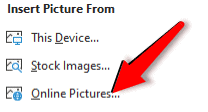
A new window will open for Online Pictures .
In the search bar, type borders and hit the Enter key on your keyboard.

The display will show many border images.
Click and select any border image.

Click on the Insert tab at the bottom of the window.
This will add the border to your slide.
Step #4: Format the Border
Use the handles on the picture to resize it to suit your slide.

We have shown you two methods of adding borders to slides in PowerPoint. Use our methods to enhance your slides in your presentation.
Leave a Comment Cancel reply
Save my name, email, and website in this browser for the next time I comment.
- Creating Presentations
- Last Updated: August 16, 2022
How to Add PowerPoint Borders to Your Presentation

Our content is reader supported, which means when you buy from links you click on, we may earn a commission.
Figuring out how to add borders to your PowerPoint slides can leave you scratching your head for hours.
It’s not worth searching through all the icons available to you on PowerPoint.
Instead, keep reading, and you’ll discover how to add PowerPoint borders quickly and easily.
Why Add PowerPoint Borders?
There are a lot of reasons you may be thinking about adding a border to your PowerPoint slides. The top reason is for design impact. Borders can make your presentation look sharp and refined.
Here’s how:
- Borders can help your slides look more organized.
- If done right, they add design appeal. This is especially true for thin borders.
- Borders give definition.
Not every presentation needs borders, and often, instructors only use borders in the introductory slide. However, you can try out your PowerPoint template with a border and without quite easily and see which one you prefer.
Different Options for Adding Borders in PowerPoint
Now that you’ve learned a little about borders, let’s get into how to create them. There are several different options that are covered for you below:
Option 1: Borders Through Shapes
This method works for all versions of PowerPoint.
In this method, you will insert a shape, select no fill, and then choose the line color and weight to give a border effect.
Here’s how to do it …
First go to the Insert tab and then click on Shapes . Select the rectangle shape if you want your border to follow the dimensions of your slide:

Place the shape where you want it on your slide:

As you can see, I placed the shape so it covers nearly the entire slide. I left a slight bit of the slide showing though. That way you’ll be able to see the border when it’s finished.
Select the shape and right-click on it. Then go down to the bottom of the pop-up menu and click on Format Shape :

Once you do that, a Format Shape box will open where you can format the shape and select the transparency.
You can slide the Transparency slider all the way to 100% if you want your rectangle shape to blend in with the rest of the slide. You can also click on Line and adjust the settings of your line (which will be your border).
For the example below, the Fill is set to 100% (so there is no color filled into the shape). The line is set to Solid Line , the line Color is a shade of gray, and the line Weight is 2:

Here’s a screenshot of how the example border turned out:

You can create all types of borders using the shape method. You can choose from dashed lines, gradient lines, different colors, and any width of line. In addition, you can place your border wherever you’d like on your slide. This makes for unlimited borders using this one simple technique.
Just to show you, I played around with the settings for this border and came up with this:

You really can make just about any type of border with this technique.
Option 2: Insert Border Image From Bing Image Search
This technique works on PowerPoint versions 2013 and up.
In order to make this method work, you’ll insert an image with borders already on it from Bing Image Search.
Go to the Insert tab and select Online Pictures :

Once you’ve clicked on Online Pictures , a box will pop up. The box is an embed of Bing Image search:

You can search through Bing image search by typing in whatever you want in the search box. I typed in borders:

When you find a border you like, simply click on it and the Insert button will be enabled:

Simply click on the Insert button and your border will be inserted into your PowerPoint slide:

You’re all set with your brand new border!
Option 3: Using Clip Art for Borders
PowerPoint stopped including a clip art library in version 2013, but you can still upload images from your computer on newer versions.
This method involves using clip art images as your border. Older versions of PowerPoint included a clip art library that you can select borders from.
First, go to the Insert tab within the Illustrations group . Then click on Clip Art :

Once you’re at the Clip Art task pane , you can search for borders.
Then click Go .
Browse through the available borders and when you find the one you want, double click on it. PowerPoint will add the border to your slide:

How’s that? I suppose it would work well if your presentation covers unicorns!
You can resize it to make it look the way you want.
Option 4: Image Border
This technique works for PowerPoint versions 2013 and up.
For this one you need to insert a background image that you then apply a border to.
You can paste in or insert images from anywhere into PowerPoint. Here’s one I pasted in by going to the Insert tab , then clicking on Pictures . From there I navigated to a picture on my computer and selected it. PowerPoint does the rest. I resized the image to leave a little of the slide background showing through:

Select your image, then right-click to get a menu to pop-up. Click on Format Picture :

Once you click on the Format Picture link, you’ll see a task pane pop open where you can configure just about anything you want dealing with the image:

I selected a Solid line for the border, a 4 pt Weight for the line and black as the Line Color . You can format the line around your image to be whatever you would like including dashed or dotted line borders.
Once you have the border you may want to think about making the image more transparent. That way you can overlay text and it will be readable. You will also be able to see your border. This is easy to do in the Office 365 version of PowerPoint. If you’re using a different version, then you will want to take a look at our tutorial on how to make transparent images in PowerPoint .
In Office 365, you can make the image transparent from within the Format Picture task pane. Just click on the Picture icon from within the Format Picture task pane , click on Picture Transparency , and then from there, move the Transparency slider to wherever you’d like it:

Here’s the finished product:

It’s an OK start. With a little more refinement you can create a great PowerPoint border around an image.
Creative Options
You can download some creative PowerPoint borders already to go and add them into your slides. This will give you an artistic look that you don’t have to create.
You can find these on Pinterest, a search engine like Bing, or on a site like Free PPT Backgrounds .
Just make sure the borders are really free and are available for use by the public.
Best Practices for Borders
There are a lot of tips for making borders that add to the design of your presentation. Here are just a few:
- Make a straight border especially for a professional presentation like online training. Curves don’t fit well.
- Draw lines that don’t reach around the entire slide. For example, your border could just be on two sides of the presentation instead of all four.
- Complex designs in your borders don’t always look great. It may distract and often doesn’t add value to your presentation.
- If you don’t use borders anywhere else, consider using them on your introductory slides. Borders on opening slides can add for a nice design element, especially if they fit with the theme of your presentation.
As mentioned, another cool tactic you can combine with borders or use on its own is to make a picture transparent in PowerPoint .
If you’re planning to use the same border for all your slides, you may want to add the border to your PowerPoint Slide Master .
The biggest take-away from this tutorial is to give borders a try! You might really enhance your slides.
They’re easy to add and often give your presentation a more polished look.
If you’ve seen or created a cool border for your presentations, show us in the comments below …

Lisa Parmley
Lisa Parmley is the founder of coursemethod.com. After gaining a Master's degree, she worked in research for about seven years. She started a training company in 2001, offering a course helping people pass a professional exam. That course has earned multiple 7 figures. She created SEO and authority site building training around 2007 which went on to earn well into the 6-figure mark.
She has 22+ years of experience in the trenches creating and selling online courses. Get help starting and growing your online course business here .
Grow faster with free step-by-step training for online course founders.
Access Course Method Pro progress tracking and Strategic Planners + gain inspiration from successful course creators in weekly emails .
Unsubscribe at any time.
How to add a border to slides in PowerPoint, and give your slideshow a sleek design
- While there isn't a built-in option for adding borders to a slide in PowerPoint, there is a workaround.
- You can add a border to a PowerPoint slide by adding a rectangle shape and removing the fill color, which will give your slide the appearance of having a border.
- You can duplicate your slide to give your entire PowerPoint slideshow the same border.
- Visit Business Insider's Tech Reference library for more stories .
While there's an option for page borders in Microsoft Word, there's unfortunately no such option for slide borders in Microsoft PowerPoint — though there is a workaround.
While you can't add borders to slides, you can still add outlines to any shape or image. You can use a shape — likely a rectangle — to create slide borders by stretching it to fit the slide dimensions, giving it no fill color, and finally customizing a thick outline.
Borders are a great way to customize your presentation, in addition to changing fonts and backgrounds. And after you customize the border on one slide, you may find it helpful to copy or duplicate the slide so you can make a uniform slideshow.
Here's how to do it using PowerPoint on your Mac or PC.
Check out the products mentioned in this article:
Apple macbook pro (from $1,299.00 at apple), acer chromebook 15 (from $179.99 at walmart), how to add a border in powerpoint using shapes.
1. Open PowerPoint on your Mac or PC and open the slideshow you want to edit.
2. Navigate to the "Insert" tab at the top of the screen. Click the "Shapes" icon and choose the shape you'd like to insert. The best ones to choose for borders are found in the rectangle category.
3. Click or click and drag to create your rectangle. Once you create your shape, PowerPoint will automatically open the temporary "Shape Format" tab at the top. Before you begin any formatting, stretch the rectangle to fill the dimensions of the slide.
4. After resizing, you'll want to click the "Shape Fill" icon in the "Shape Format" tab that appeared. This is labeled with a large paint can icon. Choose "No Fill" instead of the default color it picks.
5. Next, you'll want to change the shape outline. Click the small pencil icon next to "Shape Fill" and begin customizing its color, weight, and style. In each of these categories, you'll find the option for "More Lines…" Click this to open the "Format Shape" window.
In addition, the same menu can be reached if you right-click on your shape and select "Format Shape" from the drop-down menu that appears.
6. Regardless of how you open the advanced formatting window, you can now continue adjusting your border in greater detail. Use the arrows or manually enter a width to make the border thicker or thinner. You can also specify the border's color here as well.
7. Play around with adding multiple shapes and stacking them on top of, or inside, one another. You can further customize them by choosing different sketched styles. You can also choose different compound, dash, cap, and join types for each of them. Click each option to open its respective drop-down menu full of choices.
8. Once you've finalized your border, you might find it helpful to duplicate your slide. This will let you create more slides with the border, without having to set it up again. To duplicate a slide, right-click on the slide in the left sidebar and select "Duplicate Slide."
Related coverage from Tech Reference :
How to download and access microsoft powerpoint on your mac computer, how to embed a youtube video into your microsoft powerpoint presentations using a mac or pc, how to convert google slides to a powerpoint presentation in 4 easy steps, how to convert a powerpoint to google slides in 2 different ways, how to change the background on your google slides presentation.
Insider Inc. receives a commission when you buy through our links.
Watch: We spent a day with US Border Patrol in El Paso, where the agency is overwhelmed by the volume of migrants crossing the US-Mexico border
- Main content
How to Add a Border in PowerPoint
A border in PowerPoint is a visible line or frame surrounding an image or text box, enhancing its visual appeal and drawing attention to the content. Borders help define boundaries, separate elements on a slide, and provide a polished, professional appearance.
They can be customized in terms of color, thickness, and style to match the presentation’s theme or emphasize specific elements. By using borders, you can improve the overall design, create emphasis, and increase the readability of your slides, making your presentation more engaging and effective.
In this article, we’ll guide you through the process of adding borders to various elements in PowerPoint, helping you create engaging and professional-looking presentations.
How Does Unlimited PowerPoint Templates Sound?
Download thousands of PowerPoint templates, and many other design elements, with a monthly Envato Elements membership. It starts at $16 per month, and gives you unlimited access to a growing library of over 2,000,000 presentation templates, fonts, photos, graphics, and more.

Modern PPT Templates
New & innovative.

Maximus Template
Explore PowerPoint Templates
Adding a Border to a Text Box or Shape
PowerPoint allows you to add borders to text boxes and shapes with just a few clicks. Follow these steps to add a border:
- Select the text box or shape you want to add a border to by clicking on it.
- Click the “Shape Format” tab in the PowerPoint toolbar.
- In the “Shape Styles” group, click on the “Shape Outline” button.
- Choose a color for the border from the drop-down menu. You can select from the theme colors, standard colors, or create a custom color using the “More Outline Colors” option.
- If you want to adjust the width of the border, click on the “Weight” option in the “Shape Outline” drop-down menu and choose a line width.
- If you prefer a dashed or dotted line border, click on the “Dashes” option in the “Shape Outline” drop-down menu and choose a line style.

Adding a Border to an Image
To add a border to an image in PowerPoint, follow these steps:
- Select the image you want to add a border to by clicking on it.
- Click the “Picture Format” tab in the PowerPoint toolbar.
- In the “Picture Styles” group, click on the “Picture Border” button.
- If you want to adjust the width of the border, click on the “Weight” option in the “Picture Border” drop-down menu and choose a line width.
- If you prefer a dashed or dotted line border, click on the “Dashes” option in the “Picture Border” drop-down menu and choose a line style.

Adding a Border to the Entire Slide
To add a border to the entire slide, you can use a rectangle shape as a frame. Follow these steps:
- Click the “Insert” tab in the PowerPoint toolbar.
- In the “Illustrations” group, click on the “Shapes” button and select the rectangle shape.
- Draw a rectangle on the slide by clicking and dragging. Adjust the size so that it covers the slide’s edges, creating a border effect.
- Follow the steps outlined in the “Adding a Border to a Text Box or Shape” section to customize the border color, width, and style.
- To remove the fill color, click on the “Shape Fill” button in the “Shape Styles” group and select “No Fill.”
Advanced Border Options
For more advanced border options or to create a unique design, you can combine multiple shapes or use PowerPoint’s “Merge Shapes” feature. This allows you to create custom borders and frame designs that suit your presentation’s theme.
- Insert multiple shapes on your slide using the “Insert” tab and the “Shapes” button.
- Arrange and resize the shapes as needed to create a border or frame design.
- Select all the shapes by holding down the “Shift” key while clicking on each shape.
- In the “Insert Shapes” group, click on the “Merge Shapes” button and choose a merge option, such as “Union” or “Combine,” to merge the shapes into a single border design.
- Customize the border color, width, and style following the steps outlined in the “Adding a Border to a Text Box or Shape” section.
Tips for Creating Effective Borders
When adding borders to your PowerPoint slides, keep the following tips in mind to ensure your presentation remains visually appealing and professional:
- Keep it simple: Too many decorative elements can be distracting. Stick to simple, clean borders to maintain a polished look.
- Be consistent: Use the same border style, width, and color throughout your presentation for a cohesive appearance.
- Match your theme: Choose border colors and styles that complement your presentation’s theme and color scheme.
- Use contrasting colors: Choose a border color that contrasts with the background to ensure it stands out and frames the content effectively.
Incorporating borders into your PowerPoint presentation can enhance its overall look and help emphasize key points or elements. By following the steps and tips provided in this article, you can easily add and customize borders for various elements, such as text boxes, shapes, images, and entire slides. With a little practice and creativity, you can use borders to create visually engaging and professional presentations.

Nice to meet you.
Enter your email to receive our weekly G2 Tea newsletter with the hottest marketing news, trends, and expert opinions.
The Simple Solution to Creating PowerPoint Borders
September 24, 2019
by Grace Pinegar

Boundaries are healthy, both in relationships and in PowerPoints.
Creating a boundary, heretofore referred to as a border, in Microsoft 365 PowerPoint is a simple way to add functional design elements into your presentation. As we’ve discussed earlier, sprucing up your presentation can help it better hold attention as well as impress the audience members.
Add a border to your PowerPoint
- Select "insert" and "shapes"
- Click and drag the shape to cover the whole slide
- Click on the shape and select "format pane"
- Customize pane settings to "no fill," "solid line," and select preferred width
- Add border to all slides if desired
You can do so by learning how to add a gif into your PowerPoint, converting your powerpoint to word, or reading on to discover the simple steps it takes to add a border into PowerPoint.
How to insert PowerPoint borders
PowerPoint does not have a tool that is specifically for the creation of borders, but unto everything there is a loophole. Follow these steps and you’ll be adding some pizzazz to your PowerPoint presentation.

1. Insert shapes
On the slide where you want to add a border, select “insert” at the top of your PowerPoint and find where it says “shapes.” Select a rectangle.

2. Fill slide with rectangle
Click and drag the rectangle to fill the entire slide.

3. Format pane
Next, we have to play with the rectangle’s settings. Click on the rectangle you just created. In the top-right corner of the screen, select “format pane.”

4. Customize pane settings
Under “fill,” select “no fill.” This will change the rectangle to a thin border outlining the slide.

Next, you’ll need to make the border thicker so it’s visible. Under line, select either solid or gradient, and choose a width that works for you. You can also play around with other features, such as border color.

For example, this is what it looks like when I change the width to 20 pt:

5. Optional: add border to all slides
If you want all slides to have the same border, one easy way to do this is to copy it from one slide and paste it into the others.
If this is too time-consuming (for example, say you have 300 slides), you could save your current design as a slide theme, which would preserve your current presentation as a reusable layout.
Broaden your borders
Don’t feel like you have to stick with the same old PowerPoint style just because it’s what you’re used to. Mess around with fun features such as borders and you never know what’ll happen as a result!
Trying to convert your presentation for internet editing? Learn how to convert a PowerPoint to Google Slides .

Grace Pinegar is a lifelong storyteller with an extensive background in various forms such as acting, journalism, improv, research, and content marketing. She was raised in Texas, educated in Missouri, worked in Chicago, and is now a proud New Yorker. (she/her/hers)

Productivity
Public speaking isn’t for everyone.

More and more, e-signatures are being accepted as a legitimate and legally binding way to sign...

We’ve all sat through boring presentations with unprepared or uncharismatic speakers, wishing...

Never miss a post.
Subscribe to keep your fingers on the tech pulse.
By submitting this form, you are agreeing to receive marketing communications from G2.
How To Add PowerPoint Borders
Are you tired of drab PowerPoint presentations?
Microsoft PowerPoint has many options for customizing the appearance of your PPT slides. One of the most simple and effective ways to up the ante on your next presentation is to add borders to each of your slides. This simple step is not only visually appealing, but can help with product branding if you’re presenting to your company or to a client.
How to add borders to PowerPoint slides
How to customize your powerpoint slide borders, how to add a custom border with graphics.
To add a border to a PowerPoint slide, follow these steps:
Begin with a blank slide. From the Home menu on the top, select “New Slide” and then “Blank Slide.”

Begin by adding a blank slide to your presentation
1. From the menu below Home, select “Shapes.”
2. In the dropdown that appears, select a rectangle.

Select “Shapes” and then “Rectangles”
3. Your cursor will become a plus sign, “+.” Use this tool to draw a rectangle in your blank slide. Begin in the upper left corner, hold your mouse, and drag to the lower right corner. Then release.

Drag your cursor to create a box
4. The “Shape Format” menu will automatically open. Select “Shape Fill” from this menu.

Select “Shape Fill” under the “Shape Format” menu
5. In this dropdown, select “No Fill.”

Select “No Fill”
You now have a border around your slide. You can change this border’s placement on the slide by clicking on the circles outside of the border and then dragging the box to resize and move your border.
After you create your border, the “Shape Format” menu automatically appears. From this menu, you have many options for customizing your new border.
Customizing border outlines
Click on “Shape Outline” and you will see the following options for border customization:
Colors . Click on any of the colors to change your border color.

Customize your border colors under “Shape Outline”
Select “More Outline Colors” for even more options.

Select “More Outline Colors” to see custom color options

If you choose to see more colors, a box will display that allows you to insert color codes
Weight . Change the thickness of your border by selecting one of the options that appear from the dropdown, or select “More Lines” for more options.

Select “Weight” to change the border thickness
Line appearance . Select “Sketched,” then choose your border style. Some of your options include a straight, curved, or squiggly line.

From this menu, you can also customize the appearance of your border
Dashes . Instead of a straight line, you can select dotted lines in a variety of styles.

From this menu, you can also customize your border to have dashes
Customizing border effects
Click on “Shape Effects” and you will see the following options for border customization:
Reflections
You can also choose from preset border options that Microsoft provides.

Select “Shape Effects” to see options for other effects
In addition to selecting one of Microsoft’s effects mentioned above, you have the option of using a custom border that has been licensed for public use. To find these borders, complete the following steps:
1. Use your preferred search engine, such as Google.
2. Search for the style of border you wish to use. (For example, “Christmas border” or “border with fall leaves.”)
3. Select the “Images” tab to see all images.

Select “Images” to see all image options for your search
4. Click “Tools” to display tools, then select “Creative Commons.”

Select “Tools” to see the option of selecting public use images

Select “Creative Commons licenses” to see free-to-use images
5. Select the image you wish to use and save this image to your computer. (Right click to open the box that will give you this option.)
Add your new custom image to your slide by following these instructions:
1. From the top PowerPoint menu, press “Insert.” The Insert menu will appear below.
2. From this menu, select “Pictures.”
3. In the box that appears, choose your option for inserting a photo. Select the option to choose an image from your computer.

Select “Pictures” and then “This Device” to retrieve your custom border
4. Select your border image from where you had it saved on your computer.
Take your presentations to the next level
Microsoft PowerPoint may be the most well-known presentation software, but it most certainly is not the only one on the market. In fact, there is a myriad of presentation software available for users—and many work on cloud-based platforms, offer stunning templates, and are user-friendly. Check out some of the best presentation software on the market in our software directory.
IMAGES
VIDEO
COMMENTS
Learn how to add a border in PowerPoint with a shape outline or images. You can add a simple or more elaborate border to your PowerPoint slides.
Enhance your PPT presentations by learning how to add a border in PowerPoint. Step-by-step guide with two different methods here.
Open up your presentation and select the slide to which you want to add a border. Switch to the "Insert" tab and then click the "Shapes" button. Select a shape from the Rectangles category. In this example, we're using a basic rectangle with squared edges. A crosshair symbol displays.
In this step-by-step guide, you'll learn how to add borders to your slides in PowerPoint. You'll explore different border styles, sizes, and colors, and learn how to customize them to...
There are two ways you can add borders to slides: Using shapes. Using online pictures. We will show you both methods using simple, step-wise instructions. Let us begin. Method #1: Adding Borders Using Shapes. This method uses simple borders using built-in shapes. Step #1: Open PowerPoint slide.
Make your presentation stand out with borders. You can make a professional impact from simple slide borders. Learn how to create PowerPoint borders.
You can add a border to a PowerPoint slide by adding a rectangle shape and removing the fill color, which will give your slide the appearance of having a border.
Follow these steps to add a border: Select the text box or shape you want to add a border to by clicking on it. Click the “Shape Format” tab in the PowerPoint toolbar. In the “Shape Styles” group, click on the “Shape Outline” button. Choose a color for the border from the drop-down menu.
How to insert PowerPoint borders. PowerPoint does not have a tool that is specifically for the creation of borders, but unto everything there is a loophole. Follow these steps and you’ll be adding some pizzazz to your PowerPoint presentation. 1. Insert shapes.
One of the most simple and effective ways to up the ante on your next presentation is to add borders to each of your slides. This simple step is not only visually appealing, but can help with product branding if you’re presenting to your company or to a client.