- Follow PetaPixel on YouTube
- Follow PetaPixel on Facebook
- Follow PetaPixel on Twitter
- Follow PetaPixel on Instagram

40 Practical Photography Assignments to Reinspire You

Here are a list of photographic assignments that I hope help you. You can skip around and choose the assignments that appeal to you:
#1. 5 yes, 5 no
If you’re interested in street photography, often the fear of rejection is worse than the rejection itself.
If you want a simple assignment to build your confidence, try the “5 yes, 5 no” challenge.
The concept is simple: approach a bunch of strangers and ask for permission to make their portrait. You have to keep asking until you get 5 people to say “yes” and 5 people to say “no.”
You will discover it is harder to get a “no” than a “yes”.
If you’ve got all 5 “yes’s” but not 5 “no’s”, you need to purposefully go out and look for the scariest people you think will say “no.”
The purpose of this assignment is to help you face rejection. In life, photography, and everything else, we are slaves of fear. This will help you face your fear head-on.
#2. “10 no”
If you’re really, really afraid of getting rejected, try out this assignment (a variation of the 5 yes/5 no assignment).
Go out and try to get 10 people to reject having their photos as quickly as possible.
If you go out and try to find people to say “yes” to getting their portrait shot, you might become paralyzed. Instead, only approach people who you think look unfriendly and will say “no.”
Funny story: you will find that often the scariest/meanest looking people are the nicest (and vice-versa).
#3. Exposure compensation
I am a big proponent of shooting in “P” (program mode). Essentially the camera chooses the aperture/shutter speed for you, as well as the exposure.
If you want to get better exposures in your photos (in P mode), try experimenting with exposure-compensation.
Ask a person to stand in the bright sun, and take a series of different photos (with different exposure compensations):
0, +1, +2, +3, -1, -2, -3
Then look at your LCD screen, and look at the exposure of each photo. Then look at the real world — how does your exposure-compensations change how your photos end up looking?
Don’t get too nerdy with this. Figure out what exposure-compensations work well for your camera, in different settings. Each camera thinks differently and has different exposure compensation modes. So treat this assignment as a way for you to better understand the light, and how your camera thinks.
If it is really bright outside, I generally photograph at -1 exposure-compensation, to make the skin tones of my subject look more natural, and also to darken the shadows. I love the dramatic look this gives my images.
Furthermore, if you’re shooting in the shade, you will often need to shoot +1 exposure-compensation to light your scene better.
But once again, experiment with different exposure-compensations, and figure out what works best for you.
#4. 1,000 photos in a day
If you’re a photographer who only takes 1-2 photos of a scene and tends to run away, try this assignment.
The assignment: take 1,000 photos in a single day.
The purpose of this assignment is for you to learn how to “work the scene”. If you see a good scene, try to take at least 10 photos of each scene. This will allow you to capture better perspectives, angles, and moments.
I don’t want you to always take 1,000 photos everyday. But this might help you break through “photographer’s block.”
#5. Eye contact/no eye contact
When I’m shooting street photography, I’m not sure whether a photograph with eye contact or without eye contact will be better.
Solution? Try to get both.
If I’m shooting candidly, I will get close to my subject, and take multiple photos, until they notice my presence. Then I wait for them to notice me, and then I take a photograph when they make contact.
Then when I go home, I have the decision of choosing between two version of a photo: one with eye contact, and one without. Sometimes eye contact works better, sometimes it doesn’t.
There is a saying that “eyes are the windows to the soul.” I generally find photos with eye-contact to be more compelling, soulful, and intense for the viewer.
However at the same time, sometimes having photos with the subject looking away from the camera gives you a more moody feel.
I often like to study famous (painted) portraits of people in the past for inspiration. Look at the paintings with eye contact, and without.
#6. Ask your subject to look up, down, left, right
If you approach a stranger, and ask permission to make their portrait (or if you’re photographing a model), it is hard to direct your subject.
One tip I learned: ask them to look in different directions.
For example, ask your model to look into the camera, and don’t smile. Then ask them to look up, down, left, and right.
Often people have a “better side.” Not only that, but by having your subject look up and down, you change the mood of the photo.
When your subject is looking up, they look more confident, encouraged, and powerful.
When your subject is looking down, they look more downtrodden, depressed, and negative.
Another tip: ask your subject to look at your hand while you’re photographing them. Then move your hand, and see how their eyes track your hand.
Changing the eye and head position of your subject will change the emotion of the photo. Experiment with different head positions with your subject, and you will have more photos to choose from.
#7. Only photograph things on the ground
When it comes to photography, we often just photograph what is in front of us, at eye-level.
Yet we never look down, and we never loop up.
As a simple assignment, do a photo project of just photographing stuff on the ground. You will find lots of interesting subject-matter if you look closely enough.
The world is a rich and beautiful place to take photos. Sometimes we complain that there is “nothing to photograph.” Yet in reality, we’re just not looking hard enough.
Change your perspective and view. Don’t just look ahead. Look down. Look up. Look into cracks in-between walls. Be curious, and change your perspective.
#8. Take at least 10 photos of each scene
I mentioned this tip a bit earlier, but the mistake we make as photographers is that we’re easily satisfied with 1-2 photos, and we move on.
The problem with only taking 1-2 photos (and then checking our LCD screen) is that we don’t push ourselves. When in doubt, try to photograph 25% more than you think you need to photograph.
This will force you to be more creative. You will try to photograph your scene from different distances (close, far) and from different angles (left, middle, right). You can also switch up your positioning (crouching, standing, or tippy-toe).
It is rare to see a good photo-moment. Don’t settle with just 1-2 photos. “Work the scene” and try to take at least 10 photos of each scene. Then you will push your creative boundaries, and be more likely to make a good photo.
#9. Limit yourself to only 36 photos in a day
For this assignment, you’re only allowed to take 36 photos in a day (same amount of photos in a roll of film).
This exercise will help you learn restraint. It will balance out some of the other assignments which encourage you to take more.
If you only had 36 photos you could take in a day, how much more selective would you be with your shooting? What superfluous photos would you not shoot?
I also find that by taking fewer photos, I appreciate each scene more.
You can do this assignment on a digital camera, or on a film camera.
#10. Shoot 1 street corner for an hour
In street photography, we’re impatient. Rather than sticking in one good area and waiting for our subjects to come to us, we run around (often wasting our energy) to just find a few good photos.
The solution: find an interesting street corner, don’t move, and photograph it for an hour.
The purpose of this assignment is to realize that it can be more effective to find a good scene, background, or area, and wait for your subjects to come to you.
Not only that, but if you stay put in one area, you will get to know the area better. You will observe the flow of subjects, and get a feel of a place better. Not only that, but you will be more “invisible” in the scene — people will ignore you.
#11. Delete all the photos from your social media account
An occasional purge is good for our physical, mental, and spiritual health.
Try to do this every once in a while: delete all the photos from your social media, and start from scratch.
Don’t delete the original photos. Keep them on your hard drive, print them out, or archive them.
However if you have a lot of photos cluttering your social media account, make a practice of doing a 100% purge. Delete all the photos (or mark them private), and then re-start from scratch.
Often we let our past work prevent ourselves from innovating and creating new future work.
Purge your past. And start refreshed.
#12. Go a month without using social media
Often as photographers we fall victim to the “social media” treadmill of always uploading a photo everyday, just to feel relevant. We want it for the likes, the comments, the new followers. Yet we get addicted to social media like heroin. Without our daily “hit” of external affirmation, we feel our photography is pointless.
Yet photography should be a personal pursuit. Why care about what others think about your photos? How do you feel about your own photos?
Uninstall all the social media apps from your phone (don’t worry you can re-install them after a month). Don’t upload any photos, look at anyone else’s photos, and try your best not to cheat.
By “fasting” from social media from a month, you will get a better sense of why you make photos. And I can guarantee you, you will feel less stressed and anxious to keep up with the “social media rat race.”
#13. Only shoot black and white for a year
We don’t see the world in monochrome. Black and white is an abstraction in the world. That is why it looks more “artistic” to the average person. It is novel, unique, and different.
However it takes a while for you to train your eye to see the world in monochrome.
Many photographers shoot black and white their entire life, and still never master it. I’ve also found that if I switch between black and white and color too often, I can never learn how to really see the world in one.
The assignment is to shoot only black and white for an entire year. You can shoot RAW+JPEG with a black and white preview. And perhaps you can just use the black and white JPEG’s. If not, apply a simple black and white preset to all of your RAW photos (upon importing them).
How would you visualize the world in monochrome? I’ve found myself looking more for emotions, mood, smoke, shadows, lines, graphical elements, and minimalism.
This will be different for you, but learn how to see in monochrome.
#14. Only shoot color for a year
The opposite assignment to the prior one; shoot only color for a year.
To see the world in color is different than seeing the world in black and white.
Personally, I’ve found shooting color to be more difficult than shooting black and white. Why? Because color leads to more complexity. You need to compose and frame a scene well, but also think about the color-combinations of a scene.
Not only that, but different colors evoke different moods and emotions.
Monochrome is easy to use because it reduces and removes distractions. Color introduces more complexity and distractions.
I would personally recommend most photographers to first try to master monochrome before taking on color photography .
Color photography also requires your exposures to be better, and for you to shoot in better lighting conditions. For color photography, try to shoot sunrise and sunset ( golden hour ), or use a flash.
Train your eyes to become sensitive to different colors and play and have fun with it. See how you can mix different colors in a scene, whether they be complementary colors or contrasting colors.
#15. Only shoot JPEG for a month
RAW and post-processing is a blessing and a curse. The problem is that many of us modern photographers over-rely on fancy post-processing techniques to improve our (mediocre) photos.
I’m guilty of it — I’ve added HDR to my photos, added selective color, intense vignettes, and “overly-processed” many of my photos (thinking that they would make the photos better).
But no matter how much you polish a turd, it will still be a turd.
Shoot only JPEG for a month.
If you’re really anxious, shoot JPEG+RAW (but only use the JPEG’s) for a month.
This way you can’t rely on fancy post-processing techniques to “salvage” your photos. A great photo shouldn’t require any excessive post-processing.
#16. Only shoot with your smartphone for a month
We often make the excuse that we don’t always have our cameras with us. I know personally when I owned a DSLR, it would be a pain in the ass to carry with me everywhere I went.
But today we’re blessed by modern technology, especially with the smartphone. The smartphone is the ultimate camera: it is always with us, fits in our front pocket, and can also be used to edit/post-process/publish our photos.
If you have a big bulky camera and never take photos, take this challenge upon yourself: only shoot with your smartphone for a month. Lock up your “real” camera in a drawer, and see how you can be the most creative with just your smartphone.
The purpose of this assignment is to realize that photography is less about the gear and more about your personal vision, and how you see the world. The tool isn’t as important as your eye.
This assignment might also teach you the importance of just always having your camera with you, ready, and prepared to click.
#17. Stick to one camera, one lens for a year
We’re rich. We live in a culture of abundance. Most photographers I know aren’t starving. Most photographers have an over-abundance of cameras, lenses, and gear.
If you’re a photographer who has too much “choice anxiety” from owning too much gear, only stick to one camera, one lens for a year. Lock up your other gear in a drawer, better yet, sell it or give it away to friends.
If you really want to hone in your photographic vision; you don’t want to be distracted by gear. Also it takes a long time to get to know one camera and one lens/focal length quite well.
By sticking with consistent gear, you will have fewer gear distractions, which will give you more creative focus.
#18. Only shoot horizontal, vertical, or square for a month
I believe in “creative constraints”: by having fewer options, you are forced to be more creative.
For example, take framing. Try to only shoot horizontal (landscape), vertical (portrait), or square-format for a month.
Framing and composition is all about knowing what to leave out of the frame.
Restrict yourself to one orientation for a month and you will find more visual consistency with your work. And you will be forced to compose more creatively.
#19. Only shoot one square block for a month
With unlimited options, we become paralyzed. We don’t know what direction to take our creative work.
Restrict yourself geographically. For a month, only shoot one square block (both sides). This way, you will really have to dig deep, and find something very interesting in that one square block.
The benefit of this project is that you know exactly where to shoot. Just one specific area. And I think it is better to get to know one area very well, rather than knowing a lot of different areas superficially.
Being a great photographer isn’t about traveling the world, to exotic places, and making interesting photos overseas.
Being a great photographer is making the best out of what you have. For not complaining where you live; and being the best photographer in your own home town.
#20. Shoot everyday for a month
The only way to become a better photographer is to shoot more. The more you shoot, the more feedback you will get, and the more connected you will feel with the world.
For a month, take at least 1 photo everyday. It can be with your smartphone, DSLR, or whatever camera you have.
Just make sure it is something personally meaningful to you. Don’t just take the photo for the sake of it. Take a photo everyday of something that stirs your heart. That makes your soul sing.
The Zen masters recommended having a “daily practice.” By repetition, we reach a deeper understanding of “truth.”
In photography, we can read a hundred photo theory books, and still not learn anything. We only learn through taking photos, repetition, feedback, critique, and constantly seeking to improve ourselves.
Don’t put pressure on yourself that everyday the photo has to be great. But just build the habit.
#21. Don’t shoot for a month
To balance out the prior experiment; try to go a month without taking any photos.
You’re not allowed to take photos for a month.
Ironically enough, this assignment might be the best way to re-invigorate your passion for photography. Why? We take photography for granted. But when something is taken away from us we appreciate it more.
#22. Shoot “selfies” for a week
Many of us complain that we don’t have interesting subjects to photograph.
Not true; your best subject is yourself. Because you’re always available, and you won’t say “no” to yourself.
There are different ways you can shoot ‘artistic selfies’ of yourself. Photograph your shadow, reflection, or put your camera on a tripod and setup a scene and shoot yourself.
To photograph yourself is an incredibly intimate experience. It is an experience that allows you to be comfortable on the other side of the camera. Not only that, but it makes you realize that no matter what, you can always photograph something — who better than yourself?
#23. Have your portrait (professionally) shot
I learned this lesson from Sara Lando: if you don’t like being photographed, have another photographer (professionally) shoot your headshot. You will learn what is comfortable (and what isn’t comfortable) being a subject.
If you are a photographer, yet you don’t like having your own photo taken, you debilitate yourself. You assume everyone else doesn’t like having their photo taken (not true).
The secret is how can you make a photo of others (and of yourself) that makes the subject comfortable, at ease, and happy to be photographed?
#24. Shoot with a focal length (you’re uncomfortable with) for a week
We all have our preferences for a certain lens or focal length. If you want to push your creative boundaries, shoot with a focal length that you are very unfamiliar or uncomfortable with for a week.
If you’re a 28mm guy, try shooting only with a 200mm lens for a week. If you’re usually a 200mm telephoto type of person, try a 35mm lens. If you usually shoot with a 50mm lens, try a 28mm lens.
By shifting our focal length, we shift our perspective, how we see the world, and how we approach our subjects.
By pushing ourselves outside of our comfort zone for a week, you will gain a new perspective and also perhaps find more gratitude for the focal length you’re already comfortable with.
Or better yet, you might find a new focal length you prefer that can help you be more creative and innovative with your work.
#25. “.7 meter challenge” (1-arm length challenge)
I learned this assignment from my buddy Satoki Nagata. If you’re uncomfortable getting close to your subjects, pre-focus your lens to .7 meters (about 1-arm length distance), and only shoot that distance for a month.
This assignment will force you to get physically and emotionally closer to your subjects.
You don’t need to shoot all your photos candidly. Ask for permission.
The more comfortable you’re shooting at a close distance, the easier it will be for you to take a step back.
#26. Decapitate heads for a week
I often find photos of hands, feet, or body gestures more interesting than faces. So the assignment is to take photos of your subjects without including their faces/heads in the photo.
Try it out: for a week “decapitate” your subjects (don’t photograph their faces). This will force you to see the other characteristics and attributes of your subject on a deeper level.
#27. Buy a mannequin (and use it as a test subject)
I learned this assignment from my friend Charlie Kirk: if you want to learn how to make better portraits, how to better use studio/flash, or how to frame, buy a mannequin as a test subject.
The great thing about having a mannequin is that you will always have a willing subject.
Try using different focal lengths, different settings, different apertures, shutter-speeds, different lighting setups, and anything else you want to experiment with.
This will allow you to better understand how to use your camera technically, how light (especially artificial light) works. Not only that, but you will have a forever patient subject at your disposal (whenever).
#28. Only shoot with a flash for a week
There is a bias in photography against shooting with a flash. People say it looks “harsh” and unnatural” when compared to using natural light.
Yet the flash helps us overcome difficult lighting situations. It gives us more freedom to shoot at different points in the day, when the light might not be so nice.
For a week, experiment taking photos only with a flash. You will discover how the flash works during the day, in the shade, indoors, and other effects it might have on your images.
Having a flash is a good tool in photography. It can help you open up creative doors and opportunities. It will give you more freedom to shoot at all points during a day.
You don’t always need to shoot with a flash, but try to learn it to the best of your ability, and you can use it in special situations (or in all situations).
#29. Put together a photo album
Today’s world is (mostly) digital. In photography, we spend 99% of our efforts sharing our photos online. Very rarely do we print our work, arrange and edit our work, and create physical objects with our photography.
Buy a cheap photo album at the store or online. Print a bunch of your photos as small 4×6’s. Then put together a photo album.
Do it with your partner, children, or friends. Make a theme, concept, or a story. Have fun. Spread the 4×6 prints on the floor, and figure out what kind of pairing, sequencing, and flow you want to add to your album.
Handling physical prints is a different experience than just looking at them on your computer or phone. The physicality of photography adds another dimension for us to be more creative, to find more by-chance connections, and for us to be more engaged with others.
Making a photo album is a nice communal activity, something that families did a lot in the past. Making photo albums can help us re-connect ourselves with the past, but also create physical documents that will be well-preserved into the future.
#30. Print your portfolio
Most of us have our portfolios online. Few of us have printed portfolios.
Look at your entire library of images, and ask yourself: Which of these 10 photos represent who I am as a photographer?
Then print out those photos at any size you like. Figure out how you would like the photos to be sequenced. Then carry them around with you, and share them with your friends. Ask them to sequence your photos according to their emotion and feeling.
Learn to show your photos as prints, rather than just a phone or computer. See how people react differently to your photos, and see how it feels different for you as a photographer.
Photos don’t exist until they’re printed. When photos exist in atoms, we have a deeper connection with them as humans. When we can hold a photo, or a memory in our hands, it feels more real. We appreciate it more, and we feel more connected with them.
I find a nagging sense of incompletion if I don’t print my photos. I appreciate my photos on my computer, but I love them when they’re printed.
This assignment will also give you a good opportunity to re-evaluate your entire body of work and ask yourself: What photos really show who I am?
#31. Give away a photo everyday (for a week)
I feel the best gift you can give others as a photographer is prints. Why? Because prints are meaningful, easy to transport, and relatively inexpensive to print.
As an assignment, print out a bunch of your photos, and for a week, give out at least 1 print a day (to a stranger, friend, your barista, family member, etc). See how it affects their mood, and your own mood.
Photos are about sharing moments, art, and history. Share a little bit of your own soul by giving away your photos. You might discover that giving away your photos for free is more meaningful than selling them.
#32. Start your own photography blog, and blog consistently for 30 days straight
I’m not a big fan of traditional “social media” – because you have no control. You’re a slave to the platform, and you don’t have as much ownership and creative opportunities.
When you create your own blog, you have more flexibility. You can publish your photos, text, and ideas in different format. If you own the blogging platform (I recommend wordpress.org) you then really own your content.
Blogs are great because they are historical documents of our past. Blogging is more difficult than sharing photos on social media, but it is also more personally meaningful.
Furthermore, if you have a blog, it is easier indexed by Google. And anyone with a web browser can access your work rather than only people on a certain social media platform.
The assignment is to start your own blog, and blog consistently for 30 days straight. It can be about anything. You can just upload a photo everyday, upload photos that inspire you, or share some personal stories behind your favorite images. Don’t take it too seriously, but try it for a consistent month.
By making a blog, you gain more ownership of your own photography, creativity, and work on the internet. If you’re a slave to a social media platform, your influence is very limited and you don’t have as many different ways to express yourself creatively.
I see blogs as the future of photography — don’t be left behind.
#33. Write down a list of photographic subjects you don’t like to photograph
How do you know what your “style” is in photography? For me, it is knowing what you don’t like to photograph.
For this assignment, figure out what genres of photography you dislike. Write them down, and simply avoid taking those photos.
Then, by process-of-elimination, figure out what kind of photographer you are (based on what you don’t like to photograph).
Most people I know who are interested in street photography don’t like to take photos of sunsets and landscapes. People I know who like to shoot flowers don’t like to take photos of people. Photographers who like to shoot monochrome generally dislike shooting color (and vice-versa).
Find out who you are via subtraction and process-of elimination. Treat your photographic style the same.
What do you not like photographing? Then just don’t photograph it — photograph the opposite.
#34. Intentionally try to take bad photos for a week
One of the biggest barriers in our photography is that we always try to take really good photos. But it is rare that we make good photos.
So flip the concept upside down: try to intentionally shoot “sh**ty photos” for a week. Get rid of your concepts of good composition, framing, and light. Just take bad photos of whatever you find interesting.
Follow your gut, soul, and instincts. Just click. Don’t think too much.
Then after a week, see if you feel more loose in your photography, less “blocked” creatively. Do you take yourself less seriously? Are you having more fun?
Perfectionism ruins us. Seek to make “good” photos. And in order to do so give yourself permission to make bad photos.
#35. Create your own photography portfolio website
If you want to be more serious with your photography (and taken more seriously), make a photography portfolio website. It can just be your firstnamelastnamephoto.com (or better yet, firstnamelastname.com).
Make your own photography website, and put on your 3 best projects (restrict each project to your 10 best photos). This way, you will be able to think more about long-term projects, rather than getting swept away in the social media madness of just uploading a single (random) photo a day.
When you pass away, what kind of body of work do you want to leave behind? Do you really think that your social media profile will exist after you pass away? Will anyone even look at it?
Having a website (instead of just having social media) is better, but not the best.
Aim on creating a body of work, and several bodies of work, then publish them as books.
#36. Buy one photo book a month (for a year)
I’m a big proponent of photography books and education. For a simple motto, remember the phrase: “Buy books, not gear.”
Gear quickly gets outdated. A great photo book will increase in value over time, both monetarily and its value to you as a photographer.
I recommend trying to invest in at least one photo book a month (for a year). You don’t need to buy an expensive photo book — invest in a book that you plan on re-reading over and over again.
I also recommend buying photo books whenever you have the urge to buy a new piece of gear. Why? Photo books will actually help improve your photography, and the novelty of a new photo book will inspire you.
Every photographer needs inspiration from somewhere. Most of us get our inspiration online, on social media.
There are great photographers online, but if you really want to learn the work of the masters, invest in photo books. Photographers spend many years, thousands of dollars, to create their own book. Therefore you’re more likely to get better images in a photo book, than just when looking online.
A good photo book will last for your entire life and will always be a great source of inspiration for you.
#37. Look at all the portfolios of all the Magnum photographers
You are what you eat. If you look at the work of great photographers, you will aspire to make great photographs.
I also go this assignment from my buddy Charlie Kirk: go to the Magnum Photos website and study all the portfolios of the Magnum photographers.
Write a list of which photographers you admire. Analyze their work, and ask yourself, “Why” you like their work.
Furthermore, when you find a photographer whose work really speaks to you, buy all their photo books, watch all their YouTube interviews, and learn as much about them as you can from them.
The more great images we look at, the more inspired we will be to make great photos. By analyzing great compositions and images, we will subconsciously take better photos when we’re shooting.
Also you will find there are a lot of Magnum photographers whose work you don’t “get” or “like.” That is fine — just think to yourself, “What about their work do I not like? And why would other people like their work?”
#38. Attend a photography workshop
I think photography workshops are great because you get a “shortcut” in your learning and education.
For a workshop, you get a distilled source of information from your teacher, often in a few days or a week.
I personally think that photography workshops are a much better “bang for the buck” than photography schools. And they’re much shorter, focused, practical, and hands-on.
Find a photography workshop on a topic that interests you. And know that you’re investing your money into your education, which is always one of the best investments for your money.
If you want practical instruction in photography, to learn, have any questions addressed, attend a workshop or two.
#39. Learn how to process black and white film
I don’t think digital is better than film, nor is film better than digital. They’re different. But more similar than dissimilar.
I feel the process of shooting film, and learning how to develop it, makes you appreciate the art and process of photography much more.
When I started off in digital photography, I took for granted that you could take a photo and instantly see it on the back of your LCD screen.
Shooting film has taught me patience, appreciation for the process, and the tactile hands-on approach.
If you’ve never processed your own black and white film, give it a try. There are tons of YouTube tutorials on how to do it. By processing your own black and white photos , you will feel a lot more connected with your images. You might fall in love with the process and the magic.
After shooting film for several years, I came back to digital photography with new enthusiasm. I appreciated digital photography so much more in terms of the convenience, the flexibility, and the modern technology.
If you’ve never processed your film before, give it a go. And not only that, but try to print your photos in a darkroom at least once — the experience might totally change how you view photography.
#40. Photograph only hand gestures for a day
I think that great photos tend to have two things: 1) Great composition and 2) Great emotion.
We all know how to make better compositions. Few of us know how to capture emotions.
A practical way to capture better emotions: capture hand-gestures and body language of your subjects.
So for a whole day, do nothing but photograph people doing interesting hand-gestures. Not only that, but afterwards, look at your photos (with hand-gestures in them), and mimic the hand-gesture. This will help you connect emotionally, and empathize with your subjects.
Photos of people just walking (and doing nothing with their hands) tends to be boring. Hand-gestures are much more dynamic, interesting, and emotional.
Much of communication is body-language and hand-gesture based. Photos are silent and don’t say words. But hand-gestures do.
I hope this list of 40 photography assignments will help inspire and uplift you. It is hard to stay motivated in your photography, but know that photography isn’t a race. Photography is a personal journey for yourself. You want to take your time, enjoy the process, and gain personal meaning through your photography.
Never compete with any other photographer. Don’t compare yourself to other photographers by how many followers/likes you have on social media.
Only gauge your progress in photography by your own standards of yourself, and by your own gut.
Know that dips in motivation in photography are natural and part of the game. What matters the most is how are you going to overcome these mental blocks and barriers in your photography. Are you going to let them encourage you to try harder? Or are you going to give up photography all-together.
Tenacity and staying in the game of photography is the goal. Never give up friend. Let’s stick in photography together for the long-haul.
About the author : Eric Kim is an international street photographer. You can find more of his photography and writing on his website and blog . This article was also published here .

10 Photo Assignments to Inspire and Challenge Your Skills
Liz Masoner is a professional photographer and she shares her tips and techniques on photo editing and how to photograph nature, portraits, and events with film and digital cameras. Liz has over 30 years of experience and she is the author of three books on photography.
The best way to learn photography is to practice, though sometimes you can get stuck in a rut and not know what to shoot. That is why photographers love assignments; they give us a purpose and an idea of what to photograph.
Why Are Assignments Important?
Self-assignments are key to any photographer's growth. Even professionals with decades of experience will work on personal assignments that they may never get paid for. The goal of any self-assignment is to spur creativity, solve problems, learn new techniques, and challenge yourself.
As you start out in photography, you're probably filled with excitement and ready to shoot anything you can. That being said, sometimes a little direction and guidance are necessary.
Below, you will find ten photography assignments. Each covers a new topic, skill, or concept and they were chosen to help you learn how to see as a photographer. They are meant to be a personal challenge that you can complete at your own pace and with no outside judgment, simply as a means to practice and improve your photography. Hopefully, you will learn something new with each assignment and be able to use that in every photograph you take in the future.
Remember when composing your images to keep in mind the basics: the rule of thirds, shutter speed , aperture, depth of field , and exposure .
Assignment #1: Up Close
This assignment encourages you to get close and personal with your subject. It is an exercise in viewing a common object in a new way and examining its finer details.
- Choose an object that you see or interact with every day.
- Focus on a small part of it, get as close as your camera will allow you to focus, and shoot away.
- Try to capture different angles and unusual lighting to add to the mystery of this tiny world.
From the whiskers of your cat to a fragile Christmas ornament, and even common soap bubbles, there is an entire world that we often overlook because we don't get close enough.
Assignment #2: Motion
Photography is a static medium which means that it doesn't move. Conveying a sense of motion is often crucial to capturing a scene or emotion and it is an essential skill for photographers to practice.
The goal of this exercise is to understand how shutter speeds can be used to convey motion.
- Choose a subject or series of subjects that will allow you to convey motion in your images.
- It can be slow motions, like that of a turtle, or fast motion, like a speeding train.
- Blur it, stop it, or simply suggest that there is motion in the photograph.
Challenge yourself to capture the same motion in different ways. For instance, you might go to a race track and stop the movement of the cars completely in one image, then leave the shutter open and allow them to blur out of the frame in the next.
Assignment #3: Shadows
Shadows are everywhere and they are vital to photography because this is the art of capturing light. With light comes shadows and when you begin to look at shadows as a photographer, your world will open up.
- Take a look around for shadows and record them with your camera.
- You could show the shadow as the total focus of the image. Perhaps the shadow is incidental to the subject.
- Is the shadow natural or created by flash?
Shadows are integral to creating depth in a two-dimensional medium such as photography. Take some time to seriously explore the "dark side" of the light.
Assignment #4: Water
Water is everywhere in photography and it presents many challenges. There are reflections and movements to work with and in this exercise, you will take a deeper look at water.
- Find water anywhere: lakes, streams, puddles, even the glass on your kitchen table.
- Pay attention to reflections and use them to your advantage in the photographs. Use this opportunity to get familiar with a polarizing filter (a very useful tool in your camera kit) so you can accentuate or eliminate reflections.
- Play with the motion of a stream or the crashing waves. Notice the difference between stopping the flow of water and allowing it to blur to create a real sense of movement.
Be sure to make water the subject and not an accent to the image. Water alone is beautiful and mysterious and your challenge is to explore all of its potential as a subject.
Assignment #5: Leading Lines
A classic assignment in photography schools, 'leading lines ' is a popular and fun subject. The goal of this assignment is to learn how to direct the viewer to your subject using lines.
- Choose a subject then look around for lines in the scene that you can use to 'lead' the viewer to the subject.
- Find an interesting line then determine what the subject of your photograph is.
- Remember that lines can be man-made or natural. For instance, the yellow line down the middle of the road or a tree branch. Even a person's arm can be a leading line of their face.
Use this assignment as an excuse to take an afternoon photo excursion. Walk downtown or in the woods and look around you for interesting lines that lead the eye to a subject. There is an amazing assortment of lines out there in the world and once you begin to see them, you won't be able to stop.
Assignment #6: Perspective
How do you normally stand when you shoot? If your answer is straight up like a 5-foot-something human being then this assignment is for you. The perspective assignment challenges you to view the world from an entirely new perspective, which in turn gives the viewer a new look at the ordinary.
- Take another afternoon or evening for a photo excursion wherever you like.
- This time, every time you find something to photograph, stop!
- Ask yourself: How would a squirrel see that tree? How would a robin view that birdbath? How would a snake view that log?
- Take your photographs from very high or very low angles. Get on your belly or stand on a chair, whatever you have to (safely) do to get the 'right' angle on your subject.
If you pay attention to professional photographs, many of the images that have the WOW factor are photographed from extreme angles. People enjoy these photos because they've never seen an object from that viewpoint. It is new and unique, and you can train yourself to shoot with this in mind.
Assignment #7: Texture
You may have captured a few textural details in the 'Up Close' assignment, but this assignment takes that to the next level. The goal in this one is to study textures and forget about the object itself: the texture becomes the subject. You will also begin to realize how light affects the appearance of texture.
- Find a few objects that have very detailed textures like trees or rocks, even knit sweaters or woven rugs.
- Photograph them as close as your lens will allow.
- Use different angles and capture the same texture as the light changes. Notice how the different lighting directions and camera angles can change how much texture appears.
Textures are all around us and many of the best photographs in the world play up the textural element. This assignment should teach you how to recognize and accentuate those elements in your photos.
Assignment #8: Color Harmony
Color is important to photography because the world is full of color. This exercise requires a bit of study in color theory, which you will then put into practice in your photographs.
Do you remember art class in elementary school? You may have learned that yellow and blue make green, but color theory goes beyond that. There are cool and warm colors, complementary and contrasting colors, neutral colors, and bold colors.
It can get quite complicated, and photographers should have a basic understanding of color so you can use that when composing photographs. You don't have to study color like a painter would but can use tricks used by interior designers to influence your color decisions.
- Once you have an idea of color theory, take another photo excursion and put what you've learned into practice.
- Capture photographs with the primary or tertiary colors.
- Look for complementary colors then contrasting colors to photograph.
- Try finding a scene to photograph that is filled with neutral colors, then one that uses a bold color to 'pop' from the scene.
This is an advanced lesson, but one that any photographer working with color images will find useful. As you practice working with colors, it will become second nature and you will know how to work with color to change the feel of your images.
Assignment #9: Emotions
Take a photo of a person smiling or scowling, right? Not so. The intent of this assignment is to convey emotion in photographs without a face.
- Take photographs that express each of the basic emotions: happy, sad, and mad.
- How would you express the feeling of anger with no person? What about happiness? Sadness?
This is a purely conceptual assignment, but it is important to be able to relay emotion in your photographs and you might not always have a person available to do that with. Challenge yourself to think deeper about this one.
Assignment #10: Don't Look!
Are you ready to put your photography skills to the test? In today's world of digital cameras and the ability to see image captures right there on the LCD screen, photographers are losing some of the skills needed to visualize a photograph.
In this assignment, your challenge is to shoot as if you were using a film camera. That means that you will not look at the photographs you've taken until they are downloaded on your computer. Instead of relying on the camera's screen to see if you 'got the shot' you will rely on your instinct and knowledge, just like photographers did before digital photography. Can you do it?
- Plan a photo excursion to a particular location and permit yourself to photograph only 36 images (a roll of 35mm film).
- Turn off your camera's LCD screen so it does not show you the image after you have taken it.
- If you cannot turn off the camera's screen, cut a piece of thick paper and tape it over the screen. Use masking or painter's tape so you don't leave a residue on the back of your camera.
- Go out and shoot your 36 frames, thinking carefully about each image because you don't have an endless number of shots. Bonus points if you turn your camera to completely manual settings for focus and exposure.
- Don't peek at your photos until you get home and download them.
How did you do? Were you able to get good exposures on your own? How did it feel to be 'blind' and not know how your image turned out right away?
This is similar to what it is like to shoot with film and it does require you to think harder about every image you take. Next time you shoot, slow down and pay attention, pretend that the screen is not there and rely on your own skills to create a great image. You will be a better photographer in the end.
More from The Spruce Crafts
- An Introduction to Photography Exposures
- How to Use Point of View to Improve Your Photos
- What Are the Autofocus Points on a Camera?
- Introduction to Photography: 8 Tips for Beginners
- What Are the Different Parts of a Camera Body?
- How to Take Great Moon Pictures With Foreground Objects
- Comparison of Photograph Print Sizes
- A Brief History of Photography and the Camera
- The Best Online Drawing Classes of 2024
- How to Control Depth of Field With F-Stops in Photography
- The Bestselling Subjects for Paintings
- What Are Complementary Colors?
- Horizontal vs. Vertical Photographs
- What Is Chiaroscuro?
- The Basic Elements of a Camera
- All About Telescope Photography
15 Photography Assignments to Challenge and Inspire
By Tata Rossi 23 days ago, Amateur Photography

Photography assignments allow you to experiment with something you have never tried before and play around with different photographic approaches. With such an assignment, you will challenge yourself and develop your skills.
15 Ways to Make Photography Assignments
This list of photo assignments consists of 15 points, so I am sure that you will find the idea to your liking.
1. Self Portraits

The first task is a no-brainer: just take a self-portrait picture each day. Don’t forget to use a tripod and shutter release aside from regular shooting with your arm extended and holding a camera.
Since you will be the model, feel free to unleash your creativity with all sorts of make-up, outfits, poses until you figure out a proper look. Remember to use props as well. Then share your shots with the world via social networks or the dedicated Flickr and Twitter groups.
2. Color Challenge

Here is one of the greatest color photography assignments for the urban environment photos . Bring the camera with you and take pictures for several hours. Pick a color (or ask a friend to choose it for you to complicate the task) and photograph subjects of the chosen color only.
Once you are done, you will find yourself seeing this color everywhere! Then pick the best shots and merge them into a collage or mosaic in Photoshop .
3. After Dark

Practice with night photography and try taking pictures after dark. In case you are outside the city, you may shoot moonlight or star trails. While being in the city, capture light trails of vehicles or buildings with the light-up windows. Regardless of the location, experiment with light-painting by means of long exposure photography and moving a flashlight across areas of the scene.
4. Crop or Rotate All your Photos a Specific Way
One of the best photography practice assignments is to neglect your comfort zone and try something new for a change. For instance, if you have a tendency to snap the same kinds of photos, you should modify their perspective.
Try an approach to cropping or rotating your next 50-100 shots that differs from your regular one. Play around with square photos, 180° rotation or whatever else you can come up with. Once you get out of the familiar artistic routine, you will be able to perceive the world from another angle and get creative.
5. Quit Social Media Temporarily
/cdn.vox-cdn.com/uploads/chorus_asset/file/13439373/shutterstock_425107399.jpg "quick photo assignment")
Social networks can serve as an excellent source of photography inspiration or lead to a complete lack of it. If you use social networks without critical thinking, you may start comparing yourself to other photographers, which will be a total waste of time and effort.
While it may be one of the hardest photography assignments these days, taking a hiatus from social networks is highly important. Log off your Instagram account for some time or uninstall apps that leave you in a bad mood.
In case your job requires staying online on a daily basis, devote some of your time to non-Internet tasks, like taking pictures or gaining knowledge on photography. I suggest taking some online photography courses .
6. Shoot Every Day for a Month
If you wish to become a better photographer , you shouldn’t stop shooting. By taking pictures constantly, you will receive more feedback and will be interacting more actively with the world.
One of the most widespread photography class assignments is to take one picture each day for a month. Do it with the help of the smartphone, DSLR camera or any device that can photograph. But don’t take meaningless pictures just because you have to. The shots you take should resonate with you in one way or another and be valuable to you.
The Zen masters suggest that you have a “daily practice.” When we repeat something, we become closer to recognizing the “truth”. You may read a great number of photo theory books , but you won’t be able to shoot properly. Only through practice, repetition, feedback and constructive criticism, you can grow as a photographer. Remember that this assignment is about forming a habit, not about taking a perfect picture each day.
7. Experiment with a Completely Different Genre

The array of photography genres is truly vast. Underwater photography , glamour, smartphone, landscape photography , portrait photography – that’s only a beginning. If you feel like you are losing interest in photography, switch to another genre.
Try staying away from your primary photography genre for a while. In case you shoot portraits, go outside and capture the area where you live in. If you are involved in photographing pets , play around with self-portraiture. By getting familiar with various photography genres, you are widening your photography horizons and gaining new knowledge that may come in useful one day.
8. Put Together a Photo Album

We live in a digital world, and even nowadays’ photography comes mostly in a digital form. We constantly find ourselves sharing our photos online. It is a rare thing to print photographs, even touch them, let alone create something physical out of them.
That’s why one of the greatest photography tasks is to compile a photo album. You can buy one at a store or online. Print the desired shots in the small 4×6 size. I suggest collaborating on this task with your friend, child or partner. Think of the main idea, theme or story of the album. Put all the printed shots on a surface and consider how you will lay them out in an album, how you will pair them and in what sequence.
No wonder that our parents and elderly relatives used to create a photo book together. It is a nice way to preserve precious memories in a physical form and bring back the moments that we sometimes tend to forget over time.
9. Take Creative Self-Portraits with a Friend

While you may enjoy your own company while taking self-portraits, you may feel bored or lonely after some time. In this case, you can implement one of the most entertaining photography assignment ideas and take self-portraits with a friend (pets are welcome as well!).
Don’t forget to think through the poses, set up the tripod and find the perfect photography light. As you will be engaged in all these activities, you will be able to get a hang of a photographer’s workflow. Then, when it comes to a real photo shoot with the clients, you will be more skilled at dealing with the camera and lights.
10. Attend a Photography Workshop
Photography workshops is an excellent investment in your education as a photographer and one of the most helpful beginner photography assignments.
Pick a workshop that is dedicated to the topic relevant for you. Thanks to workshops, you will get not only theoretical but also practical information. Also, you will have your questions answered by real professionals.
11. Photograph the Same Person or Object Every Day
In case you aren’t as excited about photography as before, try capturing one and the same person or object each day for a week or month. Similar to the smartphone photography challenge, as a result, you will realize the importance of having the freedom to photograph anything you wish.
While snapping pictures of the same object, you will boost your lighting skills. To make the shots differ from each other, don’t hesitate to play around with various types of lighting and photo editing apps .
12. Go a Month Without Using Social Media
Being the photographer of the 21st century, you may find yourself in the never-ending trap of feeling the need to post photos on social networks each day. It all turns into some sort of addiction – all you crave is likes, comments and new followers. If you don’t receive the online praise you need, your photography stops making sense.
In fact, photography is something you should pursue on your own. What truly matters here is your personal thoughts on your shots, not the opinion of users online. Simply uninstall all the social network applications from the smartphone (you can bring them back once the assignment is over). Posting photos and looking through photos of others is prohibited.
If you manage to stay away from social networks for a month, you will acquire a clearer purpose of your photography work. Besides, you won’t be so obsessed with the imaginary social network competition that everyone seems to be involved in.
13. Shoot with a Limited Amount of Equipment

Regardless of whether you are an experienced, amateur or a beginner photographer , you are likely to be after all sorts of photography gear to enhance your results.
How about photography assignments where you have to use a restricted amount of shooting equipment? You can photograph strictly with one camera body or camera lens . There is no need to do it for an entire month.
For this assignment, I suggest coming up with a plan, and do it, for instance, only once a week. Working with the same gear every day will give you more flexibility in both the creative and physical aspects of the process.
So, in case you deal only with a zoom lens, you will have to experiment whenever you shoot indoors . With a wide-angle lens only, you will need to work on cropping and correcting distortions.
14. Limit Yourself to X Photos a Day
Similar to the previous assignment, limiting yourself to 10, 20, 30 or more shots per day, week or month will help you realize what your true creative needs are. Besides, with a photo limit, you will understand what subjects or scenes you are more inclined to photograph.
Another benefit of a photo limit is that it will bring more patience and creativity into the process. You won’t be able to take numerous pictures of one place, so you will be forced to risk and play around with various perspectives.
15. Take Photos with Your Smartphone Camera Only

Take pictures only with a smartphone camera for a week. For better results, download a top-notch camera app and try to figure out all of its settings. A modern smartphone will help beginning photographers get acquainted with the technical side of the shooting process.
To complicate the task, I suggest recreating some of your portfolio photos with the smartphone camera. With this assignment, you will learn all the intricacies of shooting with a smartphone and may even start taking shots not only with a standard camera but with a smartphone one as well on a regular basis!
Freebies for Photography Assignments

Thank you for download!
Check your email to download freebies. (approx. 1-2 min)
Using these presets for beginners, you will be able to enhance portrait, wedding, newborn, landscape, real estate and e-commerce photography. The presets are compatible with all Lightroom versions. Experiment with adjustments to achieve the ideal result!
- New approach
- Freebies

- Student Successes
- My Learning
12 Exciting Photography Assignments to Challenge and Inspire

You can also select your interests for free access to our premium training:
Everyone likes a good photo challenge. But photography assignments can also be very discouraging if they’re approached the wrong way. A good photography challenge will strengthen your photo skills and inspire you in multiple ways. A bad one will leave you wondering why you even tried photography in the first place.
12 Exciting Photography Assignments
Here are 12 exciting photography assignments to help you find the right one.
1. Shoot With a Limited Amount of Equipment

2. Take a Photo Every Day for a Year

3. Limit Yourself to X Photos a Day

4. Take Photos With Your Smartphone Camera Only

5. Experiment With a Completely Different Genre
There’s a wide variety of photography genres out there. There’s underwater, glamour , smartphone , landscape , and portrait , to name a few. Trying something new can help you fall in love with photography all over again. So take a temporary break from your main photo genre. If you’re a portrait photographer , take panoramic photos of your neighborhood. If you spend lots of time photographing animals, improve your self-portrait photography skills. When you expose yourself to different genres, you’ll learn many valuable lessons. And they will be useful long after the photography assignments end.
6. Photograph the Same Person or Object Every Day

7. Quit Social Media Temporarily

8. Create a Stop-Motion Video Using Photos

9. Take Creative Self-Portraits With a Friend

10. Crop or Rotate All Your Photos in a Specific Way

11. Include the Same Object in Every Photo

12. Invest in a Photo Book and Complete Every Assignment in It

Conclusion: Exciting Photography Assignments
You don’t need to travel the world or break the bank to improve as a photographer. A single assignment that lasts at least a week can teach you many lessons. And it’ll help you become a better photographer. All you have to do is find photography assignments that work for you. Then, dedicate some time to it, and watch your photo skills strengthen!
Popular Content

- Skip to primary navigation
- Skip to main content
- Skip to primary sidebar
- Skip to footer
DIGITAL PHOTO MENTOR
Photography tips, tutorials and guides for Beginner and Intermediate Photographers.

10 Creative Photography Assignments to Inspire You Into Action
by Andrew S Gibson | Last Updated: November 8, 2022
Finding interesting things to photograph can be one of the most difficult things for a photographer to do.
You’re surrounded by potentially interesting subjects, but you might not realize it if you’re stuck for inspiration. I have been stuck, so I know what that feels like.
The good news is that the world is full of interesting ideas and subjects. All you have to do is find the good ones and develop them into personal photography projects that work for you.
Of course, wouldn’t be easier if you could find lots of ideas in one place?

That’s why I wrote an ebook called 100 Creative Photography Assignments . It gives you lots of ideas for projects that you can do close to home, without traveling to exotic locations.
The book is structured into 20 broad themes, with five assignments for each theme.
To give you a taste of what’s in the book, and to help you get inspired into action here are 10 of my favorite assignments. (The theme for each is shown in brackets after the assignment number and name)
Assignment 3: Urban trees (trees)
Humans have planted trees in formal gardens for centuries to bring nature into towns and cities. Photographing trees in urban environments gives you something that is different than traditional landscapes.
How can you explore the juxtaposition of man-made and natural items?
In the photo below, the tree, which is obviously well-cared for fits in perfectly with the historic home. The two go together, as intended.
But in other situations, you might find a jarring contrast between the natural and urban environments. That is called juxtaposition and it can make for some really striking images.

Assignment 8: People and the sea (or a lake)
How do people interact with the sea?
The sea has strong links to leisure, sport, and industry, all of which have plenty of potential photographically. Think beyond simple photos of people on summer holidays. How can you explore the relationship between people and water in more depth?
Another approach is to show scale and photograph people in a way that shows the vast size and scope of the ocean. Yet another is to show people battling the weather, perhaps fishermen at sea.

Assignment 20: Framed by color (frames)
Some frames are visual rather than literal. One way to make a visual frame is to look for compositions where the main subject is surrounded by a solid block of color, as in the photo below.

This is another assignment that tests your observational skills. It also has the potential to make an interesting series. What happens when you group a set of photos that use color as a frame together?
Assignment 24: Weathered surfaces (texture)
Old buildings of all descriptions are made of materials with interesting textures. The definition of old is relative, your chosen building might be hundreds of years old or just a few.
The important thing is that it looks old. That means visible signs of weathering, like the metal wall and wooden door frame in the photo below. Some texture surfaces, like rust, also have interesting colors that you can use to your advantage.

Assignment 31: On the outside (buildings)
One approach to photographing buildings is to include as much of the building as possible in the frame. But what happens if you take another approach?
Have you ever stopped to notice the interesting things that people put outside buildings?
In Italy, I found a shrine on the outside of a colorful red building in Venice (below). In the United States window boxes and mailboxes are commonplace. Nearly everywhere you go you’ll see plants in pots outside people’s homes.
All these items make potentially interesting subjects and have the potential to be turned into an interesting series.

This assignment gets more interesting when you do it in different places, and compare the things you find outside buildings in one place with those in another location.
Assignment 39: Urban decay (your local neighborhood)
Some buildings can look good for centuries if they’re well maintained. But others soon fall into decay, especially if they’re not kept up. Look for the beauty in decayed or run-down buildings.
You expect older buildings to be in a state of disrepair, especially if you live in a country that has plenty of ruins. But more modern, urban decay can be just as interesting.
Why do modern buildings fall into disrepair? What stories do they tell about their neighborhoods, towns, and cities?
Another approach to this idea is to photograph urban decay in other countries, and then compare the results with what you capture in your local area.

Assignment 54: Capture the character of a place (b/w)
The absence of color gives you another way of capturing the character of a place. Yes, it’s true that in some areas color is an essential part of the essence of the place. But in others, it’s less important.
Working in black and white gives you a chance to see through the colors and get to the essence of a place. Visually speaking that’s texture, contrast, and tone.
But in another way, black and white images seem to help you see further and deeper. They’re moody, atmospheric, and timeless. Use these characteristics to create a set of photos that capture the character of a place.
It’s also an assignment you can do when you travel. It’s easier because you get to see everything with fresh eyes. But for a real challenge try it in your local neighborhood, where familiarity can prevent you from seeing things that might be obvious to newcomers.

Assignment 62: Embrace hard light (light and shadow)
In this assignment, your brief is to photograph a scene on a sunny day when shadows are falling across the subject in an interesting way.
Look at the way the sun casts shadows across the scene during the day. How do the shadows move as the sun moves across the sky? Do the shadows make interesting shapes?
For example, in the photo below the shadow falling across the building comes from a neighboring house and you can clearly see the chimney.

Assignment 71: Signs (everyday objects)
We’re surrounded by signs – signs that tell us which way to go, what to do, that advertise to us, state the name of a business, or tell us about roadworks.
Signs are designed to be informative, but they can also tell a story. Signs in the American mid-west look different from signs in New York City. Signs here in the UK look different from the ones in rural France. Old signs have character and tell you something about the place.
What interesting photos can you make using signs?

Assignment 94: People in the landscape (landscape)
Some landscapes are empty or void of visitors. But others are closer to large population centers and therefore you’re more likely to see other people there in the scene. The idea of a pristine landscape untouched by man is appealing, but it’s also interesting to see how people interact with the scene.
One way to approach this assignment is to use people for scale. A human figure can anchor a composition and show the width and breadth of the landscape. A small figure in the frame emphasizes the size of the landscape, and the idea of people being small compared to the beauty of nature.
The photo below juxtaposes two elements of human interaction. The stone pillar is part of a Neolithic settlement, and the people on the right are modern visitors who came to see it.

Taking it further – traveling and exploring your archives
You’ll get the most from these assignments if you make new photos for them. They’ll get you thinking about your local neighborhood – and areas a little further afield – in a new way.
The beauty of these assignments is that most of them are repeatable. You can select your favorites and use them as themes to follow when you’re traveling away from home.
You might also find that you can go through your archives and find photos that match a particular assignment. It’s an interesting exercise because you’ll start to see themes and connections that you didn’t realize were there.

For example, I have photos that fit Assignment 39: Urban decay from Alaska, Chile, and my hometown (see above). And I can continue to explore this theme when I travel to new places as well.
These ideas are explored further in Creative Photography Assignments: Themes & Projects, a bonus ebook that comes with 100 Creative Photography Assignments.

100 Creative Photography Assignments
Buy 100 Creative Photography Assignments now for just $14 USD.
Buy it now and get out there taking photos!

Note from Darlene: This is perfect if you want to get out there doing some photography. But maybe due to covid, finances, or other circumstances you can’t currently travel. Look no further than your front door to get started! To really challenge yourself do the 100 assignments one a day for the next 100 days!
About Andrew S Gibson
Andrew S. Gibson is a writer based in England’s southwest. His interest in photography began when his parents bought him a Ricoh KR-10m camera more than 20 years ago. Since then, he’s taken photos in over 60 countries, studied for a degree in photography, and worked as Technical Editor for EOS magazine. Today, he makes a living helping people make better photos through ebooks and photography courses.
Learn Photography Basics
Yes, you can learn to take better photos! It’s my passion to help you learn the photography basics and take better pictures. It’s also the same reason I teach workshops, do photo travel tours, and have online photography courses available.
Enroll in our free photography basics for beginners course, or 12-part portrait photography course , also free.
Recent Photography Articles
- Get Into Gear By Completing 10 Powerful Composition Challenges
- Lifestyle Photography Tips for Realistic Portrait Photos
- Step-by-Step Guide to Making Stunning Portraits With One Light
- How To Discover and Develop Your Unique Photography Style
- Luminar Neo GenExpand: Game-Changer or Just Hype?
Useful Links
- Beginner Photography
- Intermediate Photography
- Photography Challenges
- Photography Tips
- Photo Editing
- Recommended Amazon Products
- Course Login
- Write for Us
12 Assignments To Take Your Photography To the Next Level

Sometimes our photographic progress seems to stop, and we need a boost for our creativity. Try one of these assignments to stimulate your photographic mojo.
Stuck in a Photographic Rut?
As with any art, our photography reaches a level and then stops progressing. Learning curves typically show us improving steeply, then reaching a plateau, and there we linger before we can move on again. However, sometimes it is difficult to find a way to climb above that level of stability and start improving again. One great way to improve is to set yourself an assignment.
The Assignments
Have you ever thought about setting yourself a project or assignment? Good assignments are not too prescriptive. They should give the photographer a broad scope for interpretation, so as to suit their location and interests. Here are twelve of my most popular for you to choose from, but use them for guidance, adapting them to suit your favorite genre or style.
1. Observe What You Know
You know the world at your doorstep better than anyone. But sometimes that familiarity leads to us not noticing or appreciating what is there. Look at something that you see every day and think about how you could make it the subject or background of an interesting image. Can you add something to it to make it more interesting? Let your imagination run wild.
Ideas: Put together a collection of photos to entice other photographers to visit where you live, or show the other local residents that there is more to your hometown than meets the eye.
2. Study The Shadows

On some evenings, and only at certain times of the year, the sun reflects off a window on a neighbor's house and shines through the blinds and into a room in my home. As the world turns, the light falls on different objects and casts interesting shadows both from and across them.
Look for shadows at your location and how they project onto other surfaces, or how they interact with the subject itself.
Idea: Choose a building and photograph how is shades the street at different times of day, or how the window frames and doorways are accentuated by their shadows. Look for the shapes and repeating patterns.
3. Natural Light
One of my favorite subjects is just over a mile offshore from the small fishing town where I live. At different times of the year, I need to stand in different places to see the sun or the moon rising behind the island.
Take a series of photos to show how the sun or moonlight plays on and interacts with a subject near you at different times of the day and year.
Idea: Find a spot in a forest that you can visit throughout the day and take the same photo every hour. Or, go to the same spot once a week and take the same photo throughout a season or the whole year.
4. Shoot With Others

Shooting with others helps with motivation and inspiration.
The world is filled with people looking for an excuse to go out and take photos. Many of them would relish the idea of visiting a spot to explore it with a camera, but don’t want to go alone. If nobody you know enjoys photography, there are lots of local online groups, and camera clubs with members crying out for opportunities to go out photographing. Pick a nearby venue and choose a time, then ask around on social media.
Idea: Visit your local park or beach with a friend and choose a theme, e.g. litter, red, tall and short, dogs, etc. Spend an hour just photographing that topic and then compare and discuss results.
N.B. If you are meeting strangers for the first time, please consider your safety and choose a public location during the day.
5. Try Taking Minimal Kit
Before you go on a shoot, decide what you are going to photograph and take just the equipment you need for that shot. Set your camera up beforehand and try staying with those settings. You will find that by using the same focal length, ISO, aperture and/or shutter value, and filter, you will create a series of images that cohere with one another. Afterward, examine the images and ask if you are happy with the results. If not, what would you do differently next time?
Idea: Go out before sunrise with just your camera, a wide-angle lens, and a beanbag. Shoot twenty unique photos using just that equipment.
6. Choose a Different Viewpoint
Lots of photographers shoot the same scene in the same manner. However, the most compelling photos are those that show the world in a way we don’t usually see it. Try something different from holding your camera at eye height. Shoot with it down at knee level instead. Alternatively, get in really close too and look at the fine details in the subject you usually miss.
Idea: Shoot a familiar location from a worm’s eye view.
7. Critique Other Photographers’ Images
You can learn a lot from looking at other people’s photos, those both shot by experts and beginners. Study each image carefully and decide what you do and don’t like about it. What works, what doesn't? Are there unwanted distractions in the frame? Do you like minimalism, repeating patterns, landscapes with people in them, black and white, etc.?
Try to work out what settings the photographer used. If you are unsure, you can always ask them; the worst they can do is say no. Would you have done it differently?
If you do study others’ work and are critical of it, please don’t share those thoughts with the photographer unless they ask you to do so.
Idea: Find an old photography book in a second-hand bookshop, or dig up an old photography magazine. Over a coffee, look at the images with a friend, find one that you each like, and try to create an image in the same style.
8. Use a different Focal Length
The usual approach is to use a long lens for wildlife.
Idea: get a friend to wear outrageous makeup. Fit a wide-angle lens and photograph them very close up.
9. Be Creative

Combining intentional camera movement (ICM) with holding the camera still for half the exposure, giving the impression of a double exposure.
Creativity is about combining different existing ideas in new ways. For example, The Beatles’ classic album Sgt. Pepper's Lonely Hearts Club Band is a mishmash of rock, folk, ballads, psychedelia, and music hall brought together in a way that had never been seen before.
Do the same with your photography. Discover ways how you can combine different techniques or genres in your photography to find something new. Alternatively, seek out disparate subjects that clash or harmonize with each other in unexpected ways.
Idea: Try double exposures, one with a long exposure in color and the other with a fast shutter in monochrome. Some digital cameras have double exposure facilities, but otherwise, you can combine them in layers using photo editing software. Try mixing or playing around with other creative techniques.
10. Listen to Music
All creatives are influenced by artists from other fields. For example, the great Henri Cartier-Bresson found inspiration from the surrealist movement. Poetry is often influenced by art, such as Anne Sexton’s The Starry Night, and The Disquieting Muses by Sylvia Plath.
There will be songs or tunes that mean something to you. Listen to one and then shoot photos inspired by that music. You can either interpret the lyrics literally, or just take the feel of the piece as inspiration, or maybe convey the message of the song in your photograph.
Idea: Listen to your favorite piece of music and write down five to ten words that describe it or appear in the lyrics. Over the same number of days, shoot an image that represents each word.
11. Give it Time

A nighttime image taken in my hometown many years ago, inspired by feelings after listening to a Chopin Nocturne. Revisiting and critiquing old images helps us to improve our photography.
When you take photos, wait before you process them. Putting time between shooting and looking at images on the screen helps you to become more objective towards them. If it is practicable, and it isn’t always, then that separation can help you choose which images are worth keeping and which you should reject. It also helps you view the subject afresh and decide that a particular processing would suit the image best.
Idea: Revisit your back catalog and find photos you took a year ago. Consider them with fresh eyes. Critique them and recognize how you would shoot them differently now. What do you need to do to them to make them stunning? What would you exclude from the frame? Would you choose a different exposure? Would you shoot it from the same position? Now, go and shoot the same photo again.
12. Share your photos
Everybody wants recognition for their artwork, and photographs are art. In fact, there is little worth in creating art of any kind if it is not going to be appreciated by others. It doesn’t have to be online. Get them printed and glue them to cards to send to people on their birthdays and other celebrations; a gift of original art is both appreciated and means far more than mass-produced, throwaway cards bought in a supermarket.
Idea: Take your best shots, get them printed to a large size, and hang them on your wall. Consider hiring a community hall for the day and running an exhibition of your work as a fundraiser for your favorite charity. Or, why not populate your Fstoppers gallery? However, experienced at photography you are, there will be those who enjoy and learn from your photos.

A professional photographer, website developer, and writer, Ivor lives in the North East of England. His main work is training others in photography. He has a special interest in supporting people with their mental well-being. In 2023 he accepted becoming a brand ambassador for the OM System.

Great post, now if you can get anyone to read it..........
I just read it! BTW Terry love your caption on the hot air balloon photo!
Thanks Terry and Gregory. You are right about Terry's balloon photo title, Gregory, Quite a lot of folk have read it! :)

Great article. Nice practicle advice. Makes me realize I'm lazy and need to use my camera more deliberately.
Thank you, Spike.
Has anyone got any assignments they are happy to share with others?
- Photography Articles
- Camera Buying Guide
- Lens Buying Guide
- How to Learn Photography
- Time Lapse Photography
- Learn & Explore Photography
- How to Articles
- Holiday Gift Guides
- Photography Blog
- Color Management
- Travel Guides
- Astrophotography
- Free Photography eBooks
- Real Estate Photography
- Bird & Wildlife Photography
- Tip of the Week
- Photography Quotes
- Best Canvas Print Company
- Best Workshops & Tours 2020/2021
- Photography Glossary
- Photography Lighting
- Drone Photography
- Portrait Photography Tips
- Beginner Photography Tips
- Best Large Print Companies
- Gallery Home
- Latest Uploaded
- View by Categories
- Inspirational Photos
- Upload Your Photos
- Photography Forum Home
- Latest Posts
- Search Photography Forum
- General Discussion
- Taking The Photo & Editing
- Photo Galleries & Critiques
- General Manufacturers
- Equipment Research
- Recommended Vendor
- Camera Bags
- Camera Straps
- Maternity Gear
- Community Badges
- Get Metal Prints
- PT Scholarship
- Member Interviews
- 30 Day Creative Eye Challenge
- Bird Photography Mastery Course
- Business Builder Mastery Course
- Landscape Photography Mastery Course
- Travel Photography Mastery Course
- Portrait Photography Mastery Course
Remember me
- Forgot Username?
- Forgot Password?

Beginner Photography Projects

photo by shopformoose via iStock
While you’re stuck at home self-isolating, it may be the perfect time to start some beginner photography projects.
There are a ton of benefits to photography projects, like learning how to develop your artistic eye or figuring out how to use your photography equipment.
Plus, being forced to complete simple photography projects at home will teach you how to get especially creative with limited space and resources.
Here are some of our favorite beginner photography projects for you while you’re stuck indoors.
Photograph a Rubik’s Cube

This may seem like an odd project to start this list out with but here us out.
Rubik’s Cubes are cheap. They’re probably readily available to you and they will help you to learn how to use leading lines in your photos.
Leading lines are a wonderful compositional tool that help direct the viewer’s eye deeper into the shot. They’re often used in landscape photography, but can be used to bring attention to any kind of subject.
Recommended Photography Reading
- National Geographic Photo Basics: The Ultimate Beginner's Guide to Great Photography
- Photography: The Definitive Visual History
- Read This if You Want to Take Great Photographs
Master a Still Life
You should definitely include learning how to shoot a still life in your beginner photography projects checklist.
You can create a classic still life with fruit and wine, or get more creative with random objects lying around your house.
Still lifes will help you learn how to compose your images, allow you to work on lighting, and hone your other photography skills too.
Get some great tips on how to shoot still life photos in the video above by Karl Taylor .
Take a Self-Portrait

photo by SolStock via iStock
Not everyone is comfortable in front of the camera, but taking on a self-portrait project can be hugely beneficial for your photography.
Not only does taking a good self-portrait require you to think about posing, lighting, camera settings, and so forth, but you also have to think about styling, colors, the background , and any props you might want to use.
Self-portraits are also a great way for you to understand what it’s like being in front of a camera, which will help you as you grow your skills and start to take portraits of other people.
Force Your Kids to Sit for a Session

Photo by Caroline Hernandez on Unsplash
Okay, you don’t have to force them to sit. In fact, my kids love most of my beginner photography projects because I’ll have them pull out all of their toys and have them go crazy for 15 minutes while I take their photos.
Letting kids be kids in front of the camera can get you some truly authentic and heartwarming environmental portraits. Besides, everyone likes a good candid portrait now and then too, right?
Plus, if your little one is like mine and loves to mimic you, then you can pick up this adorable camera for toddlers and let them take photos of you too.
Photograph Your Pets

Photo by T.R Photography on Unsplash
Most photography projects for beginners include photographing things you already love and simply trying to find a new way to look at those things. So, why not photograph your adorable pets?
You already post about them on social media enough, so you may as well have some excellent photos of them for your next post.
If you need some help getting your pet to stand still, you can purchase this gadget that attaches a ball to your phone . My dog has never sat more calmly before.
Again, when you’re trying to learn the fundamentals of portraiture, your pets are a great subject. Cats, in particular, will often sit or lay there as you work your portrait magic!
Get some awesome pet photography tips in the video above by Westcott Lighting .
Learn More:
- 4 Photography Mistakes You Need to Quit Making
- How to Carry A Lot of Camera Gear
Find Cobwebs

Photo by Jill Dimond on Unsplash
Whenever I recommend beginner photography projects to people, I try and make them as practical as possible (especially now).
Which is why many of my photography project ideas for beginners include the chance to clean up their space.
Go in search of some cobwebs in your house. You can photograph them and play with lighting before cleaning them up.
Here’s some cobweb photography ideas to get you started:
- Photograph through the web toward the rising or setting sun so the light filters through the web
- Head out to your yard in the early morning to photograph the web covered in dew
- Use a flashlight to illuminate a cobweb at night for a shot with a bright, white cobweb and a dark background
Shoot the Sunrise From Your Window

Photo by Tarik Haiga on Unsplash
There is no better time for finding natural lighting in your home than at sunrise and sunset.
To shoot romantic photos from inside your home, try and capture the sunrise or sunset from your window.
You can focus on the scene outside your window and how the morning or evening light interacts with it.
You can also put a subject - your spouse, a child, your pet - in front of the window to take a beautiful natural light portrait . There might even be opportunities for creating a silhouette.
Just be sure you clean the window beforehand. Nothing ruins an otherwise beautiful indoor photo like nose smudges on the glass!
Look for Reflections

Photo by Maddy Baker on Unsplash
Most of these beginner photography projects are all about training your eye for photography, which essentially means seeing your surroundings in a new light.
Go search your house for reflections you can find. This may be in your morning coffee, or it may be your windows. You might find something interesting reflected in the hallway mirror. Chances are there is beauty hiding right around the corner. You just need to find it!
Practice Sun Stars

photo by Suntammy via iStock
I’m sure you’ve seen sun star photos before…
You can create sun stars pretty easily, believe it or not. Don’t believe me? Check out my video tutorial below!
As with many of these photography project ideas for beginners, you’ll find it’s easiest to capture starbursts when you’re using a tripod with your camera (even a cheap one for your iPhone will work).
Begin a Year-Long Project

Photo by Dan Smedley on Unsplash
For those of you who have been participating in beginner photography projects for a while, you’ve probably heard of Project 52.
It’s when you take a photo every single week for a whole year. Usually, all of these photos will pertain to a specific theme you love.
If you need some inspiration for your Project 52, the 52 Week Photography Challenge is filled with ideas.
Try New Angles

Photo by Shitota Yuri on Unsplash
Whether you’re shooting from the comfort of your home or are working with a client for the first time, you’ll want to know how to explore different angles. Why not try it now?
Get a step ladder and shoot objects around your house from above. Then, crawl around on the ground to figure out what those objects look like from below.
Doing so will help you appreciate how different perspectives can totally change how a subject looks.
Explore Negative Space

Photo by Fabrice Villard on Unsplash
Negative space is one of the most intriguing concepts to explore in photography and it is especially difficult to explore in your home, which makes it one of my favorite beginner photography projects.
Negative space is simply blank space around your subject. It helps make the subject stronger in the frame, and is often used to create minimalist compositions.
Get some practical tips for using negative space in photography in the video above by Peter Forsgård .
Capture One Thing, 10 Ways

Photo by Koen Emmers on Unsplash
If some of these beginner photography projects are too easy for you, I promise this one won’t be.
Find one object in your home. Then, try and photograph it in 10 different ways. You’ll definitely want to clear your schedule for this one and have YouTube at the ready!
Master Silhouettes

If you’re one of the lucky ones that have a yard you can escape to during these times, you can practice capturing silhouettes of your kids, your pets, or strangers on the street.
If you aren’t one of the lucky ones, you can still work on capturing silhouettes, you’ll just need to do it with your windows or artificial light.
Happy shooting!
- How to Carry A Lot of Camera Gear
Not sure what to photograph next?
Go through our 30-Day Creative Eye Challenge and discover the long last secrets to finding awesome shots, anywhere, anytime (with any camera).
We Recommend

- Maternity Photography
- Portrait Photography Master Course
7 Skill-Building Photography Exercises That Really Work

Your changes have been saved
Email Is sent
Please verify your email address.
You’ve reached your account maximum for followed topics.
I Bring My Still Photos to Life Using These 4 Tools
This is the best ai image editing tool i've ever used, when does facebook messenger notify others about screenshots.
Despite how easy it looks, photography is hard, with three learning curves to conquer: the technical aspects of the camera, the theory of light and shadows, and the actual composition of a photo (sometimes called "seeing the shot").
That last part is the hardest thing for beginners to grasp. Composition has an artsy component that can't be easily taught. It must be discovered by the photographer themselves.
Fortunately, there are photography exercises that can help "develop your photographic eye". And with practical experience being the only guaranteed way to understand composition, these are the most effective photography exercises we've found.
1. Crop Someone Else's Photos
Great photography starts with the eye, not the camera. This means it should be possible to develop your photographic eye without ever touching a camera or lens. And it is! For this photography composition exercise, all you'll need is one of the easy-to-use photo editing programs like Paint or GIMP.
First, learn the fundamental rules of photo composition . You don't have to know every single one of them right now, but you should know at least one, as this exercise will force you to put these rules into practice. We recommend starting with the Rule of Thirds .
Next, go to a free photo-hosting site like Flickr or 500px and download a bunch of images to your computer. (The easiest way is to right-click and "Save Image As"). Any kinds of images will work, but this exercise works best with portraits and landscapes.

Now, open one of the images in your photo editing program of choice and start cropping. Try all of the standard aspect ratios, including 1:1, 4:3, 3:2, and 16:9. Try cropping vertical photos as horizontal, or horizontal photos as vertical. Move the subject around. Be creative.
The point is to experiment and see how different crops can change the look and feel of an image, and how certain crops are more aesthetically pleasing than others. This experience is invaluable when you start framing your own shots through the viewfinder.
NB: You can play around with someone else's images, but do NOT upload them or republish them on the internet in any way. That would be a violation of copyright law unless you have express permission from the image's original owner.
2. With One Subject, Shoot 10 Photos
Here's a common mistake made by newbies: always taking photos from the same height and from the same angle. It's natural to stand up straight and take snapshots from eye-level, but that's boring. After all, everyone knows what the world looks like from eye-level.
If you want your photos to be more compelling, change things up. Capture the world from unusual angles and positions: viewpoints that are foreign to most people.

This photography exercise helps train your sense of angles. First, find a subject. Any subject. It could be a stove-top kettle, a pet dog, a fire hydrant, a herb garden, a manhole cover. Anything works.
Then take 10 photos of it. No two photos should be alike. Try looking directly down at it. Then try looking directly up at it. Shift the angles. Look at the front of the subject, then the back, then the sides.
The possibilities are countless, and even the smallest tweaks to the angle can have a large impact on the resulting photo. Do this for hundreds of subjects and you'll start seeing angles everywhere you go without even trying.
Related: Photography Terms All Photographers Should Know
3. With Three Objects, Shoot 10 Photos
In some cases---like landscape, astronomical, and street photography---the idea is to capture scenes in the moment as they are. In other cases---like portrait, food, and product photography---the idea is to construct your own scenes.
As you imagine, this isn't easy. There are many factors to juggle such as lighting and background, but one particular aspect that newbies find difficult is how to position multiple subjects within the frame.

That's what this photo composition exercise is about. Find three random objects, such as action figures, fruit, bowls, candles, plants, or whatever else you have to hand. It doesn't matter if they're related to each other or not, although it will be easier if they're all similar in size.
Now position them however you wish. Think of it as if you're composing the objects for a photo shoot (that is what you're doing, after all). Do this 10 times, rearranging them in different ways each time. Over time, this will stretch your creative muscles and develop your eye.
4. With One Lens, Shoot 1,000 Photos
The focal length of a lens controls more than just the zoom factor of a shot. Yes, all things being equal, an 18mm lens requires you to be closer to the subject than a 50mm lens or an 85mm lens. But different focal lengths can evoke different feelings from a photo, too.
For example, the wide angle of an 18mm lens comes with a lot of distortion, which can produce a comical or whimsical effect. On the other hand, a 200mm lens has a compression effect that makes the photo seem flatter than, say, an 85mm or 50mm lens.

In short, different focal lengths require different approaches when composing shots. That's why we recommend mastering one kind of lens at a time, preferably starting with a 50mm prime. Read up on the common camera lenses and when to use them .
For this exercise, all you have to do is stick with one focal length for your next 1,000 photos. It's easiest with a prime lens, but if you only have a zoom lens, just pick a focal length and leave it there. Switch to another focal length when your 1,000 photos are complete.
By the end, you will have a better understanding of how to use the different focal lengths at your disposal to achieve the shot you're after.
5. Hula-Hoop Photo Walks
Creativity is often seen as something that's infinite, and full of possibilities. And while there's technically nothing wrong with that, the truth is that creativity needs limits and constraints to really flourish.
If you've ever felt like you wanted to take photos but didn't know where to start, where to go, or what to shoot, then you'll know what I'm talking about. Restrictions are good, and that's how this photo exercise is going to unlock your creative potential.

Take a hula hoop and go outside. Toss it up into the air, then let it bounce and roll around until it eventually comes to a stop. Now stand inside the hula hoop, take a look around, and shoot 10, 20, or 50 photos of anything. But try to make them good.
When you're done, toss the hula hoop into the air again and repeat the process. If you don't have a hula hoop, just pick a random direction and walk a random number of steps to find your next spot. Pretty soon your creative juices will start flowing, guaranteed.
6. Weekly Photo Challenges
Weekly photo challenges are popular on the internet, but different photography communities have different names for them: Photo of the Week, 52 Photos Project, Sunday Photo Prompt, etc. The key is to take 52 photos over the course of one year.

Ideally, you'd take part in some kind of community version of the challenge because this gives you a chance to see the photos of other participants, and a chance for others to critique your work. But if you'd rather do a personal challenge instead, that's fine too.
Sometimes each month has a theme, but not always. It's up to you how you want to do it. We recommend setting a regular weekly deadline and sticking to it. Need inspiration? Check out 52 Weeks Photography Challenge , 52 Frames , or 52 Weeks of Photography .
7. Recreate Someone Else's Photos
Once you feel a little more comfortable behind the camera, you may want to try recreating photos that others have shot. Browse Instagram, Flickr, or 500px, pick a few that seem within your skill range, and have at it!

The goal here isn't to make an exact 1-to-1 replica of your source material, so don't be discouraged if you can't get that far. Rather, this photography exercise is meant to get you thinking in ways you haven't considered. To push you outside your comfort zone.
At first, your imitation photos will look like garbage compared to your source photos. That's normal. Keep at it, however, and you'll start to see fast improvements. Along the way, you may even start to discover your own voice and sense of style as a photographer.
Photography Is a Long But Rewarding Journey
Don't expect to unlock your photographer's eye overnight. It's a gradual process that could take weeks, months, or even years before you really start to "see" photographs before taking them. But the journey is well worth taking, so don't give up!
If these photography exercises weren't enough and you need even more ideas, then we highly recommend checking out these free lessons to learn the basics of photography .
- Photography Tips
- Smartphone Photography
SLR Photography Guide
** JUNE SALE ON NOW – UP TO 75% OFF PHOTOGRAPHY COURSES AND GUIDES **
- 100 Photography Assignment Sheets
Want an easier way to learn photography without reading a lengthy camera manual or sitting down at a computer studying techniques? These assignment sheets are hands down the fastest and most active way to grasp key concepts of photography. Think of them as see and do cards.
Or maybe you’re needing some inspiration to kick start your photography again? With 100 sheets, you are sure to pick up skills you never learned previously.
SIMPLE STEP BY STEP INSTRUCTIONS AND CAMERA SETTINGS THAT ANYONE CAN FOLLOW
Here’s How They Work
These Photography Assignment Sheets discuss specific photographic topics (100 in total), then provide you with suggested camera settings so you can go out and start capturing great images immediately.
Print the Assignment Sheets or download them to your mobile device and take with you when out in the field
WAS $49, TODAY ONLY $34
- Printable / Desktop & Mobile Versions
- Three Bonus Photography Ebooks covering ISO, Aperture and Shutter Speed
- Free Monthly Photography Magazine + past editions (73 issues to date)
- Lifetime Access including future updates
- 100% Satisfaction Guarantee
Designed so you spend more time shooting, and less time reading!
No fussing around. Learn camera settings that will get you into the ball park as fast as possible for capturing great shots.
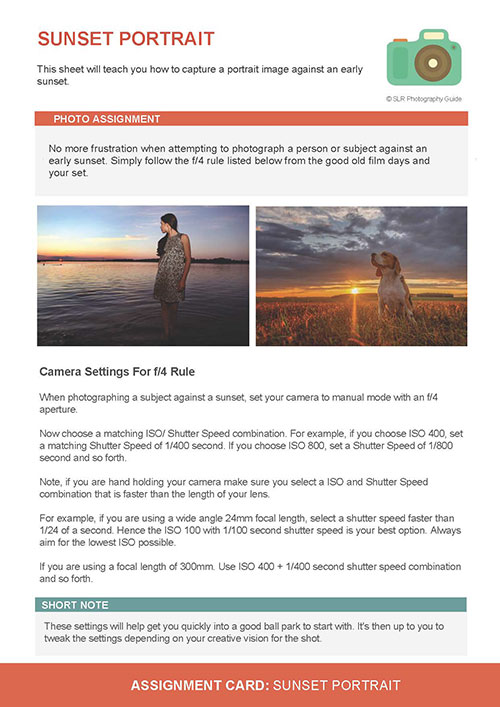
Here’s a run down on some of the topics covered
- Long Exposures
- Astrophotography
- Macro and Close Up Photography
- Flash and Lighting
- Sports (indoor and outdoor)
- Bird Photography
- Animal and Pet Photography
- Learn how to capture the moon in all phases
- Capture bolder colors in your images
- Composition
- Key camera settings, ISO, Shutter Speed, Aperture
- High Key and Low Key Photography
- Water Drops & Splashes
- Old School Rules that still work today. Sunny 16, f/8 and f/11
- Learn how to handle harsh lighting or high contrast scenes

FREE Bonus: 3 Photography Ebooks
Understanding ISO – Aperture Explained – Mastering Shutter Speed
100 Photography Assignment Sheets + 3 Ebooks + free monthly magazine including past editions (73 editions to date) with lifetime access including future updates.
We are an online Photography Community with over 300,000 members.
Depositphotos
Get started.
- Photography Tips
- Camera Settings
Quick Links
- Photography Courses
- Member Login

Want to improve your photography? Taking on a photo 365, photo a day, project365, or a selfie 365 challenge? Failure is no longer an option thanks to thousands of ideas from the LEARN PHOTO365 photography assignment generator app.
IDEAS. INSPIRATION. EDUCATION
A unique app that is all about TAKING better photographs... not about doing things TO your photographs. From iPhoneographers to SLR shooters, beginners to pros, this app is chock full of assignments to get your creative juices flowing.

Hundreds of Assignments
Camera settings. Creative Techniques. Composition. Lenses. Light. Landscape. People. And More
Thousands of Random Possibilities
Unlimited combinations of random objects, places, techniques, and scavenger hunt lists will provide tons of inspiration.
Photo 365/52/30 List
Never fail at a Photo365 again. Get a full list of assignment for the year, 52 week, or 30 day challenge.
Favourite Assignment
Save your fav assignments on an easy-to-access list so you don't have to search them out.
Challenge Your Friends
Get your friends in on the fun by sharing your assignments via email, Facebook, and Twitter. (iOS only for now)
Stop taking the same old boring selfies. Get a list of ideas that will bring yours to the next level.
Daily Reminder
Keep your Photo 365 on track by letting the app send you a daily reminder to give you that kick in the butt.
No Network Required
Stuck in a photo rut deep in the Amazon Jungle? No worries. App is fully contained, so no need of wi-fi or network.
Examples/Settings
700+ example images for inspiration, along with info on camera settings, lenses, and techniques to use.
Check this video to know more about this app
What People Are Saying About The App
Photography Assignment Generator for iOS is a new twist on an old problem
A camera app packed with assignments and ideas to help iPhoneographers capture amazing pictures.
Looking for inspiration? The iPhotography Assignment Generator app can help.
iPhotography Assignment Generator Great Tool for Hobbyists, Pros Alike
Need Inspiration? Check Out the Photography Assignment Generator
DOWNLOAD FOR iPHONE/iPad/iPod

Try before you buy.

For SLR shooters.

For iPhoneographers.
DOWNLOAD FOR ANDROID

About The Guy Behind This App

Jerslin doe
App developer.

UX Designer

IOS Specialist

Team manager
Connect with noel.
PRIVACY POLICY
- Share full article
Advertisement
Supported by
Lesson Plan
Five Photography Assignments That Invite You to Look Closely at the World
Students, try one of these exercises inspired by the visual series The Take. What can you learn about the world by looking at it through a particular lens?

By Natalie Proulx
How often do you look — really look — at the world around you? Below, we offer five photography assignments that challenge students to do just that, all inspired by The New York Times visual series The Take .
In this series, The Times asks photographers to explore different cultural themes through images — for example, to document what they see when they look up, to capture the sounds they hear in New York City or to find dance in everyday movements.
What can you learn about the world by looking at it through a particular lens? Choose one (or more) of the five assignments below to try out. For each, we’ll guide you through a warm-up activity, a reading of the Take article that inspired the exercise and your own photo shoot. When you’re done, you can create your own visual article by putting together a gallery of your images and writing a short commentary on what they mean to you.
These exercises are meant to be accessible to anyone with a camera or smartphone, whether you’re an experienced photographer or you’re just looking for a fun visual challenge. If you’d like to experiment with some composition and editing techniques, see our related photography lesson plan .
And if none of these projects inspires you, look through The Take’s archives for more ideas.
Assignment No. 1
Most of us spend our days looking down: at our phones, computers, homework, meals. What would you see if you looked up instead? For this assignment, we invite you to photograph what you see when you turn your gaze to the sky.
We are having trouble retrieving the article content.
Please enable JavaScript in your browser settings.
Thank you for your patience while we verify access. If you are in Reader mode please exit and log into your Times account, or subscribe for all of The Times.
Thank you for your patience while we verify access.
Already a subscriber? Log in .
Want all of The Times? Subscribe .

8 Creative Black and White Photography Assignments for You
First sent on ERIC KIM NEWSLETTER >
Dear friends,
Some quick black and white photography assignments to get you going:
- Photograph your hand . Shoot in RAW, and increase the contrast, to see more details in your hands
- Inverse your photos : Choose some monochrome photos of yours which you like, and inverse them, to gain a more interesting view into them.
- Shoot with a flash : Monochrome and a flash renders interesting scenes. Shoot everything you see with a flash and without a flash. You can experiment with RICOH GR II Program Mode and the integrated flash, or the integrated flash on your Fuji, or even the iPhone with Noir mode with the integrated flash!
- Make a portfolio of your favorite (current) monochrome photos and upload them to your website portfolio.
- Study the masters of monochrome photography. Andre Kertesz , Henri Cartier-Bresson , Josef Koudelka , Richard Avedon .
- Experiment with RAW or JPEG high contrast for monochrome . You can download ERIC KIM PRESETS for free to experiment with.
- Exposure compensation : When you see something interesting, shoot it at -1 exposure compensation, 0, and +1 exposure compensation.
- Abstract your photos as much as possible . This means, blur your photos, shoot your photos out of focus, and make them more surreal !
Upload your favorite monochrome photos to arsbeta.com
Monochrome thoughts

- How to Make More Meaningful Black and White Photos : With monochrome, our photos feel a bit more timeless. So perhaps with photographing your really meaningful moments, monochrome is better?
- On Discovering Your Style as a Photographer : To discover your style as a photographer means to discover your taste, and to evolve your artistic vision.
- All photography is creative : Monochrome is interesting, because we do not naturally see the world as monochrome. Thus, to take the beauty of reality and make it more surreal … this is more artistic?
More monochrome articles >
HAPTIC BOOKS
HAPTIC PRESS — creative books to get you going:
- PHOTO JOURNAL: Discover more personal meaning in your photos
- MASTERS: Distilled lessons on photography >
- STREET NOTES: Street photography assignments >
- HOW TO SEE: Improve your visual acuity >
- Street Photography Starter Kit: Master street photography >
See more digital products >
FREE EBOOKS
Monochrome manual.
- Zen in the Art of Street Photography
More books by KIM >
The motivational thought
If reality existed simply for the sake of photography, it was all worth it!
Never stop shooting, ERIC
New motivation
- ERIC KIM PODCAST
HAPTIC INDUSTRIES : Creative tools to empower you.
MUSE by KIM. DISCOVER your new MUSE >
Discover more on AMAZON >
If this inspired you, feel free to forward to a friend or subscribe/re-subscribe here .
Dear friends, I am excited to announce my new free book: “ Monochrome Manual .” It is a brief 34-page handbook on the basics of black-and-white photography, full of practical tips, and some of my favorite monochromatic images. If you have a passion for black-and-white photography, download it for free and share it with your friends.
Read more for more download options, or to read the entire book as a blog post:
PDF (38.1MB):
- Direct Download
- Dropbox Download
- Google Drive
- Google Docs
- Microsoft.docx
iBooks author file (161.MB):
Table of Contents
- Why Monochrome?
- The Subject
- The Gesture
- Figure-to-Ground
- Negative Space
- Embrace the Light
- Ambient Light
- Harsh Light
- Out-of-Focus
Reflections
- Self-Portrait
- The Blacker, the Better

Black and white is the essence of photography. There is nothing more simple, minimalist, and sublime than a mono (singular) chromatic (color) image.
When I started shooting street photography, I embraced black-and-white, because I felt that it better communicated my emotions and feelings. Not only that, but I often found color to be a distraction to my images.
This manual will share you some practical tips when shooting street photography in black-and-white, and also provide some philosophical reasons why to shoot monochrome. Always, Eric
Why monochrome?

One of the aesthetic philosophies I love is: “less is more.” Not only that, but the phrase, “Less, but better” also comes to mind.
If you are a photographer that seeks to capture raw emotion in your photos, monochrome is for you. Monochrome helps you cut distractions, to eliminate noise, and to focus on the essence of the scene.
One of the best ways to make a better street photograph is to remove the superfluous from a frame. That means to get a clean background, to not have things sticking out of the head of your subject, as well as to not have unnecessary subjects in your photographs.
I also feel that monochrome better helps you focus on emotions. To capture better emotions in your photographs, capture gestures, body language, and facial expressions. Let’s start from the basics.
The subject

If you are new to photography or monochromatic photography, I recommend you to start with the basics– a single subject. The purpose of a photograph is to focus your attention to the primary subject of your photograph. By focusing on this one subject, you are able to communicate a certain message or a feeling to your viewer.
The fewer distractions you have in a frame, the more focus you can have to your subject.
Regardless of what type of photography you shoot, try to think: “Who is my subject?”
If you shoot street photography, that means focusing on a single subject that you find interesting on the streets. If you are shooting candidly, try to eliminate other elements or subjects from the frame. If you ask for permission, try to isolate one subject you find interesting, and photograph them.
If you shoot landscapes, perhaps your single-subject is a solitary tree, a solitary rock, or a starfish on the beach. If you shoot architecture, try to find a singular point in a photograph that catches your attention.
By focusing on a single-subject; that element is your “anchor.” To be more specific, your subject is a visual anchor.
Also by incorporating other compositional techniques (leading lines, diagonal lines, and strong contrast) you are able to isolate your viewer’s attention on that single subject.
So start off by capturing your single-subject.
The gesture

When you have identified your subject, one of the keys to capture a powerful monochromatic image is to focus on a gesture.
A gesture can be having someone’s hand on their head, pointing a certain direction, or having their hands on their hips.
Why are gestures important?
Well, with gestures you can capture emotions in your photographs. So rather than just photographing your subject mindlessly walking in the streets or looking like a scarecrow, try to engage your subject. Take photos while your subject is talking or ask them questions to provoke hand-movement.
The stronger the gesture of your subject, the stronger the emotion in the photograph.

Figure-to-ground

One of the secrets to making a stronger photograph is to have strong “figure-to-ground” (contrast) in a scene.
The “figure” is your subject. The “ground” is your background. So for example, if your subject is white, you want them against a black background. Or if you have a black subject, you want them against a white background.
The biggest mistakes a lot of photographers make is that there is not enough separation and contrast between their subject and the background. You can see this when you see street photographs of people with trees, tree poles, or other distracting elements overlapping with the subject.
A good way to make stronger images is to start off with a simple and minimalist background. Start off with a white or black background, and simply add your subjects into the frame.
Negative space

Another way to make a maximum statement with less is to embrace “negative space.”
Negative space shouldn’t be decorative. Negative space allows you to focus the viewer’s attention onto your subject. Not only that, but having negative space allows the subject in your photograph to “breathe.”
For example, in the photograph above, I have Cindy lit with a single light. The pitch black envelops her– and having just her face lit gives her a “spotlight” effect (like an actor on a stage). The black also helps give focus to the expression of her face– a bit lost, unsure, and looking to the future.
The secret to making strong images with negative space is to intentionally take a step back, and make your subjects smaller than you think they “should” be. Also by lowering your “exposure compensation” — you can make the blacks envelop the entire frame.
Embrace the light

One of the good things about monochromatic photography is that even if your light is flat, the photos tend up looking “okay.” With color photography, having flat light ruins a photograph.
However if you want to make a truly stellar black-and-white photograph, you need to embrace the light. The ideal light to have is during “golden hour”; either sunrise, or sunset.
Having beautiful light will truly bring your monochromatic images to life. They will make the blacks of your photos darker than ink, and they will make the highlights of your photographs glisten with life. And no amount of post-processing or darkroom magic can “fix” a photograph with poor light.
In this photograph, I made some portraits of a man in Downtown LA during sunset. I made many photos of him, and I got lucky with this moment. A combination of the strong black horizontal lines, the soft expression in his face, and the mysterious hand coming out of the shadows.

“Eyes are the windows to the soul.” There are no truer words.
When I’m out shooting on the streets, I try to get eye-contact in my images. I can get eye-contact in my photographs either by interacting with my subjects, or taking photos candidly of my subjects until they notice me, and then turn towards me, and make eye-contact with me and my camera.
To highlight the eye of your subject, try to find shafts of light, and set your exposure-compensation to -2 or so. This will highlight the exposure of your subject’s eye, and darken everything else.
If your subject is looking straight into the lens, the viewer will feel more captivated by the image. There is nothing more haunting, memorable, and soul-gripping than strong eye-contact in an image. One of the best ways to study eye-contact in images is to look at Renaissance paintings (some of the most memorable images have the subjects look straight into the eye of the viewer).

After the face, the hands of a person are the second most interesting part of a human.
Why? With hands you can communicate. Many psychologists say that 80% of communication is based on body-language and gestures; not words.
Not only that, but hands often have an interesting story of their own.
For example, in this image, I approached a woman in Downtown LA, and asked to take her portrait. At first she refused, and then I asked if I could take a photograph of her amazing nails instead. She assented (I’ve never met anyone who refused having a photo of their hands taken).
I feel the resulting image is much stronger. By just looking at the woman’s hands, you can infer a lot about her personal style and it makes the viewer wonder, “What kind of woman would have those kind of hands and nails?” The more questions, the more engaging and memorable the image is.

One of the beautiful things about monochrome is that it highlights shadows.
By incorporating shadows into your photos, you incorporate more mystery and drama to your photos.
For example, in the photograph above, take a look at the shadow. What do you think is the hidden story behind this photograph? This is what makes the photograph interesting to look at; the viewer can make up his or her own story behind the photo. If you want engaging shadows in a photograph, shoot during sunset. The lower the sun sets, the longer the shadows get. A secret to getting (even) longer shadows– try to get the shadow to curl around the edge of a wall (like it is above).
Another tip: only photograph the shadow of a subject (don’t include the subject).

To make a beautiful black and white photograph, you need strong “figure-to-ground” or strong contrast in a scene.
However when it is really dark, what is one of the best ways to illuminate your subjects? Easy– use a flash.
By using a flash, you will draw your subject out of the shadows. You will make your subject illuminate with brilliance.
You don’t need to shoot with a big external flash; just use the integrated flash in-camera (if you have one). If not, use the smallest and least-obtrusive flash. In terms of technical settings, I just recommend using “P” (program) mode; which will automatically meter your scene.
Using a flash works best when shooting against the sun, in the shade, indoors, or at night.

If you have never been in a film darkroom; there is a technique called “dodging” (brightening) and “burning” (darkening). Fortunately for us, we can also do this digitally.
For me, I love dark blacks. To me, dark blacks are more mysterious, more sinister, and have more drama.
In this photograph, I took a photograph of a suited man walking by a diagonal wall. I crouched down, and took a quick photograph. I noticed in my LCD screen that his face was (mostly) black. But to make this image even more dramatic, I darkened in his face completely using the “adjustment brush” tool in Lightroom, and totally “burning” (darkening) his face. But isn’t this “cheating?” No — black-and-white isn’t about capturing reality; it is about creating your own version of reality. After all, do you really see the world in black-and-white?
Ambient light

One of my favorite situations to shoot monochrome in is when there is a faint light source– a little bit of ambient light to light up my subject.
For example, in this image I was at a dive-bar in Provincetown, and I had an engaging chat with the man above. He excused himself for a bit, in order to pick a song on the jukebox. When he was thumbing through the catalogue of songs, I saw a great photo opportunity. I set the camera to -3 exposure-compensation (shooting in “P” mode) and took probably 70-80 photos of this scene.
I love the resulting image. There is a great deal of drama in the photograph, because the soft glow of the jukebox barely illuminates the hollow-looking face of the subject.
If you want to capture more subtle ambient light, try to shoot in the evening– in really dark situations. Try to use just a single light bulb, or even the light of a smartphone. Use ISO 3200+ and -3 exposure.
Harsh light

If you want to make strong and gritty images, embrace “harsh light.”
You will find harsh light when you are shooting in the middle of the day, anytime between 11am-2pm (depending on the time of the year). During these times of the day, the light isn’t soft and graduated– it stops in jagged edges.
If you are shooting in harsh light, put your subject in the light, and experiment setting the exposure-compensation of your camera anywhere between -2 and -3. What this will do is have your subject well-illuminated in the light, and have the background be pitch-black.
For example in this photograph I saw this badass guy with these fantastic tattoos. I stopped him, and I complimented him on his tattoos and asked to make a few photographs of him. He assented– and I asked him to stand directly in the light– where his tattoos and eyes would be illuminated. If you take a look at my contact sheet, you can see how I asked him to move forwards and backwards (to have the light properly exposed on his face).
There is no such thing as “good” or “bad” light in photography– but there is “harsh” and “soft” light. Experiment with all different lighting situations (shooting without a flash, and with a flash), and you will be able to create monochromatic images with different “looks” and emotion.

Out-of-focus

The more mysterious a black-and-white photograph is, the more engaging it will be to the viewer. When a photograph of out-of-focus, it forces the viewer to put in extra effort to try to make out what is happening in a photograph.
In photography, we are always told to have the subject perfectly in-focus. But try the opposite– make photos where your subjects are intentionally out-of-focus.
For me, most of my out-of-focus photos that I like are accidents, or “beautiful mistakes.” Or what I do sometimes is take several photos– some photos in-focus, and some photos out-of-focus, and end up choosing the photos I like best.
I also have found that photos that are out-of-focus in monochrome tend to look aesthetically more appealing than color photographs. Why? Because they look even more haunting and gripping.

To make more interesting monochromatic images– add an extra “dimension” to your photos. One way to add another dimension to your photographs is to integrate more reflections.
You can add reflections to your photos by finding a spot where you see potential– this can be mirrors, windows, or even in puddles of water.
For this photograph, I was on my lunch break and walking around a local mall. I rode the escalator up, and saw the sides of the escalator make a nice curved leading-lines. I then held up my camera, and waited for a subject to enter the middle of the frame. I then saw a man coming from the right side, and took a photograph the second he was in the middle of the frame. Half a second before I shot the photograph, I noticed his reflection on the left of the frame.
However it wasn’t until I went home that I saw the third reflection on the right of the frame. The reflections make this photo.

If you are new to black-and-white street photography, you might have gone a bit crazy with the “vignette” tool. I have to admit, when I started shooting monochromatic street photos, I would add a strong vignette to all of my images.
I liked the vignette because it added more focus to the middle of the frame, by darkening the edges of the frame. However what I have learned in my personal photographic journey is that adding too much vignette to an image makes it look more artificial, forced, and unnatural. You never want to add so much vignette that your subject will think, “Wow, this photographer added too much vignette to the image.” You want the viewer to just enjoy the image.
However of course there are cases where a strong vignette will add more power to an image– like this photograph I shot in Seoul in 2009. I feel the vignette helps the woman in the white umbrella pop more, and illuminate her surroundings. The result is the photograph has an “ethereal” feel.

If you’ve ever watched a film-noir film from the 50’s, you will see a lot of crazy effects done with smoke and fog machines– to add more drama, mystery, and confusion to a scene.
Personally I am not a smoker, but I love the aesthetic quality that smoke brings to an image.
You can shoot smoke in different ways– you can shoot smoky pipes on a cold winter day, or the steam coming out of the sewer. You can shoot in misty situations, or you can ask your friend (or your subject) to blow their cigarette smoke towards you.
When it comes to smoke, it is unpredictable how it will render in a photograph. My practical situation: take photos of the smoke with a flash and without a flash. Sometimes the flash will illuminate the smoke and make it “pop.” Other cases, not using a flash will give the image more drama and mystery. Regardless, smoke is a timeless tool that makes monochromatic images more compelling.

Life moves fast– one second it is there, and one second it is gone. If you shoot street photography, you might want to capture the vigor and energy of the urban jungle in your images. One of the ways to do this is to add blur to your images. This will make your images more “edgy” and engaging.
There are many ways you can create more blurry images– you can set your camera to “shutter-priority” mode and set your shutter-speed slow (anything slower than 1/10th of a second).
You can shoot with a slow shutter-speed while you are moving, or take the opposite approach and put your camera on a tripod (have a sharp background, but your subjects are like ghosts in your frame).
Another technique to add blur to your photos is to use a flash, but set your shutter-speed to slower than 1/10th second. This will cause your subject to be tack-sharp, but the background to be blurry.

There is nothing more sublime than beautifully-composed monochromatic images. If you love geometrical elements in a frame, try to incorporate repeating elements into your frame.
For example, I was traveling with Cindy, her mom, and my mom in Portugal. We went to a small seaside down, and found this interesting area where there were all of these repeating windows against bleach-white walls.
In this image, you see the repeating patterns of the black windows (some of them are circular arches, and some of them are rectangles or squares). To continue the repeating pattern of the blacks in the photo (against the white background), I added my mom’s head in the lower-right part of the frame.
A key to have strong repetition in black and white photos: make sure to have “white-space” between the dark elements in a photograph. Also make sure to “fill-the-frame” and make a balanced frame.

Self-portrait

If you live in an area where you don’t have a lot of people or interesting subjects, know that you can always photograph yourself– your own shadow, your own reflection, or your own face.
One of the photographers I am greatly inspired by when it comes to self-portraits is Lee Friedlander — he is able to integrate great humor into his self-portraits by putting his shadows and faces in the most unlikely places. In this photograph, I put my shadow over this road separator, and it almost looks like I have these alien-eyes floating above my shadow’s head.
No matter how “boring” the city, town, or neighborhood you live in– you always have yourself (the best subject to photograph). Another idea: do an entire monochromatic self-portrait project, and have fun with it.

The blacker, the better

I recently read an essay about the color black by the world-famous designer, Paul Rand.
In his essay, he shares how in modern (Western) society we look down on the color black. We see the color black as evil, darkness, and danger. Unfortunately, this is where a lot of racists find their rationale to look down on black people, and other “colored” peoples.
For me, I think the blacker, the better. Black to me is beauty. Black is not pretentious, black is minimalism, black is elegance, and black is bliss.
If you want to see the world in a deeper way, try to see the world in black-and-white. See how many shades of white, grey, and black you can get in an image. Find your monochromatic bliss, and don’t let color blind your eyes.
Focus on raw emotions, faces, eyes, shapes, lines, and the dance between the light and dark in a frame.
Some of the greatest photographers have spent their entire careers trying to “master” black-and-white; but many of them have died admitting that even they weren’t able to master black-and-white before they passed.
I definitely don’t plan on mastering black-and-white in this lifetime; but I do find it to be not only a beautiful aesthetic in photography, but a way to see the world in a more calm, elegant, and simple way.
Make monochromatic memories, and savor the brilliance it will bring your images.
Always, Eric Thursday, March 31, 2016 / Oakland
11 Advanced Photography Exercises for High School Students
Whew! Eleven advanced photo assignments…did you try them all?
As I explored these photography assignments again, I had so much fun taking new photos and applying the techniques right alongside you!
If you didn’t join in on all the fun, you’ll find the complete list of photo prompts we explored below. Click on each link to see the short blurb with related tips and tricks for each prompt.
Also, if you teach photography, here’s a free lesson plan that goes along with this whole series. Click the button below and enter your email! (You can also click here to purchase the entire unit, including all the worksheets with keys, test with key and review, a complete presentation, and a project outline.)

Alphabet Photography
ABC! Ready, Set Go! Take your alphabet pictures; you may be surprised at how fun and challenging finding photography letters can be!

Extra Credit
Do you need some extra points? Here are some photoshoot ideas that will get you extra points in the grade book and give you a reason to support your school! So go [insert your school’s name here]!

Built-In Camera Flash
You may need to use the flash on your camera when you’re in a pinch! Check the link for tips to make the light look as natural as possible!

External Flash
If you’ve got an external flash, it’s time to learn to use it! It can come in very handy in low-light situations!

Candid Photography
What is candid photography? Well, it’s a bit like being a spy! You’ll need to take pictures on the sly to capture those authentic expressions you’re looking for.

Story Telling in Photography
A picture is worth a thousand words? You bet! Maybe more! Take thoughtful, rich photos that have the ability to strike emotion in your viewers.

Pattern in Photography
Pattern photography is some of the most artistic photography you can take. Finding a good pattern and then capturing the perfect angle to accentuate it is fun!

High Contrast in Photography
I think most the great photographers thrive on high-contrast photography. These photos pop out and say, “LOOK AT ME!”

Low Contrast in Photography
This type of photo is much more subdued than your high-contrast photo, but if done effectively, it can really set the mood!

Color Contrast in Photography
We live in a world of color, so naturally, we must learn how to make the colors look good in our photos! So, using the color wheel and some good old-fashioned simplicity, we’ll get some pictures with great color contrast!

Light Painting Idea
What do you get when you mix a camera (with a tripod), a dark room, and some light sticks? Light Painting! This is one of the most fun photography assignments I’ve ever done!
I hope you take the time to try all these out! Also, don’t forget to click the links above to download the worksheets and view the full articles on each.
Thank you SO MUCH for all YOU do for those budding Photographers out there. YOU are truly amazing, too!
Click here to receive the FREE lesson plan that goes with this blog series and be added to my email list so that you don’t miss a thing! (If you want to do the thing right, check out this link to get information about the entire unit! )
Leave a Reply Cancel reply
You must be logged in to post a comment.
Want to see a sample lesson?
Enter your email below!
Digital Art Teacher | All rights reserved |
Privacy Policy |
Terms of Use |
Disclaimer |
Support
15 Project Ideas to Spark Your Creativity
A Post By: Nancy Young
Photography has never been as popular as it is today. People of all ages learn photography in various schools and online universities, and lots of talented photographers have a wonderful opportunity to reveal themselves not only as artists, but also as teachers.

By Alex Eylar
Like all creatives, photographers can sometimes experience creative block or a lack of interesting ideas, no matter what side of the school desk they are sitting on. One way for photography mentors and teachers to fight this problem is through the use of creative assignments.
In this article I’ve put together 15 creative project ideas to use in your photography class (if you are a teacher) or for yourself. When completed properly, a student assignment is a great teaching tool. If it’s well-designed and structured, it enables students to develop their technical skills and artistic vision, as well as improve their general thinking abilities and subject knowledge. So whether you’re a photography teacher looking for effective assignment ideas or a self-taught photography student focused on training your eye and critical vision, this roundup will surely come in handy.
1. 365 Project
No matter what you call it, the 365 Project or Photo a Day project, the result is the same – a photo for every day of the year. These kinds of long-term projects give you an opportunity not only to explore and learn photography, but also develop creative seeing and improve your post-production skills. 365 Projects have changed the lives of a lot of photographers, and who knows, maybe you’re next?
Further Reading : 11 Tips for a Successful 365 Project

By Olli Henze

By Dennis Skley
2. 100 Strangers
The 100 Strangers project enables you to interact with 100 strangers and take a photo of each of them. It can be quite scary to start shooting people in the street, or local cafe, if you’re an introvert. But being a photographer is not as easy as it may seem at first. Photography is all about overcoming your fears. This project will help you do that.

By Louisa Billeter
3. 52 Weeks
The 52 Weeks project is similar to 365, but this time you’re supposed to come up with a new photo each week, not each day. The difference between these two projects is that you can choose a theme for every week. For instance, you may shoot particular subjects, places, or even do some photowalks. A photowalk is an awesome way to find inspiration, discover new locations, and come up with really valuable, interesting ideas in the end.

By shutterbugamar
4. Social Awareness Project
Capturing dramatic moments that will influence the minds of their viewers is a mission that many iconic photographers are dedicated to. Spend a weekend shooting the faces on your local streets, or collaborating with a non-profit can help you develop your skills as a documentarist and photojournalist. Such photo projects are definitely not easy to work on, both emotionally and technically, but the reward of being an activist is obvious – every time you click the shutter button you create a photo that could change the world.

World of Coal by Ouie Sanchez on 500px
5. Self-Portrait
Of course, you may have taken a self-portrait many times with your smartphone. Instagram has turned self-portraits into something usual and mundane.
However, self-portraits can be quite helpful in opening up, and exploring parts of photography in which you don’t normally find yourself involved. Mix it up and stay creative with your surroundings and emotions. For example, look at the work of Kyle Thompson , who has really succeeded in self-photography.
Check out these Self Portrait Photography Tips for some hints on where to start.

By Özgün ERDEM
6. New Lens Type
You may pick one lens and use it exclusively during this project. A 50mm is a good starting point , as it forces you to move around and stay selective. A fisheye lens could also make an interesting theme.
Moreover, you may experiment with freelensing which is an inexpensive way to get a similar photo effect as from an expensive tilt-shift lens. The idea behind a tilt-shift lens is tilting the lens at an angle to the sensor to change the orientation of the plane of focus (PoF). The technique of freelensing, not only gives you the ability to change the PoF, but it also gives you some pretty cool light leaks from not having the lens actually attached to the camera.

By Nuwandalice

By David Hepworth
7. Monochrome
Try to shoot all your photos in monochrome, or convert them to black and white in post-processing . The beauty of black and white photography is that it focuses more on visual elements such as tone, texture and shapes. By starting this project for yourself, you’ll see the objects in a different light, and rather than just color, your eyes will be better trained to recognize various forms and shapes.

8. Panoramas
Panoramas are one more way to develop your creative vision. Panoramas usually give the viewer a much wider viewing angle than normal. You can create some small panoramas by merging three photos in one, or go full 360 and make tiny globes like the ones in the picture below. It’s all up to you!
Further Reading: 8 Guidelines To Taking Panoramic Photos With Any Camera

By Johanna Herbst

Promised Land by Beno Saradzic on 500px

The Birds and the Barn by Bruce Hood on 500px
In today’s world of foodie-Instagram, everyone could be a food photographer. Especially if you’re fond of cooking, then food photography is right for you. It’s a myth that you need a super-wow camera to capture food. Food photography is all about styling and beautiful background. No matter what kind of photographer you call yourself, it’s advantageous to have some food photography skills under your belt.
Further Reading : How to Take Mouth watering photos of food

By Christopher Chan
10. Sunset and Sunrise
As dawn breaks and the sun comes up, you get to see the creeping rays of sunlight bathe everything in their shining glow. Such scenes are the perfect environment for memorable photos that you can’t pass up. Sunrises and sunsets happen every day. It may sound quite obvious and ordinary, but these times of the day are a golden opportunity to capture breathtaking images.
Read more about how to photograph sunsets and sunrises .

By Mike Behnken

By Linda O’Dell

Paradise Pier Sunset by William McIntosh on 500px
11. Single Theme
Pick an object and try to get a collection of snapshots representing it. For example, try to shoot only circular objects everywhere you go. Or pick a color, for instance blue, and try to go all day long photographing only blue things. The aim of this assignment is to learn to see the ordinary object in a different way.

La bicicleta by Adrian Hernandez Binz on 500px
12. Phone Camera
The main advantage of your phone camera is that it’s with you everywhere you go. Moreover, these days smartphones’ camera quality is much better than years ago and you may come up with images that look almost as good as if they were taken with an expensive DSLR. Using your phone allows you to put exposure on the back burner, and lets you focus more on composition instead. You may also use various photo-editing apps to add various photo effects.

By Takeshi Garcia
13. Urban Exploration
Urban exploration photography is the art of finding abandoned places, houses, locations; explore them and shoot in a unique way. It’s potentially dangerous, exciting, and a lot of fun. In order not to get scared, you should take your friends with you. Even if they’re not interested in photography, exploring abandoned places is really breathtaking.
Editor’s note: always follow the laws when doing urban exploration. Do not enter where prohibited and always stay safe. Abondoned buildings can be dangerous or illegal to enter. Be careful.
Read more about urban exploration photography .

By Michal Jan?ek
14. Perspectives
Shoot a whole set of images from one perspective, such as from a child’s the point of view. Or try to capture all photos from up high. We are used to seeing the majority of shots at eye level, why not to try something different? It’s a great way to learn how to deviate from the normal .

Fishing by Minhajul Haque on 500px

By Ken Owen
15. Film Photography
Film photography is something every photographer should practice for a few reasons.
First of all, unlike digital photography, you don’t get to see the image you took for a while. It may seem annoying, but you’ll get used to it.
Second of all, you will begin to think more carefully before pressing the shutter button. While shooting digital photography, you may take 10 photos of the same thing to choose the best shot in the end. But with film photography you will not have that chance.
Read this helpful post with suggestions on getting started with shooting with film .

By Gioia De Antoniis
Bonus Assignment
Once you accomplish your creative assignment, create a dedicated photography portfolio ( Defrozo and Koken provide website building tools for free) or write a guest post for some photography blog to describe your journey and share your experience with fellow enthusiasts. Developing your marketing and blogging skills increases the likelihood of building a prospering and successful photography business.
Resources for Inspiration
The web has so many opportunities to get fresh ideas for your next photography project. I’d like to share some resources you may get inspiration from.
Ted is aimed to amplify the ideas of students and teachers from all over the globe. Their mission is to spread great ideas and inspire students of any specialization. You may browse 1800+ TED talks on photography available on their site to spark your curiosity.
OKDOTHIS App
This smartphone app was made by a celebrity photographer Jeremy Cowart. OKDOTHIS is a photography community that inspires people to do more. It’s based on DOs which are creative tasks made by other members of the community. You may upload a photo in someone’s DO or create your own one. The app has also a built-in photo editor.
Behance is a leading online platform to showcase and discover creative work. All the creatives starting from web designers to photographers share their best artwork here. You may browse the Behance gallery in Photography to find new projects from other photographers.
Weekly Assignments in the dPS Forum
Check out the weekly assignments in the dPS forum for more inspiration. DPS nominates a topic for each week. It could be a lot of fun and a great way to improve your photography skills in various areas.
Make it Happen
What homework do you prefer to give to your students? What assignments appeal to you most? What project interests you and gets you thinking creatively? Share your experience and suggestions in the comments.

Read more from our Tips & Tutorials category

is a passionate writer and blogger. She writes tons of inspirational articles on photography and web design, despite the fact that she is an economist by education. Nancy believes in the magic of written words to inspire and motivate. She is a part of the Onedesblog Team .
- Guaranteed for 2 full months
- Pay by PayPal or Credit Card
- Instant Digital Download

- All our best articles for the week
- Fun photographic challenges
- Special offers and discounts
Photography Life
PL provides various digital photography news, reviews, articles, tips, tutorials and guides to photographers of all levels
Composition in Photography: Assignment Discussion
By Romanas Naryškin 17 Comments Last Updated On January 20, 2022
A few months ago, I started working on our Mastering Composition” series articles. The idea behind them was to cover all the basics of composition in photography (and, consequently, visual arts in general) starting with some extremely simple concepts, and also provide assignments for beginner photographers to make the educational process fun and engaging. With some luck and effort from our side, the project would gain momentum and we’d be able to not only touch more advanced composition rules / theories and discuss specific examples sent in by our readers (eventually), but also organize a few online and offline workshops along the way. In this article, I will discuss the task and the answers provided by our readers under the first article of the series .
Table of Contents
The Assignment
Before we begin, let me just remind you what the assignment was. I asked you to name basic varieties of composition you were familiar with. I also wanted you to list just one variety and try not to repeat types that have already been named by someone else – to make the assignment more interesting. The following image was provided as a hint for one of the more basic compositions types:

Basic Types of Composition
As we’ve already learned , there are two basic types of composition – open and closed. But I wouldn’t have given you a task that has just two possible answers, that would have been a little boring! There is a bit more to it. Each of the two types of composition has different basic varieties. We will be covering these varieties in separate articles with appropriate images to illustrate them. For now, I will simply list them for you and provide a short description for each one. Notice how many of these you’ve actually seen – possibly without knowing what they were called. More than that, you’ve probably used quite a few yourself. That only proves theory isn’t everything – a lot of these things come naturally, as they should.
1) Open Composition
- Asymmetrical composition – a way of placing the elements within the frame in a way that is not symmetrical in relation to the center or central axis of the image. Primitively speaking, asymmetrical composition is an opposite of symmetrical composition and means that elements on one side of the image are different in shape, size, color and/or number to elements on the other side. Asymmetrical composition in its nature is quite dynamic and expressive, although it is not always the case. Mind you, whilst balance in composition is a subject we will touch on later, I feel I must stress out that asymmetry does not mean that the composition of that particular photograph is inherently unbalanced.
- Diagonal composition – this way of composing an image is based on placing elements along one or several diagonal lines (which can intersect) within the frame.
- Fragmental composition – when the objects (or subjects) within a specific photograph are only a part of their surrounding environment and that surrounding environment is shown going off beyond the edges of the frame, such a photograph is employing fragmental composition. Basically, it shows a part of a bigger scenery/story.
- Spiral composition – elements within the frame are placed in an extending spiral in relation to a vertical or diagonal axis. This composition variety has a lot to do with the Golden Mean (aka Rule, Spiral, Ratio, etc), which we will cover in a separate article.
- Vertical composition – elements within a frame are positioned along one or several vertical lines, which creates a sense of vertical movement. This does not mean all vertically framed photographs employ vertical composition, nor does the photograph have to be framed vertically at all. So why is vertical composition considered to be more dynamic than if the objects were placed horizontally? Well, placing the objects horizontally also “grounds” them, it is similar to laying a person down rather than having him stand up. Simply put, a person who is laying down is just visually more static.
2) Closed Composition
- Symmetrical composition – this is one of the easiest varieties to distinguish. Symmetrical composition is, as you probably realize, a complete opposite of asymmetry. It is a way of composing the image (elements in the frame) in relation to a vertical, horizontal or diagonal axis symmetrically, meaning there are elements that are very similar to each other (not necessarily identical) in their shape, size and color on both sides of the axis. A very good example of such composition is the first image in this article, the one that was provided with the assignment. The rainwater pipe is not only a symmetrical element of the photograph, but it also very clearly matches the axis in relation to which the elements (the two windows, etc) are placed within the frame. Similar elements placed around the center of the frame (in a circle, for example) also make for a symmetrical composition.
- Antithetic composition – this variety is actually very, very similar to symmetrical composition. The biggest difference is that there isn’t always a distinguishable axis around which the elements are placed. Such composition contains elements that mirror each other, but are not identical, merely similar. For example, a photograph of a man and a woman looking at each other (taken in profile) can be considered to employ antithetic composition.
- Central composition – a way of composing the image whilst emphasizing the elements that are at the center of the frame.
- Frontal composition – photographing a subject or object directly from the front, “head on”, results in a frontal composition. The photograph that you see at the top of this article that we’ve already identified is symmetrical also employs frontal composition.
- Pyramidal composition – placing two or more elements to form a triangle within the frame results in a pyramidal composition. A basic example would be a tightly framed portrait of a young family with the father in the middle (as the tallest person), the mother on one side and the son on the other, both leaning into the father slightly (who’s hugging them, of course!) to create a sense of closeness.
Something to Keep in Mind
These are not all varieties, but a lot of them don’t get used much in photography and are more common in other forms of visual art, such as painting. More often than not, photographers will employ several varieties at the same time without even thinking about it. What’s more, some photographs might have features of varieties that seemingly belong to a completely different type of composition. For example, a particular photograph can be symmetrical (a variety of a closed composition) and fragmental (a variety of an open composition) at the same time, even if that is a relatively rare case. So all the information that I have provided above is, like many things when it comes to arts and composition, not set in stone.
Your Answers
As I have already mentioned, a lot of these theoretical concepts come naturally in practice. This means that you have absolutely no reason at all to feel bad for not guessing the answers previously, if you haven’t. So don’t feel bad, not even for a minute – we are all here (including the whole Photography Life team) to learn from each other, after-all. I am not an expert at this myself and learn quite a lot while writing the article – there’s always a lot of research going on “behind the scenes”. That also means corrections and suggestions are always welcome! More than that, not all of you might have gotten the answers right, but, simply by guessing, you’ve mentioned plenty of other very important aspects of composition that we will eventually cover in our Mastering Composition series. These include rules and guidelines of composing images (Rule of Thirds, Golden Ratio), ways to direct the viewer’s gaze (Leading Lines), elements of composition (Perspective) and so on. I hope you will continue to take part in these assignments for beginners and have fun while at it!
A special mention goes to Sherman J. Buster, who listed symmetrical and asymmetrical compositions, and also Dan, who mentioned diagonal composition. Well done! Hope you did not Google it :)
Quick Assignment for Beginners
At first I thought of providing visual examples (photographs) to go with the definitions above and analyzing them for you so as to give a better idea of what is what . But even though this is an assignment discussion article and we are supposed to learn the right answers to the previous assignment, it feels wrong not giving you even the slightest bit of homework. So I will :)
Based on the varieties of compositions mentioned in this article and their short descriptions, analyze the two following photographs and:
- Identify the main type of composition (open or closed)
- Identify composition varieties (there might be several that suit a single photograph) of both images according to your conclusions of part 1) of this assignment
- Leave a comment with your answer below
Now, three days have already passed, so here are the correct answers for each photograph. It gives me great pleasure to say most of you were very accurate, good work!
The First Photograph
This photograph by Nasim uses a closed central, frontal, symmetrical composition. Some of you also thought that it might be diagonal because of the angle of the sun rays. However, what you must remember is to judge the general composition and the main object of focus, not separate elements in the photograph.

The Second Photograph
This photograph uses an open diagonal, fragmental composition with just a hint of vertical lines, too. Again, most of you were very accurate, I am impressed!

I was very happy to see so many of you take a shot at this and I’m also glad you liked the article and the assignment! More to come, I promise.

About Romanas Naryškin
A student and a wedding photographer with a passion for cinematography and writing. You'll see me buying film even when there's no food in the fridge. Follow me on Google+ , Facebook or visit my wedding photography website to see some of my work.

Hi Romanas, have really enjoyed this series so far and learned so much from it, thankyou for taking the time to share your knowledge. Will the series be continued? Eager to learn more as this is the area I feel least confident in!

Hello, Lisa. Certainly. Just be patient. :)

Wow, a real article on photography written by a real photographer (who also shoots film, too). And not one word about gear, megapixels, resolution, sensors, oil spots, sharpness, VR, buffer, frame rate, etc.
Bravo, Romanas! There’s actually hope for this website!

I see the first photo as being primarily a closed image that is symmetrical, with a central and frontal composition.
The second photo is an open image that is primarily asymmetrical with a diagonal composition. It has vertical and horizontal lines, too, but the diagonal lines dominate.

photo 1: closed; symmetrical, central, frontal photo 2: open; asymmetrical, possibly diagonal or fragmental (difficult for me to classify this one)

1st photograph: Closed composition – Symmetrical, Central and Frontal. 2nd photograph: Open Composition – Diagonal, Fragmental

Hi Roman, Image 1: closed, symmetrica, frontal and pyramidal Image 2: open, asymmetrical, fragmental and vertical Nice exercise :)

I think first one is closed central and second one open diagonal

Image 1- open and closed, symmetrical,central,diagonal. 2-closed, diagonal,antithetic

First photograph: Closed, Antithetic light beam to the left of the axis. Second Photograph: Open, Diagonal, Vertical, Fragmental.

Great lesson!
Image 1 – I feel it shows both, open and closed. Open; fragmented, there’s more to the image not shown. Closed; pyramid – the light beaming down in relation to the ladder
Image 2 – Open; displays both diagonal and fragmented composition.
Thank you for sharing with us!
- Beginner Photography
- Lens Database
- Photo Spots
- Reviews Archive
- Camera Reviews
- Lens Reviews
- Other Gear Reviews
- Submit Content
Photo Books
- Fleece Blankets
- Ceramic Mugs
- Wedding Invites
- About Photo Prints
- Anniversaries
- Baby Showers
- Cards and Stationery
- Father's Day
Wedding Invitations
65+ photography project ideas you can start today.
Written by Shutterfly Community Last Updated: Dec 8, 2020
Do you want to sharpen your skills, learn fresh techniques or just have fun with your camera? Photography projects help you accomplish all three.
Shop Trending Categories
Canvas Prints
Photo Puzzles
Through themed projects, you can capture unique images that follow a certain framework or style. Your project can last a week, month or year—depending on how in depth you’d like to go. To offer you inspiration, we’ve compiled 68 creative photography projects that are appropriate for all skill levels.
Once you’ve completed your project, be sure to create a photo book with your images or select your favorite for a canvas print .
1. Self Portrait
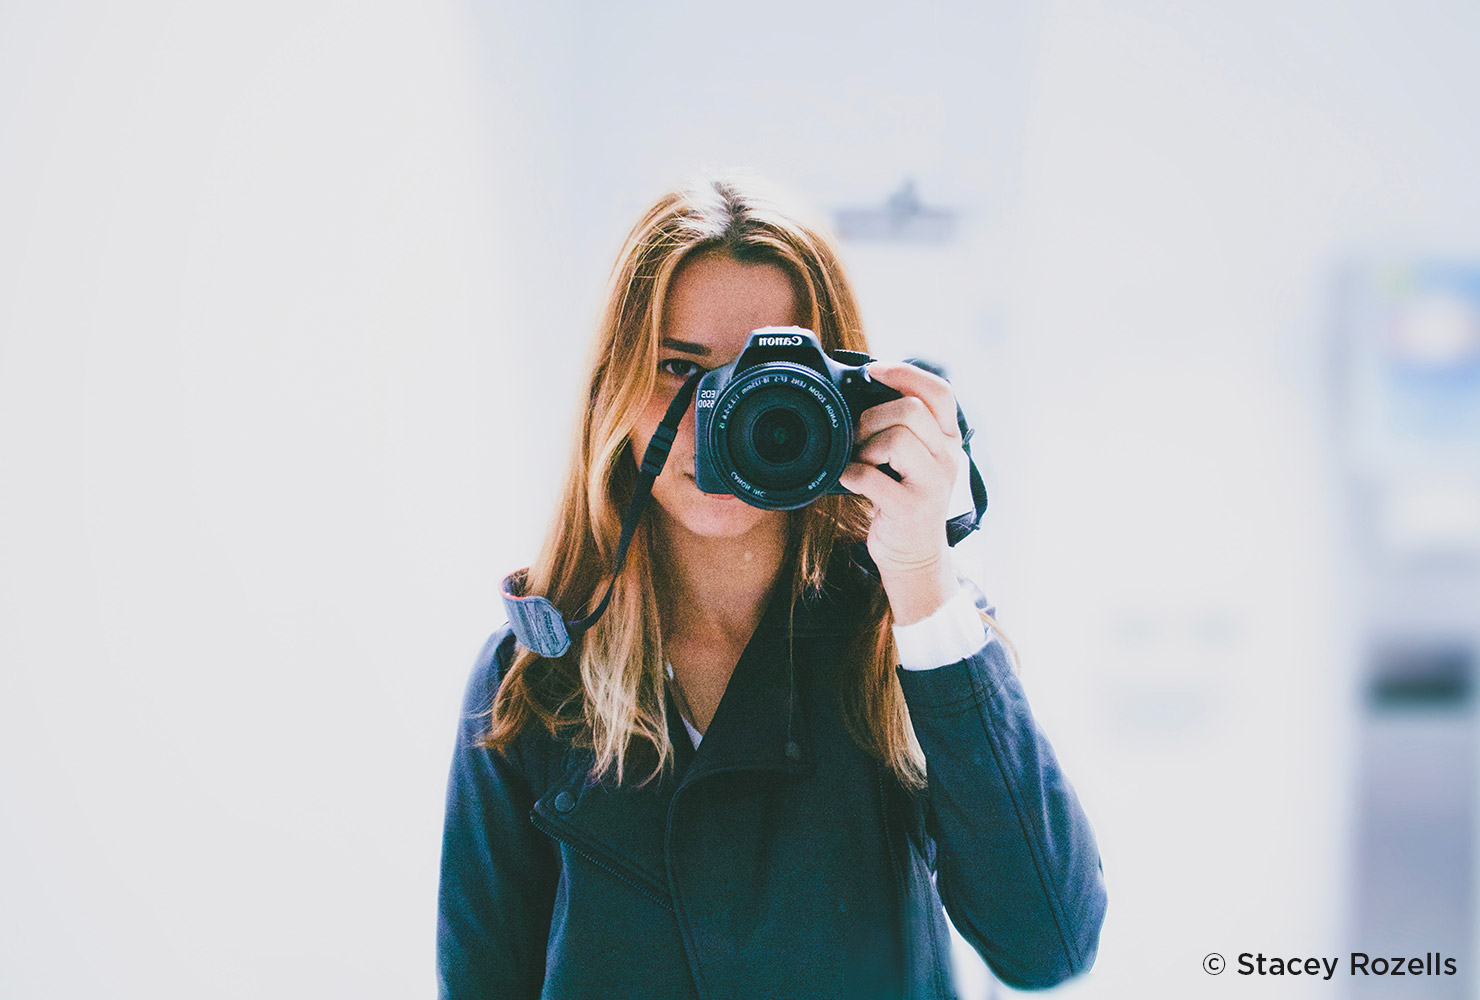
By switching the focus from other subjects to yourself as the subject, your photography takes on a whole new perspective. When setting up your shot, choose a landmark item to use as a stand-in until you’re ready to jump in the frame.
Play with auto and manual focus with your stand-in until you get the shot just right. Then, enter the scene using the timer option.
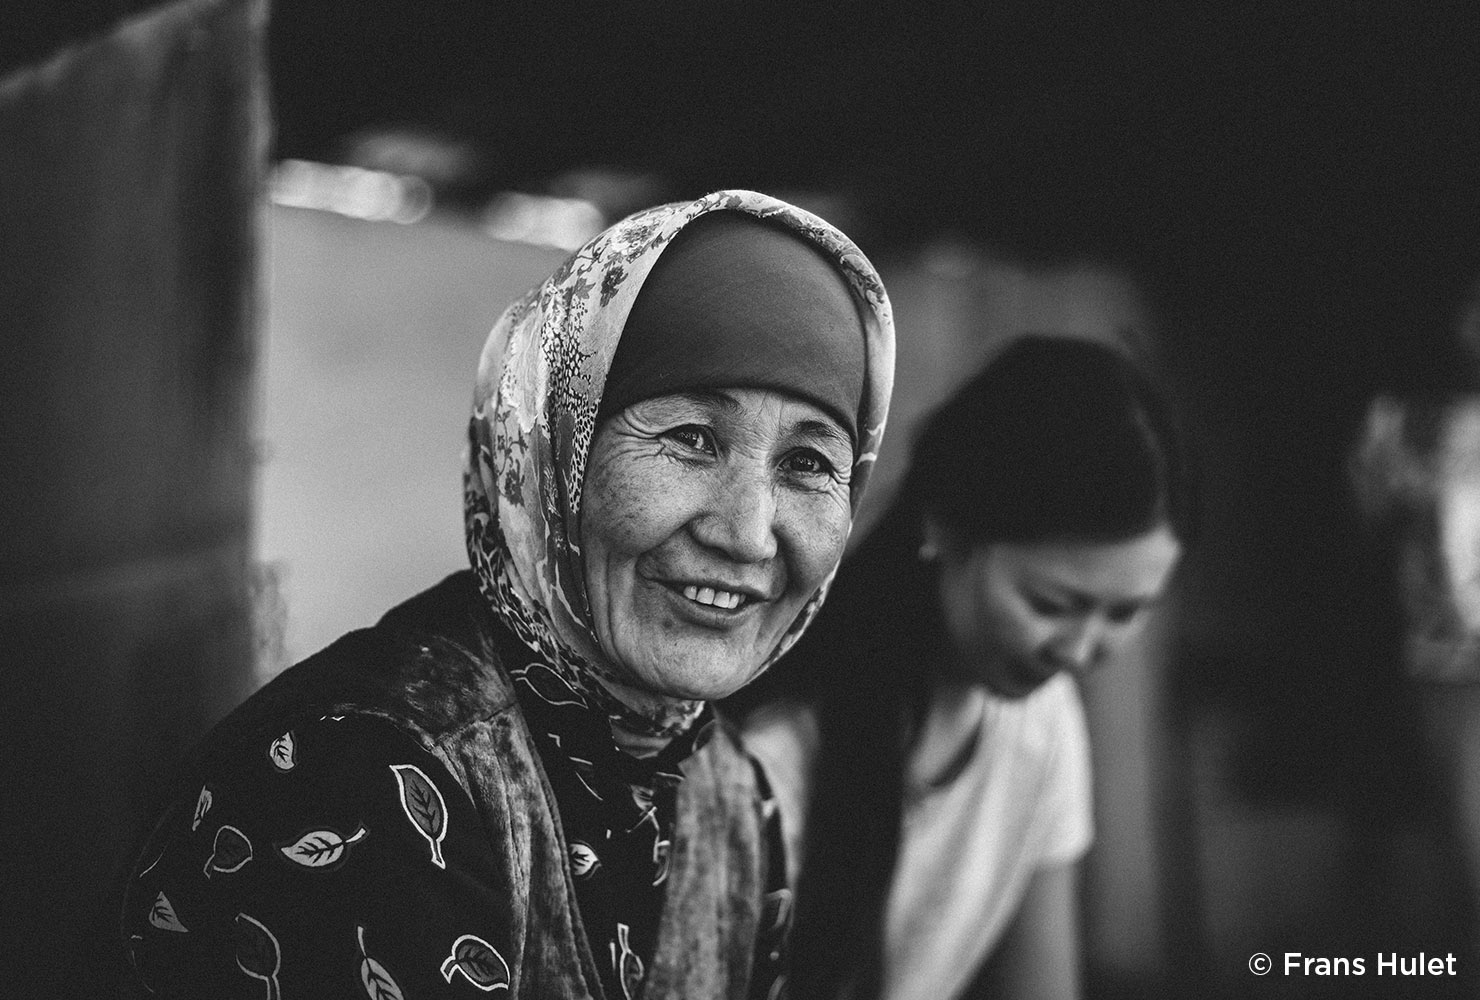
For the wisdom project, the goal is to gather photographs of those who have offered you wisdom or a helpful perspective. You might feature grandparents or mentors—or be inclined to include young ones who have provided you a fresh angle on life.
Aim to capture individuals in their natural state, especially if it’s in a location where they shared a special moment with you.
3. Candid Photo
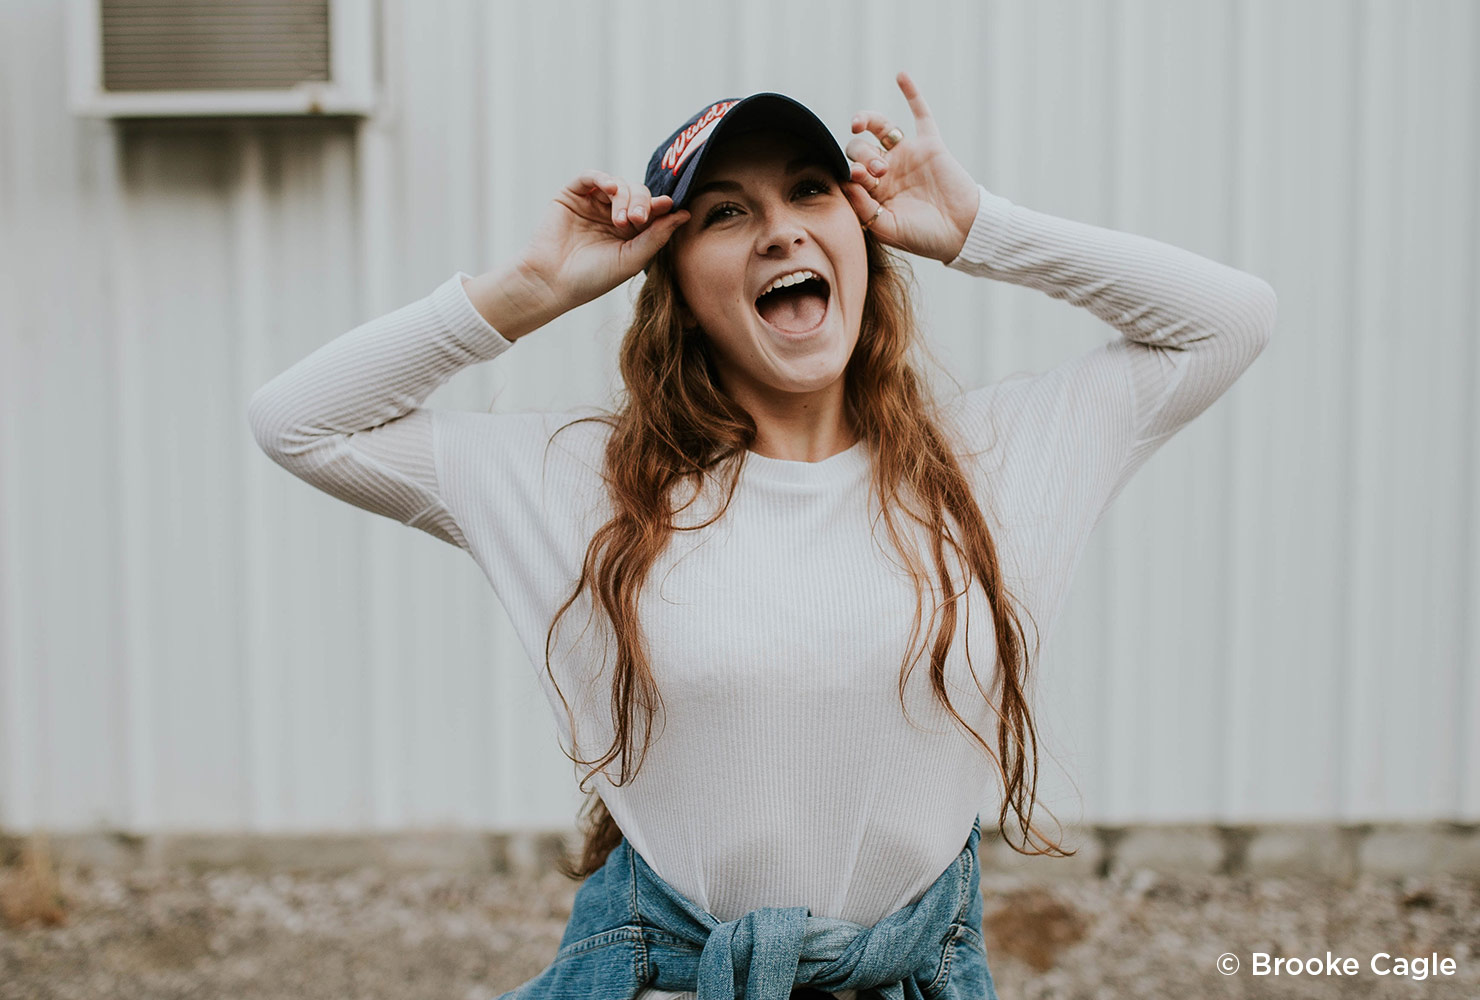
Photographing someone in their natural state allows for their true personality to shine through. With a candid photography project, incorporate a range of human subjects for a diverse collection, or capture the same subject across different settings and days.
Building a portfolio of several candids allows you to paint a vivid persona of your subjects.
4. Street Style Photography

Authentic street style photography allows you to snag shots of the latest fashion—all without the strut of the runway. Look for colors first (either eye-catching or stunningly neutral), then watch for the cut and structure of the clothes.
Aim for overall beauty within the frame, including the street or walkway, so the focus isn’t solely on the clothes.
5. All About The Details
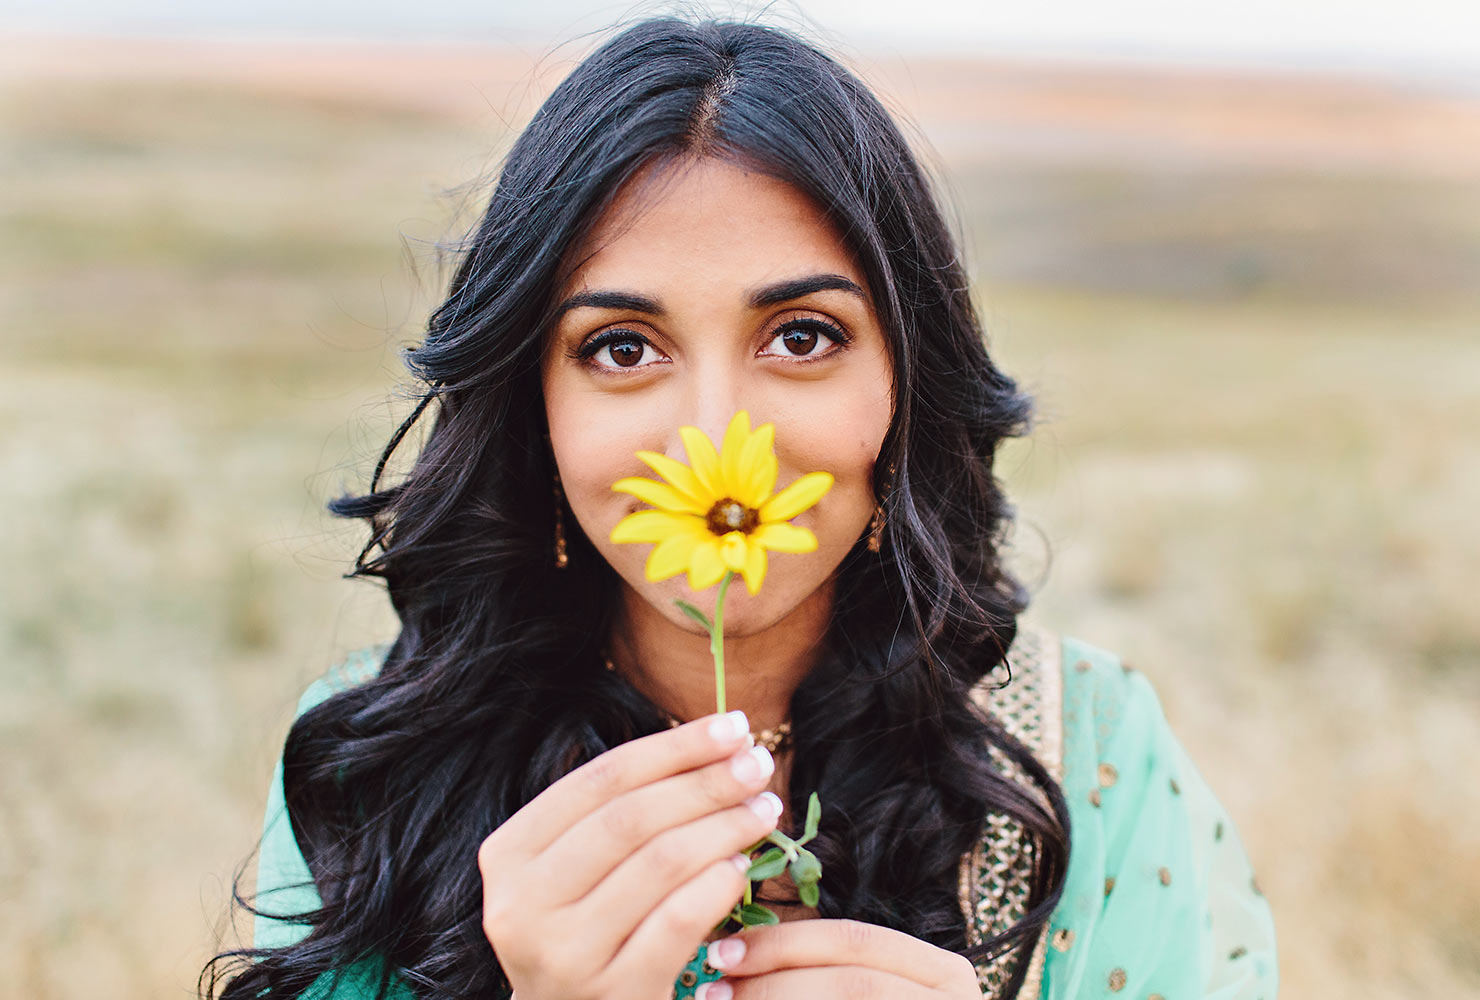
Create a collection of shots with unique subjects that focus on the details. Whether the photos are for an engagement , graduation or everyday occasion, you can take portraits of smaller details, like wisps of hair, relaxed hands and prominent features. Making your subjects feel comfortable and confident in front of the camera is the first priority. Plan a single shoot for various angles to help capture what looks best on a given day or moment.
6. Natural Element
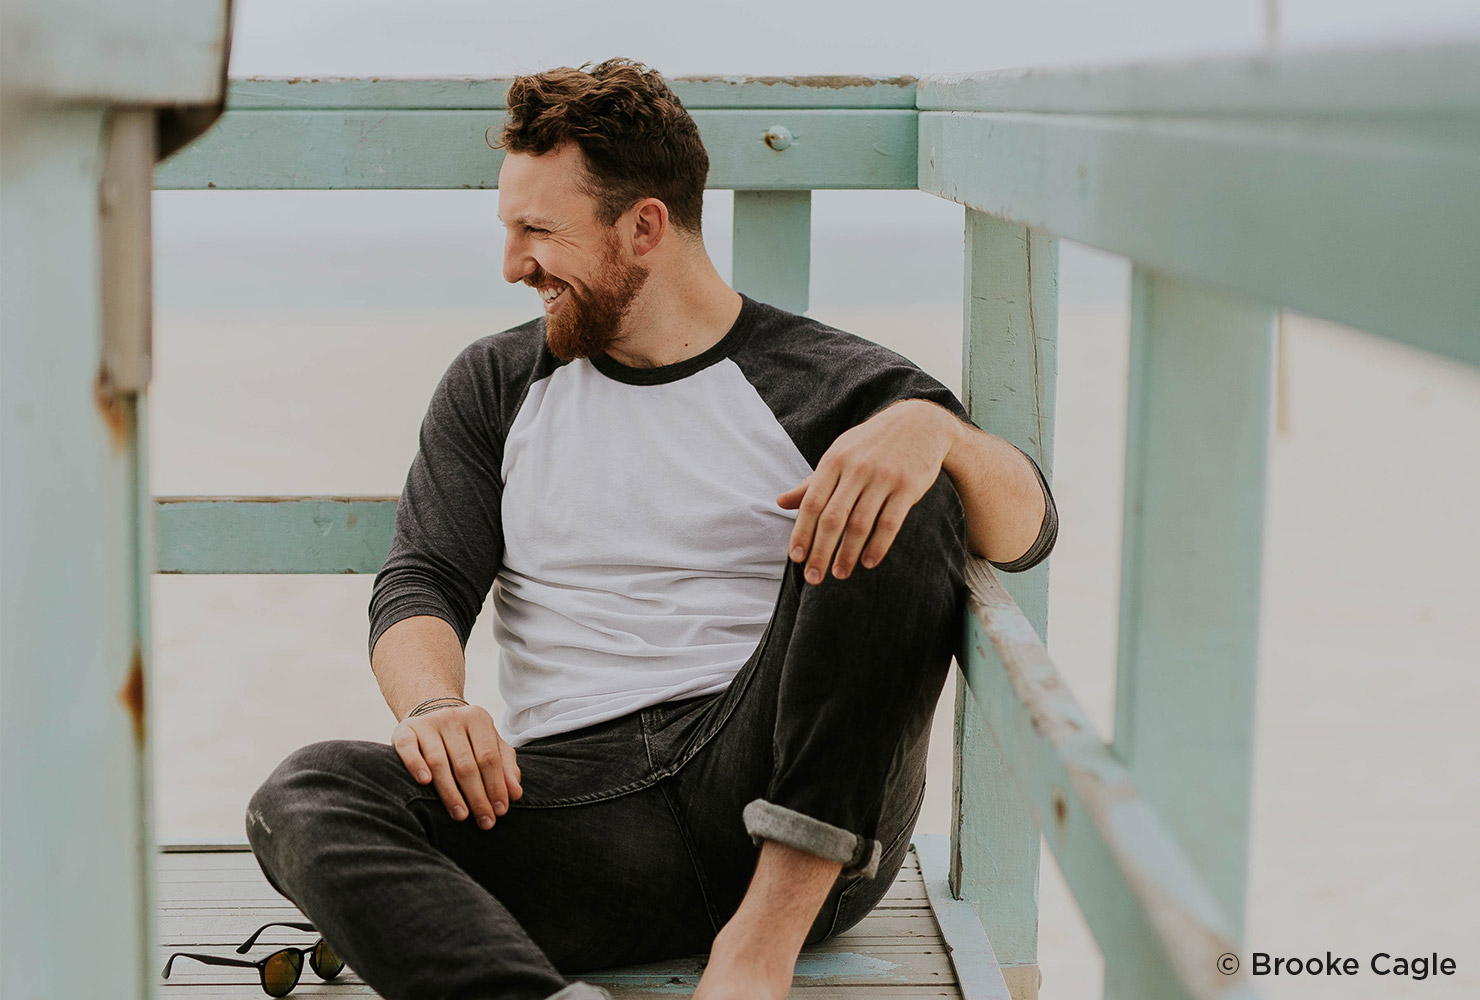
Plan for your gallery of photos to include candid shots of the subject in their element. Whether they love the beach or like to craft, you can capture your subject in their favorite space or place to go.
If a subject feels awkward in front of the camera, have him or her lean against something vertical, like a fence, wall or car. They’ll feel more anchored and their body angle will offer the photo some character without seeming unnatural.
7. Pet Photography

From cats to dogs to horses, the heart and soul of your pets can be captured with the right technique. Incorporate natural light in your shoot keep watch of your pet’s eyes. Expressions and personality often shine through and it’s a great time to capture these moments.
8. Motherhood

Being a mother is one of life’s greatest gifts. When we’re parents, beautiful moments take place along with messy and chaotic ones. Encapsulate the full spectrum of motherhood with photos from quiet moments like snuggling with your child to lively times like cooking together in the kitchen.
With any photography project, it’s important that your images tell a story.
9. Panoramic Pictures

A popular technique for landscapes, panoramic photography enlarges the viewpoint beyond the normal size of a camera lens. To ensure there are no gaps in your panoramic shot, overlap your image by 15-30%.
You’ll also want to keep your camera as level as possible to ensure the photo is even throughout. Don’t forget that panos work well for vertical shots, too, like waterfalls and deep canyons.
10. Sunsets Photos

Sunsets make for stunning photos—especially when executed well. For maximum beauty, be sure to slightly underexpose the sunset for rich and dramatic colors. Use manual mode and a fast shutter speed for underexposure, or use aperture priority with exposure compensation.
Make your sunset even more magnificent by arranging an object or scene in the foreground of the sunset, like a lake or mountain.
Mist and fog are natural elements that can enhance the beauty of your photography. Check the weather to determine when fog might pop up. Oftentimes the best lighting for fog photos occurs in the wee hours of the morning or late in the evening after sunset. The low lighting causes a slower shutter speed, which means a shakier camera.
Keep your camera as still as possible or use a tripod. The best places for foggy photos? Open bodies of water and other sweeping landscapes like fields and low rolling hills.
12. Cityscapes

Hovering skyscrapers and diverse skylines are part of what makes cityscapes such attractive photography. For a cityscapes project, try different vantage points across the city to see what works best (think: a popular lookout compared with a more secret locale).
Prepare for an after sunset shoot, allowing the city lights to pop against the dark sky. Remember to use a wide angle lens to cover as much ground as possible.
13. Water (Rain, Ocean)
Whether you’re hoping to create scenes of smooth, flowing water or capture dynamic waves crashing against a seawall, it’s critical to have better than average camera equipment. For nearly every water shot, a tripod is also essential to keep the frame still for the length of the exposure (usually two to four seconds).
Pack along a lens-friendly cloth to remove splashes and water marks. Plan to get wet if you’re banking on a stunning water shot.
14. Seasons

Each season offers its own charms—from snowy branches to colored leaves. Select a location for your seasons project where you’ll snap photos throughout all four seasons. Once the year is complete, you’ll have a collection of stunning images that tell the story of your special place over the course of a year.
15. Star Trails
Spectacular from edge to edge, star trails photography is an adventure to shoot. The first step is to find a clear sky full of stars, but free of pollution and other light interference. Anchoring your camera on a tripod, set your camera to shoot on manual mode. The faster the lens you have, the better.
Once you have your shot prepared, select drive mode for consecutive shots rather than a single frame. With your remote, let your camera take photos for thirty minutes up to a few hours, depending on the length of star trails you’re creating.

Capturing still images with a remote-controlled drone opens up the options for angles and perspectives in your photography. Consider sending a drone above a beach, golf course or mountaintop.
Increase the altitude of your drone for a more impressive viewpoint and try GPS mode for a more stable shot.
17. Food Photography

As a still life technique, food photography requires a few main ingredients: good lighting, props and style. Place your items near natural lighting or use a flash to give the photo a balanced look. When it comes to the arrangement, consider adding in table setting details like plates and silverware.
Amplify the photo’s texture with decorative pieces like colorful fruits and sprigs of herbs. For a well-rounded food photography project, shoot a variety of foods and dishes.
18. Black and White Month

Instead of using the full color spectrum, this project idea prompts you to capture images in black and white only. Two-toned photography provides a different perspective or feel to your work, and gives you a chance to highlight people, places and objects in a novel way.
For instance, a close-up of hands be enticing when displayed in color, but in black and white, the image paints the story that all humankind is united.
19. Everyday Moments

Photos that showcase a slice of regular life contain a certain genuine beauty. When preparing for everyday moment shots, make sure subjects are comfortable. People should interact as if you aren’t even present.
The true magic happens when you’re able to capture two people’s true connection.
20. Random Acts of Kindness

The random acts of kindness project prompts you to capture someone doing something thoughtful or helpful for another person. By photographing these moments, you’re telling a larger story of humanity.
To be successful in this project, you’ll need to keep a keen eye out for small acts of generosity, like a young man holding the door or a little girl smiling at a stranger.
21. Shoes For a Week
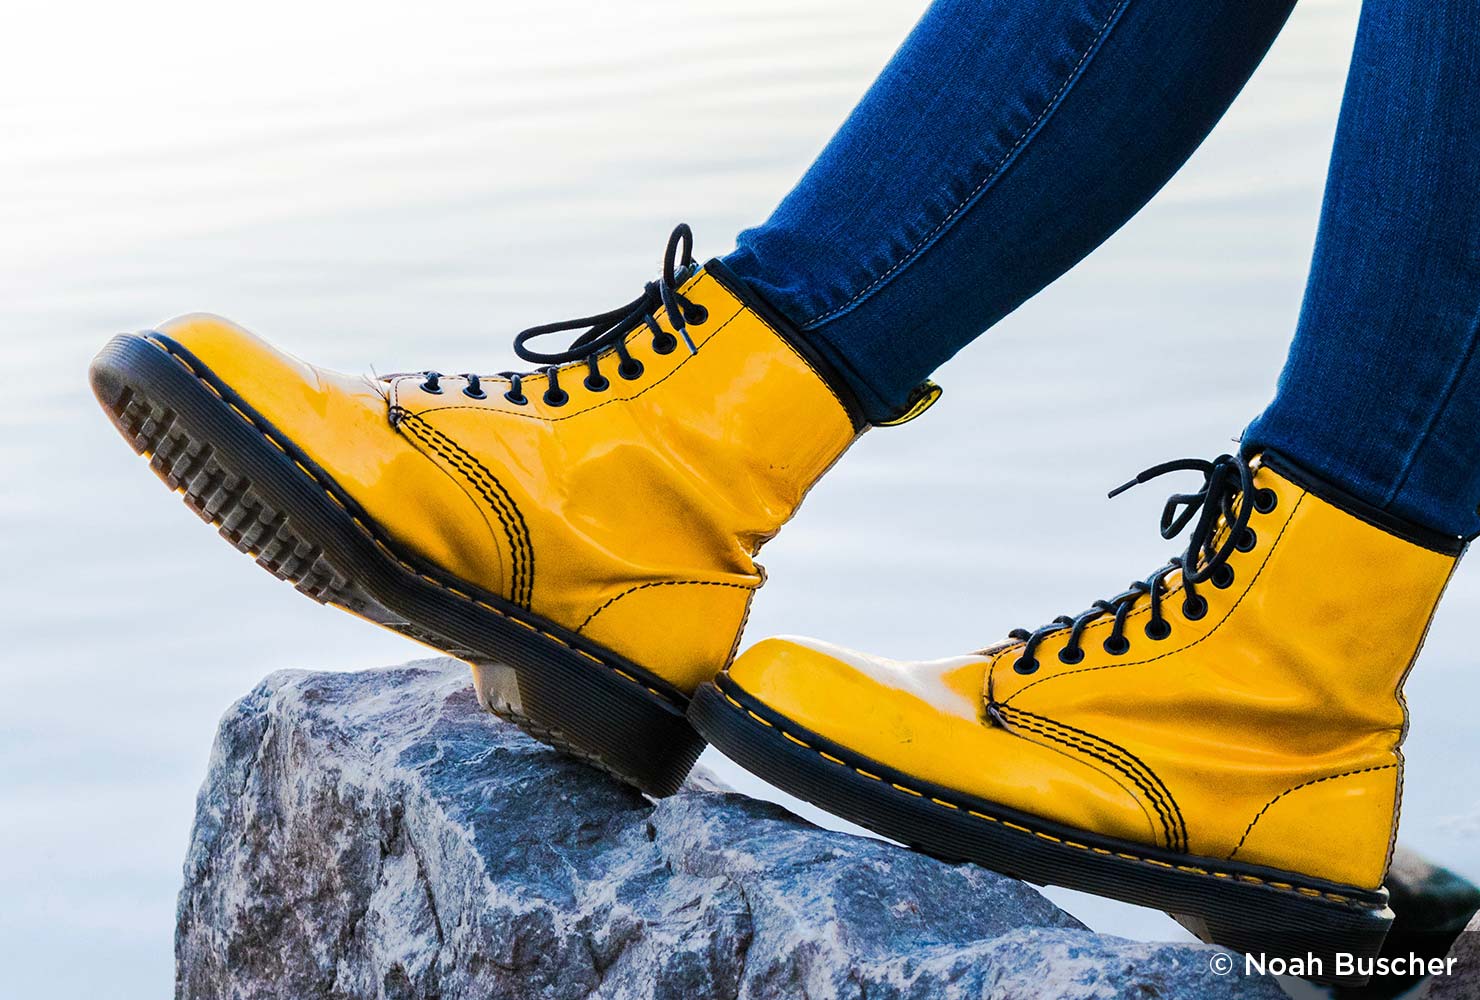
Narrow your photography focus for a week by capturing different styles of footwear. From boots to sandals to athletic shoes, diversify your image collection. Be sure to utilize a range of angles to create unique stories for each photo (i.e. a guy lounging with shoes on, two people talking while standing, a woman running).
22. Comfort Zone Challenge
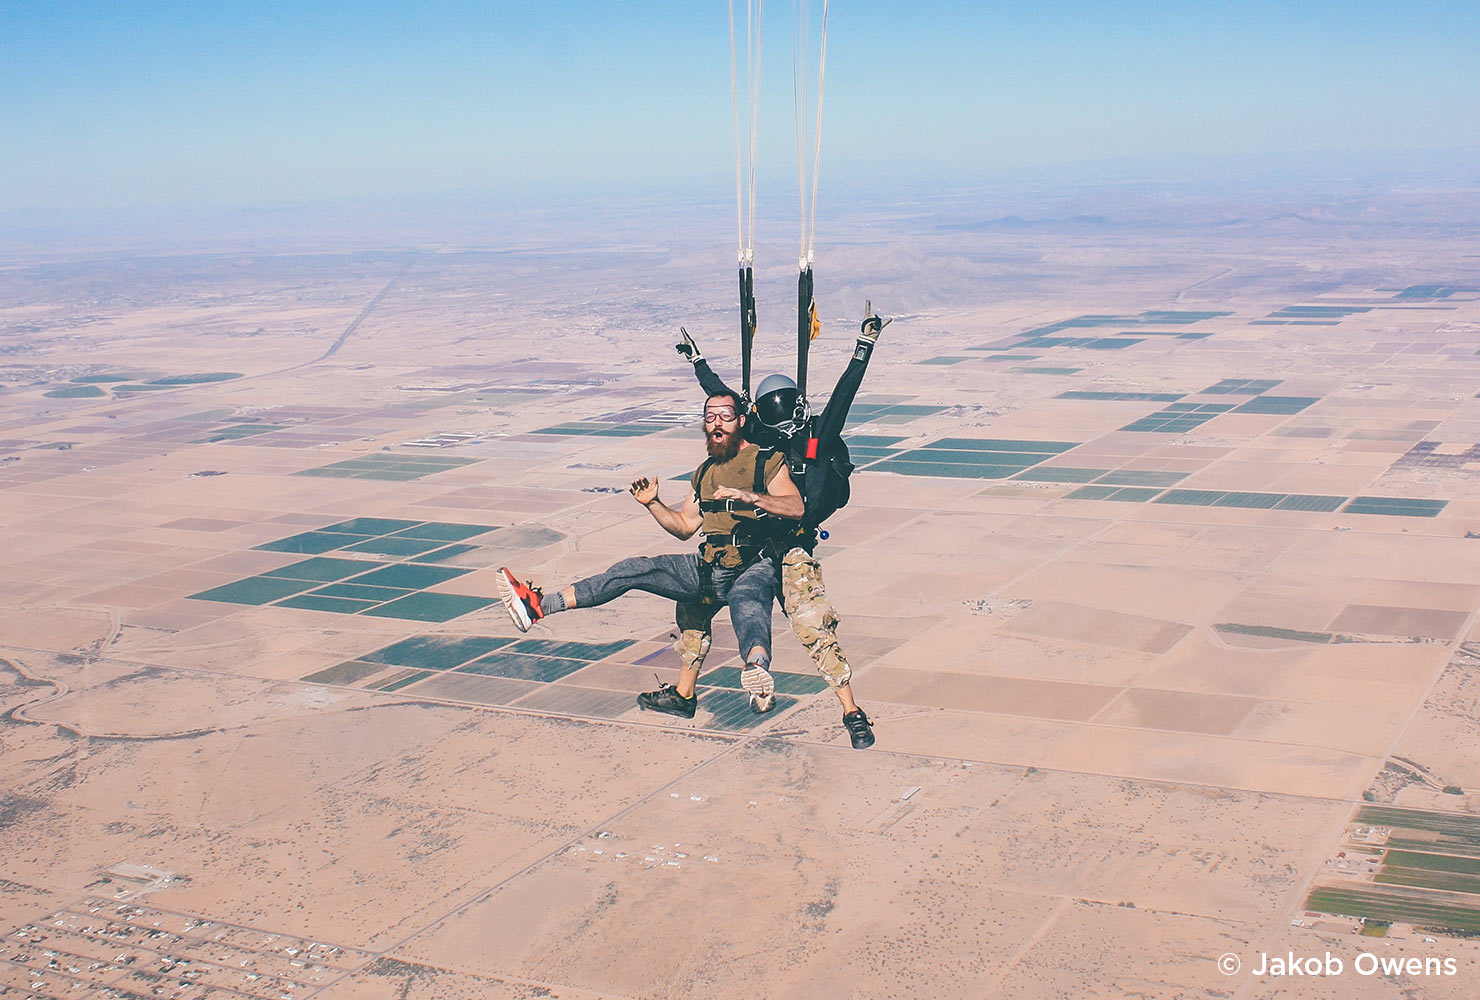
Pushing the limits of your creativity often leaves you with impressive and surprising results. With the comfort zone challenge, throw caution to the wind and experiment without expectations.
Maybe that means you’ll shoot a paragliding experience, a fireworks explosion or animals in action. When you’re snapping shots, play around with your shutter speed, aperture, focal length and movement.
23. 30 Strangers
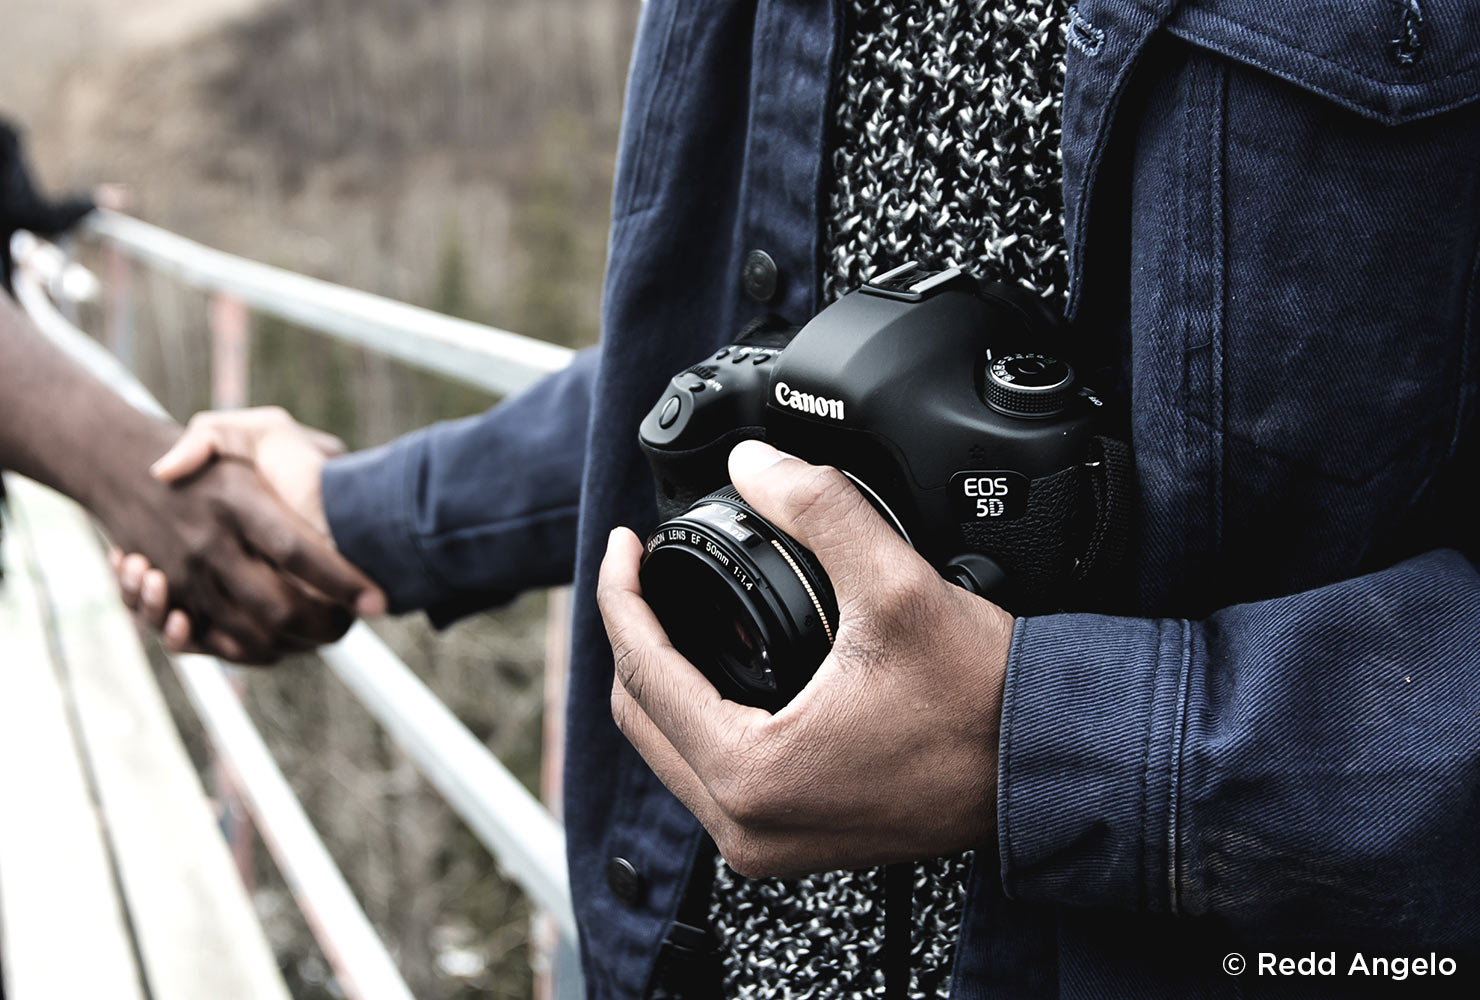
Taking a photo of someone whom you’ve only just met can be thrilling. It can also be personally and professionally rewarding. Through the 30 strangers project, you’ll capture 30 portraits of people you’ve never met before. Find people on the street, in a shopping mall or at a park.
Be sure to ask each person’s consent first before posting publicly. The 30 strangers challenge will certainly stretch you outside of your artistic comfort zone.
24. Duotone
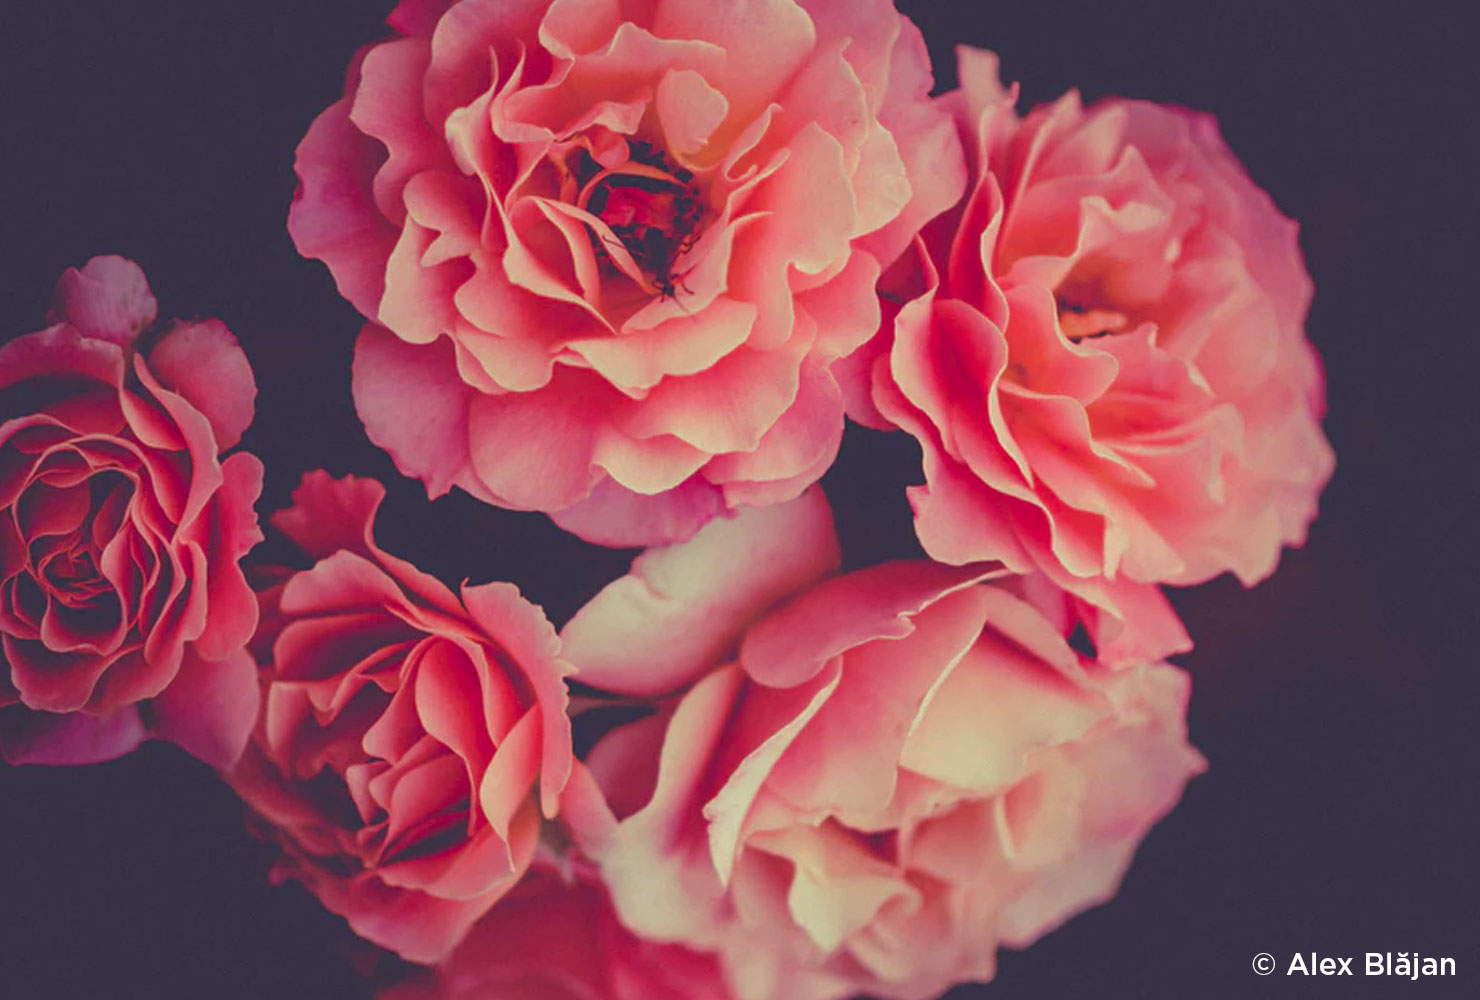
Duotone photography refers to a multitone production of an image, usually imposed through photo editing techniques. The superimposition of a contrasting color halftone (normally black) over another color halftone enhances the middle tones of an image.
Photographs with one main object, like a flower, seashell or tree, are ideal for creating duotone effects.
25. Perspective
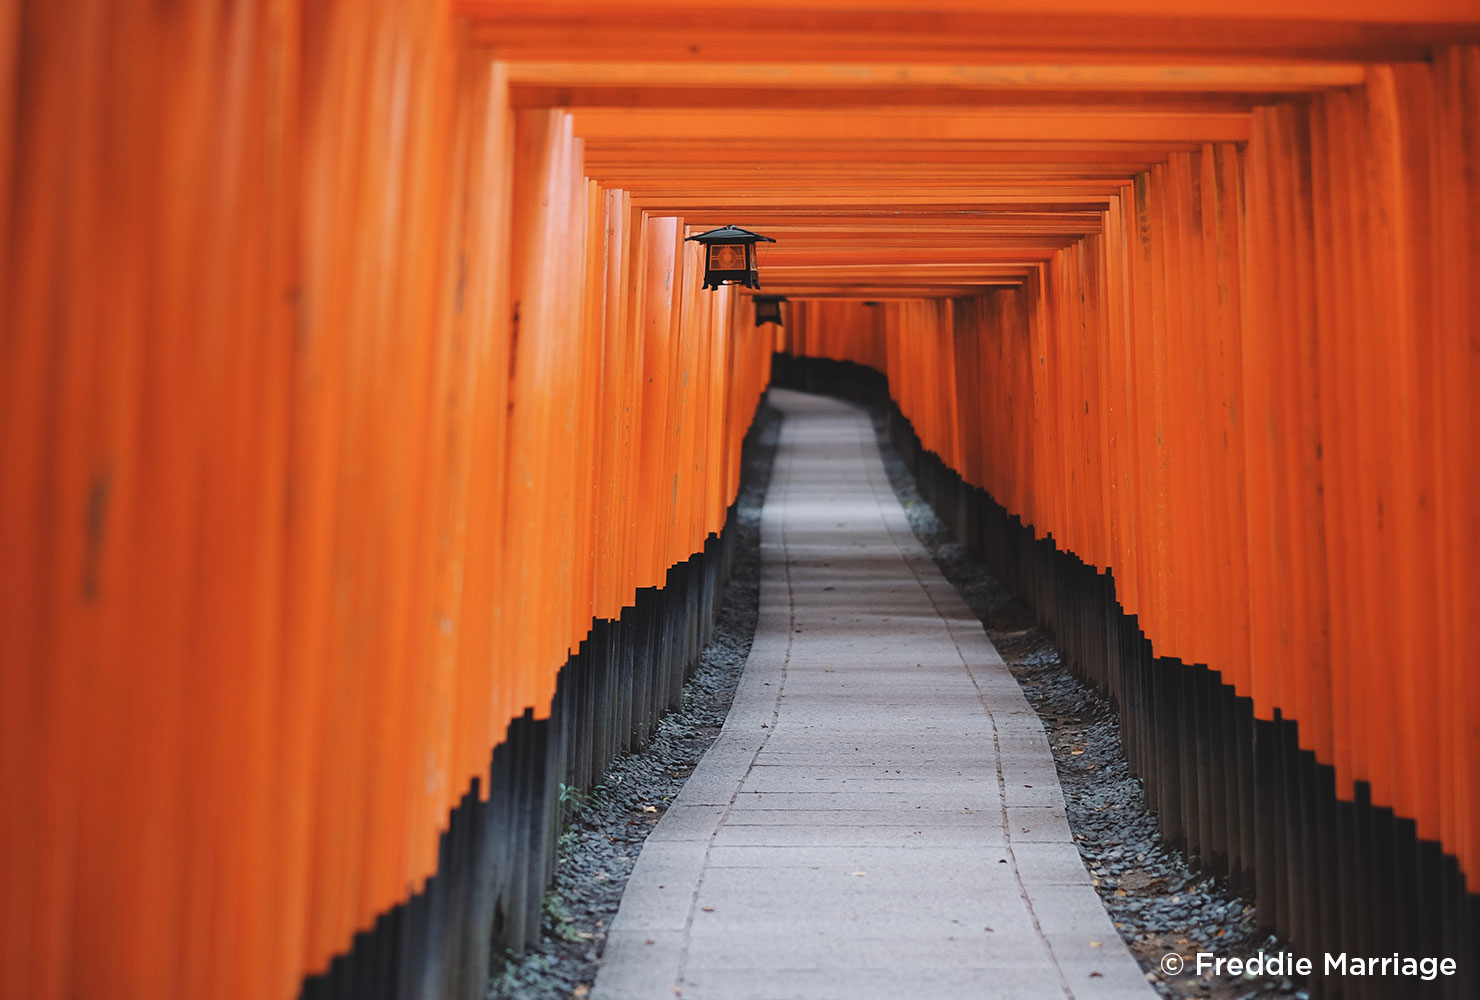
Perspective photography can take many forms: those shot from a low angle, ones with strong leading lines and those that look straight up into the sky. Whether your scene is a railroad track or skyscraper, your image should emphasize the angle and the unique perspective you’re hoping to give the viewer.
Train your eye to notice patterns, lines and reflections you can capture from different angles.

Not only is coffee delicious and rejuvenating, it’s also a work of art. Collaborate with a barista on a latte design or the type of mug to use. Choose a simple backdrop so the coffee remains the focal point.
A dark backdrop is best if you’re aiming to capture the steam rolling off of a warm drink.
27. Create a Photo Album

Let your memories last forever by creating a photo album for a recent vacation, an adventurous summer or a year filled with fun. Design your photo album with a theme in mind to build cohesion. Vary your layouts from page to page for texture and personality.
28. Traffic Lights
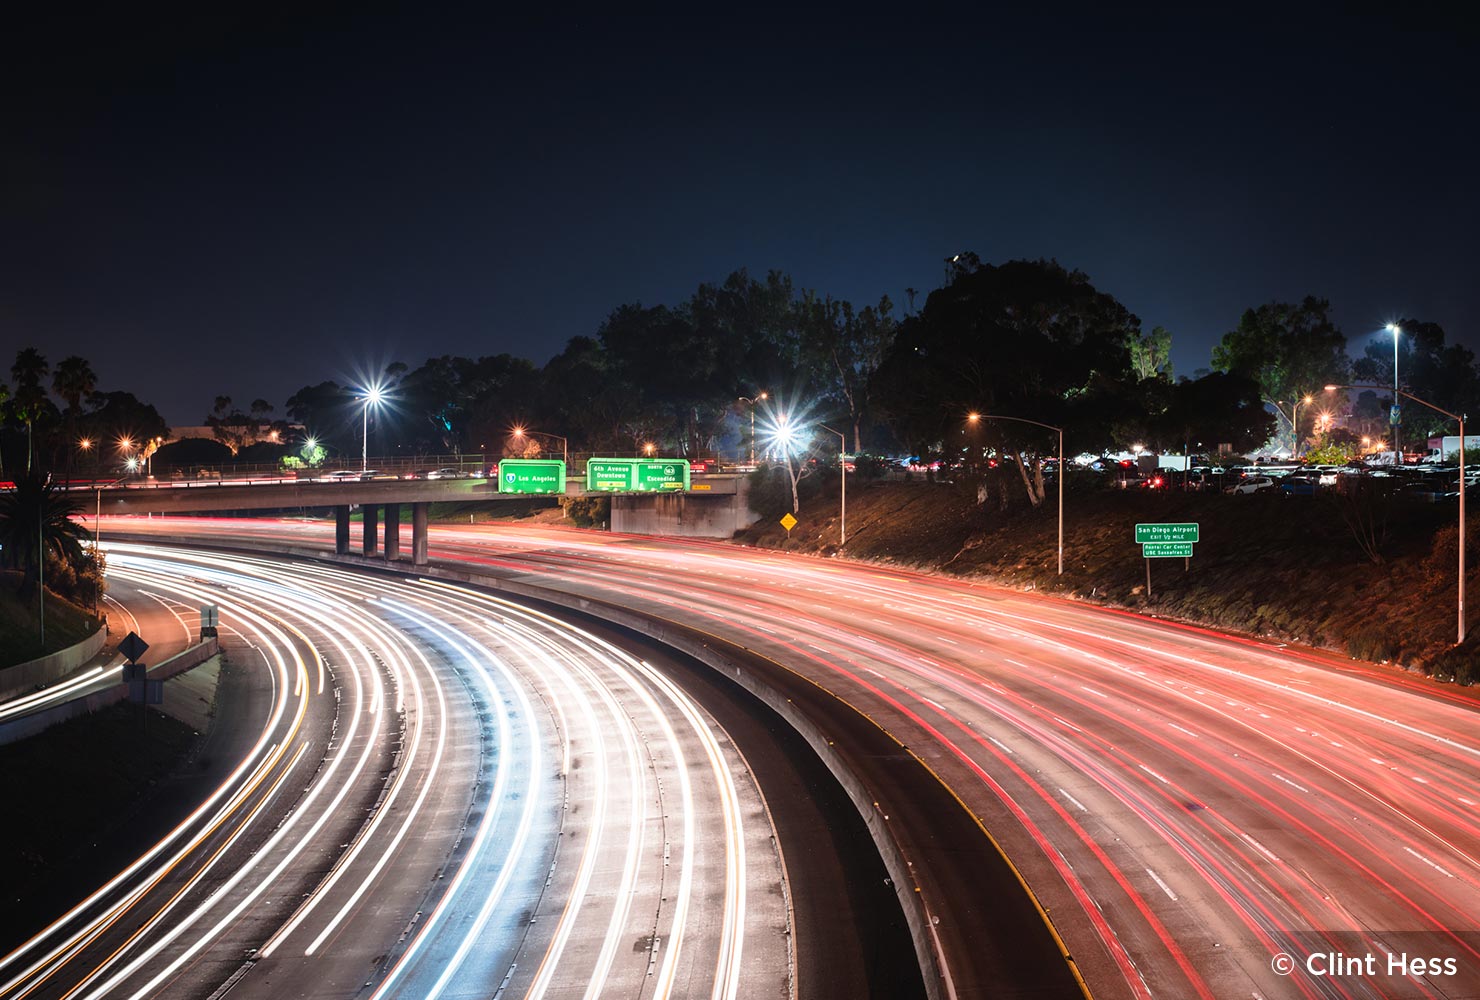
When photographing traffic lights and other light trails, the best time is during or after twilight on a night when minimal wind is present. Based on your camera angle and objects, you’ll need to adjust and experiment with your settings.
Often times, shutter priority mode is ideal along with a shutter speed of six seconds. Make stability a non-issue with a tripod, and remember you won’t be using a flash.
29. Happy Days
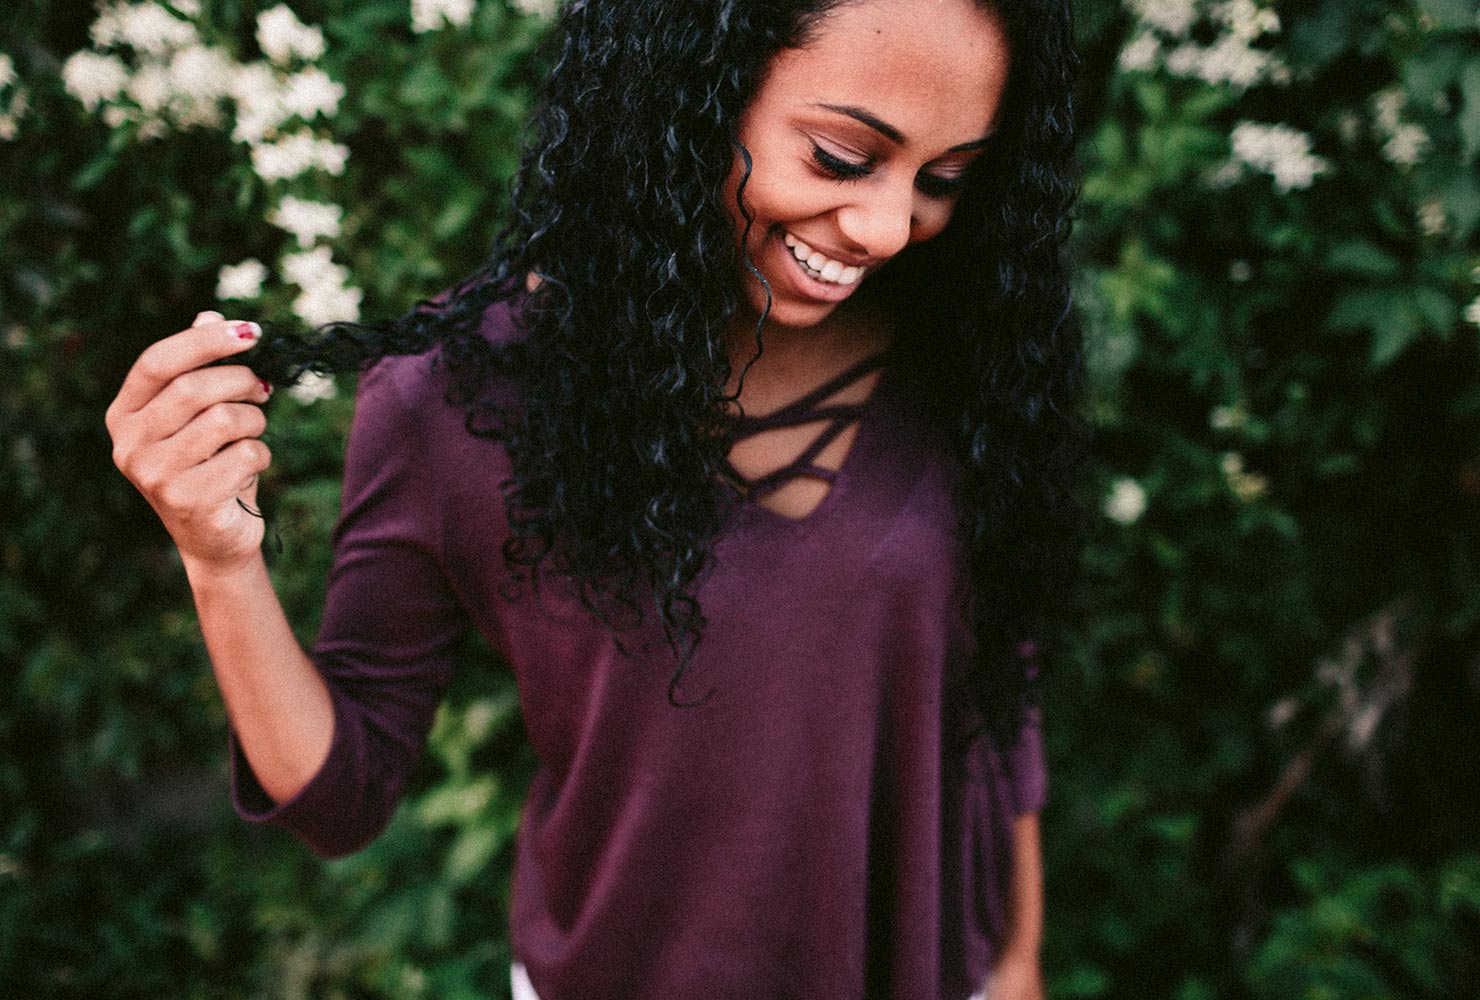
Allow joy to take the center stage of your photos. Whether they’re candid shots of family members interacting or a single subject, make sure the smiles are natural. Enhance the happiness level by highlighting the subject with ample natural lightening.
30. Photo Scavenger Hunt
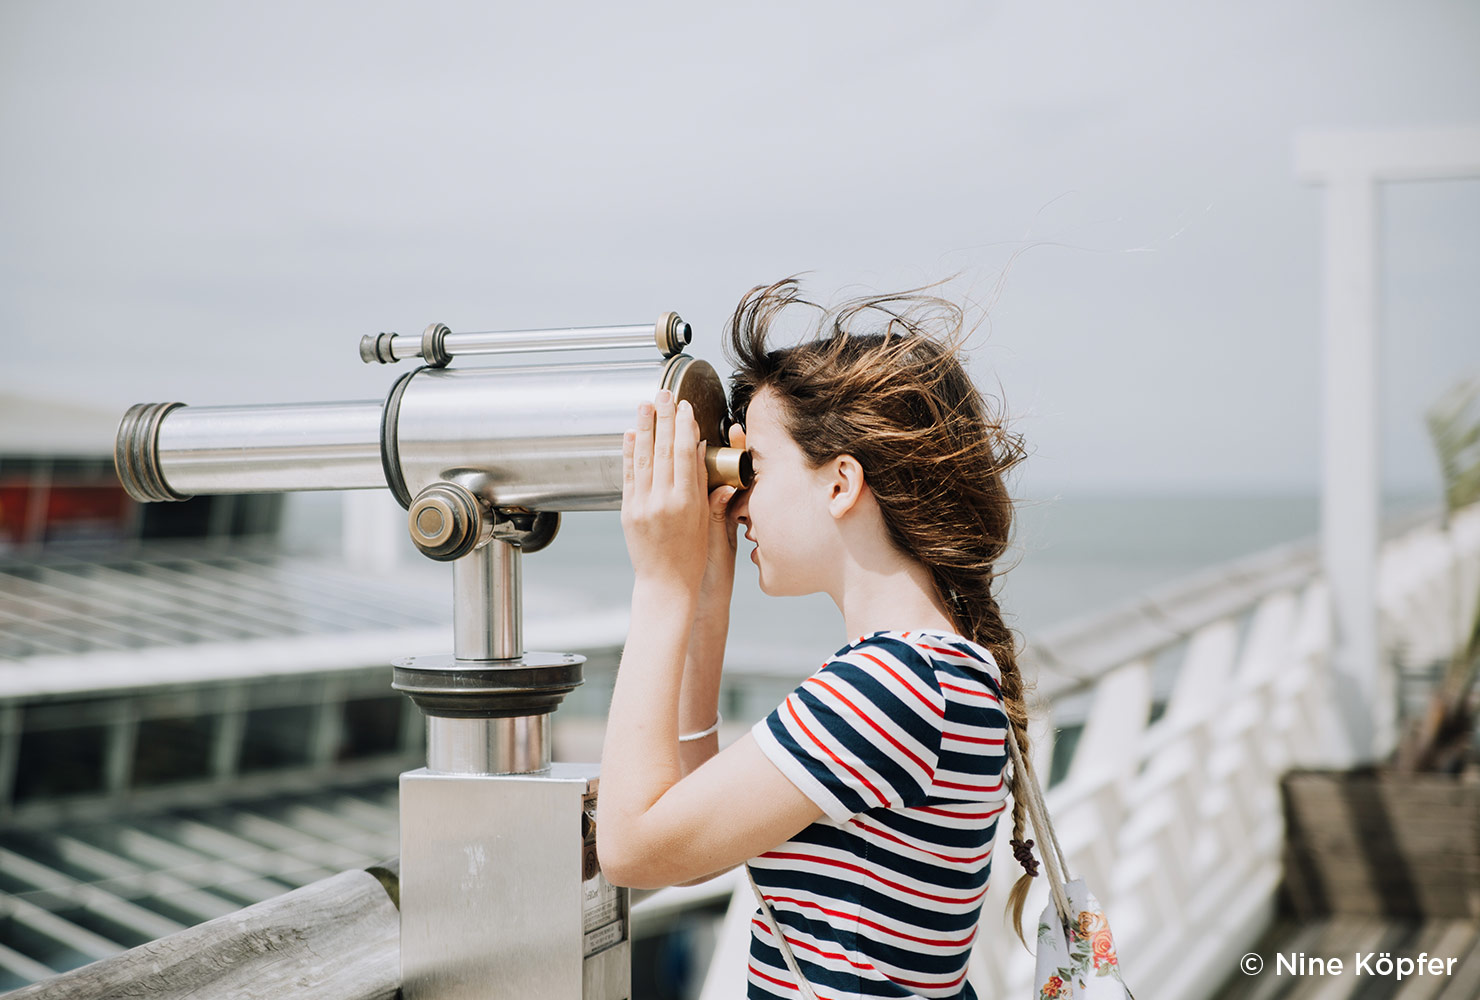
Challenge yourself and your fellow photographers by setting up a photo scavenger hunt . Rather than choosing objects and locations to capture, create a list of photography styles to achieve. For instance, your list might include building a motion blur or catching a clear action shot. At the end of your hunt, you’ll have a collection of impressive photographs.
31. Night Scenes

Night scenes, also known as low light photography, allow you to make the most of dark scenes that are hard to capture. When less light is present, it means you’ll also have slower shutter speeds, which equals more camera shake. For this reason, landscapes and long exposures at night time require tripods.
Whether you’re shooting special moments around the campfire or gazing up at the stars, utilize a wide aperture or a low f-number to let in as much light as possible.
32. Polaroids
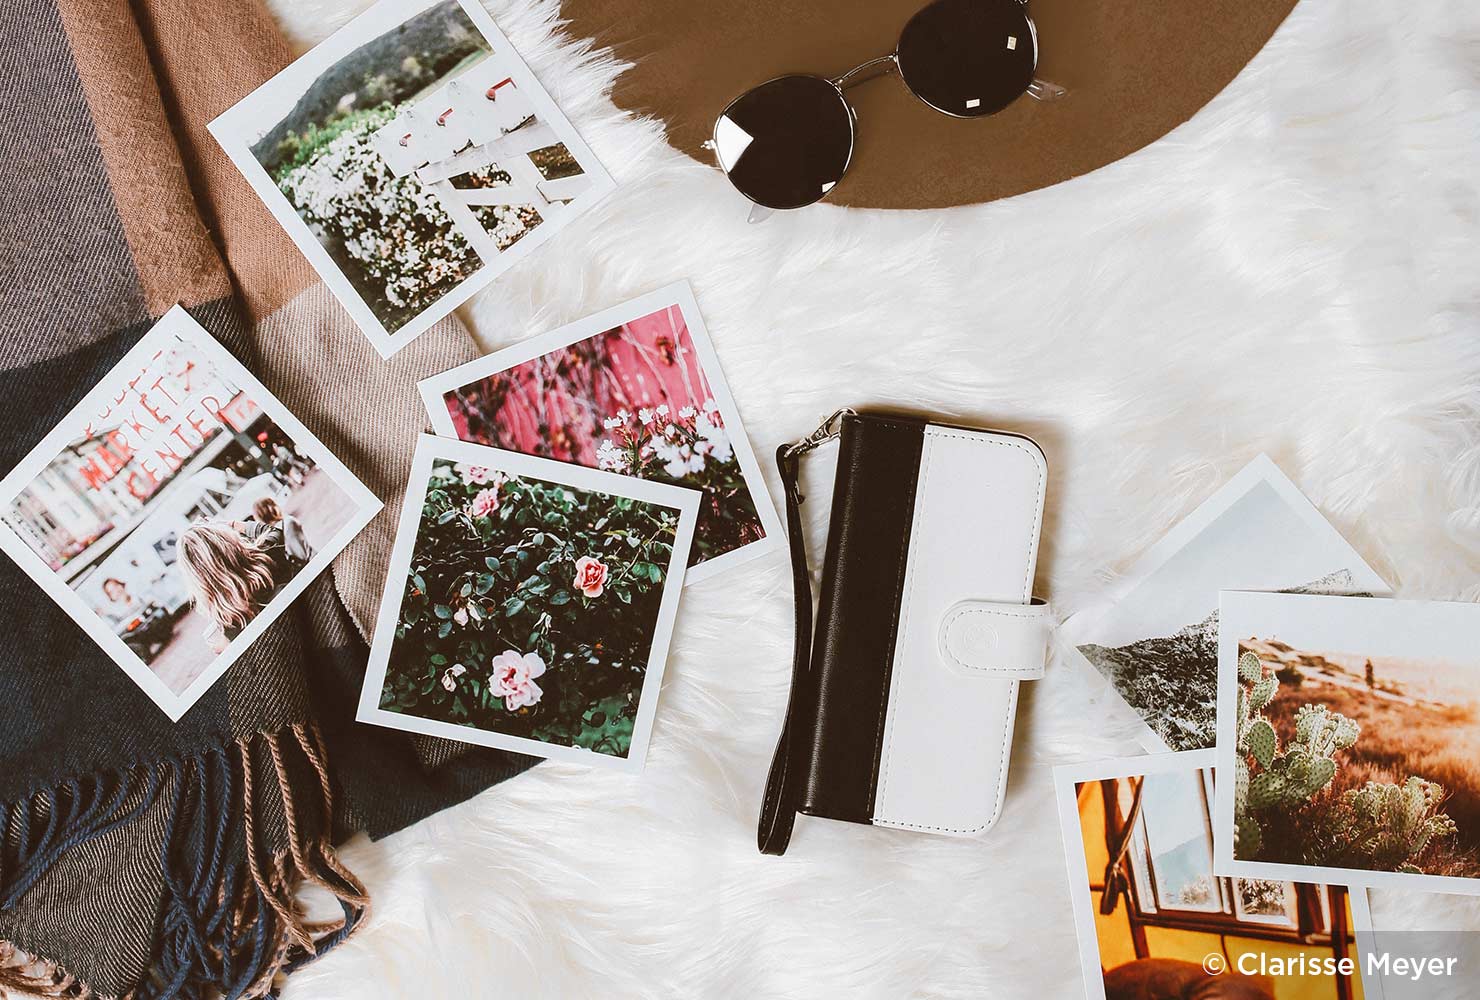
Polaroids offer a timeless feel and give photos a natural frame. When creating a collection of polaroids, be sure to switch up your angles and perspectives. Try a few upclose shots of objects along with macro shots of mountains and lakes.
For polaroids with human subjects, allow for plenty of natural light and aim for candids.
33. Letters/Signs

With any inanimate object, the challenge with photography is to bring it to life. With letters and signs, try to enrich the shot with the surrounding scene whether it’s greenery or a neat light fixture. Angle your lens in a way that makes the lettering most striking.
Build a full photography project with at least five to ten different signs.
34. Action Shots
To nail a clear action shot—for sports, animals or anything else—the most important aspect is to be prepared. Consider pre-focusing your shot, so when the subject enters the frame, you’re ready.
Because it may take several shots to capture even one solid photo, shoot in short bursts for a few seconds at a time. Keep extra space at either edge of your frame to allow for your subject’s movement.
35. Abstract
Fundamental to abstract photography are lines and curves. The shapes you highlight will guide the viewer’s eye to a certain engaging element. To get up close and personal with an object or design, use a macro lens. With the macro, your photo composition will have clearer resolution and sharpness. Complete your project by gathering a collection of abstract photo pieces.
36. New Lens
Your camera equipment plays a large role in your work as a photographer. Your tools, like your lenses, can fundamentally change the structure your art.
To sharpen your skills, try using a single lense for an entire month. Ideally, the lense will be new to you—allowing you to master the new tool and broaden your photography skills.
37. Architecture
Photographing architecture—whether modern or classic—presents unique challenges. Consider capturing an array of building styles for your portfolio and don’t forget to mix up your angles. Vary your shots by choosing a different weather conditions and times of day.
Through your diversity of shots, you’ll have richer story of the buildings’ relationship with the environment.
38. Thankful
To enhance your gratitude and happiness, consider completing a thankful project where you take one photo every day of something you’re grateful for. From flowers to pets to family members, find subjects that have personal meaning to you.
By capturing what you’re thankful for, you connect deeper with the people, places and things that surround you.
39. Sunday Mornings
Whether you’re enjoying a cup of coffee or a good book, snap a photo every Sunday morning for one month or a year. Capturing everyday occurrences through photography is a form of artistic journaling, helping you to document life’s big and small moments.
40. Top View
The angle of your shot makes all the difference in how appealing and engaging it is. Try a series of photos where your perspective comes from the top. Amp up the creativity by getting higher for your shoot and using a wide angle lens.
A busy environment, like a packed street or active household, can become a striking composition when using a top view perspective because it offers necessary distance from the cluttered setting.
41. Guilty Pleasures

We all have foods and activities we love despite feeling that they might not be held in high regard. Perhaps your guilty pleasure is cream-filled donuts or binge watching reruns of your favorite sitcom.
Collecting images of your guilty pleasures will likely bring you humor and levity, knowing that these items are a part of you, but they don’t necessarily define you.
42. Silhouettes
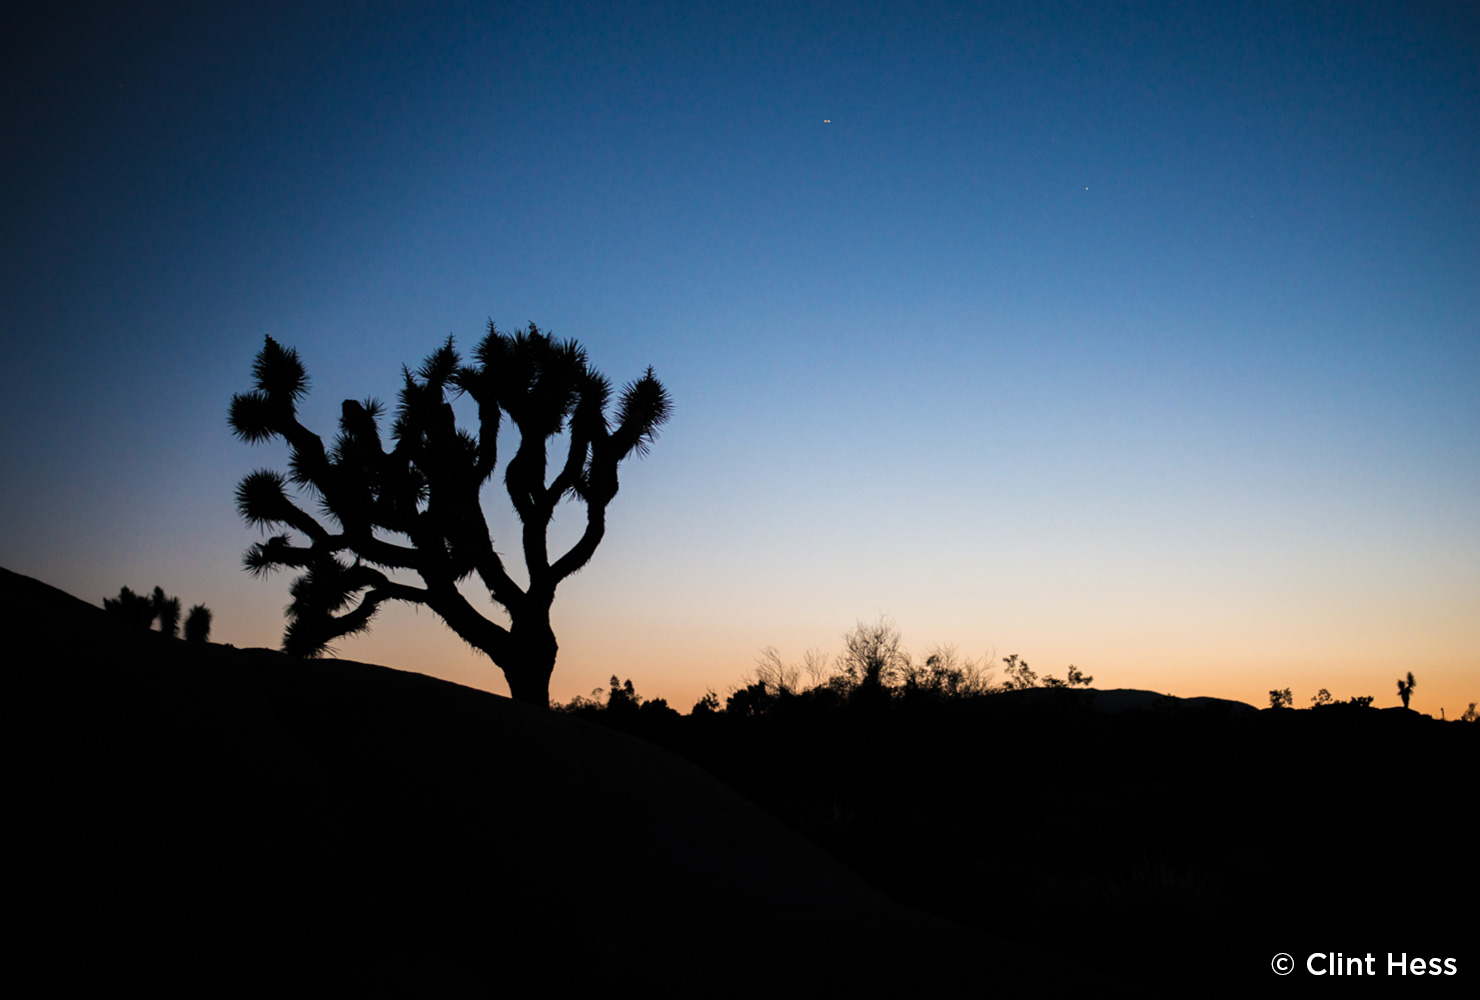
Forming a distinct contrast between light and dark, silhouettes highlight one or multiple subjects. Ensure your subject is backlit with the sun behind them. The best times to shoot silhouettes are in the morning or late evening.
Build a stunning image by setting the scene with open space, like in a field or along the beach. Set up your camera angle facing the sun, then ask your subject to stand between the sun and you. Play around with the exact angle until you have a strong contrast.
Create a collection of photos shot with prism filters on your lens or by placing a prism in front of your lens. The light that dances off of the prism will add creative effects to your photography by dispersing light before it hits the camera. Secure your camera on a tripod so you can have your hands free to play with the prism and lighting.
Prism photography can include large subjects like nature scenes and architecture or smaller objects like books and candles.
44. Symmetry

Finding subjects that offer you symmetry is the foundational step for this photography project idea. Look for symmetry in architecture and nature, but don’t leave out human and animals subjects. Smaller details, like hands or feet, often make for the perfect symmetrical photo.
Bokeh photography is denoted by one unique characteristic: a blur produced in the out-of-focus area of an image. The blur, produced by a lens, helps direct the focus of the photo. A fast lens is necessary to achieve this technique, with at least an f/2.8 aperture.
With a wide open lens, you can create bokeh with subjects like butterflies, humans and fencing around a baseball field. These photos are perfect for framing around your home .
46. Action Figures

Due to their size, action figures are easy to rearrange and shoot from multiple angles. Bring the scene to life by having the figures interact with each other. If you’re looking for an extra challenge, tell a story through your action figures, like one you would find in a comic book. Include action shots against a simple backdrop.
47. Steel Wool
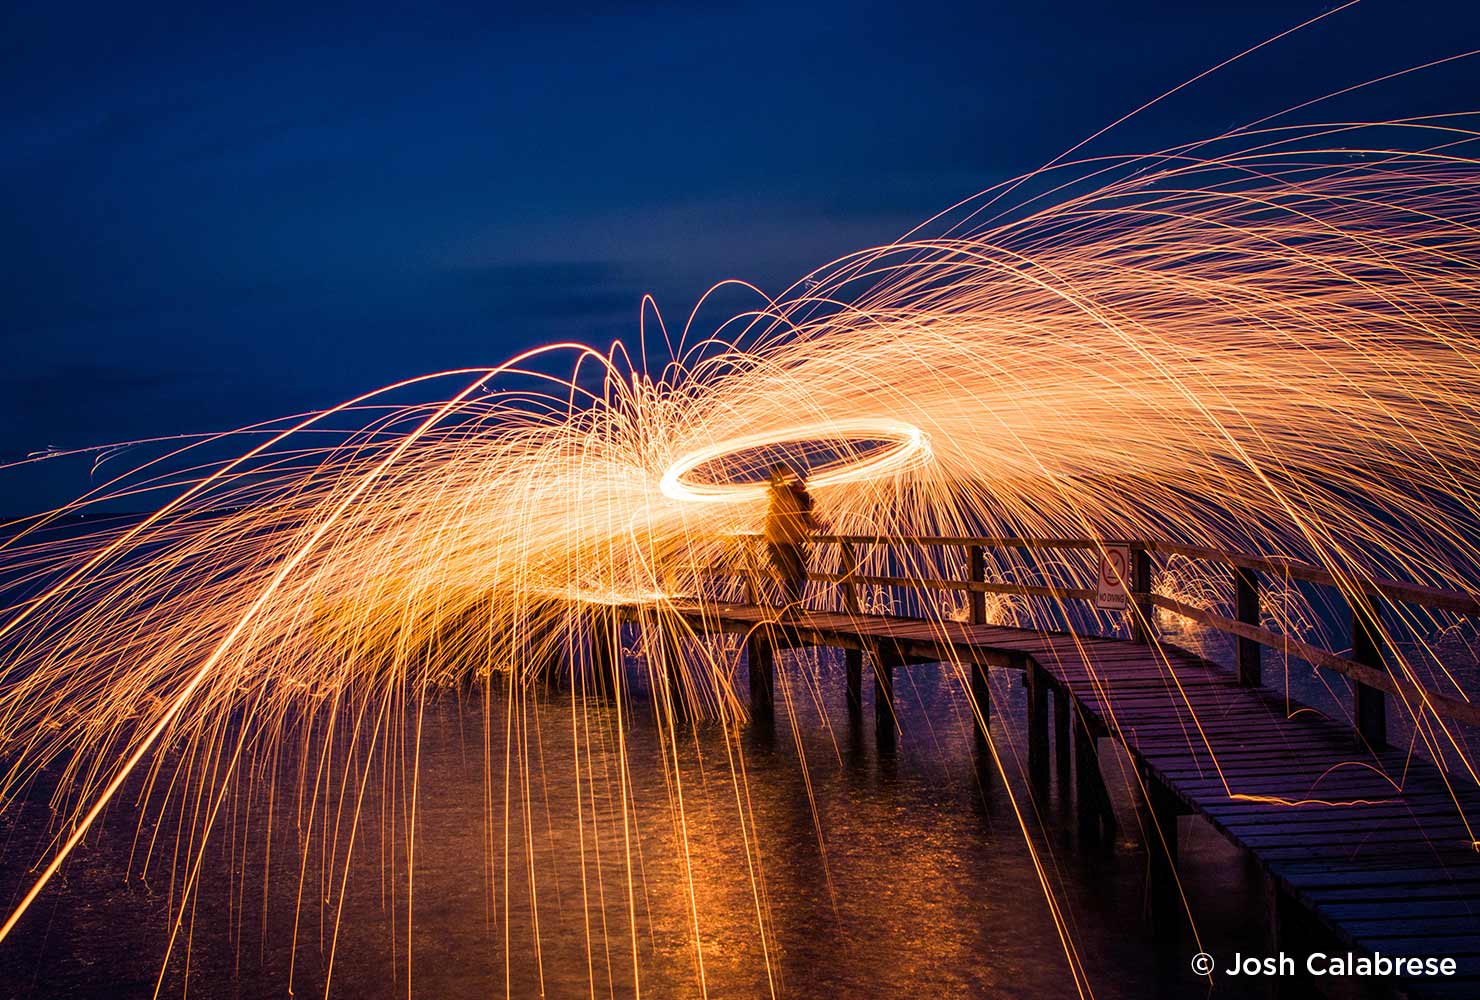
Although it may seem like steel wool photography would require expensive equipment, it is a surprisingly inexpensive technique. For this project, you’ll need the following: a camera, lens, tripod, shutter cable, steel wool, string, stainless steel whisk, lighter and protective gloves. In a dark location—away from combustible items and other people—burn steel wool that’s loosely packed in a whisk.
As the steel wool burns, spin the whisk either vertically or horizontally to create the desired effect. The burning will only last about ten seconds, so you’ll want to set up for at least five seconds of exposure time. Steel wool photography creates wild and interesting images, but be sure to follow safety precautions to avoid hazards.

To enhance your skills and test out a nifty shooting technique, try macro photography on tiny subjects like insects, match-heads and flowers. Keeping your budget in mind, choose a magnification lens that lets you make super small items appear larger than life. For your macro project, vary your subjects.
Consider nature’s smallest members, miniature household items and up close shots of human elements for your portfolio.
49. Double Exposure
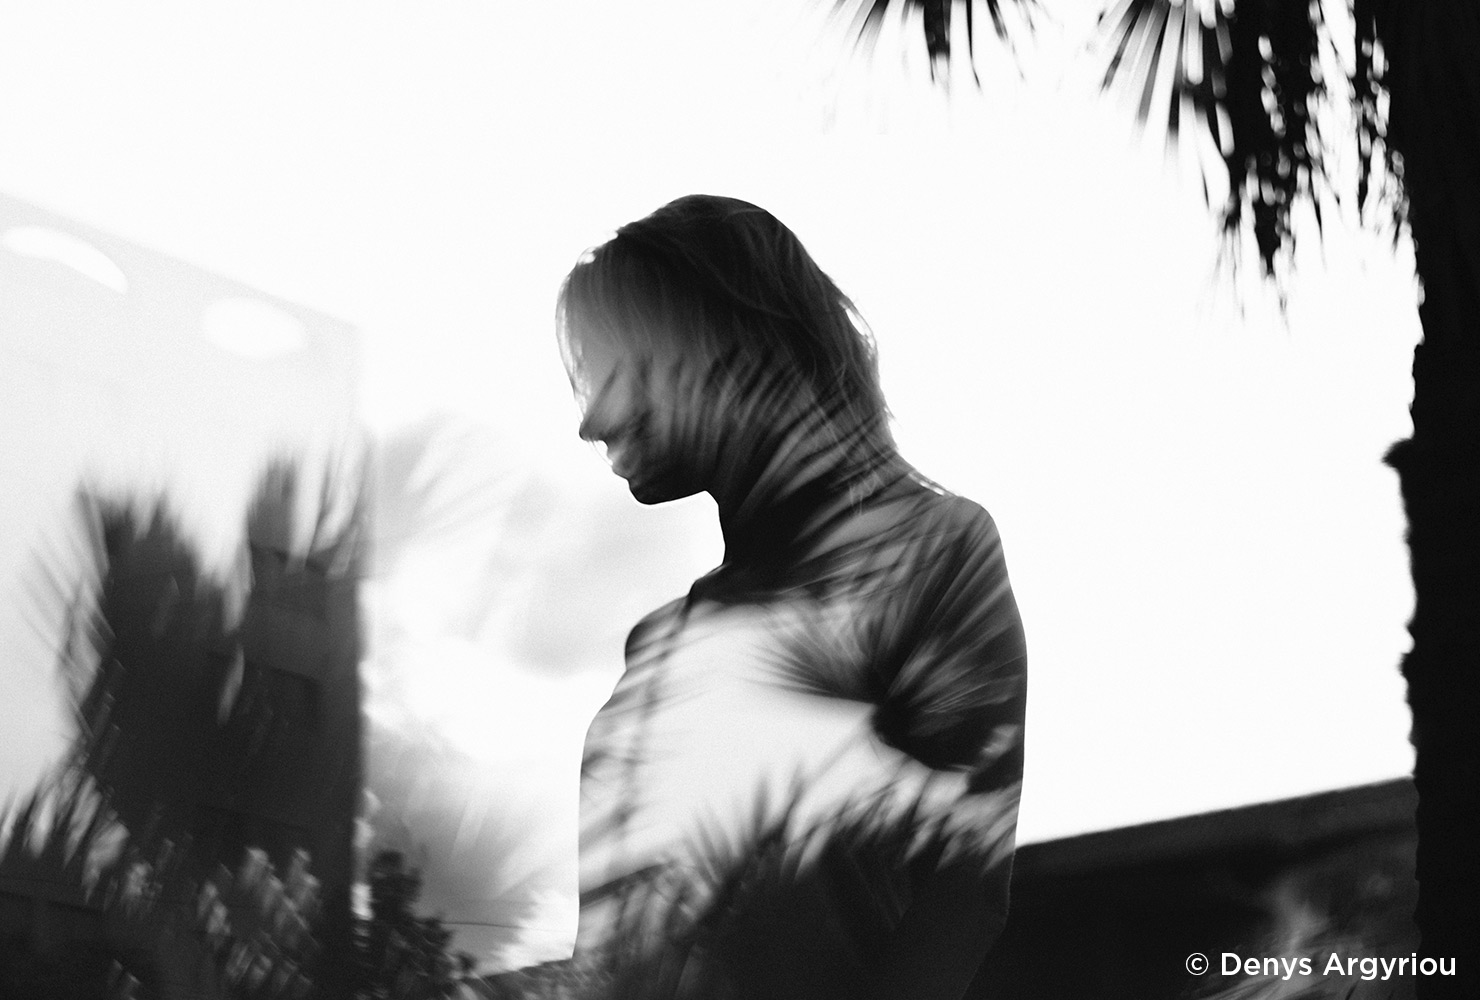
Double exposure, also known as multiple exposure, is a technique that combines two images in a single image. By using double exposure, you can create a distinct effect like a mirror image or ghost-like presence. The layering technique can be done with or without photoshop, depending on your equipment and skill set.
50. Escapism
Photography, like any type of art, can be a form of escapism. Through the camera, we can create images that help us step out of reality and into our daydreams. Prepare for your escapism photography project by thinking of your ‘happy places’ or locations you go to get away.
After brainstorming, head to one of those locations and shoot scenes that offer a mystical aura—whether it’s birds fluttering in the forest or the clouds lifting off of the mountains.
51. Shadow Art
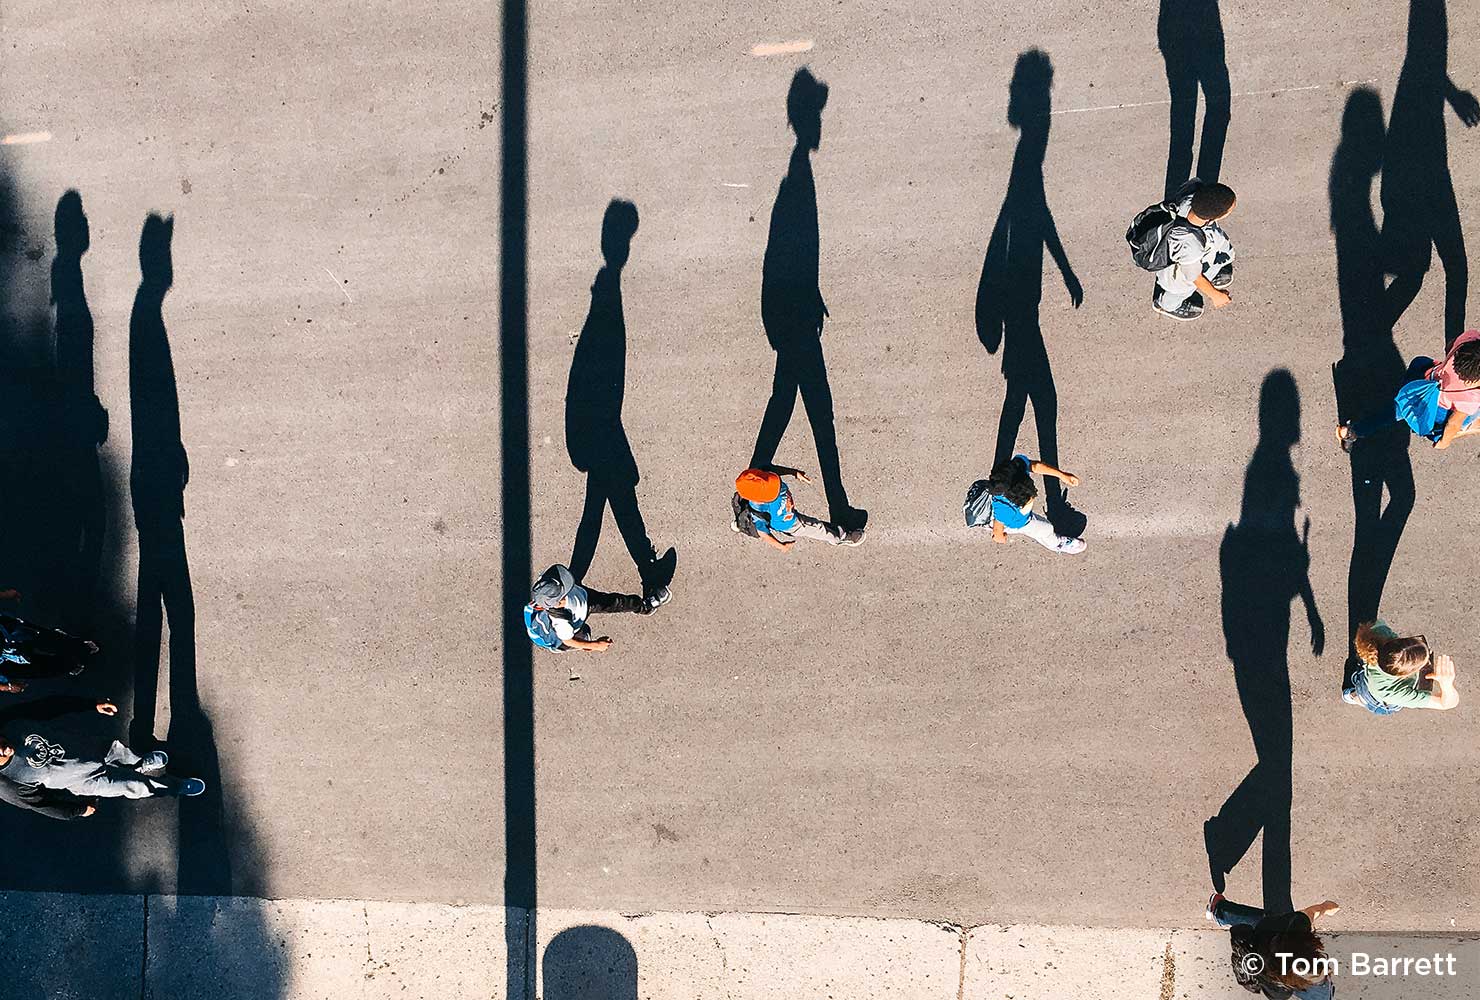
Just as light is a critical element to photography, so is darkness. With shadow art, the focus is placed on the subject as it blocks light from reaching a surface, like a sidewalk or table. Experiment with the angle, distance and size of your light source to alter the intensity and scale of your shadows.
Consider humans as your subjects, but inanimate objects, too, like musical instruments, buildings and action figures.
52. Texture

From brick walls to tiled roofs to wooden fences, textures are all around us. Complete a photo challenge where you take one shot of a textured surface every day. Turn on your auto focus to ensure the object is in perfect focus. Adjust your distance from the subject based on how much detail you want in your image. This idea is perfect if you’re also looking for creative Instagram photo ideas .
Aim for a ninety degree angle when you shoot the image so your texture is lined up straight with the camera.
53. 365 Wardrobe

On each day of the year, snap photos of your clothes before you begin the day. Arrange them differently—sometimes orderly, sometimes more carelessly—to gain a sense of how your mood changed from day to day. Remember to include accessories like purses, shoes, belts and headbands.
54. Suspend Time
Photography is a powerful art medium: it can even pause time. Whether you’re suspending an item with a fishing line or taking a shot of someone jumping, you can create the look of time being stopped. Start this photography project by choosing three items or people you’d like to suspend.
55. Balloons
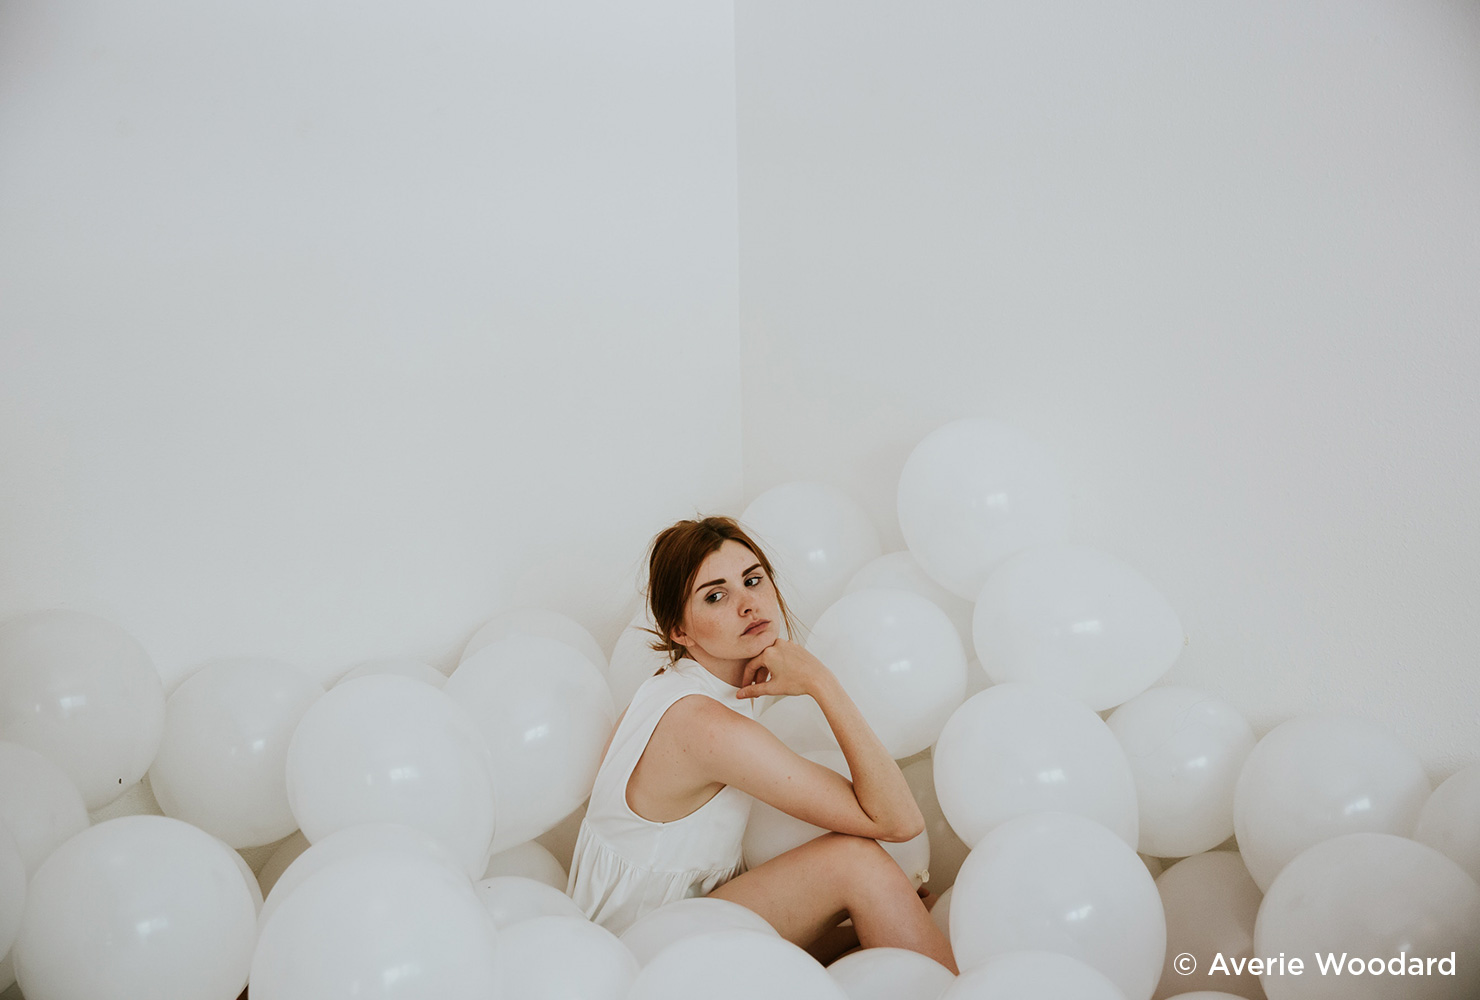
Bursting with color or more neutral tones, balloons make for versatile props. Let helium balloons off into the sky and capture photos as they float up. Surround the birthday girl with balloons in an otherwise empty room. Or tie a balloon to a child’s wrist and photograph them as they wander through a park.
56. Hotel Carpet
If you travel frequently, the hotel carpet project may be the right kind of fun for you. Next time you’re walking through a hotel lobby, glance down at the carpet beneath your feet. All sorts of patterns and colors are used in hotel carpets across the world. Take a snapshot (ideally at a 90-degree angle) of each carpet for a collection that will help you remember all of the places you’ve been.

Across neighborhoods and cities, doors provide insight to each home’s character. For this photography project, set out on an adventure to collect as many styles and sizes of doors as possible. Choose a macro approach, where the whole door makes the shot, or go micro by narrowing the frame to door handles and styles of wood.
58. Juxtaposition

To build juxtaposition in your photographs, place two opposite subjects next to one another. Like a blue ocean and a green forest, the contrast between the two is noticeable yet stunning. Types of juxtaposition might include a person and their shadow or a thin item next to a thicker item. For this photography project, try several contrasting subjects or locations.
Photos full of irony can be humorous or thought-provoking. Maybe you snap an image of a tow truck hauling another tow truck or you notice a descriptive sign in a place that doesn’t quite seem to fit. When it comes to ironic photos, a keen eye is needed along with a quick wit.
60. Fairy Lights

Fairy lights make for beautiful focal points. You can wrap the lights around a tree, weave them between human subjects or fill mason jars with them. Build a larger scene by ensuring no backdrop distractions are present or capture the fairy lights up close.
Regardless of what subjects and scenes you decide to shoot, proper exposure is crucial.
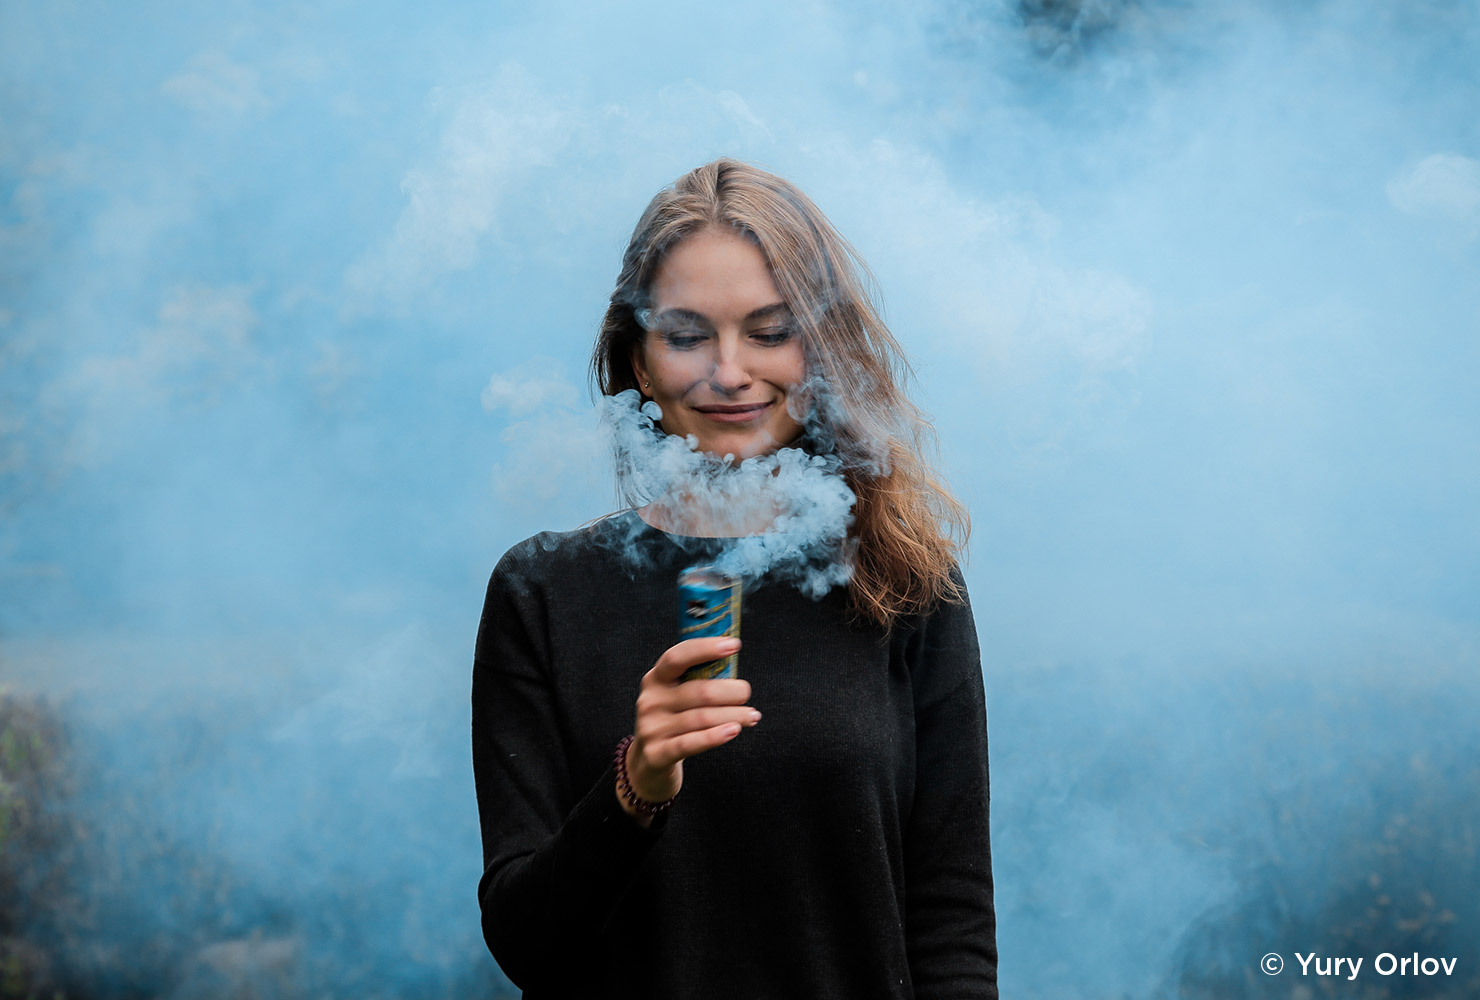
For this photography project, choose smoke as your primary accent. Incense sticks are easy to use and allow you to play with various colors. Your setup should ensure ample ventilation for the smoke to escape the room. Some photographers merge two photographs (one of the smoke and one of the object) to design a special scene, like one of a toy train blowing smoke or a tea kettle steaming.
62. Vintage Cars
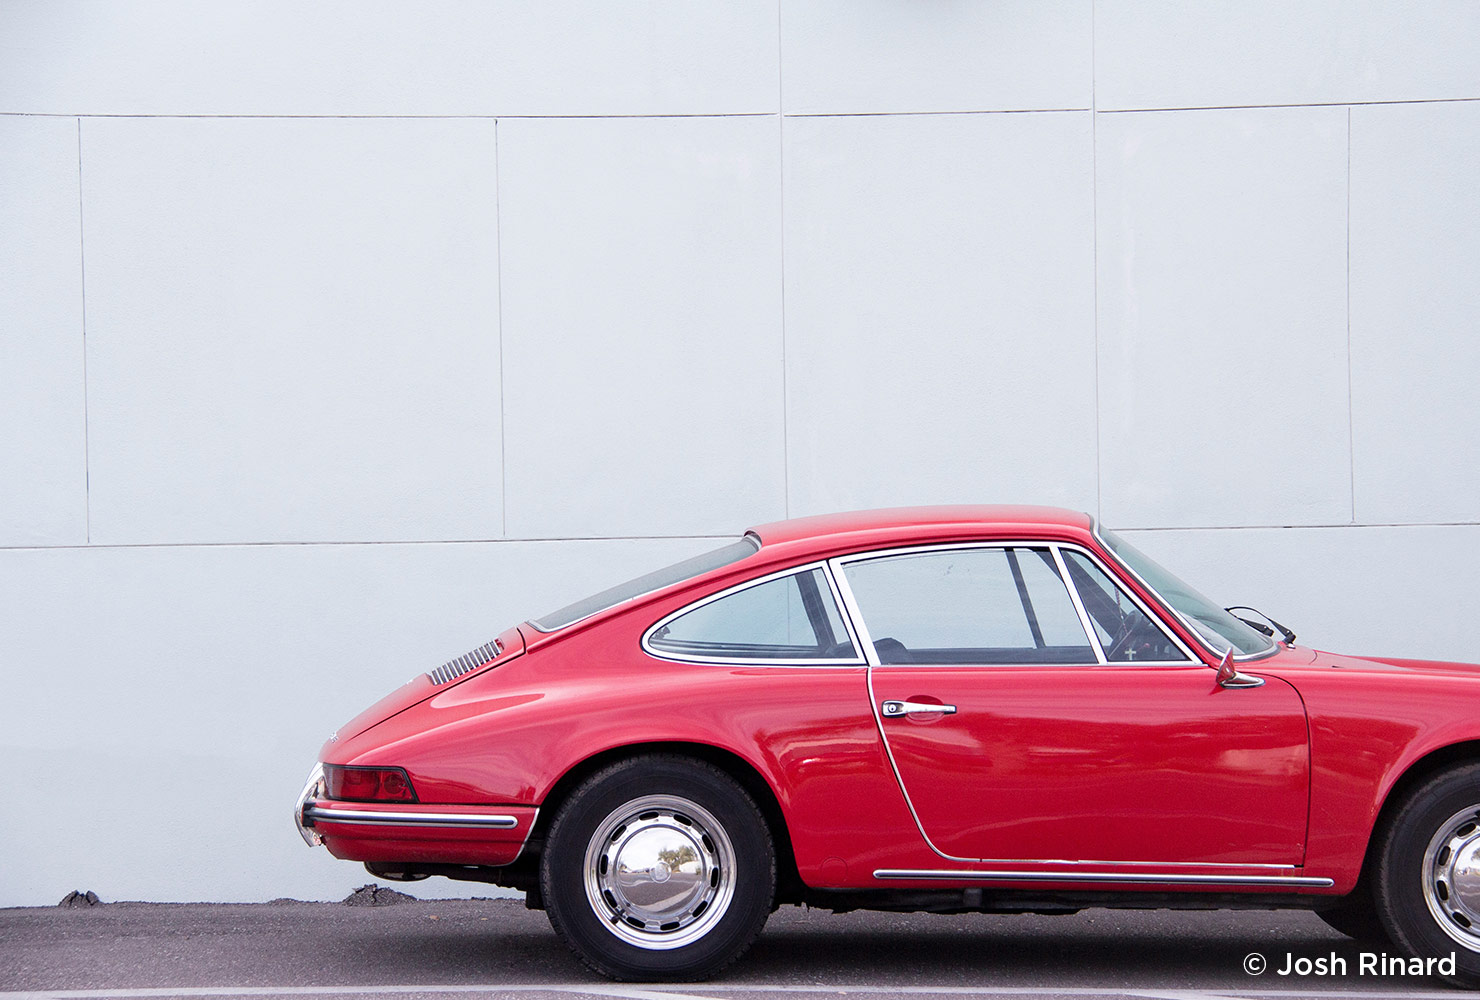
From sporty models to classic town cars, vintage vehicles never go out of style. Look for vintage makes at car rallies and exhibitions, although sometimes you’ll come across them in your everyday happenings. The golden hours, right after sunrise or right before sunset, are ideal for shooting cars. Highlight specific parts, like bumpers, trunks and hoods for diverse perspectives.
63. Faces In Things
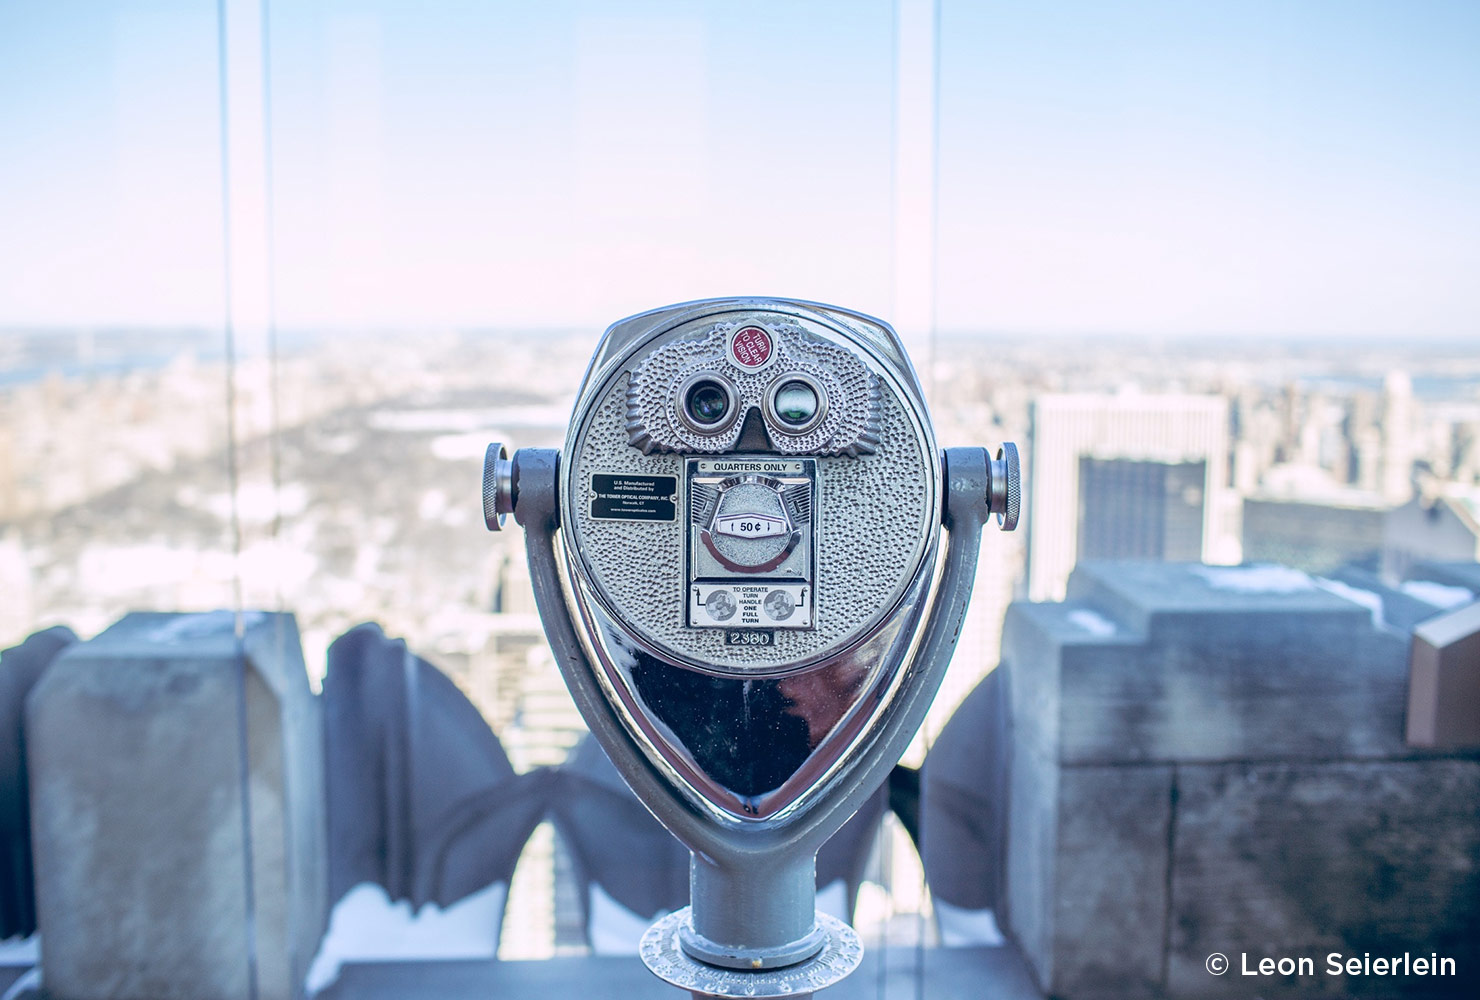
You’ve probably seen images that double as a face and another object. In this photography project, you’ll create a similar effect. Take a close look at nature, food and furniture to locate hidden human faces. Compile as many faces as you can, and see if your friends can guess what’s in the images.
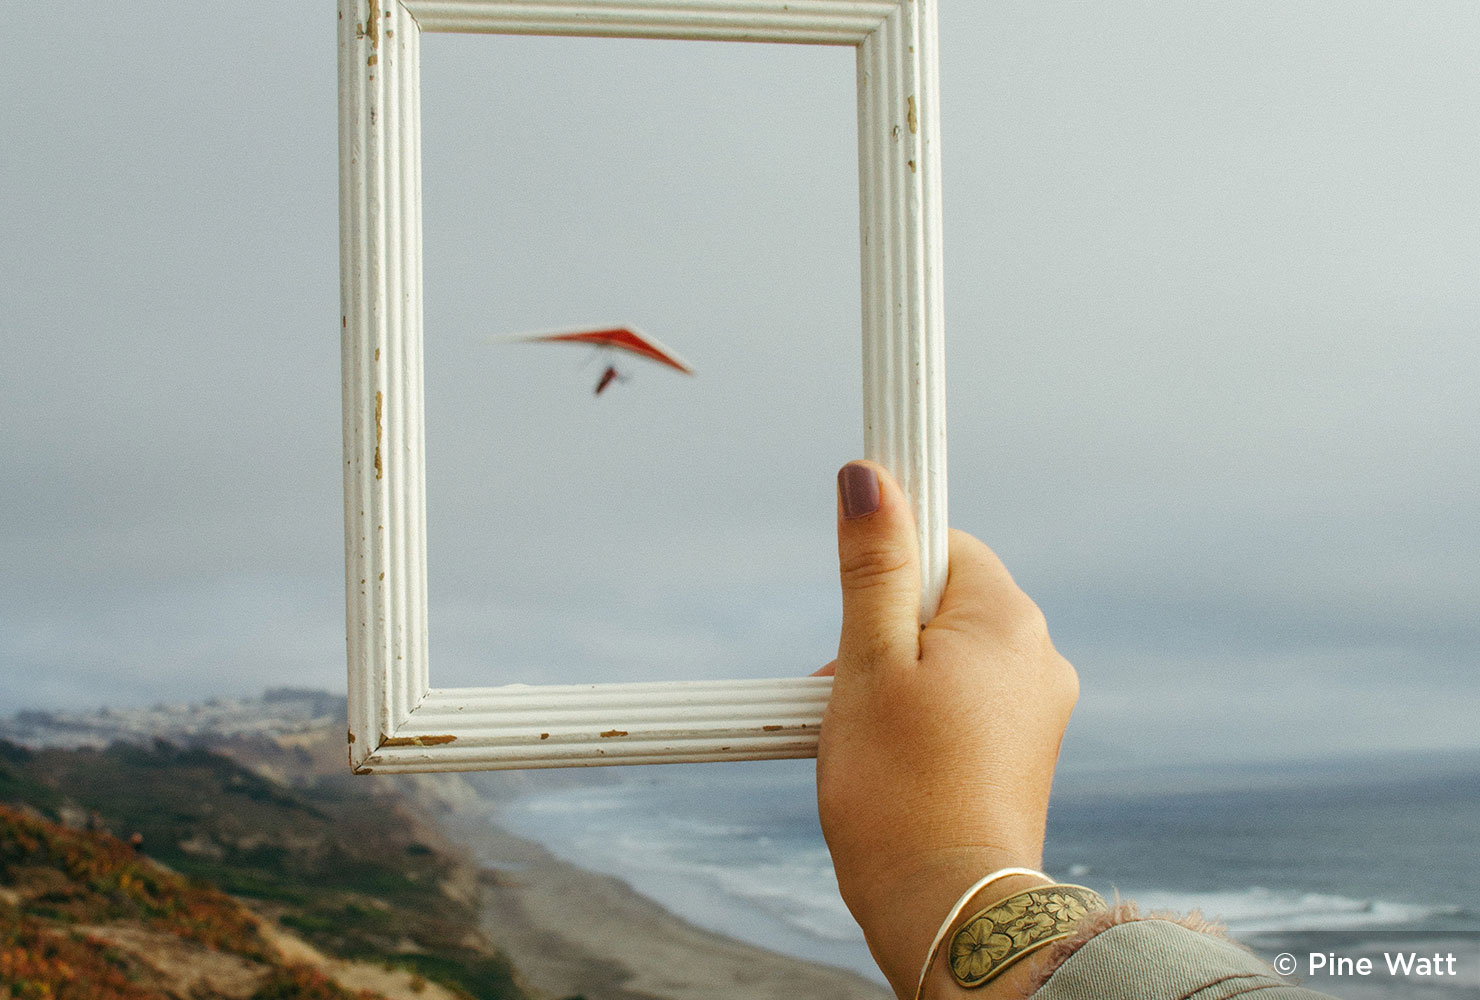
Alter your perspective by shooting your subject through a picture frame. The frame technique works best outdoors where you can place ample distance between your lens and your subject. Consider creating scenes with a woman standing on the beach, a tree in an open field or a tall building at the end of a street.
65. Reflections
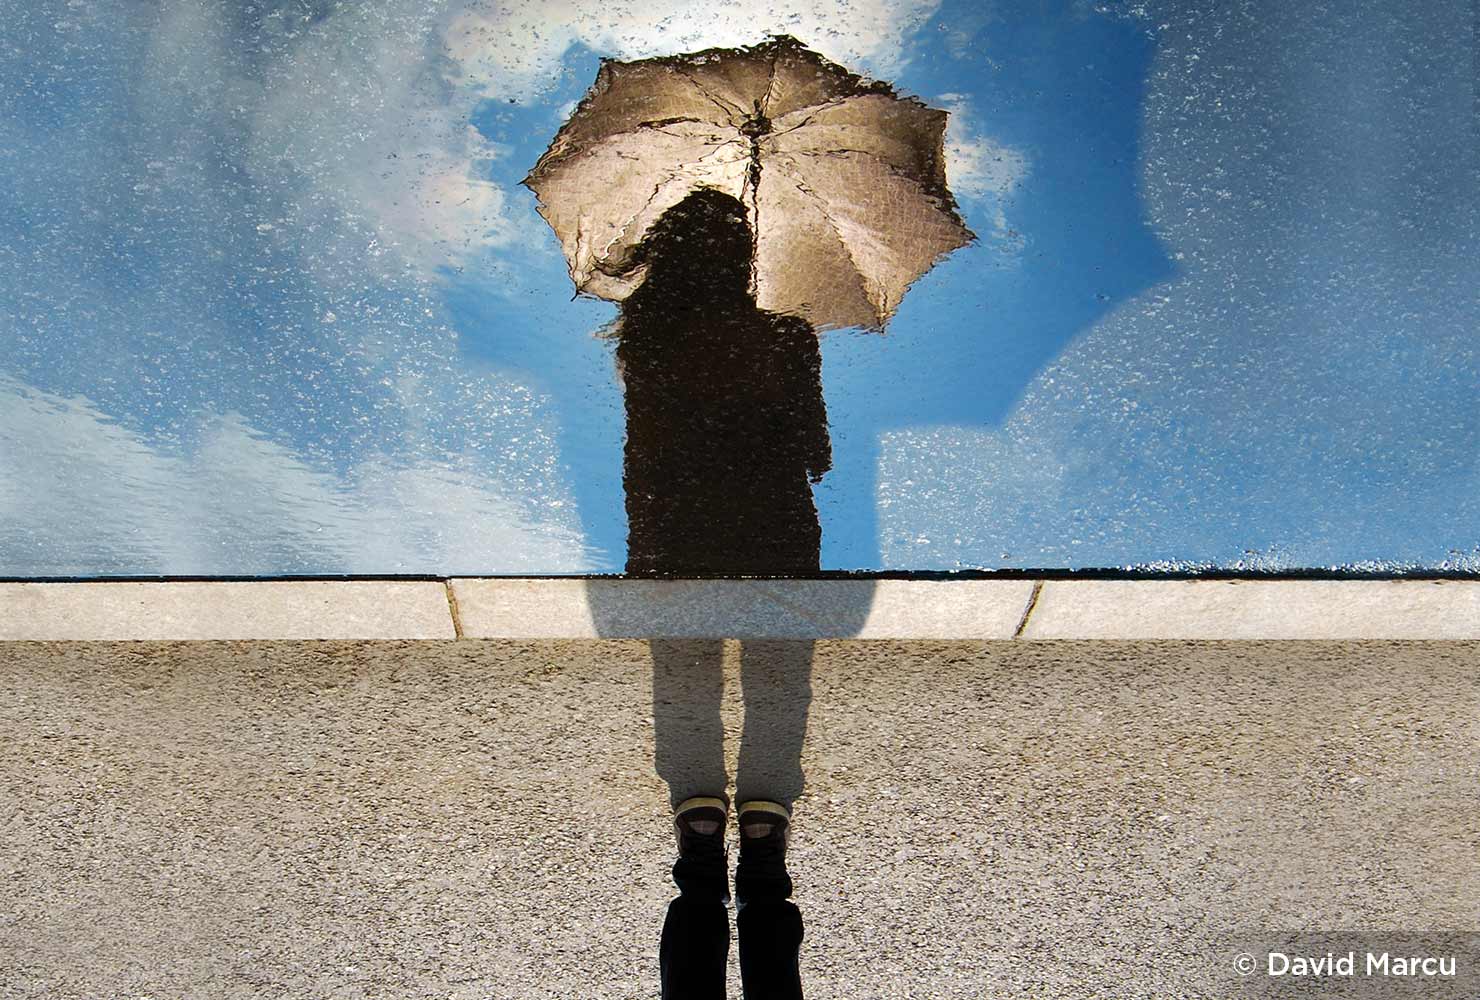
Any body of water—like a lake, river, pond or swimming pool—can act as your reflective tool for this photography project. You’ll want to avoid direct light on the water to eliminate glare. Practice using reflections on waterfront cityscapes or mountains overlooking a lake.
66. Take My Hand
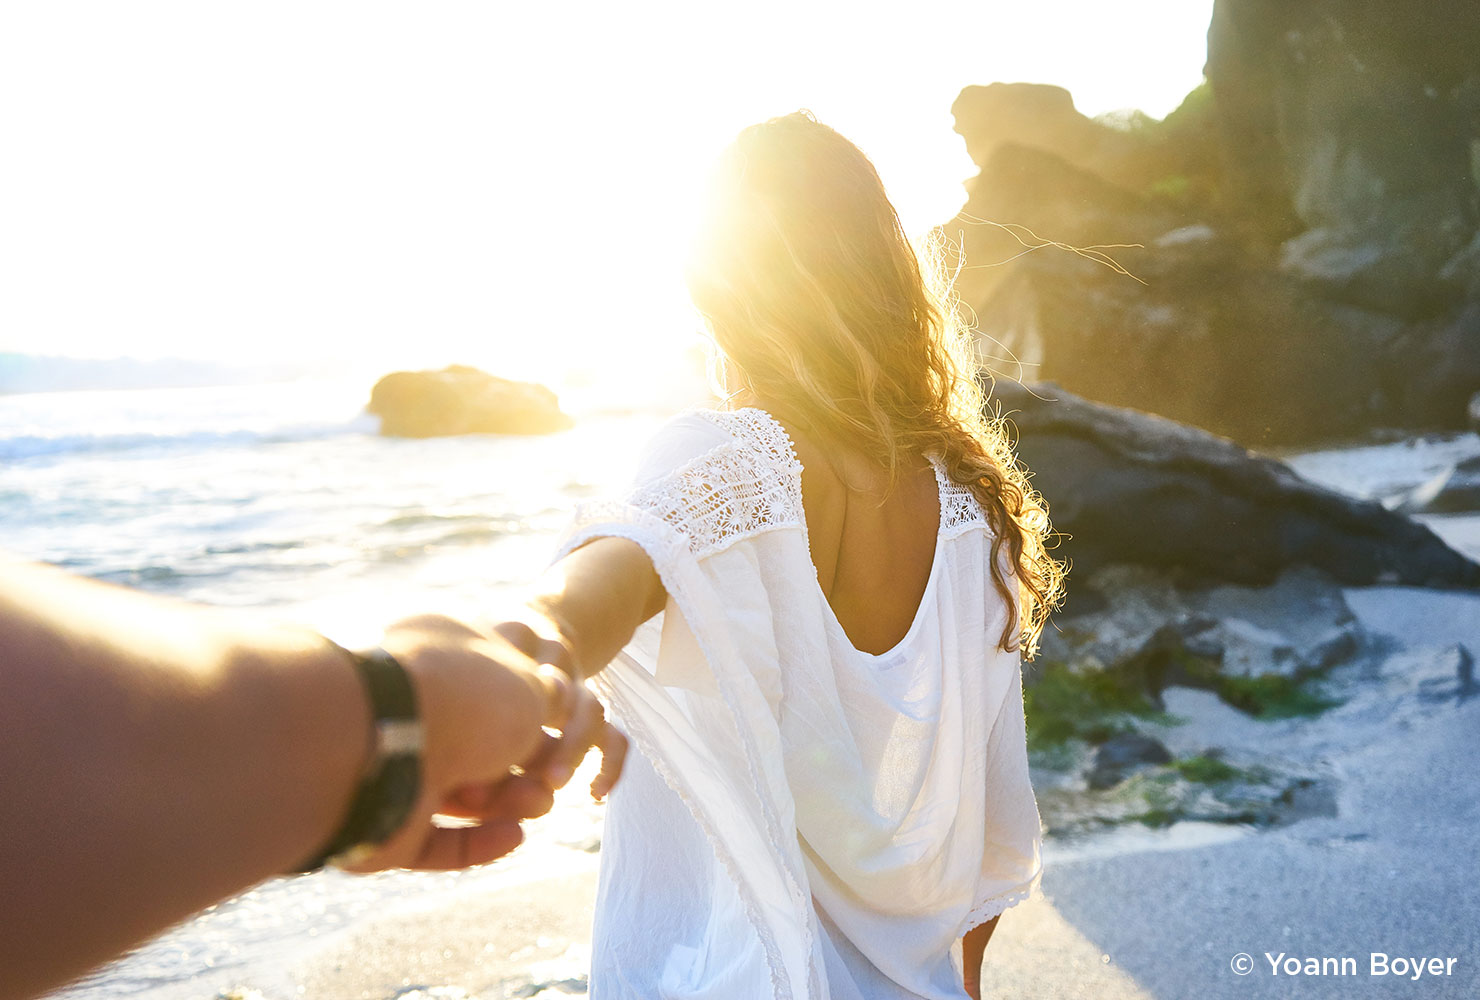
When you can represent human connection in photography, the emotion of the image is strengthened. Head out on a hike or stroll through a garden to practice photographing two hands linked together.
67. Picception
A relatively new technique, picception images incorporate another camera or photo into the shot. It can be a picture-in-a-picture style or something more subtle like a photograph of someone taking a photograph. While often informal, picception shots can be formal if intentionally designed.
Often eye-catching, neon photos provide a stunning mix of light, shape and color. Whether you’re on the Vegas strip or exploring your hometown at night, take photos of neon signs with your camera’s evaluative meter exposure setting. Choose a low ISO of 200 or 100 to avoid noise. Be sure to place your camera on a tripod for stability.
No matter which photography projects you decide to complete, remember to enjoy the process and save copies of your photos. Design a themed calendar or metal print to showcase your results.
Explore Categories
Framed Prints

Custom Photo Blankets

Save the Dates
Thank You Cards

Written by Shutterfly Community | View all posts
★ Lifestyle Expert
Shutterfly Community is here to help capture and share life's most important moments. Discover thoughtful gifts, creative ideas and endless inspiration to create meaningful memories with family and friends.
Visit their Website . You can follow on Instagram and Pinterest .
Assignment Details: Listening to an Audiobook
Learn to Shoot the Assignment

On Assignment: Listening to an Audiobook
Have you ever tried to portray, in a photograph, the idea of someone listening to something? I never had! So that made this assignment a unique one for me. To begin with, I had one idea for how to photograph someone “listening to an audiobook”, so I started with that...
Assignment Deadline: June 22, 2024
Who We’re Shooting for
CrossCurrent Digital
What They Need
Stock-quality photos for marketing campaigns, website, and print materials, depicting people reading/listening on CrossCurrent.
Take photos of people reading/listening to the audiobooks, ebooks, and podcasts on CrossCurrent. Depict how people can interact with the content without necessarily being glued to their device.
Important note: June is Audiobook month, and CrossCurrent Digital needs photos during the month of June in addition to after the assignment is over. With this in mind, CrossCurrent Digital will be selecting 3 weekly winners throughout the first three weeks of June, and then 1 additional weekly winner plus 1 grand prize winner at the end of the assignment.
To be considered as one of the first 3 weekly winners, you must submit your non-watermarked, high-resolution photos (DNGs preferred) below as normal, but by 12:00 midnight Thursday of the week you are submitting.
You may submit photos as often as you'd like - up to 10 photos per week.
After the assignment ends, CrossCurrent will choose the fourth weekly winner and the grand prize winner. There is also the possibility that they may want to choose winners for other projects in the future as well.
Special Instructions: Be creative! Some ideas include: parents reading with children, families reading together, families listening together, kids listening to a book while doing other projects, etc. Think of ways that you can show people engaged with digital books in a way that's not just them staring down at a device! CrossCurrent would also love to see families and different generations interacting in the photos.
Orientation: All aspect ratios considered.
Photo Specs: Minimum 2400px longest edge. Edited photos are fine.
Model Release: Each person you photograph (or the parents/guardian of the person) will need to sign a model release ( like this one ). You do not need to submit the signed model releases to Lenspiration unless specifically requested.
Assignment Awards: Only Lenspiration members are eligible for assignment awards.
- The 4 weekly winners will each receive 2 book credits.
- The grand prize winner will receive $50, plus a 6-month subscription to CrossCurrent (6 book credits).
- Any additional winners chosen by CrossCurrent will receive 1 book credit/photo.

Submit your High-Resolution Photos
Required: Upload your non-watermarked, high resolution photo(s) to Dropbox. You may submit up to 10 photos.
If using Lightroom, export as DNG and upload those.

Share for Discussion
Optional: Create a small version of your edited photo(s) to share & discuss with the Lenspiration community. You may submit up to 10 photos.
Share JPGs, less than 8MB each. 1200px longest edge recommended. Watermarks are fine.

Join the Coaching Webinar!
Register to attend the live photo coaching webinar on June 25 at 7 PM (EST).
We'll review photos submitted for the assignment, and answer questions asked during the live event.
Updated by business owner over 3 months ago

Popular dishes

Beef Noodles Soup

Pork Soup Dumplings

Dry Minced Pork Noodles

Fried Pork Buns

Spicy Dry Noodles

Chive and Pork Dumplings

Peppercorn Spicy Chicken

Cheese Potato Tower

Fried Pork Chop Over Noodles

Pork Chop Noodle Soup
Chongqing Noodle

Pan Fried Chicken

Peppercorn Soup Dumplings

Xiaolongbao

Panfried Pork Dumplings

Pan Fried Pork and Onion Dumplings

Black Vinegar Chicken
Location & Hours
Suggest an edit

387 E Gude Dr
Rockville, MD 20850
| Closed now | |
Amenities and More
Powered by Health Department Intelligence
Ask the Community
Ask a question
Yelp users haven’t asked any questions yet about Yu Noodles .
Recommended Reviews
Apache Fire

- 90% Contained
- 1 County: Butte
ALERTCalifornia Camera Feed
Resources assigned.
- 71 Personnel
- 0 Helicopters
- 2 Water Tenders
- 3 Other Assigned
Numerous firefighting air tankers from throughout the State are flying fire suppression missions as conditions allow.
Status Update
Situation summary.
No active fire was visible today, and no fire growth is expected. Full suppression techniques are being implemented, and fire suppression repair is in progress.
Evacuation Information
Current evacuations.
All evacuation orders and warnings have been lifted by the Butte County Sheriff's Office. All roads are open. Please use caution when driving in the area as fire crews continue working on and around roadways.
Damages and Destruction
Confirmed Damage to Property, Injuries, and Fatalities.
- 2 Structures Damaged Residential, Commercial and Other
- 14 Structures Destroyed Residential, Commercial and Other
- 0 Fatality Confirmed Fire Personnel and Civilian Fatalities
- 4 Injuries Confirmed Fire Personnel and Civilian Injuries
Agency Information
Butte County Office of Emergency Management, Butte County Sheriff, Butte County Public Works, Pacific Gas & Electric, California Department of Parks and Recreation
Social Media
- CALFIREButteCo
- calfire_butteco
Incident Photos

trending now

Pierce Brosnan's son Christopher makes rare public outing nearly...

Duke alum Kyle Filipowski's family accuses fiancée Caitlin...

Ben Affleck moved all his belongings out of mansion shared with...

Jennifer Lopez appears tense as she heads to work solo after...

‘Hands-on mother' Melania Trump has deal with Donald to not be...

Taylor Swift gives sweet nod to Travis Kelce as he skips first...

Lauren Sánchez goes jet skiing with Jeff Bezos and Kim...

Mamie Laverock's mom gives update on 'When Calls the Heart'...
Kelly bensimon calls off her wedding to scott litner.

This week in celebrity news, the “We Hear: Quick Fix” podcast covers:
- Kelly Bensimon calls off her wedding just four days before the ceremony.
- Jennifer Lopez returned from her solo vacation amid her marital woes.
- And Bethenny Frankel’s ex-fiancé was spotted getting cozy with Olivia Culpo’s sister Aurora.
We Hear: Quick Fix is a week-in-review five-minute podcast from Page Six. Chief Reporter Francesca Bacardi breaks down the biggest stories of the week – including The Joy of Six, the most satisfying piece of gossip.
Share this article:
- Click to share on Facebook (Opens in new window)
- Click to share on Twitter (Opens in new window)
- Click to email a link to a friend (Opens in new window)
- Click to copy URL
Transfer photos and videos from your iPhone or iPad to your Mac or PC
With the Photos app and a USB cable, you can transfer photos and videos to your computer. You can also make your photos available on all your devices with iCloud Photos.
Use iCloud Photos
Import to your mac, import to your windows pc.
iCloud Photos keeps your photos and videos safe, up to date, and available automatically on all of your Apple devices, on iCloud.com , and even your PC . When you use iCloud Photos, you don't need to import photos from one iCloud device to another. iCloud Photos always uploads and stores your original, full-resolution photos. You can keep full-resolution originals on each of your devices, or save space with device-optimized versions instead. Either way, you can download your originals whenever you need them, as long as you have enough space on your device. Any organizational changes or edits you make are always kept up to date across all your Apple devices. Learn how to set up and use iCloud Photos .
The photos and videos that you keep in iCloud Photos use your iCloud storage. Before you turn on iCloud Photos, make sure that you have enough space in iCloud to store your entire collection. You can see how much space you need and then upgrade your storage plan if necessary .
You can import photos and videos to your Mac by connecting your device to your Mac. However, if you use iCloud Photos , then you don't need to import.
To import to your Mac:
Connect your iPhone or iPad to your Mac with a USB cable.
Open the Photos app on your computer.
The Photos app shows an Import screen with all the photos and videos that are on your connected device. If the Import screen doesn't automatically appear, click the device's name in the Photos sidebar.
If asked, unlock your iOS or iPadOS device using your passcode . If you see a prompt on your iOS or iPadOS device asking you to Trust This Computer , tap Trust to continue.
Choose where you want to import your photos. Next to "Import to," you can choose an existing album or create a new one.
Select the photos you want to import and click Import Selected, or click Import All New Photos.

Wait for the process to finish, then disconnect your device from your Mac.
You can import photos to your PC by connecting your device to your computer and using the Apple Devices app:
Install the Apple Devices app from the Microsoft Store.
Connect your iPhone or iPad to your PC with a USB cable.
If asked, unlock your iOS or iPadOS device using your passcode.
If you see a prompt on your iOS or iPadOS device asking you to Trust This Computer, tap Trust or Allow to continue.
Then, visit Microsoft's website to learn how to import photos to the Microsoft Photos app in Windows .
If you have iCloud Photos turned on, you need to download the original, full resolution versions of your photos to your iPhone or iPad before you import to your PC.
When you import videos from your iOS or iPadOS device to your PC, some might be rotated incorrectly in the Microsoft Photos app. You can add these videos to iTunes to play them in the correct orientation.
If you want to ensure photos from your iOS or iPadOS device have the best compatibility with Windows, try these steps:
On your iOS or iPadOS device, open the Settings app.
Tap Camera, then tap Formats.
Tap Most Compatible. From now on, your camera will create photos and videos in JPEG and H.264 formats.
More ways to transfer photos and videos to your computer
Use AirDrop to quickly send photos and videos to your Mac .
Import photos and video from storage media , like a hard disk or SD card, to Photos for macOS.
Use a scanner and Image Capture to import photos that were taken with a film camera.
Import your images directly to a folder on your Mac with Image Capture.
Sync music, movies, and more from your iOS devices using your computer.
Use Time Machine to back up all of your files, including your photos and videos, to an external hard drive.
Information about products not manufactured by Apple, or independent websites not controlled or tested by Apple, is provided without recommendation or endorsement. Apple assumes no responsibility with regard to the selection, performance, or use of third-party websites or products. Apple makes no representations regarding third-party website accuracy or reliability. Contact the vendor for additional information.

Related topics
Explore Apple Support Community
Find what’s been asked and answered by Apple customers.
Contact Apple Support
Need more help? Save time by starting your support request online and we'll connect you to an expert.
IMAGES
VIDEO
COMMENTS
Then you will push your creative boundaries, and be more likely to make a good photo. #9. Limit yourself to only 36 photos in a day. For this assignment, you're only allowed to take 36 photos in ...
Assignment #3: Shadows. Shadows are everywhere and they are vital to photography because this is the art of capturing light. With light comes shadows and when you begin to look at shadows as a photographer, your world will open up. Take a look around for shadows and record them with your camera.
photo by Nikos Koutoulas. 1. The Park Bench. Take your camera and a tripod to a park, and find a busy park bench. Set yourself up some distance away with a long lens aimed at the bench and pre-focused. Settle in, and for the next few hours take images at fixed time intervals, say every ten minutes. This is really an exercise in timelapse ...
15 Ways to Make Photography Assignments. This list of photo assignments consists of 15 points, so I am sure that you will find the idea to your liking. 1. Self Portraits. The first task is a no-brainer: just take a self-portrait picture each day. Don't forget to use a tripod and shutter release aside from regular shooting with your arm ...
Here are 12 exciting photography assignments to help you find the right one. 1. Shoot With a Limited Amount of Equipment. Whether you're a full-time photographer, a hobbyist, or a beginner, you're probably itching to invest in all kinds of equipment to take your photos to the next level. But here's a challenge.
Exercise 13: Two Trips. Put your camera somewhere safe. Walk somewhere without a camera and look for photographs. When you reach your destination, walk back over the same route while still looking for photos. Finally, with camera in hand, retrace your steps for the third time and capture those photographs.
Assignment 20: Framed by color (frames) Some frames are visual rather than literal. One way to make a visual frame is to look for compositions where the main subject is surrounded by a solid block of color, as in the photo below. This is another assignment that tests your observational skills.
Assignment 80: Limited color palettes (Composition) The final composition assignment tests your observational skills by asking you to make photos of scenes with a limited color palette. Often this type of scene is dominated by a single vibrant color, like the orange flowers in the photo on the right.
Idea: Find an old photography book in a second-hand bookshop, or dig up an old photography magazine. Over a coffee, look at the images with a friend, find one that you each like, and try to create ...
Look for Reflections. Photo by Maddy Baker on Unsplash. Most of these beginner photography projects are all about training your eye for photography, which essentially means seeing your surroundings in a new light. Go search your house for reflections you can find. This may be in your morning coffee, or it may be your windows.
3. With Three Objects, Shoot 10 Photos. In some cases---like landscape, astronomical, and street photography---the idea is to capture scenes in the moment as they are. In other cases---like portrait, food, and product photography---the idea is to construct your own scenes. As you imagine, this isn't easy.
WAS $49, TODAY ONLY $34. 100 Photography Assignment Sheets. Printable / Desktop & Mobile Versions. Three Bonus Photography Ebooks covering ISO, Aperture and Shutter Speed. Free Monthly Photography Magazine + past editions (73 issues to date) Lifetime Access including future updates. 100% Satisfaction Guarantee. >> YES, GRAB THIS DEAL.
Taking on a photo 365, photo a day, project365, or a selfie 365 challenge? Failure is no longer an option thanks to thousands of ideas from the LEARN PHOTO365 photography assignment generator app. IDEAS. INSPIRATION. EDUCATION. A unique app that is all about TAKING better photographs... not about doing things TO your photographs. ...
Your turn: Photograph what you see when you look up. You might approach this assignment in two ways: 1) You can carry your camera around with you for a day or several days and photograph anything ...
Some quick black and white photography assignments to get you going: Photograph your hand. Shoot in RAW, and increase the contrast, to see more details in your hands. Inverse your photos: Choose some monochrome photos of yours which you like, and inverse them, to gain a more interesting view into them. Shoot with a flash: Monochrome and a flash ...
As I explored these photography assignments again, I had so much fun taking new photos and applying the techniques right alongside you! If you didn't join in on all the fun, you'll find the complete list of photo prompts we explored below. Click on each link to see the short blurb with related tips and tricks for each prompt.
So whether you're a photography teacher looking for effective assignment ideas or a self-taught photography student focused on training your eye and critical vision, this roundup will surely come in handy. 1. 365 Project. No matter what you call it, the 365 Project or Photo a Day project, the result is the same - a photo for every day of ...
Creative Photography Assignments: Themes & Projects (bonus ebook) Your purchase includes Creative Photography Assignments: Themes & Projects, a PDF that shows you how to develop the assignments into long term themes and mini projects that are easy to tackle.There are several examples from my own photography, showing how the assignments benefit experienced photographers as well as less ...
Quick Assignment for Beginners At first I thought of providing visual examples (photographs) to go with the definitions above and analyzing them for you so as to give a better idea of what is what . But even though this is an assignment discussion article and we are supposed to learn the right answers to the previous assignment, it feels wrong ...
15. Star Trails. Spectacular from edge to edge, star trails photography is an adventure to shoot. The first step is to find a clear sky full of stars, but free of pollution and other light interference. Anchoring your camera on a tripod, set your camera to shoot on manual mode. The faster the lens you have, the better.
Learn to take pictures by taking pictures. Every month, Lenspiration publishes a Photo Assignment. We call them "Shoot to Serve" opportunities because we are taking photos for real businesses or nonprofits that need specific photos for their upcoming projects. How it Works. View Current Assignment.
ARLINGTON, Va. (AFNS) -- The Air Force and Space Force have completed the annual review of special duty assignment pay for enlisted members and established new guidelines to support a quadrennial SDAP board process. The SDAP board has transitioned to having a board every four years, rather than annually. The change is intended to stabilize the budget for Airmen and Guardians receiving the pay ...
Learn to Shoot the Assignment. Important note: June is Audiobook month, and CrossCurrent Digital needs photos during the month of June in addition to after the assignment is over. With this in mind, CrossCurrent Digital will be selecting 3 weekly winners throughout the first three weeks of June, and then 1 additional weekly winner plus 1 grand prize winner at the end of the assignment.
See where your favorite Cup Series driver will pit during Sunday's USA Today 301 at New Hampshire Motor Speedway (2 p.m. ET, USA).
47 reviews and 204 photos of YU NOODLES "Excellent soup dumplings, got both the standard pork and the peppercorn, very quick service, couldn't ask for more."
See the best photos at Nashville Superspeedway as the NASCAR Truck, Xfinity and Cup Series take on the Music City.
9. Limit yourself to only 36 photos in a day. For this assignment, you're only allowed to take 36 photos in a day (same amount of photos in a roll of film). This exercise will help you learn restraint. It will balance out some of the other assignments which encourage you to take more.
Incident Photos. Photo 1 Photo 2 Quick Links. Current Incidents; 2024 Incidents; Defensible Space; Executive Staff; Resources; Statistics; Subscribe to Newsletter; 2024 Strategic Plan; Programs. Board of Forestry and Fire Protection; Communications; Equal Employment Opportunity; Fire and Resource Assessment Program ...
This week in celebrity news, the "We Hear: Quick Fix" podcast covers: Kelly Bensimon calls off her wedding just four days before the ceremony. Jennifer Lopez returned from her solo vacation ...
Use iCloud Photos. iCloud Photos keeps your photos and videos safe, up to date, and available automatically on all of your Apple devices, on iCloud.com, and even your PC.When you use iCloud Photos, you don't need to import photos from one iCloud device to another. iCloud Photos always uploads and stores your original, full-resolution photos.