- Presentations
- Most Recent
- Infographics
- Data Visualizations
- Forms and Surveys
- Video & Animation
- Case Studies
- Design for Business
- Digital Marketing
- Design Inspiration
- Visual Thinking
- Product Updates
- Visme Webinars
- Artificial Intelligence

How to Make a Video Presentation With Audio in 8 Steps

Written by: Orana Velarde
Wondering how to make a video presentation with audio?
You're in the right place.
In this guide, we’ll cover the 8 steps to creating video presentations with voiceovers, pictures and music. We've also included tips for powerful presentations to help you get maximum results.
Here’s a short selection of 8 interactive presentation templates you can edit, share and download with Visme. View more templates below:

Jump to your desired section in the table of contents below.
8 Steps to Creating a Video Presentation
What is a video presentation, what makes a good video presentation, step #1: plan and strategize, step #2: organize your content, step #3: log in to visme and choose a template, step #4: input your content into the slides, step #5: add animations and transitions, step #6: add audio to your presentation, step #7: review and edit, step #8: download and share.
A video presentation is a presentation that can be shared and viewed as a video. Technically, for a presentation to be a video presentation, it must be an MP4 or MOV file type.
A video presentation can be shared online on YouTube, Vimeo and other social media platforms . The best part of a video presentation with audio is that you can share it widely without the need of being there to present the information in person.
Even a live presentation can be improved with a video slideshow. Simply give a live introduction during your webinar or summit, and then play your video presentation to the audience.
A video presentation becomes even more valuable and high-quality when you add audio to it. For example, adding a music clip or a narrated voiceover can do wonders to help you get your message across and leave a lasting impact.
Check out this "2021 Year in Review" video presentation we created at Visme.
Made with Visme Presentation Maker
Make your own video presentation in Visme! Create Now
A good video presentation will capture your audience’s attention until the very end.
When it comes to creating a video presentation, there is no definite checklist as to what constitutes a good video presentation. But there are some things you can do to make sure that yours is good enough to keep the viewer engaged.
For example:
- Think of your presentation as a video from the very beginning.
- Take the time to create an outline or storyboard of your slides.
- Make sure the information flows from one slide, or scene, to another.
- Preview your presentation as you put it together, making sure it flows well.
- Add animations and motion graphics only if they bring visual value.
- Stay balanced with animations and transitions throughout the scenes.
- Tell a story to improve content retention.
Using the tips above, you’re well on your way to creating a video presentation that is sure to make an impact.
Ready? Let’s get started with a step-by-step tutorial!
If you prefer watching over reading, here's a short video tutorial on how to create engaging presentations in Visme.

For any successful project to be a success, including your new video presentation, you must plan and strategize. You and your team need to know the purpose of the video presentation before you even start putting together content or visuals.
Because you need to know the reason, the why, behind the project. That way, the creation process will reflect those goals and take you in the right direction faster.
For example, if you want to create an explainer video about your new product line, do you want the goal to be brand awareness or sales, or both?
If it’s sales, then the messaging and visuals must be created for that purpose. If it’s awareness, then you can take a different approach at how to portray the new product line.
If you want both, then you can do a bit of both and tell a story about the product that explains how it’s made and how it will improve your customers' lives.
Hey marketers! Need to create scroll-stopping visual content fast?
- Transform your visual content with Visme’s easy-to-use content creation platform
- Produce beautiful, effective marketing content quickly even without an extensive design skillset
- Inspire your sales team to create their own content with branded templates for easy customization
Sign up. It’s free.

Questions to ask before you create a video presentation.
Here are the most important questions to ask yourself and your team before you create a video presentation:
- Why do you need a video presentation?
- Who will watch this video presentation and where?
- What are you planning to convey?
- What story are you telling?
- Who do you want to convince, of what?
- How would you like the audience to feel when seeing your video presentation?
- Will it be in-house and private or public for the world to see?
- How can your company or brand sound like an expert in the topic?
- Do you want the audience to engage when they are done watching?
- Do you need a voiceover or maybe a music track will be enough?
- Is it necessary to hire voice talent or maybe a presenter you can film?
- Will you need to write a video script or not?
Write down a list of goals for your video presentation and make sure they are on-hand during every step of the process. Use these goal-setting worksheets and templates to get started.
Every person involved in the creation of the video needs to know about the purpose, goal and plan at all times — from stakeholders and designers to content creators, marketers and social media managers.
Here's a sample plan template you can use to keep up with your project goals, target audience, tactics and more. Share it with your team to help everyone stay on the same page.

Customize this template and make it your own! Edit and Download
Now that your team is on board and you know the purpose of your video presentation, it’s time to get organized.
This is a step with more value than you can imagine. In fact, it should be an un-skippable step to every visual project you create, along with the first step of planning and strategizing.
Start by organizing all the content for the presentation into a folder on your desktop. Include all the graphics, photos, video clips, audio bites and any brand assets. Create a document with all the written content and make notes on what the audio will be.
- For a voiceover, draft a script.
- For music, choose the perfect track.
With the written content, draft a simple outline or storyboard. For a video presentation, in particular, you should try a storyboard.
This step is especially important if you have stakeholders invested in seeing the final product and want to see the process.
How to create a storyboard in Visme.
It's easy! Use one of the Visme storyboard templates to put one together.
Remember, storyboards don’t need to be too detailed. The purpose of making one is to give an idea of what will be created. Don’t invest too much time in trying to perfect it.
Here are some templates to get you started.

Microwave Lunch TVC Storyboard

Public Library Storyboard

Thrift Shop Storyboard

Art Therapy Storyboard

Air Pollution Storyboard

Tree Plantation Program Storyboard
Create your storyboard View more templates
It’ll be easier to create a storyboard once you’ve already created the outline. The slide layout for a video presentation is much like the layout of a regular presentation.
For example, here is a broad outline for a regular presentation with sections:
- Slide1: Title and Subtitle
- Slide 2: Introduction - Table of Contents
- Slides 3: Section 1 Title
- Slides 4-7: Section 1 content
- Slide 8: Section 2 Title
- Slide 9-11: Section 2 content
- Slide 12: Summary or Review
- Slide 13: Conclusion and Closing
If your presentation doesn’t have defined sections to separate the content in, choose a good flow from one slide to another . For example:
- Chronological Order
- Problem and Solution
- Before and After
- Hero’s Journey progression

Browse presentation templates in Visme! Create Now
Now that you have a good idea of the purpose of your video, an outline or even a storyboard, it’s time to put it all together.
Log in to your Visme account and select a starting point for your video presentation. This could be:
- One of the four presentation themes with hundreds of slides and layouts to mix and match.
- A full-scale pre-designed presentation template with animation effects.
- One of our animated video templates.
- A previously created and imported PowerPoint presentation.
- An existing Visme slideshow without animation, video or audio.
Use your outline or storyboard to set up your slide order in the editor. Make sure you have all the slides you need to fit your content.

Now, it’s time to add the content to your slides. If you are starting with a blank canvas, you can use content blocks to help you layout the content in balanced compositions.
When adding the content to your slides, remember that people don’t want to read slides on videos. Keep the text to a minimum and use more visuals instead.
If you’ll be using a voice over for the online video presentation, then you’ll need hardly any text on the slides apart from titles and section titles.
For complementary visuals like images and backgrounds, look through the library on the left side menu of your editor. It’s also likely that you have a selection of images from your company that you want to use in your slides. Upload them to your library.
Add some uniqueness to your images by placing them inside frames or cropping them to fit next to colored shapes and sections.
For backgrounds, you have lots of choices — from full colors to gradients to animated and video backgrounds. Try photographs with filters for a subtle background that doesn’t compete with the foreground elements.
You can also add videos inside your video presentation, either uploaded or with a link to YouTube, Vimeo or Wistia. We suggest you use short videos in this case so that your final project isn’t excessively long.
Do you know how to make a video presentation that is impactful and fun to watch?
Just add animations and moving elements!
Visme comes with built-in with the following animated assets:
- Animated icons
- Shapes and lines
- Animated illustrations
- Animated characters
- Special effects
- Animated gestures
- Animated charts and data widgets
It’s time to bring it all to life and go from regular static presentation to video presentation.
At this point, you might already have some animated elements in your slides, maybe some animated icons or animated characters. Before you go ahead and animate anything else, review all the transitions between slides.
It’s important to understand that the animated elements, embedded or background videos, and audio you use must all match the transition between slides.
This is the magic sauce for transforming a normal presentation into a video presentation.
Let’s look at all the animation and transition options in your Visme dashboard and how you can use them to your advantage.
Animated characters, icons, illustrations and special effects.
All these elements have options to select the number of repetitions of their action and the speed. The higher number of repetitions you choose, the longer it will take to finish its action. The speed will make the action faster or slower. You can toggle both to find the perfect combination.
The completed action of any of these animated elements will override a timed transition. The transition will wait until the animation is finished to go ahead and start. You can adjust the final length of your animated elements by previewing your slide and taking note of its length.
Additionally, you can customize the poses that the characters portray and also the color of their clothes and skin. These deep customization options will help you stay on brand when creating your video presentations.
Stock videos and video backgrounds.

Videos you add from the editor or import from your computer have the option to trim to a desired length, loop or autoplay.
Alternatively, use video as a background. Stretch it to fit the entire slide and position it behind all the other content. The edit settings are the same as a regular video.
Visme offers a large selection of quality video clips to use as backgrounds or as complementary visuals. it's also easy to upload your own video to the library.
Animated backgrounds.
These loop on their own and are ruled by the transition settings. Animated backgrounds stand out so make sure you are keeping a balance with the elements in the foreground.
Manual animations.
Animations can be added to everything on your slide, including the videos and animated icons. You can tweak the settings to control when elements enter and exit the slide.
There are lots of options for these animations and you can time them using the animation settings. Try to keep animations on the same slide to a minimum so they're not distracting.
Smooth transitions.
Transitions can be added slide by slide or to the entire presentation at once. If you don’t go into the transitions menu at all, Visme will apply a staggered enter from the side that already looks great for presentations that you have to click on to continue to the next slide.
For video presentations, you’ll need to edit your transitions to happen automatically according to what is going on in your slide.
In general, you can make the transition happen after a specific number of seconds but if you have an animated element or audio clip that lasts longer, the transition won’t happen until the longest one has finished its action.
For slides with added video, make the transition happen either when the video ends or at a calculated time after the video has ended. Both are available options in the transition settings.
Transitions can be set in different styles, slide from the side top or bottom, or a simple fade or zoom. For a balanced composition, use the same style of transition throughout.
But if you want to get creative, use different transitions to design a more creative flow. Just make sure you don’t go overboard.

In the section above, we already talked a little about how audio works together with the transitions for a seamless video experience.
Now, let’s take a look at how to add audio inside Visme.
As you work on your video presentation, you might feel the need to work on animations, transitions and audio at the same time so that it all fits together in the best way possible.
To add audio to your presentation in Visme, you have several options:
Adding audio in the background.
Adding audio to each slide., tweaking the audio inside video clips., adding a voice over or narration..

To add a background sound clip, click on the top-left hamburger menu and select “Publish Settings”. This is where you can tweak your project's main settings. Click on the third tab "Sound."
Toggle background music on to release a dropdown that shows the options inside the editor or any .mp3 file you’ve added to your library.
Adjust the volume of this clip and choose if it will loop, fade in or fade out. You can also choose if the background audio will play at a specific point in time.
Any background audio will play under all other audio or video you add to the presentation. So make sure these are balanced and make sense together.
Inside the editor, you have the option of adding individual audio clips to each slide.
Choose from any inside the editor or upload your own. You’ll have the option to trim the length of the audio, its volume and if it loops or fades in and out.
Similar to the background audio, you can choose to start at a specific time during that slide’s progression.
When you add a video file that has audio in it, you can choose to keep the audio or turn it off. The option is inside the video settings in the “muted” tab.
You can add voiceovers to your video presentation in three different ways;
- A track in the background
- An imported clip to each slide
- Recorded over every slide using the Visme voiceover recording feature
Whichever you choose, remember to calculate all the play lengths along with the transitions so that everything flows well.

Now it’s time to review everything and make sure it’s perfect.
First up, do some proofreading of your text to fix any typos or grammatical issues. Make sure all the text is in the correct font and size to stay on brand and maintain a visual hierarchy.
Use the Present button and watch the entire video presentation from start to finish. Take notes along the way of things you notice that need a fix or edit.
If you want to see what the final project will look like to your audience, download a video version and watch it on your video player. Once again, take note of any necessary edits.

You’re done! That was easy, wasn’t it?
It’s time to share your video presentation with its intended audience. Click on the download button and select the MP4 file option.
If your video is especially long or full of features, it will take a bit longer to download. We’ll send you an email when it’s ready so you don’t have to watch the progress bar.
Go get a coffee or take a break for a job well done!
Once downloaded, upload your video to YouTube, Facebook or any of your favorite social media platforms.
If you created the video as part of a larger Visme project, upload it back into your editor. Use your video as part of an interactive report, or for your website, landing pages or email campaigns.
Ready to Create Your Video Presentation with Audio?
Are you ready to create your video presentation with audio? Visme offers all you need to create professional-looking video presentations with audio for any purpose and industry.
With plenty of ready-made presentation templates , you don't need video editing experience. And, since Visme is a web-based app, it doesn't matter if you use a Mac or PC computer.
Video presentations with audio are great for projects like:
- Annual reports
- Explainer videos
- Sales pitches
- E-learning courses
- Pitch decks
- Informational reports
- Advertising
- Explanations
- School reports
- Medical reports
If you’re still doubting if you know how to make a video presentation, just remember to follow the steps in this guide and use the tips in the first section to guide you through the process.
Don’t forget that the ultimate goal for your video presentation with audio is to leave a powerful, lasting impact on your audience.
Sign up for our presentation software and get started right away. Make simple video presentations or rich, interactive and memorable video presentations with audio, animations, characters, links, embedded content and other exclusive features.
Create beautiful presentations faster with Visme.

Trusted by leading brands
Recommended content for you:
![15 Best AI Presentation Makers in 2024 [Free & Paid]](https://visme.co/blog/wp-content/uploads/2023/11/Best-AI-Presentation-Makers-in-2024-Thumbnail-500x280.jpg "how to create a video for a presentation")
Create Stunning Content!
Design visual brand experiences for your business whether you are a seasoned designer or a total novice.
About the Author
Orana is a multi-faceted creative. She is a content writer, artist, and designer. She travels the world with her family and is currently in Istanbul. Find out more about her work at oranavelarde.com
From ideas to screen: How to make presentation videos that shine

What type of content do you primarily create?

Visuals can mean the difference between a killer presentation and a lost opportunity.
For salespeople, it’s difficult to close a deal without business presentations to back up your pitches. For marketers and business owners, video presentations help communicate ideas and share results from projects to ensure future success.
Customers also love high-quality visuals, like branded explainer videos and product tours. They’re the fuel that drives eight in 10 people to make online purchases.
But what makes a good presentation? And how can you engage viewers throughout your video? This guide covers what you need to know about creating video presentations, no matter the purpose.
What is a video presentation ?
A video presentation refers to a sequence of visuals combined with audio to convey information, arguments, ideas, or narratives. It can be about a product, service, internal business reports, or even a topic of interest.
Video presentations can range from simple slideshow-style videos with voiceovers to more complex productions involving animations, live-action footage, music, sound effects , and more.
A good video presentation provides information clearly and concisely. But the best video presentations engage your target audience with professional video quality: a good camera and mic, skilled editing, and a confident presenter.
There are a ton of different types of video presentation formats you can choose from, including:
- Animated explainer videos
- Employee onboarding videos
- Screen recordings
- Training videos
- Product demos
- Microsoft PowerPoint presentations with a talking head
- Sales presentations
- Awards presentations
Benefits of a video presentation
These are great reasons to put in the effort to produce this type of video content.
Enhanced engagement
Video recordings—whether on social media or hosted on your website—are great for engagement and getting your audience’s attention. Wyzowl found that 95% of marketers have said video marketing has helped them increase brand awareness, 90% say it has helped generate leads, and 87% said it has helped them increase sales.
Visual clarity
There's a reason many people suggest something like "If you can learn it, you'll find it on YouTube." The presentation video format is unique in its ability to teach and demonstrate, similar to the in-person experience you'd get with a tutor or salesperson.
The same Wyzowl report found that 96% of marketers say videos have helped increase user understanding of products and services. In short: video helps customers retain your information.
Global reach and accessibility
Video presentations are a great way to reach a global audience. More than half of people say they’re more likely to share a video with others than any other type of content.
A video presentation is also better for accessibility than other content types. With video editing software , you can:
- Easily add subtitles and annotations to your video footage for those with hearing loss.
- Add an audio description voiceover for those with sight loss.
- Change the color filters for those with color blindness.
Personal connection
Building a personal connection with your audience is critical for overall brand engagement. A video presentation, especially one with a person in the video, helps you do that. Research shows that students have positive feelings for videos presented by an instructor, for example.
How to create a video presentation
Step 1. plan and prepare.
Proper planning and preparation can help the rest of your presentation creation process run smoothly.
Think about what you’ll say, and use a storyboard to build out a visual plan of your presentation ideas. Storyboarding your presentation, instead of making it on the fly, will help you stay focused when you fire up your presentation software. (You don’t need to be an artist; just set out the scenes in a way that makes sense to you.)
At this point, start writing the video script for your presentation. You’ll know what to say and when to say it, and won’t fill your presentation up with filler words like “um” and pauses when trying to think about what to say next.
Step 2. Gather resources
After you’ve completed your paper storyboard and script, it’s time to go digital. With Descript, you can build your slideshows into the video editor just like any slideshow tool .
To create a presentation video in Descript:
- Hit New project .
- Import any media (images, infographics, short video clips, GIFs, or sounds) you want to include in your presentation.
- Drop your visuals into the script and edit them into a sequence, or work scene by scene by adding a / at the beginning of each slide.
- Add the background of your presentation, then your script in the left panel.
- Add captions to your presentation by hitting the T icon at the top and choosing Captions.
When you've set up all your slides, you can get fancier and add transitions, extra media, and special effects later.
But maybe you’d prefer to create the presentation using more familiar software, like Prezi, PowerPoint slides, or Google Slides. In that case, you can import the presentation into Descript later or use its screen recording functionality. (If you upgrade your Descript plan, you can create your own video presentation templates to use over and over again, if that’s your style.)
Step 3. Record your presentation video
With your slides all set up, it’s time to turn them into a video. This step is pretty straightforward if you’ve used Descript to make the presentation slides. All you’ll need to do is go to the beginning of the presentation and hit the Record button at the top of the screen:
If, like in the image example above, you’ve written your script into the scenes, change the default setting Record into script to Record new layer . This preserves your script so you can read from it whil recording your presentation video.
Decide if you want to record a voiceover only (leaving the record option as Audio only ), or add a floating head video with your webcam to show yourself as the speaker by clicking the Screen option. Either way, go through your script as the slides move along.
If you created your presentation in another software like Google Slides, there may be no built-in option to record your presentation over the slides. In that case, use Descript’s screen recorder to film your screen with audio. The video file will be ready and waiting for you in the video editor when you finish recording.
Step 4. Edit and enhance
At this point, you’ve got the basic presentation down. It’s time to bring out your inner filmmaker and turn the slideshow into something special.
With Descript’s free video editor, you can:
- Add title screens to introduce your presentation.
- Choose from a library of background music.
- Change the fonts of your captions and any other text layer.
- Add cool slide transitions.
- Improve audio quality with Studio Sound .
Descript’s video editing is different (and easy) since you can edit the video using the script instead of a traditional timeline editor. This makes the process super efficient since you can quickly identify what needs cutting. Simply delete the part of the script you don’t want, and the accompanying video will disappear.
Step 5. Review and fine-tune your video
What makes Descript extra special is the ability to edit your audio by taking out filler words you might have accidentally recorded. Remove “ums,” “uhs,” and awkward pauses in a single click with filler word removal .
If, like me, you also have a habit of forgetting to say something important, you can use Descript's Overdub feature to add those few missed words without re-recording the whole scene. The software will create an AI clone of your voice to fix audio mistakes.
With your video presentation fine-tuned, you’re ready to save and share it with the world. Click the Publish button in the top right corner and download the MP4 file, or export it directly to a platform like YouTube or Wistia.
6 key elements for crafting a great video presentation
Now you know the practical how-tos of making a presentation video, let’s look at some key elements that turn a good video presentation into a great one.
Clear and engaging content
Visual appeal, narration and voice quality, engagement techniques, structure and flow.
- Audience-centric approach
No one likes feeling confused. If your presentation isn’t clear, you’ll end up frustrating your audience. A nice trick for clarity is to imagine you’re explaining your presentation to a child; don’t use big words to sound smart. Presentations that are clear from the start are naturally more engaging.
Gone are the days of 360p Nokia footage. Even if you don’t have a professional camera setup, you can still record a video on a PC, phone, or webcam with high quality. But don’t forget about the images and text overlays. No one wants to try deciphering pixelated visuals—use the highest quality video resolution you can.
Even the best-quality video presentation can be ruined by bad audio. Poor-quality narration is hugely frustrating to viewers. Prioritize your audio quality, especially for information-rich videos like presentations, and use Studio Sound to remove distracting background noise from your presentation video.
When it comes to video presentations, you should think like a salesperson. You can't expect your audience to believe the information you give them if they don't trust you. Engage your audience by telling a personal story, describing relatable scenes, or emphasizing important points throughout your video.
Treat your presentation like a story with a beginning, middle, and end. Information should flow nicely from one point to the next. Do a test run through your slides before you start recording to ensure any questions don't crop up prematurely because the viewer thinks you haven't covered it (when you do a few slides later).
Learn: Narrative structure: How to compose the best story for your footage
Audience-centric approach
It's pretty much always to the audience's benefit when you make a presentation video, so you shouldn't focus too much on yourself. Address your audience's needs and go above and beyond to answer any questions they may have. Otherwise, why would they listen to you?
5 tips to help you craft remarkable video presentations
Now we know what makes a great presentation video, here are five bonus presentation tips to create yours.
1. Practice and rehearse
You won’t always get it right the first time, and that’s okay. But the more you practice before hitting record, the better your presentation video will be—and the less legwork you’ll need to do throughout the video editing process.
2. Invest in good equipment
Top-notch equipment makes your life easier throughout the video creation process. Replace your webcam with your iPhone to improve picture quality, and invest in editing tools that allow you to record and edit in the same dashboard.
3. Optimize lighting
Another area where you can improve the quality of your video is the lighting technique . If you have the budget, you can use a simple ring light, but if you don’t have the cash to invest in video equipment, use natural light (such as a window) behind your camera.
4. Engage with eye contact
If someone was talking to you and they weren’t looking at you, you’d probably be a little confused or uncomfortable, right? It’s the same with video. Look into the camera when making video presentations to simulate real eye contact with your audience. If you forget, use Descript’s Eye Contact AI effect to fix it.
5. Keep it concise
If you waffle on with unnecessary information or get sidetracked on a story, you’ll lose your audience’s attention, and they’ll click away or switch off. Stick to your video script and keep your presentation concise.
Elevate your video presentations with Descript
Creating an informative and engaging video presentation isn’t the easiest task in the world. You’ve got to know your audience and what they want, present the information confidently, and do it with visually appealing content.
With Descript, you can take your presentation video to the next level with an editing experience that allows you to:
- Record your screen on a Mac or Windows device
- Create and record slides (with voiceover) in one dashboard
- Remove filler words with a single click
- Use Studio Sound to remove background noise from your presentation
- Turn your presentation into a YouTube video, or download it as an MP4 file
Take a free tour of Descript and see why thousands of creators love its video editing platform.
How to make presentation videos FAQ
How do i make a presentation video for free.
- Choose a slideshow software like Descript
- Create your slides
- Add transitions
- Record your voiceover
- Edit your presentation
- Share your video
How do I video myself when presenting a PowerPoint?
Use PowerPoint’s built-in recording feature and choose the “Cameo” option to record yourself when presenting. Or, use Descript’s screen recording feature and have the presentation ready for editing when you finish recording.
How do I make an audio-video presentation?
If you don’t want to record yourself on video, use a screen recorder to film your presentation slides. Video presentation makers like Descript allow you to record a voiceover.
Related articles

Featured articles:
Articles you might find interesting
Product Updates
Descript Season 5: SquadCast joins Descript. Easy, reliable remote recording + editing in one place
With the acquisition of SquadCast, Descript now offers reliable, easy remote recording for audio and video

12 places to find podcast intro and outro music
Here's why you need to be careful where you find podcast music — and 12 places to find usable audio.
.jpg)
How to use background music in your podcast
Here, we share some tricks for selecting good background music for podcasts. We also offer an overview of music licensing, including copyrighted music in podcasts.

How Descript Helped Produce The Sharpest Political Ad of the Season
Descript’s magic lies in its simplicity: It transcribes audio and video and allows you to edit the underlying media by editing the transcript. Harnessing that simplicity in creative ways enables editing workflows in Descript that would be overwhelmingly laborious and time-intensive in other traditional media editors. In a nutshell, that’s the story of how political coalition Republican Voters Against Trump (RVAT) used Descript to edit down hours of footage of Senator Lindsey Graham’s own words into a razor-sharp ad that went viral on Twitter and made waves in American news media.

How to make a boomerang: 2 creative ways to capture the perfect loop
Explore two ways to create a boomerang video in our guide and see how Descript makes it a breeze for stunning results.

The YouTuber’s guide to the curiosity gap: How to keep your audience’s interest
Keeping your audience watching throughout your video is one of the best ways to succeed with the YouTube algorithm. The curiosity gap is the way to do that. Here's how.

Join millions of creators who already have a head start.
Get free recording and editing tips, and resources delivered to your inbox.
Related articles:
Share this article
The ultimate guide to making video presentations
Heads up! This content is relevant for Clipchamp for personal accounts. Try this link If you're looking for information about Clipchamp for work accounts.
On this page
What is a video presentation?
Benefits of video presentations, popular video presentation formats , how to plan your video presentation, branding for video presentations, crafting voiceovers for video presentations, how to create an engaging video presentation , downloading format options for video presentations, repurposing video presentations, bonus tips to make your video presentations stand out .

Are you looking for innovative ways to share information with your team, students, or followers? Engage your audience with captivating video presentations they can watch anytime, anywhere.
Did you know that 83% of people prefer watching videos over reading or listening to information? This makes video presentations more impactful than traditional slides. Luckily, creating a video presentation is easy with a little planning and an online video editor like Clipchamp . Read on to learn how to make fun and effective presentation videos.
A video presentation combines videos, images, webcam footage, voiceovers, and animations to deliver a message. It’s a great alternative to tried-and-tested formats like PowerPoint.
Presentation videos are useful to share with groups and remote teams working asynchronously, to enliven online learning and even generate customized marketing and sales presentation pitches. Depending on the content, video presentations can be created to be shared and repurposed or be edited to match the presenter’s needs.
Video presentations are becoming increasingly popular due to their ability to engage audiences and convey information in a dynamic and visually appealing manner. Here are some key benefits.
Enhanced engagement
Visual and auditory elements in video presentations capture and hold viewers' attention more effectively than static text or images alone.
Interactive features, such as clickable links or embedded quizzes, can further increase engagement.
Versatility
Video presentations suit various purposes, including education, marketing, business pitches, and more.
They can be tailored to different audience needs and preferences, making them a flexible communication tool.
Improved accessibility
Videos can be easily shared and viewed across multiple devices and platforms, making them accessible to a wider audience.
They can be hosted on websites, shared via social media, or distributed through email, ensuring broad reach.
Retention and understanding
Combining visual and auditory information helps improve comprehension and retention of the presented content.
Using storytelling techniques and clear visuals can make complex information easier to understand.
Professionalism
Well-crafted video presentations can enhance your professional image, making your message appear more polished and credible.
High-quality visuals, animations, and voiceovers can elevate the production value.
1. Slideshow presentation video
We’re all familiar with making PowerPoint slides. A slideshow presentation video takes this to the next level. Instead of static backgrounds and tiny bullet points, a slideshow presentation video allows you to tell a story. It's a creative way to present information.
Start by arranging stock video backgrounds to create the foundation of your video and place smooth transitions between slides or topics. Share your key messages using animated texts, lower thirds and graphics which make your video memorable. You can stop here, or add a webcam recording or record an audio voiceover .
It’s a popular format for school projects, corporate intro videos, and even product launches, and the process can be simplified even further by using an online video presentation maker.
2. Video presentation with audio narration
Another effective video presentation format is when you create a screen recording of a website, process, workflow or PowerPoint presentation and add a voiceover to guide viewers. It’s comparatively low effort to a slideshow presentation video, but still ensures engagement from viewers. With new tools like lifelike text to speech generators , narrations can be created in global languages in just a few minutes.
Effortlessly record your screen online, trim away unnecessary frames and use graphics like arrows and circles to highlight key points. Next, type your ideal video voiceover and let AI create a flawless voiceover that explains your video well.
This is a great video solution if you’re trying to whip up a group presentation by collecting information from different team members as it can help you make a consistent and high-quality video. It’s also super useful if you’re hosting an online learning session, webinar or creating a demo video .
3. Video presentation with talking head
Wait, what’s a “talking head”? It simply refers to when a webcam recording is inserted into a presentation video to make it easy to follow. This may be bad news for the camera-shy presenters out there–adding your friendly face captures the attention of your audience while building interest and trust in your presentation.
The good news is that such videos are super easy to create. Simply record your webcam footage online and layer it on top of your slideshow presentation video . Finetune the size of your webcam video, overlay the video in a corner or place it side-by-side with your presentation visuals. Don’t forget to add captions to make your video stand out even when played on mute, like on social media feeds.
Sales, explainer videos, and even video resumes can benefit from the personal touch of a talking head presentation video.
4. Animated presentation video
Evoke emotions from your viewers when you create an animated presentation video. While there are whiteboard animation softwares out there, that’s not the only option in this format. If you think a cartoon character could educate your class, tell your business story or simplify a big idea, consider this video format. If you’re wondering how that would suit your budget (or lack of), explore free cartoon stock videos and turn up your creativity to make them suit your needs.
Remember that choosing the right background music, adding your brand logo and adjusting the aesthetics of your stock video (like adding a filter) can truly help your video look custom-made.
Identify your main audience: Choose your key audience, whether it’s potential or existing customers, colleagues, or others. Map their needs, interests, and pain points to help you create valuable content.
List your key messages: Identify the main points to convey in the video, and prioritize them based on how relevant they are to your viewers. Make sure they match your video’s goal and are crafted in a way that’s useful to your main audience.
Consider your video’s lifetime: Consider where you’ll host, post, or share your video, how long it will stay current and relevant, and whether it will need revisions.
Decide your branding needs: Don’t miss a good branding opportunity. Think about adding your logo , brand colors or other elements that link your presentation video closer to your brand.
Create a script or storyboard: Structure matters! Plan out the content and flow of your video in advance to help achieve its goals. A storyboard is a shot-by-shot outline of what main frames in your video will look like. If your video only needs a voiceover, write a script so your visuals match the audio narration .
Consider audio and video tools: If you aim for a professional look and feel, choose your toolkit wisely. Clipchamp is an easy online tool that can record your screen and webcam , generate voiceovers, and even has royalty-free stock and video elements to confidently edit video presentations.
Nothing says "we've got our act together" like using your company’s logos, colors, and fonts throughout your presentation videos to reinforce your brand recognition. Adding your branding shows attention to detail and commitment to quality, which makes a good impression on your viewers.
Incorporating strong calls-to-action (CTAs) with logos into presentation videos can encourage viewers to take the next step and boost your conversion rates. According to a study by Lucidpress, consistent branding can increase revenue by up to 23% . That's why Clipchamp makes it easy to customize videos to match your corporate identity using our brand kit feature , ensuring your presentation maintains a professional and cohesive look.
Use branded fonts and colors to make your slideshow videos and presentations easy to identify, no matter where they are shared.
A well-crafted voiceover script is key to delivering a clear and engaging presentation. Here are some tips to help you write an effective script for a presentation.
Keep your script conversational: write your script as if you’re speaking directly to the audience. Use simple language and avoid jargon to make your narration relatable and understandable. If you need help with writing, try these useful AI prompts to write video scripts .
Be concise: assume your viewers have short attention spans and keep your sentences short and to the point. Break down any complex information into bite-sized pieces.
Emphasize key points: repeat or summarize key points to highlight the most important information.
If you're recording your own voice, leverage the simplicity of the voice recorder feature in Clipchamp to produce voiceovers with ease. It's good to practice your delivery to sound more natural and confident during the actual recording.
Voice recordings not your thing? Try our AI voiceover generator instead .
Step 1. Create video slides or record your screen and webcam
To import your own presentation videos, photos, and audio, click on the import media button in the your media tab on the toolbar to browse your computer files, or connect your OneDrive.

You can also use free stock media like video clips, photos, video backgrounds, and GIFs. Click on the content library tab on the toolbar and click on the visuals drop down arrow, then videos, photos, or backgrounds. You can also use the search bar to search through the different stock categories.

If you would like to record your presentation, click on the record & create tab on the toolbar, then record using either screen and camera, camera, screen or audio options .

Drag and drop your media onto the timeline side-by-side to create a slideshow video.

Step 2. Edit your video presentation
To trim the length of your video , click on the video on the timeline so it’s highlighted green. Move the handles to the left of the timeline to trim the video length. If you trim too much footage off your video, just drag the handle back to the right to recover your footage.

To crop your assets , click on the video so it’s highlighted green on the timeline, then click on the crop button on the floating toolbar. Here, you can freely crop away unwanted areas of your video using the cropping handles. Click on the done button when you’re finished.

Step 3. Add transitions, animated text and stickers
Add transitions between clips by clicking on the transitions tab on the toolbar. Drag and drop a transition onto the timeline between two videos. Repeat this process for the rest of your videos added to the timeline.

Place text and titles on your video by clicking on the text tab on the toolbar. Drag and drop a title onto the timeline above your video. Use the text tab on the property panel to customize your title.

Overlay stickers onto your video by clicking on the content library tab on the toolbar. Next, click on the visuals drop down arrow, then select stickers, shapes & annotations, frames & borders, or overlays . Search through the categories then drag and drop an asset onto the timeline above your video.

Step 4. Preview and save your video presentation
Before saving your new video, make sure to preview using full-screen mode . When you’re ready to save, click on the export button and select a video resolution. For the best quality, we recommend saving all videos in 1080p. Paid subscribers can save in 4K video resolution.

Once your video presentation is complete, it's important to know how to export and share it effectively. Clipchamp offers multiple exporting formats such as MP4 and GIF.
We recommend saving video presentations in 1080p video resolution for high-quality playback wherever you choose to share it, including social media, website, and email. You can also explore different exporting options (like seamless OneDrive integration ) in Clipchamp to find the right balance between quality, convenience, and file size.
Get the most bang for your video presentation buck by repurposing it for different uses. Here are some ideas.
Presentation teaser
Create a short highlight video from your presentation to share with external customers or internal employees. This gives them a sneak peak of what to expect from attending the meeting or watching the video presentation.
Embed into email campaigns
Embed your video presentation into newsletters to provide additional value to your readers. Repurposing content in this way extends its reach and impact.
Video clips for websites
Trim and create video snippets that could support users searching for information on your website. This can also drive traffic back to your full presentation.
Adjust the colors or apply a filter to help your webcam videos look and feel consistent, especially if you are combining webcam footage from more than one speaker.
Share additional information to support your visuals, from locations, names of speakers, or key takeaways using animated lower thirds .
Highlight important sections in your screen recording using a colored shape like a hand drawn circle to give your presentation a polished look.
Choose presentation background music that complements your video goals and doesn’t overpower the video narration, if any.
Use an intro and outro slide to make a lasting impression. It can be as simple as a logo animation .
Add captions to your video to make it accessible and easy to view even when on mute.
Frequently asked questions
Can i turn my powerpoint into a video presentation.
Yes, you can save your PowerPoint presentation as an MP4 file directly or use the screen recorder in Clipchamp to record your screen instead. When you’re happy with the recording, you can edit it in the timeline.
How to end a video presentation?
It depends on your video’s goal. Corporate presentations usually end with a reminder of the brand name or animated logo, and some call-to-actions to learn more on the website or email the contact person.
Easily create captivating video presentations in Clipchamp and share your video with ease on social media or OneDrive.
Learn more ways to create videos trouble-free with our beginner-friendly video templates or get inspired with these great explainer video examples .
Start editing with Clipchamp for free or download the Clipchamp Windows app.
More from the Clipchamp blog

How to make an image transparent

How to change image background color
How to make a logo transparent
Start creating free videos with clipchamp.
Home Blog Presentation Ideas Video Presentations: A Guide for Engaging Content
Video Presentations: A Guide for Engaging Content

In a time when the Millennials’ attention span can be measured as little as 12 seconds, how can we create genuinely engaging presentations? Is continuously changing slides the answer these days?
A skilled presenter has to master different techniques; therefore, we will examine the potential for video presentations. Join us to discover what video presentations are, the reasons why you should use them amongst your presentation tools, and exciting tips on how to drive engagement from them.
Table of Contents
What video presentations are
Video presentation stats to consider, different types of video presentations, why should you use video presentations, what are the components of a winning video presentation, the role of accessibility: advanced research on video presentations, 5 tips on how to make your video presentations engaging.
- How to create a video presentation
Do you need special software to create video presentations?
Closing thoughts.
Presentations are a crucial part of business and academic environments. Thousands of presentations are delivered each day in different environments; still, many are doomed to fail. Although we can blame this on a lack of proper presentation skills , reality tells us there’s a change in how people prefer to see the content.
As a general rule, consider 10 minutes the Goldilocks Zone for traditional presentations in what comes to audience engagement . Inspirational presentations like the ones we see on TEDx don’t follow this rule, as the objective here is to share a compelling story as detailed as possible so the audience can relate. In some cases, academic presentations of the thesis defense style remain loyal to a specific format. Still, trends are also changing, and video presentations have much to offer in terms of exposing complex concepts more plainly.
A video presentation can be represented in multiple formats: as a compendium of animated slides in video format, video files and audio sources packed on a single video file, a video recording made in interview format, a video documentary, etc. Although this definition may sound redundant, the concept behind a video presentation is that they don’t require a presenter to change between slides or windows to browse different assets . Hence, the importance to create a story behind the video presentation, so the various elements don’t feel segregated without logic.
We can say people use the video format to convey information in courses, job training, edutainment, conferences, and any kind of message-sharing purpose that requires connecting with the audience for engagement.
Before dwelling on the specifics of building a video presentation, here we share some video presentation stats that speak about the importance of video presentations these days from a marketing perspective.
- Online search continues to be the most common way (45%) for users to find instructional and informational video content. ( source )
- The most commonly-created types of videos are explainer videos (72%) , presentation videos (49%), testimonial videos (48%), sales videos (42%), and video ads (42%). ( source )
- 57% of consumers said that product videos make them more confident in a purchase and less likely to return an item ( source )
- Millennials’ attention span can be measured as little as 12 seconds ( source )
- A minute of video is worth 1.8 million words in terms of information retention ( source )
As you can see, the effort of building a video presentation is well-paid in terms of consumption and content information retention from the audience.
Depending on the requirements of the presentation itself, we can classify video presentations as follows:
In-Company Video Presentations
These video presentations belong to the business and corporate world, but their purpose is to distribute information among coworkers or to coach the personnel for a specific requirement. In-company video presentations are used in workspace training, as part of internal recruitment processes, or other kinds of internal presentations.
In-company video presentations usually carry the company branding; they have restricted access for people outside the organization, so their distribution methods happen in meeting rooms dedicated to these purposes.
Business Video Presentations
Business video presentations are used for a variety of business purposes: business pitches, workspace training, advertisement, product releases, recruitment, and more. Business video presentations also include the ones dedicated to B2B or B2C relationships.
Like In-Company Video Presentations, they carry branding to identify the video presentation’s author quickly. They are shared through official mediums for the company (like a brand’s social media channels and website), during corporate meetings with investors or potential business partners, and through 3rd. party channels.

Examples of these kinds of videos are product launch sessions, much like what tech giants like Xiaomi do.
Another kind of business video presentation is the explainer video. Explainer videos can be defined as short online marketing videos that are used to explain the company’s product or service. Explainer videos are commonly used for sales, marketing, and training purposes. Here is a real example of a 1-minute video presentation introducing SlideModel.com.
Another application of business video presentations is when sponsorship deals are involved, as brands can present their value to influencers through short reels.
Resume Video Presentations
This is a relatively recent but incredible turn of resume presentations. In resume video presentations , the candidate offers a detailed introduction of their capabilities, skills, interests, and potential value to the employer in a visually engaging format.
Unlike traditional CV presentations, the video format gives little room for anxiety, answering most of the interviewer’s questions or even driving admiration for the effort and dedication to this job-hunting adventure.
We recommend the usage of resume presentation templates for this purpose, as they save tons of time in crafting a high-quality resume video presentation.
Educational Video Presentations
This category can be divided into three different sub-categories:
Academic Video Presentations
Intended for University-level presentations or post-Doctorate work, these presentations follow strict format guidelines. They are mainly designed to distribute data comprehensively, with proper documentation backup. Animations usually don’t take part in these video presentations.
Despite being commonly associated with business events, conferences also belong to the academic video presentations category, as the live sessions are recorded to spread the message about important research discoveries.
Teaching & Training Video Presentations
Teachers introduce the presentations to their students on various topics to understand abstract issues better. Chemistry, Physics, and Geography are typical examples of subjects that use video presentations. However, subjects like History and Philosophy can save countless hours of whiteboard sessions by using educational video presentations.
Webinars fall under this category, either being released to the public or in-company webinars, as they share common aspects in their structure. Do keep in mind that educational content recorded as video presentations is not the same as a webinar, as the latter requires the presence of a live audience, a moderator, and usually a Q&A session at the end of it. If we talk about educational content being recorded and released as a course platform, then we can say it is a workshop.
According to recent studies, visualizations through video presentations and video-based learning can enhance understanding. It is demonstrated that students who watched learning videos on Statistics, influenced engagement and motivation positively .
Student Video Presentations
Finally, students also make video presentations as requested by their teachers to present a lesson or project exhibition. These presentations vary as the students grow older, becoming less dependent on animated effects, setting the bases for future work or academic presentation formats.
Informal Video Presentations
If you remember seeing videos in situations like 50th birthday parties, baptisms, wedding anniversaries, etc., then you have already experienced informal video presentations.
These informal presentations are free from any format restriction. As the term implies, they are used for any kind of meetup, making it simpler to share a story rather than to tell a lengthy story.
Inspirational & Motivational Video Presentations
The final category belongs to the video presentations with a strong emotional component. They are built to connect, to empathize with the audience in specific situations or problems. Examples of this are TEDx , Evan Carmichael, or similar influencing platforms.
In general lines, motivational video presentations are recordings of live events shared with the purpose of getting the message to the biggest audience possible (internet consumers). Another possible format for these presentations is recorded interviews or testimonials intended to speak about a person’s contributions to society. An example of this, from an organization’s point of view, are the videos produced by the UK’s NHS to highlight and thank their medical personnel for their efforts during the COVID-19 pandemic.
Inspirational video presentations share common aspects with motivational speeches. A list of requirements for these video presentations would be:
- Have a clear purpose
- Make it personal
- Get the message tailored for the target audience
- A strong conclusion
Compared with traditional presentation methods, such as presentation slides or speaking in front of an audience, video presentations can offer a series of advantages.
For starters, as you write the “ story ,” you are also rehearsing the points to be covered. In that way, anxiety or shyness won’t trigger you to forget about essential points or lose track of time. The length of the presentation can be predetermined, depending on the external requirements of the organization party, or how comprehensive or concise you need it to be.
In the case of people struggling with camera shyness , an animated video presentation with voiceover is the answer to deliver quality work. Since psychologists and doctors agree the common point on fear of public speaking is the delivery of the presentation itself, video presentations shall reduce work-induced anxiety to a great degree. Since psychologists and doctors agree the common point on fear of public speaking is the delivery of the presentation itself, video presentations shall reduce work-induced anxiety to a great degree. You can also convert images to video online using video editor platforms to easily create video from images and voiceover on video.
Video presentations can be persuasive thanks to the usage of graphics and audio. It is far easier to convey emotions through video presentations than to put them in the presentation design. Also, research by Dr. James McQuivey proved that a minute of video is worth 1.8 million words in terms of information retention.
Regarding engagement, the popularity that both TikTok and YouTube gained among the younger generations reflects the behavioral changes in content consumption . It has come to the point that even professionals use TikTok to demystify health hoaxes and help users worldwide. Therefore, using video format for presentations can help to boost your presentation performance, making it attractive for your audience and less effort-demanding.
The most significant factor in delivering a successful video presentation is keeping the audience engaged. To ensure this, make sure the presentation doesn’t feel robotic-like but that it conveys a personal message. Don’t get this point wrong if we talk strictly about business or academic scenarios; making video presentations to deliver your personal touch can become as simple as selecting the proper color combination to enforce your message . Other solutions come from watching your voice tone not to make it too monotonous.
Structure your presentation accordingly. In business or academic video presentations is a good idea to introduce a slide in the fashion of a table of contents . It is an extra touch that brings the audience closer to the topics due to be discussed.
Consider the audience’s perspective as a vital element in video presentations. Check relevant examples of the topic discussed on platforms such as YouTube or DailyMotion. Compare their approach to yours and assert if you would watch your presentation as a spectator or not. This simple test gives insights into which aspects you should work on.
Winning video presentations never miss the usage of CTAs. It’s a good method to direct the audience’s interest to a specific goal.
Video presentations can become an incredible tool for driving engagement, yet there is a problem that not so many presenters address: accessibility. Think about how many times a presenter ends a phrase like “over here,” assuming the audience is watching the item being shown. But what if members of the target audience have visual impairments?
Much like we consider the importance of adding Closed Captioning (CC) to our videos, accessibility in terms of the narrative is a must. On this behalf, we want to introduce an interesting research that led to the production of a tool named Slidecho . Using state-of-the-art technology like video scene detection, AI, and OCR, Slideshow follows these very steps:
- Step 1: Extract slide frames
- Step 2: Selecting slide elements
- Step 3: Detecting described elements from the slide elements
- Step 4: Aligning slides with the speech
Therefore, Slidecho uses an algorithmic methodology to extract the visual elements from the slides, converting them to an audio reading format whilst aligning it with the original speaker’s narration. Moreover, its interface instantiates new interactions that augment the plain video interface with synchronized slide information and audio notifications to alert users to undescribed elements.
This technological advance helps the audience better understand what is being presented, regardless of the context of the presentation. Imagine an award ceremony where many references apply to visual cues. People with visual impairments get half of the message, with luck, when presenters fall into colloquial language usage, not understanding the context or having to ask for clarification. If instead, the synced narration is available, we then talk about making presentations available for everyone. This is an accurate definition of enriching an event experience.
If we talk about attending to the needs of people with hearing impairments, we have to consider the social factor as a motivator in presentations. It is a common mistake to leave slides filled with text and voiceover narration in the background providing detailed information. A study made by Stanford University speaks about the value of having the presenter’s face available through these slides, as it delivers both social cues plus helps users through lip reading. The human factor also reduces distractions since the audience must check the presenter’s input on written slides.

Tip #1 – Be mindful of the presentation topic
It’s not the same to create a presentation for a business audience as an inspirational presentation. The category of the presentation shall determine items like
- Background music
- Color theme
- Visual hierarchy
- Videos to include
Tip #2 – Limit the number of words to include
The whole idea behind the video presentation is to make a dynamic presentation, not having to pause every 5 seconds to allow the spectator to read.
Instead, use words to transmit powerful messages, such as quotes relevant to the presented topic, key information, or CTAs. Use the 7×7 rule: no slide should have more than 7 lines of text, and no sentence should have more than 7 words.
Tip #3 – Voiceovers can become your best friends
The whole point behind a video presentation is not to create a boring one-person video speaking in front of the camera. Use voiceovers effectively to introduce charts, data feedback, etc., with your voice connecting the points of the entire presentation.
Be mindful of the tone. A monotonous or flat tone can divert attention and induce people to ignore your work. Your voice skills should articulate the importance of the point being discussed as well as your interest in it.
Tip #4 – The power of transitions
Adding suitable transitions and animations makes the presentation more engaging . However, this isn’t equal to adding countless effects. Less is more.
Ask a professional for guidance if you don’t have experience with animation effects. The transition can be part of the conversation, being subtle if the presentation is flowing between data sets or similar topics, or contrasting and powerful to deliver a persuasive message. You may also want to insert a transition when you’ve used a video cutter to remove an unwanted part to smooth out the video flow. Don’t abuse any of the two extremes, or the audience may find it uncomfortable.
Tip #5 – Make video presentations accessible
As we mentioned before, quite often presenters assume the audience can understand every part of a video presentation. Reality tells us to attend to the needs of people with visual and auditory impairments by making audio and video media accessible .
Subtitles or translator screen-over using sign language is a perfect opportunity to help people with auditory impairments feel part of the presentation, making the message available to them as well.
For people with visual impairments, be mindful about how you create the narrative for your presentation, in particular, avoiding visual cues like: “over here,” “this,” and “there” and gesticulating over an object or person, assuming everyone can get the same reference information. Instead, opt to be descriptive in your speech; software solutions can help a great deal, but you can also use native PowerPoint or Google Slides tools such as voiceovers .
How to create a video presentation & recommended video presentation templates
You can create your own video presentations as easily as using Microsoft PowerPoint, Apple Keynotes, or Google Slides.
Check these links for relevant information on how to create a video presentation:
- How to Convert a Google Slides Presentation to a Video
- How to Convert a PowerPoint Presentation to a Video
- How to Embed a YouTube Video in PowerPoint
In case you feel stuck about which content to input or how to make your video presentation outstanding, a brainstorming technique can do wonders for interactive presentations and creative thinking. It is known as the SCAMPER technique .
Since video presentation templates make our life easier, we also recommend you check the following product categories to access extremely visually appealing designs created by professionals to help you deliver your message in style:
- Animated PowerPoint Templates
- Animated Text Banner Templates
- Academic PowerPoint Templates
- Business PowerPoint Templates
- Marketing PowerPoint Templates
Additionally, here you can preview some of our presentation templates that you can use to create a video presentation in PowerPoint.
1. Animated PowerPoint Charts Collection Template

Present data in a visually appealing format by using this collection of animated charts in PowerPoint. Fully customizable, this template brings ease to speak about data-driven presentations; hence becoming a vital asset for any presenter in the corporate world.
Use This Template
2. Animated Network Diagram PowerPoint Template
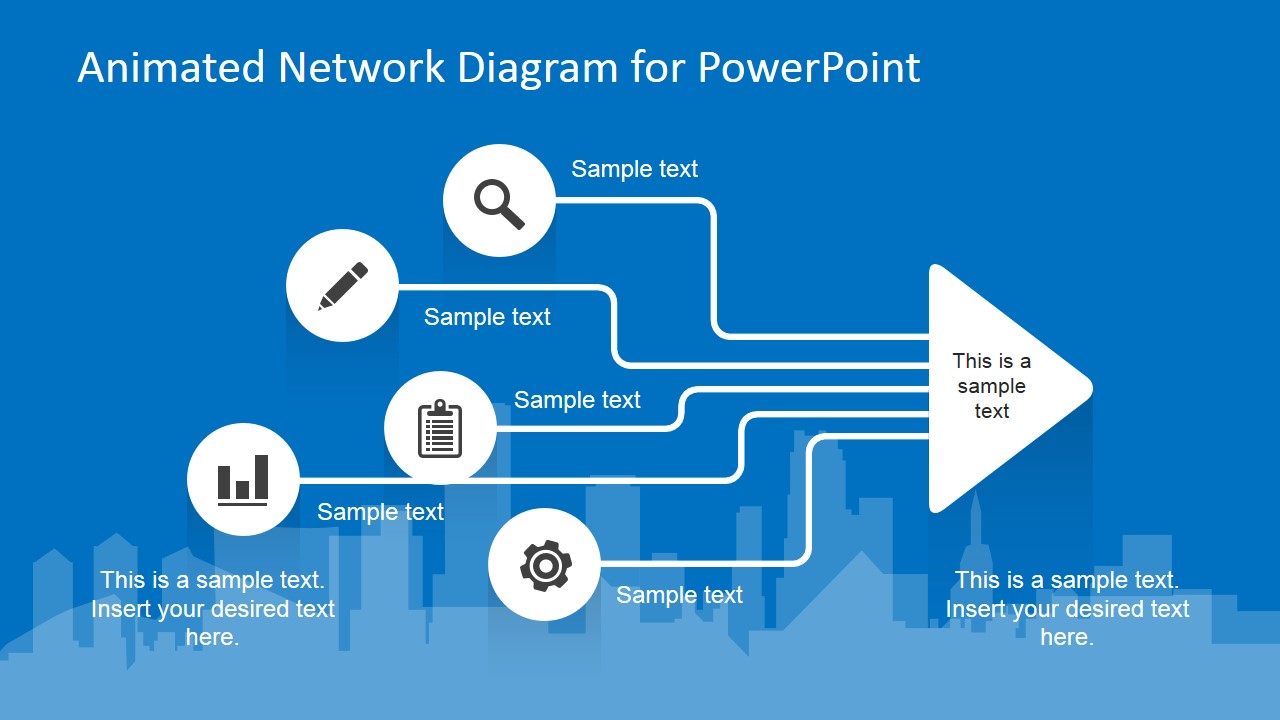
Simplify the different streams that take part in your project or product release with the help of this animated template design. This Animated Network Diagram template can help you expose the processes that, with integrated effort, evolve into a successful outcome. It has animations applied to the objects, plus transitions to make the presentation more fluid.
Fully editable with any version of PowerPoint.
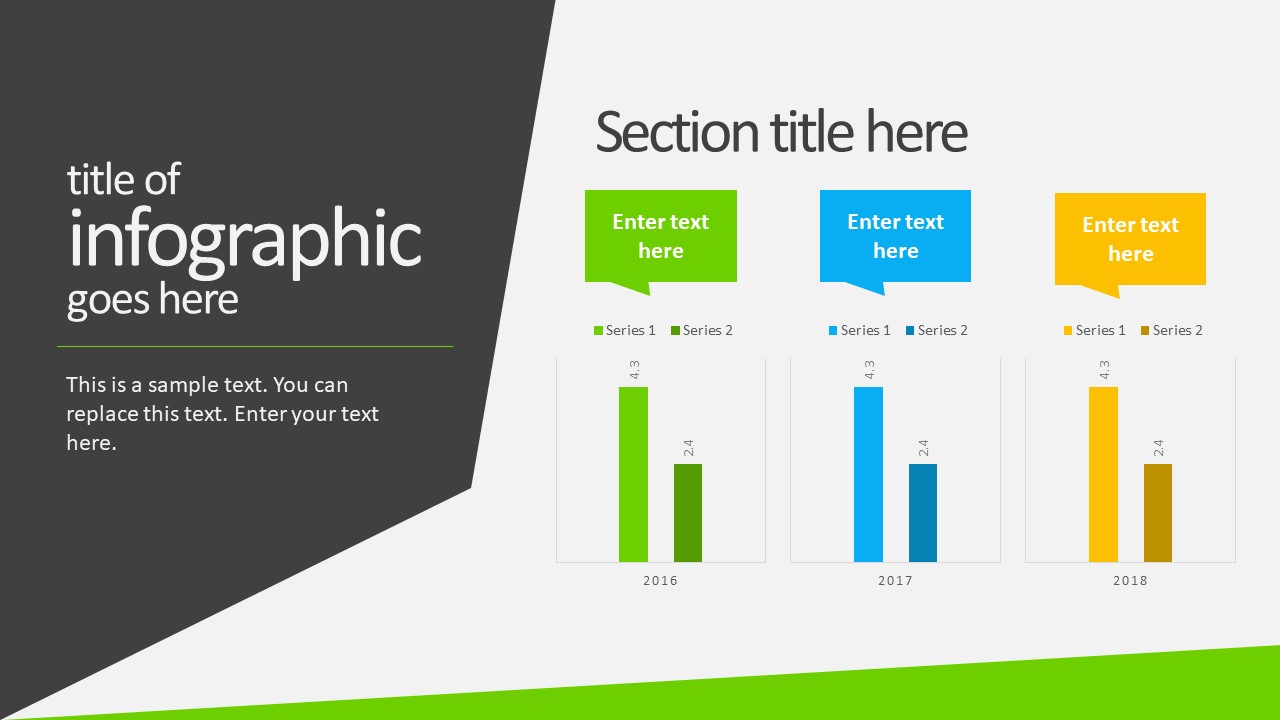
3. Free Animated Editable Professional Infographics PowerPoint Template
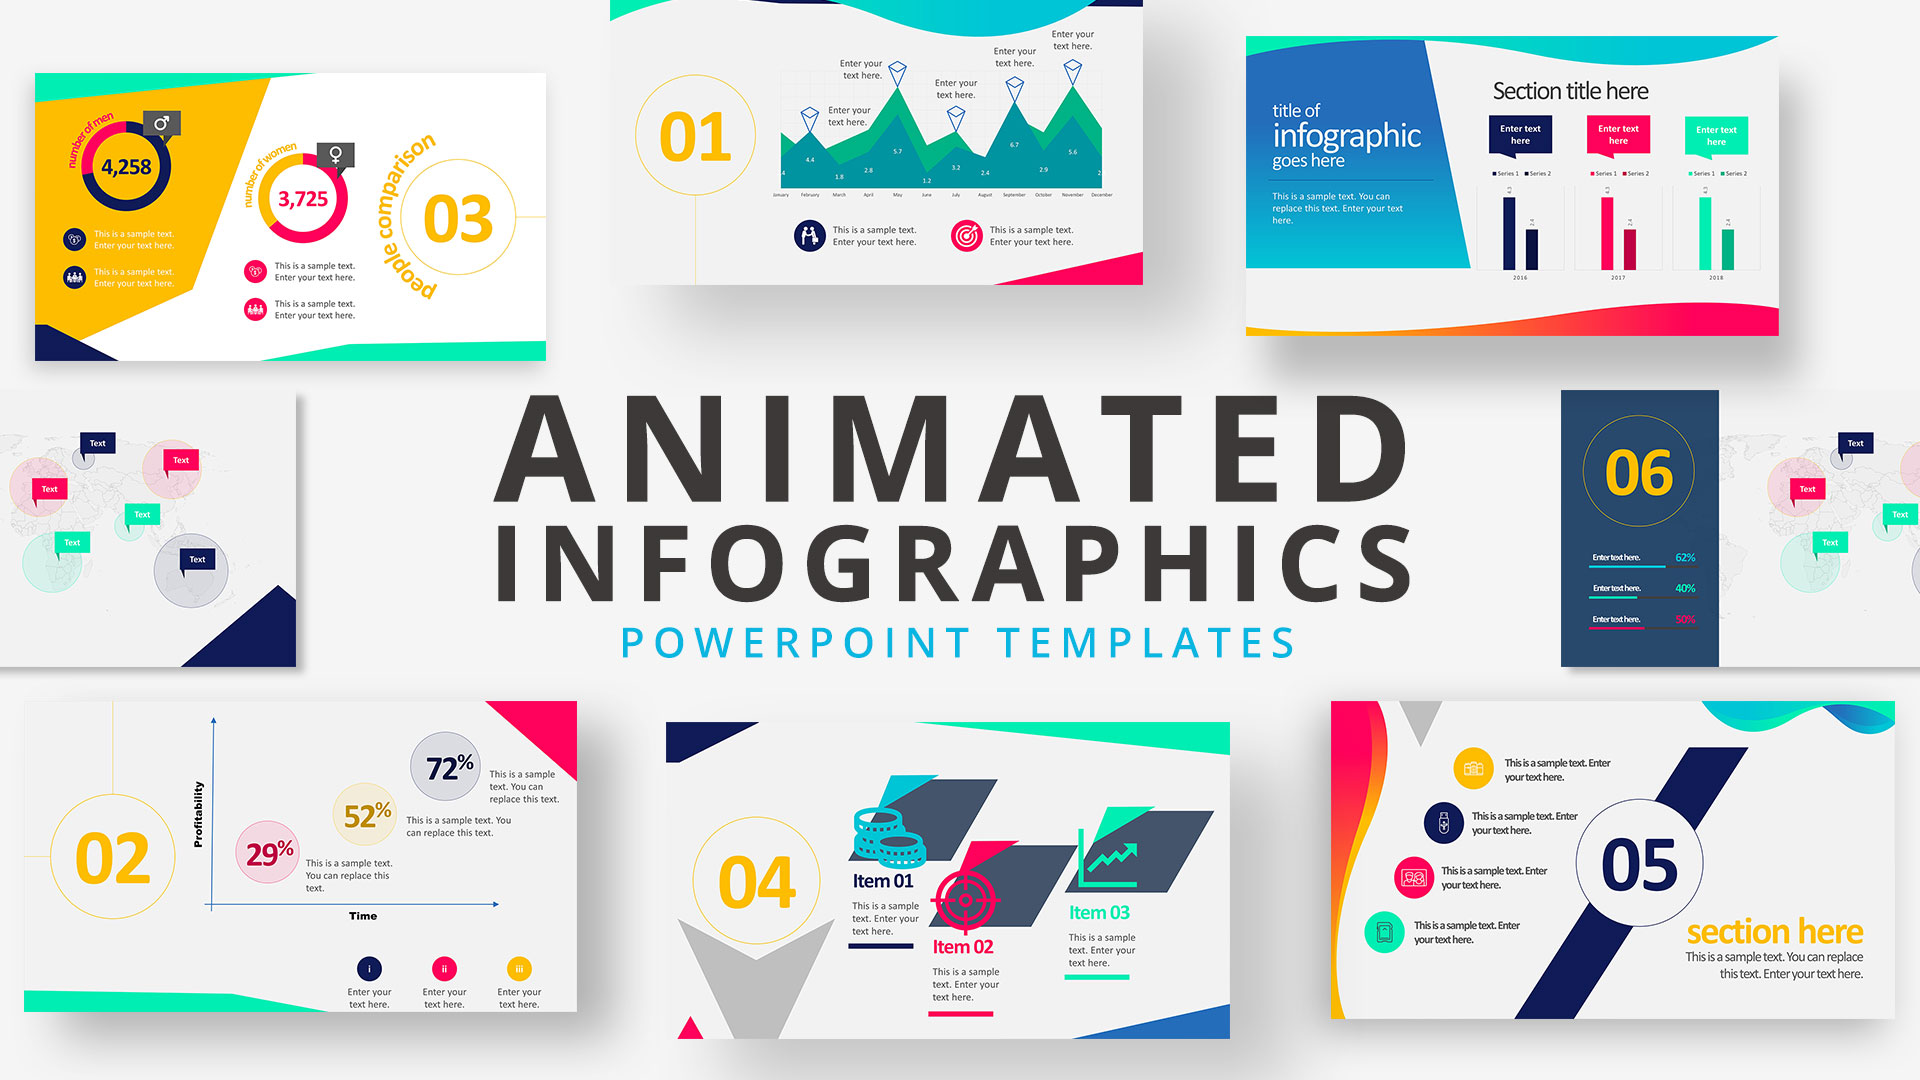
Infographics are a powerful tool that every presenter must consider for their work. This Free Animated Infographics template allows presenters to communicate complex data pieces, build marketing strategies, or prepare professional-looking reports.
You can find a broad variety of charts and graphs. These are fully editable by using the chart filter option to edit on a spreadsheet.
4. Free Animated Editable Infographic PowerPoint Slides

If you intend to present financial data or KPIs for your marketing projects, look no further: this Free Animated Editable Infographic Template for PowerPoint has it all.
Arranged in an 8-slide deck, we find a compendium of graphic elements to represent complex data in a visually compelling manner. Fully editable in all versions of PowerPoint
5. Free Animated Business PowerPoint Template
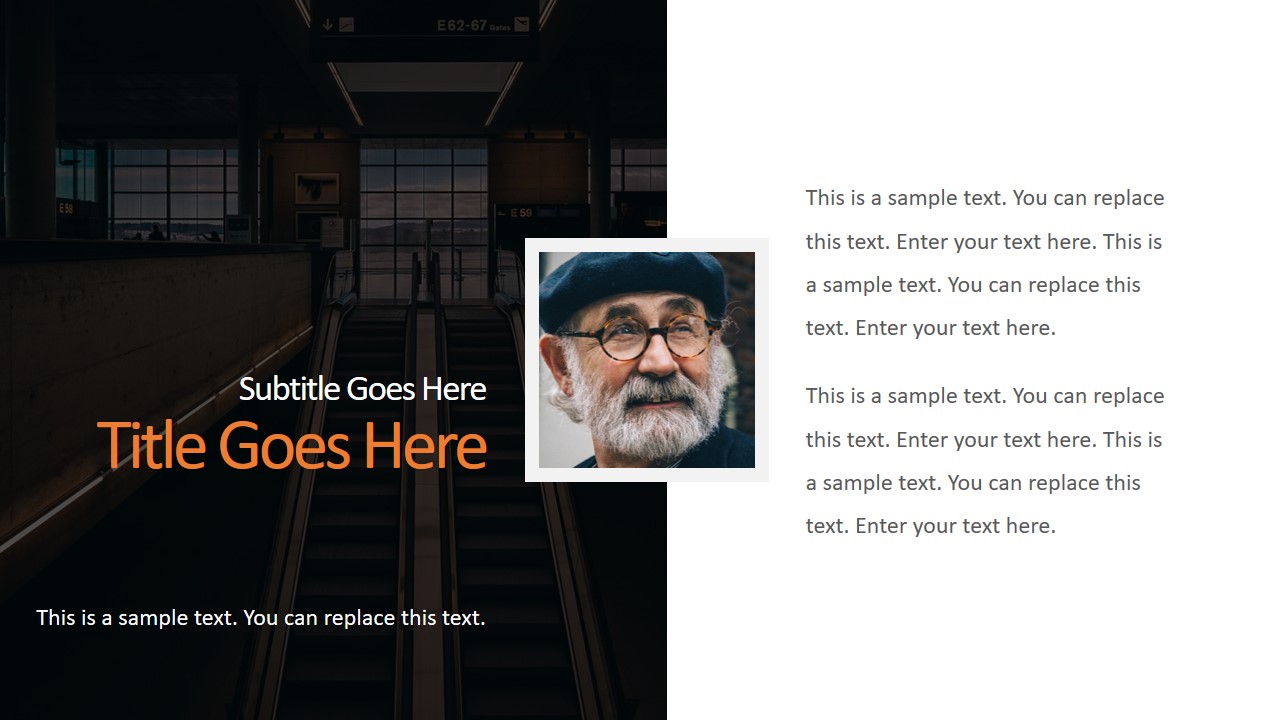
This versatile free presentation template for PowerPoint makes the perfect tool for more than business presentations: it works perfectly for educational video presentations and even inspirational video presentations.
With 9 fully editable slides, you can build your video presentation by using a unique combination of graphic elements, animations, and transitions. The graphics elements on this template are oriented to highlight leadership concepts.
6. Free Animated Business Infographics PowerPoint Template
Use this free template to create powerful statements backed by data in your video presentations. With a broad selection of graphs, diagrams, and charts, this fully editable template can help presenters to discuss topics ranging from demographics, economy, marketing indicators, or other relevant research results in an easy-to-understand format.
Compatible with all versions of PowerPoint, Google Slides, and Keynote.
You also need to consider the output format of your video presentations. For maximum compatibility, you can use MP4 or MOV. Other alternatives include:
- MKV : The native format of most 4K videos due to being able to store multiple audio tracks. Ideal for presentations with different voiceover languages that presenters can pick from.
- WMV : It’s a quality format for rendering videos to be shared via e-mail, although not compatible with some devices. Installing codecs is advised.
- WebM : This format is one of the preferred choices for online video libraries or live streaming services, but it can present compatibility issues.
The answer to this question entirely depends on your aim for creating video presentations. For most presenters, PowerPoint and Google Slides will do a good job, allowing them to use features such as voiceovers, transitions, animations, and high-quality graphics.
If instead, you desire to make advanced effects, screen recordings, or toon-like animations with voiceovers, then you should check the following list of solutions:
- Camtasia (Techsmith) : It is a professional video editing software, much lighter and easier to use than Adobe Premiere or Sony Vegas. You can create professional transition or animation effects, work with layers to add multiple sounds or video sources and create screen recordings.
- Adobe Premiere Pro : The industry-leading software in video editing. This often intimidating software by Adobe has all the requirements for professional video editing, plus full integration with third-party plugins or other software from the Adobe suite to enhance the video result.
- Sony Vegas Pro : It is considered a direct competitor to Adobe Premiere Pro, less demanding in hardware requirements, and somewhat more user-friendly.
- Final Cut Pro : For Mac users, this is the option to consider if we talk about video editing. Powerful and tailored for the hardware the Mac device has.
As we have seen in this article, video presentations are far from obsolete. It is a truly engaging method to divulge our ideas, especially if we target a younger audience.
Take your time to write a compelling story to tell rather than spilling animations and transitions along the way. Professional-made video presentations always care about details and the takeaway message for the spectator.

Like this article? Please share
Presentation Videos, Video Filed under Presentation Ideas
Related Articles

Filed under Business • April 24th, 2023
How to Ace Your Zoom Presentation: Tips for Successful Virtual Presenting
Master the art of delivering Zoom presentations by checking this quick guide. We list suggestions, how to share a PPT presentation and more.

Filed under PowerPoint Tutorials • October 22nd, 2022
How To Convert a PowerPoint Presentation to a HD Video in 3 Steps
Learn how to convert a PowerPoint presentation to video and prepare video presentations in minutes.

Filed under PowerPoint Tutorials • September 6th, 2022
How to Embed a Youtube Video in PowerPoint
Give your presentations a dynamic performance thanks to embedding YouTube videos to them. In this article, we will explain 5 different methods to perform this task.
Leave a Reply
Like what you're reading?
How to make a video presentation with Prezi in 6 steps
Get your team on prezi – watch this on demand video.

Meghan Ryan October 16, 2020
If you’re not able to be there in person, the next best thing is to present virtually in a video presentation . Over the years more and more people have started to work remotely and communicate virtually, and video presentations have become one of the main ways of presenting. People present live in virtual meetings or share their recorded videos in email or on social media so that others can watch them on their own time.

Prezi Video is the online video presentation tool that puts you and your content side-by-side on-screen, helping you stand out and grab your audience’s attention without losing the human connection. Read on to learn how to make a video presentation with Prezi Video.
Steps for how to make a video presentation
1. prepare ahead of time.
You need to prepare for your video presentation before you can nail it. Start with the basics. How to make a video presentation really boils down to a few simple questions:
- What’s the goal of your video presentation?
- Why do you need this video presentation?
- Who is your audience?
- What information do you need to include in your video presentation?
- What format or features would best serve your presentation?
- How do you want to brand your video presentation?
Try creating a mind map to outline your thoughts around a single idea. Then, compose your main message by using storytelling principles to keep your message focused and interesting for your audience. Get more advice about preparing for a video presentation with the how to present on video series from Jessica Chen , the founder of Soulcast Media, and read our guide to learn more about what you can do to prepare for a video presentation
2. Turn an existing presentation into a video
You can easily create a video from a presentation with Prezi Video. Use an existing Prezi presentation, or create a new presentation in the Prezi Present editor and press “create video” when you’re ready to record. You can also turn your PowerPoint presentation into a video by uploading your slides and editing them in the Prezi Video editor.
3. Set up a home studio
How to make a video presentation doesn’t require the most expensive equipment, but there are a few steps you can take to look and sound your best on camera. Position your camera at eye level so that it feels like you’re making eye contact with your audience. Clean up and declutter the space around you that’ll appear on camera. If you think the space behind you is too messy, try using a virtual background with Prezi Video . Good lighting and background will make you look more energetic and professional, so situate yourself in front of a light (a window that lets in natural light is best). Find more tips about lighting, backgrounds, and audio quality in our article about home studio setups .
4. Use presenter notes
It’s helpful to have notes next to you while you’re presenting for reminders and cues. Take advantage of presenter notes in Prezi Video – add notes to your presentation before recording to highlight key information and talking points. These are super useful for practicing before you record, and you’ll be the only person who sees them when you’re presenting. Keep in mind that you shouldn’t be looking at your notes every second during your video presentation. Instead, presenter notes should only serve as a hint. Look at your camera as often as you can to make your audience feel seen and involved.
Now comes the fun part – recording your presentation! This is easy to do in Prezi Video. After you’re done adding and editing your content, press “next step” and then press the red button at the bottom of the screen. You can always pause the recording to collect your thoughts and trim the video once you’re done. Don’t like what you see? No problem — you can discard the draft and record again.
6. Share your video presentation
Once you’ve wrapped up recording, it’s time to save your video and share it. You have plenty of options here: share a link, embed your video , or download the video file and share it on social. Learn more about sharing and live streaming with Prezi Video in our article about sharing your video .
Tips for making video presentations
Now that we’ve covered the step-by-step instructions for how to make a video presentation with Prezi, let’s dig into a few of our tried-and-true tips for making it better. Here are the video presentation tips that everyone can start utilizing in their presentations today.
Keep your video short and to the point
Understand the goal of your video presentation and what you want to cover beforehand. Your audience’s time and attention are limited, so, you don’t want to make a long video that tries to cover everything. Keep your video concise and focus on one or two things to captivate your audience.
Use interactive elements
One way to engage your audience is to implement interactive elements, such as GIFs, polls, Q&A, music, and quizzes, into your video presentation. These elements will make your video presentation more interesting and let you interact with your audience.

Summarize your point at the end
After watching a 10-minute video presentation, your audience might have forgotten what you covered in the beginning. Adding a summary in the end reinforces the main points that people should take away. Based on the recency effect , a strong ending creates a strong impression in your audience’s mind.
Preview and practice before recording
Going through your presentation and practicing several times beforehand can help you talk smoothly and more confidently during the actual presentation. Also, preview your presentation so that you can spot potential issues and pinpoint areas that you can improve.
With remote work and online learning being so prevalent these days, it’s a great time to start honing your online presentation skills and learn how to make video presentations that have a big impact. Start today by creating your first video presentation with Prezi Video .

Give your team the tools they need to engage
Like what you’re reading join the mailing list..
- Prezi for Teams
- Top Presentations
- AI Video Generator
- Text to Video AI
- AI Logo Maker
- AI Website Builder
- AI Business Name Generator
- YouTube Name Generator
- Video Editing
- Website tips
- Onboarding Videos
- Contact Support
- Knowledge Center
- Video Tutorials
My Projects
- My favorites
- My colors & fonts
- Subscriptions
Make Video Presentations with Outstanding Visuals
Bring new quality to your presentations and turn them into attractive and top-notch videos to enhance your storytelling.

Join Millions of Users to Save Time and Succeed!
High-quality presentation video templates.
Whether it’s a whiteboard video presentation or explainer animation, we have millions of slides in different categories to cover all your design needs. Simply choose your desired style and continue the editing process online, directly in your browser.

Business Presentation Pack

Whiteboard Animation Toolkit

Informative Social Pack
Ultimate Icon Animation Pack

Modern Infographics Pack

Company Presentation Toolkit

Explainer World Toolkit

Dynamic Corporate Presentation

3D Explainer Video Toolkit
What kind of presentation videos can you create.
Whiteboard Explainers
Our whiteboard animation toolkit has thousands of animated whiteboard scenes which do help to bring life to your ideas and visuals.
Explainer Videos
Explainer video templates can be used to create an animated video presentation for maximum engaging results.
Footage-Based Presentations
We have an immersive library of 1M+ stock footage and images, which can be combined with your texts and turned into beautiful and informative presentation videos.
Informative Pitch Decks and Infographics
Use infographics and typography presentation templates and turn your ideas and numbers into beautiful animations, which stand out from the crowd and make you unique.
The Process of Presentation Video Creation

Pick a Video Template
Start creating your presentation by going through our rich template library and selecting your favorite one. Each template offers hundreds of scenes separated by categories. Pick and add the scenes manually, or go with the fully customizable video presets, to streamline the creation. The scenes will then be added to the editor for further personalization.

Personalize Your Video Presentation
Design a compelling presentation by customizing the scenes to match them with your project purpose. Use the flexible editing tools of video maker to modify the text, alter style and colors, upload your media, and pick a dynamic transition. Move to the 'Music' section and add a background tune or a voiceover.

Export and Share Your Presentation
Go to the “Preview” section to see the final version of your presentation video. Ensure that there are no more changes to be made in there. Once the video is final, export it in your preferred quality. Then, instantly share the video to digital platforms, or download it to your device.

See what our customers say about us

Darlan Evandro, Content Creator
“Renderforest is an amazing tool with many practical solutions for small businesses. Even without advanced knowledge in design creation, small entrepreneurs can create videos, logos, presentations and even websites to promote their products and companies. If you want to create beautiful and high quality materials without investing hours in study and production, this is definitely an excellent option for you!”
Olga B., Education Manager
“That's impressive! Amazing! Beautiful! Outstanding! The first service which helped me to create, visualize and implement my ideas, but finally I started to create my own videos, with my face and voice, but Renderforest taught me how to present my ideas into logical, laconic, beautiful, rational and clear way. It is the best tool for creating short cartoon videos I have ever used. The main thing which makes this company unique is that they help to make your videos inspiring, influential, motivational, encouraging, meaningful and valuable. Your videos matters. Renderforest is born to inspire. Just unleash your fantasy and keep moving forward.”
Kamal Balogun, Marketing Consultant
“Before I discovered Renderforest, I was using seven different platforms to run my daily business functions and assets. Fast forward to today and I use two. Renderforest is 90% and the other tool 10% of the time. Do you want to make websites, logos, brand assets, social media assets, videos of all styles, and endless possibilities with Renderforest in your possession? I don't have space to detail all that Renderforest can do for you in a fraction of the time and how much money your business will SAVE is mind-blowing.”
Discover more from Renderforest
- Video Presentation
- Video Templates
- Video Editor
- Video Ad Maker
- Video Opener
We use cookies to improve your experience. By clicking agree, you allow us such use.
How-To Geek
How to make a microsoft powerpoint presentation into a video.

Your changes have been saved
Email Is sent
Please verify your email address.
You’ve reached your account maximum for followed topics.
The Real AI Revolution Will Be Invisible
Today's nyt connections hints and answer for june 29 (#384), the internet is not forever, so it's time to preserve what you can, quick links, why convert a powerpoint to video, convert a powerpoint presentation to a video.
Microsoft PowerPoint presentations are great, but they are not as easily accessible as videos. Luckily, you can convert your presentations to videos with a built-in option. We'll show you how.
There are many reasons to turn a presentation into a video. Maybe you want to send someone a presentation but they don't have PowerPoint installed. Or, maybe you want to upload your presentation to a site that only accepts videos.
PowerPoint has a built-in option to convert presentations to videos. When you perform this conversion, all your original animations, transitions, and media items are preserved. Your resulting video also includes all recorded timings , narrations , ink strokes, and laser pointer gestures (though you can choose not to include these if you want).
Related: How to Burn Your PowerPoint to DVD
To turn a PowerPoint presentation into a video, first, open your presentation with the PowerPoint app on your Windows or Mac computer.
In the top-left corner of PowerPoint, click the "File" option.

From the sidebar that opens after clicking the "File" option, select "Export."

In the "Export" menu, click "Create a Video."

To the right of the "Export" menu, you will now see a "Create a Video" section. In this section, you will define the options for your video file.
First, choose the quality for your video by clicking the "Full HD" option.

You will see multiple video quality options. Select the one that you think works the best for you. Know that the higher the quality you select, the larger the file size of your video will be.

To include the recorded timings and narrations in your video, then beneath the video quality menu, click the "Don't Use Recorded Timings and Narrations" option.

Select the "Use Recorded Timings and Narrations" option. If this option is grayed out, that's because you don't have any recorded timings or narrations in your presentation.

You will now specify how long each slide appears in the video. Click the "Seconds Spent on Each Slide" box and enter the duration in seconds. By default, this duration is set to 5 seconds.
Finally, at the bottom of the "Create a Video" section, click "Create Video" to start making your video.

Your computer's standard "save" window will open. Here, select the folder to save your video in, type a name for your video, and click "Save."

PowerPoint will take you back to the main interface. At the bottom of this interface, you will see the progress of the conversion.

When your video is made, you will find it in the specified folder on your computer.
And that's how you make your presentations available to a wider audience by converting them to a video format!
Need your video in another format? Use VLC to convert your video to other formats.
Related: How to Convert a Video or Audio File Using VLC
- Microsoft Office
- Microsoft PowerPoint

How to Make a PowerPoint into a Video in Under 5 Minutes
- how to make a powerpoint into a video

PowerPoint is, by far, the most popular tool people use to make presentations , whether for school projects or work-related activities, such as staff training or pitching a product idea to investors.
PowerPoint is genuinely a great tool. It’s simple and easy to use, offers hundreds of themes, and if you spend a bit of time playing around with all the different options inside the program, you can make professional presentations that will captivate your audience.
The only issue regarding PowerPoint—more specifically, presentations in general—is the limited usability of PPT files. You can’t upload a presentation on YouTube , for example. You could technically share it on your website or on social media, but a presentation without a presenter is just a random compilation of images.
Unless the person who created the presentation takes the time to weave the story, explain all the concepts, and expand on the bullet points the audience sees on the slides, the presentation won’t have the desired impact.
Does that mean that presentations are only viable in a face-to-face setting? Not exactly. There are a number of different ways to utilize presentations, but they all involve converting the PPT file into a video .
Now, the question begs itself— how do you make a video out of a presentation?
Turn PPTs into engaging videos
With InVideo’s online editor

Creating a Video from PowerPoint
The first thing that will go through most people’s minds is a webinar. When you stop to think about it, a webinar is nothing more than a glorified presentation. Someone takes the time to record themselves as they’re going through all the different slides and explaining everything in detail.
A webinar is a rather specific form of content, and it takes a lot of time and effort to put one together and to get enough people to watch it to make it worthwhile. Unless you’re an experienced salesperson who is adamant about selling a product and firmly believes that the best way to do so is to blabber about it for two hours, you’re probably looking for a faster, less painstaking way to turn a PowerPoint into a video.
Thankfully, there are a number of different ways to do so. In fact, PowerPoint itself gives you the option to convert the presentation into a video. In this article, we’ll walk you through the entire process step by step and show you how to make a video PPT using all the different versions of the program.
How to make a video from PowerPoint?(Office 365, PowerPoint 2019, PowerPoint 2016)
Although the option is there, keep in mind that it’s not as simple as clicking a Convert to video button. You do need to record narration and laser point gestures (mouse movement on-screen) beforehand.
The reason for that is simple and technical in nature—unless you record narration and timings beforehand, PowerPoint will default to five seconds per slide when creating a video.
You can change this by clicking the upward arrow next to the Timing under the Create a Video option, but keep in mind that you’ll be adjusting the time for all slides simultaneously. There is no option to adjust how long each individual slide will appear on the screen.
If you want to use different timings per slide, as well as record narration, select the Recording option inside PowerPoint and create a video.
Here’s how you’ll enable recording inside Office 365 PowerPoint, as well as PowerPoint 2019 and 2016:
1. Click on File and select Options on the left-hand side of the screen 2. Choose Customize Ribbon (A) from the drop-down menu 3. Check Recording (B) in the pop-up window and hit OK (C)

Image source: Microsoft
You’ll see a new option appear on your screen under the Recording tab, titled Record Slide Show. Clicking on the downward pointing arrow will allow you to choose whether you want to start recording the slideshow from the start or from the slide you’re currently on.
You can also choose to record the narration as audio or video, and you will be able to leverage a variety of different tools, such as pens and markers, to highlight certain elements on your slides.
As you’re recording, the red circle next to the Record Slide Show button will be blinking, indicating that the audio and/or video is being captured. Once you go through all the slides, you can either:
- Click on the square Stop button - Press S on your keyboard.
Exporting your video
The easiest way to export the video you just recorded is to navigate to the Recording tab and select Export to Video . This will open up a new menu, and PowerPoint will prompt you to choose the video quality.
|
| ||
|
| ||
| Standard (480p) | 852 x 480 | Portable devices like phones and tablets |
| HD (720p) | 1280 x 720 | The Internet |
| Full HD (1080p) | 1920 x 1080 | Computer monitors and HD screens |
| Ultra HD (4K) | 3840 x 2160 | Large TVs |
One thing to keep in mind is that the Ultra HD option is available only on Windows 10 .
Next up, you’ll need to either set the timings for the slides or select the Use Recorded Timings and Narration option.
Then, click on Create a Video , name your file, and choose where you want to save it.
Finally, select the Save as Type option and choose between two available formats:
- MPEG-4 Video - Windows Media Video
PowerPoint will start converting the slideshow into a video automatically. Depending on the video quality and length, this process might take a while, so we suggest timing it so that you don’t have to use the computer during that time. For larger, Full HD or Ultra HD videos, it’s best to keep the program running overnight.
PowerPoint 2013
One notable difference with the 2013 version of PowerPoint is that the video quality options are slightly different. Ultra HD (4K) was just entering the scene, and not a lot of people owned devices that supported the 3840 × 2160 video resolution, so it’s no surprise that the option doesn’t exist in this version.
|
| ||
|
| ||
| Presentation Quality | 1920 x 1080 | Computer and HD screens |
| Internet Quality | 1280 x 720 | The internet |
| Low Quality | 852 x 480 | Portable devices |
The interface didn’t change much over the years, so if you happen to be running PowerPoint 2013, you’ll go through the exact same process as with the newer versions of the program:
1. Navigate to File , click Export , and choose to Create a Video 2. Select the resolution 3. Set timing parameters or use recorded timings and narration 4. Click on Create Video 5. Choose Save as Type and select between MPEG-4 or Windows Media Video
PowerPoint 2010
If you are still using the 10-year-old version of PowerPoint, the options for creating a video out of your slideshow will be a bit different.
The first thing to keep in mind is that PowerPoint 2010 only supports .mp4 files and that the maximum resolution for the videos is 1290 x 720, which isn’t exactly ideal. If you want to create a professional-looking video from your PowerPoint presentation to share with business partners or your audience, you might want to consider a less restrictive alternative.
Here’s how you would turn your slideshow into a video in this outdated version of the program:
1. Select Save & Send under File 2. Choose the option Create a Video at the very bottom of the right-hand side of the screen 3. Find the Create a Video tab if you want to see the available video quality options 4. Click on the downward-pointing arrow next to the Computer & HD Displays option and choose from the three available options 5. Choose between Use and Don’t Use Recorded Timings and Narration depending on whether you want to use recorded timings and narration 6. Click on Create a Video , name it, choose the destination folder, and hit Save
|
| |
|
| |
| Computer & HD Displays | 1920 x 1080 |
| Internet & DVD | 1280 x 720 |
| Portable Devices | 852 x 480 |
PowerPoint Video Drawbacks
It’s always great when you can use the same tool for various different tasks. In the case of PowerPoint, you can both create the presentation within the program and convert it into a video on the spot.
That said, PowerPoint isn’t a video editing tool . What we mean by this is that you are severely limited in terms of what you can do with the video you create from your PPT. There are no transitions, you can’t leverage fade-ins and fade-outs, and there is no music, among other things.
No matter how you look at it, the videos created through PowerPoint will be bland. PowerPoint’s PPT to video conversion might get the job done if your only goal is to share a presentation internally with your team. Even then, it only makes sense in a remote work environment, where you can’t physically hold the presentation to your coworkers.
If you’re planning on using the presentation as a core part of your marketing strategy , then the video quality—and we don’t mean the resolution here—you’ll get from PowerPoint won’t suffice. No matter how professional you sound during the narration, the videos created through PowerPoint will still give off the impression that you didn’t try all that hard.
When you see the production value of the videos that businesses share on their websites, YouTube channels , and social media, it’s painfully obvious that PowerPoint videos can’t compete. This doesn’t mean you have to spend months learning video editing or spend a small fortune hiring a professional videographer to make and edit the videos for you.
With InVideo, a powerful yet easy-to-use online video editor , you can create stunning videos from your presentations in minutes! We’ll walk you through the whole process to show you how easy it is to create breathtaking videos from presentations with InVideo .
How to make a video from a PowerPoint Presentation using InVideo?
Videos are quickly becoming an integral part of every business’s marketing strategy. Whether you’re a startup, an enterprise, a medium-size business, or a solo entrepreneur, you will need to use videos if you want to attract as much traffic to your website as possible. The same goes for influencers and bloggers—videos beat any other type of content when it comes to user engagement.
InVideo makes video editing quick, easy, and fun. Thanks to our intuitive, drag-and-drop video editor , professionally designed video templates , and an extensive library of photos and audio tracks, you can create killer videos in no time, even if you have absolutely no video editing experience.
Our platform is cloud-based, meaning you can access it from any browser on your computer and laptop. This also means that your video editing capabilities won’t depend on how powerful your machine is, meaning you can create HD and Ultra HD videos even with a low-end PC or laptop.
The best part about InVideo is the fact that you can export up to 60 videos per month for free! With our free plan , you’ll have access to all of InVideo’s features so that you can play around with all the different options and learn video editing at your own pace. We also have dozens of video editing tutorials for different use-cases, so you can get started right away.
Creating videos from photos and PowerPoint presentations is one of many things you can do with InVideo.
Here’s are the simple steps you can follow to create a stunning video from your presentation with InVideo:
Step 1: Create an account
To get started, you’ll need to create an account.
Navigate to our website and click Sign Up in the top right corner. Input your email, set up your password, and you’re good to go. We’ll never ask you for your credit card information or phone number. We won’t bombard you with emails either—we hate spam as much as you do.
Step 2: Select a Template or start from scratch
Once you log in, you’ll see several different options on the homepage:

The Pre-made Templates option will be selected by default. While there are over 5000 stunning video templates in our library, we strongly suggest that you go with the Blank Template option for this purpose.
You will be starting from scratch, but it’s not as scary as it might sound. The blank template is the most convenient option since you’ll be treating each slide as a separate scene and editing them individually. Here’s how to do it:
- Choose how long each slide appears on the screen - Add the appropriate narration - Throw in effects , filters, transitions , etc.
Step 3: Upload your media
Assuming you are the one who created the presentation, you should have all the necessary media on your device—photos, slides, and the script . To add it to the video, you’ll first need to upload it through our video editor .
From the menu on the left, select the Uploads option and click on the Upload button at the bottom of the screen.

You can upload files up to 800MB at a time. If you have all the photos neatly sorted into a folder, you can upload the entire folder in one go. All the media you upload will be available immediately to the left of your video—for this and all future projects—and you can drag and drop images to the center of the screen to add them to the timeline.
Step 4: Add the photos
Let’s start with a single scene—the intro of your presentation. Drag and drop the desired image from the Uploads library onto the screen to add it to the scene.

The video editor will show you what the image will look like in the video. When you drop the photo, you’ll need to select one of the two options:
- Replace - Add as a layer

If the slide consists of a single image, choose Replace. Since we’re not using a pre-made template here, the image you chose will replace the black background.
If you would like to add additional images on top of it—such as graphs, screenshots, product photos, or lifestyle images—drag and drop them to the center of the screen once again, but this time select the Add as a Layer option. This will put the new image on top (in front) of the background one, making the first one act as a backdrop.
Step 5: Edit the Scenes and add text
By default, scenes will be about five to six seconds long, which probably isn’t sufficient for the narration. You can edit how long each slide—referred to as a scene in the video editor—will be on the screen for on the timeline.

The image above shows the basic timeline, which is great for having an overview of all your scenes. To edit a specific scene, click on it on the timeline and select the Advanced Timeline option in the top right corner.

On the left side, you’ll see all the different elements that make up the scene. Select each one you’d like to edit, whether it’s a logo, the text, or the image itself.
The middle of the timeline is reserved for the length of the scene. To adjust how long this scene will be in the video, move the sliders left or right. The duration of the scene will always be displayed in the center.
On the right side, you’ll be able to zoom in and out, so you can edit the timeline more easily.
As far as text editing is concerned, you can do so either from the timeline or by selecting the text box on the screen. You’ll be able to drag and drop the text box to adjust the positioning, rotate the text, change the colors and font, and more. To add multiple text boxes, select the Text option from the left-hand menu and drag and drop the new box onto the screen.

Step 6: Add narration
All that’s left to do is add narration. If you’ve recorded the audio already, you can add it through Uploads , the same way you did with photos. If not, you can add a voice-over to each individual scene. Select the Add VO option and import an existing voice-over or choose to record it on the spot.

Step 7: Export the Video
After you record or upload the VO, add the photos, and edit the length of each scene, you’re good to go. You can play around with filters, effects, and transitions if you’d like, but the base video is complete and ready to be shared with the world!
All that’s left to do is to click on Export in the top right corner and wait for the video to render. After a few minutes, depending on the video’s length, you’ll be able to download it, post it on YouTube and social media, or copy the shareable link and use the video in your marketing campaigns.
Turn your PPTs into epic videos
Without spending hours on editing

That’s how easy it is to create stunning videos with InVideo. Click here to get started today for free and turn your PowerPoint presentations into breathtaking videos in no time!
Let’s create superb videos
How to Create & Record Video Presentations | Ultimate Guide

Knowing how to create and record video presentations is a vital skill. It can help you grow your business, engage viewers and expand your follower base.
You may be a member of a company wanting to share your vision, or a student making a presentation for class. Whatever your situation, knowing the steps for a successful video presentation is essential.
That’s why we’ve broken down every stage of creating a video presentation. By following the steps below, you can easily record like a pro. You’ll be able to impress your audience with a sleek, eye-catching video presentation. We’ve even covered different video presentation software and how to use it.
To get started, all you need to do is read on.
What is a video presentation?
Typically, a video presentation involves a series of slides accompanied by audio narration. The narrator talks the viewer through the on-screen information and adds further details. There can also be diagrams, photographs, and animations during the presentation. These help the audience engage with the video and reveal more information.
The message of a video presentation depends on the purpose of the presentation. The presentation may be for entertainment, training employees, educating, pitching to investors, or many other reasons.
Why should you use video presentations?
All kinds of people find that video presentations are ideal for achieving their goals. From startup companies pitching for investments to tutors teaching their students, the uses of video presentations are almost limitless.
Not only this, but video presentations are a great way to make content more memorable. Instead of simply giving a speech, using a visual aid helps your audience engage with and absorb information. In fact, one study found that a visual presentation increased long-term information retention by up to 50%.
You should use video presentations to convey information in an entertaining and engaging way. Imagine you’re in a meeting room for training. Instead of sitting and reading a handout or listening to your boss talk, a video presentation can better capture your attention.
Video presentations include both audio and video together in one streamlined presentation. This helps prevent boredom and get viewers invested in your message.
How to create video presentations successfully: A Step-by-step
Creating a sleek, informative, eye-catching video presentation might sound like a challenge. The reality is anyone can do it. All you need are the right tools and steps to follow. We’ve got you covered with this step-by-step guide, which takes you from an idea to the final product.
Following this plan, you can make your next video presentation one to remember.
Step 1: Plan your presentation
Every great project begins with an idea. Before you can go any further, you’ll need to decide what your presentation will be about. You might be teaching new clients about your company or creating a presentation about your worldwide travels.
Whatever the topic, break it down into its key components. Which sections do you want to cover? What order should they go in? Remember not to lose sight of your overall message when planning. Stay on-topic and focus on the goals you want to achieve, such as brand awareness.
Step 2: Create a slideshow
Creating a slideshow involves adding content to individual slides in a program such as PowerPoint. This content could include bullet points, photographs, video clips, animations, links, etc.
The most important thing is to get your slides in the correct order with the right amount of information per slide. It’s a good idea to follow the 5/5/5 rule when it comes to making slideshows. The 5/5/5 rule means the following:
- 5 words per line
- 5 lines of text per slide
- 5 slides in a row that follow these rules
Remember, you don’t need to include all the information on the slides. You will record yourself speaking while presenting, so you can go into much more detail and explain the slides. Instead, focus on writing the most important information on each slide. This includes words and phrases you want the audience to remember.
Step 3: Write a script
Now that your slideshow is ready, it’s time to think about what you will say. As you narrate your presentation, you can give further information about each slide as you narrate your presentation. You can also add personal accounts and recollections to make your speech more engaging. What you don’t want is a long stream of rambling speech with too many ums and ahs. This can make your audience lose interest.
Creating a script is a good way to keep yourself on track. You can write or type your script into a Word document. It’s helpful to mark the places in the script where you will move onto the next slide. Be sure to repeat important phrases and stick to your main message.
Step 4: Choose a recording platform
A recording platform is a place where you can capture audio or video footage. You can use this platform to record yourself and your slideshow as you give your presentation. This will preserve the presentation, ready for you to show others or share online.
Your recording platform may be the same one you created your slides on. For example, both PowerPoint and Google Slides have recording capabilities.
Another way to capture your content is to use a recording platform like Riverside. With the Presentation Recorder , you can record a video of yourself at the same time as recording your slideshow. You can also record a presentation with multiple people, as you can invite remote guests to join your recording. This is a handy tool for collaborative webinars or a co-led course.
Consider which of these options appeals most to you. If you do decide to use a recording platform, take a look at the choices available.
Step 5: Record your video presentation
How to record your presentation will depend on which platform you use. It may be as simple as clicking the Record button on PowerPoint. You might need to set up an account for other recording platforms first.
If you will record a video of yourself, ensure you are in an uncluttered space. Choose a place without a distracting background or lots of noise nearby. Dress in a way that reflects the tone of your video, like a suit and tie for a company training presentation.
Record your audio using a microphone. Consider investing in a high-quality mic to capture crisp and clear sound. Recording uncompressed WAV audio can help you achieve a higher-quality end result.
How to record video presentations: Video Presentation Software to Try
Video presentation software refers to platforms for creating and recording your presentations. This type of software is ideal for finding useful tools to create content easily and professionally.
Whichever software you choose, you can streamline your workflow and save precious time by knowing exactly how to use it. That’s why we’ve laid out step-by-step guides for creating video presentations with both PowerPoint and Riverside. You’ll find all the details below so you can get started.
Microsoft PowerPoint is one of the most popular programs for creating slideshow presentations. You can access PowerPoint as long as you have a Microsoft account. Within PowerPoint, there are tools for making a slideshow, including animation, design, and transition options. You can add text, images and videos to slides and format them in a variety of ways. There are also video and audio recording tools, perfect for capturing your video presentation.
How to record video presentations with PowerPoint
Step 1: Open PowerPoint and select ‘ New’ , then choose to create a ‘Blank Presentation ’ or select one of the templates for a premade design
Step 2: To start creating slides:
- Go to ‘Home’ > ’Slides’ and click on ‘ New Slides’ to choose the layout for each new slide you add.
- Add text to each slide by typing in the text boxes
- Add pictures and shapes by going to the Insert tab and choosing the picture source with the Insert Picture From tool
Step 3: Add speaker notes to your slide. These notes will only be visible to you during a presentation, and you can use them to record your presentation script.
- Click on any slide you want to add notes to.
- Select Notes in the bottom right-hand corner.
- Type out your notes in the window that pops up.
Step 4: When you finish creating your slideshow, select the ‘Record’ button in the upper right-hand corner. You will now see a recording button at the top of your screen and your presentation below it.
Step 5: Turn on your camera by clicking on the camera icon and make sure your microphone is on as well.
Step 6: Use PowerPoint’s default Teleprompter view to read your speaker notes while presenting your slideshow.
Step 7: Select Views in the bottom right-hand corner to change from a Presenter to a Slide View
Step 8: Press the red record button when you’re ready to begin your presentation
Step 9: To continue recording on your next slide, go to it. (Keep in mind Powerpoint stops recording audio during slide transitions, so finish all your transitions before speaking again.)
Select stop when you finish recording.
Step 10: Click the Play button to review your recording
Step 11: Press Export to download and share your video when you finish.
.webp "how to create a video for a presentation")
Riverside is a high-quality remote recording platform with professional features for brands, businesses, and individuals. The platform Presentation Recorder , available with the Business Plan, streamlines your video presentation recordings. Manage and record your presentation from the same place while also being able to see other guests in the recording. You can even take some of the stress out of recording by assigning a guest to control your presentation remotely.
This online software uses local recording, so your video is recorded directly onto your computer and doesn’t rely on the internet to achieve a high quality. So, even if your internet connection dips, you’ll still be able to achieve impressive resolution on your video presentation. You’ll get an end result with higher quality than a screen share.
Riverside also offers top-quality 4K video recordings and up to 48kHz audio recordings You’ll receive separate audio, video and presentation tracks giving you more post-production control.
Key Features:
- Presentation recorder to easily upload a Powerpoint (PPT or PPTX), Keynote (KEY), or PDF file, ready for presenting in your recording studio
- Up to 4K video resolution with sharp, clear 48kHz WAV audio
- Remote guests capabilities where you can invite up to 7 other participants to join your presentation recording
- Separate, in-sync audio, video, and screen share tracks for all participants, ideal for postproduction
- Producer mod e so you can invite someone specifically as a producer to manage guests, adjust audio, screen share, and more during the recording
- AI Transcriptions with unmatched accuracy perfect for SEO content or creating subtitles with
- Text-based editing , making it quick and easy to edit your video by changing your Riverside-generated transcription
- Magic Clips creator so you can effortlessly repurpose one recording into multiple short form videos, all in one click
How to record video presentations in top-quality with Riverside
Step 1: Create and log into your account at Riverside.fm
Step 2: Click + Create new to make a new recording studio. Give your studio a name, select your recording type and transcription language. Then click Enter studio.
Step 3: You’ll now enter the lobby. Choose your equipment from the drop-down menu. Type in your name, select whether you’re using headphones, then click Join Studio.
Step 4: Invite remote guests to join your recording by copying the link in your Studio and sharing it with them
Step 5: In the studio, click on the Share button at the bottom of your screen, then select Presentation.
Upload your PowerPoint, Keynote, or PDF.
Step 6: When your file finishes uploading, click on it to present. All your guests and participants will see the slides in high-quality 16X9 format
Step 7: Navigate through your slideshow by hovering over slides with your mouse or clicking the left and right arrows on your keyboard.
Step 8: Give a guest control of your presentation at any point during your recording. Allow yourself to focus on the content while someone else controls the slides.
Simply click the plus icon at the top and select Give Control. Then choose which participant you want to put in charge of the slides.
Step 9: When you finish presenting, click on the + button on the top right of your slides, then select Stop Presenting.
Click on View recordings from your studio to find your separate video and presentation tracks ready to download in high quality. Just wait a few moments for the files to upload.
Step 10: Use Riverside’s Editor for text-based editing, clip creation, video trimming and more
Best practices for creating effective video presentations
Creating a stand-out video presentation is all about the methods you use. Following these best practices, you can create more professional, sleek, engaging content. If you’re unsure about making your first presentation or just want to pick up a few ideas on how to nail it, check out this list of tips.
- Practice. It can be nerve-wracking to give your first presentation. You can improve your confidence and speaking skills by practicing your presentation before the recording.
- Speak clearly without too many pauses and tangents. This will help your audience stay focussed on your presentation. It’s easier to stay on-topic by writing a script beforehand.
- Have a remote guest on-hand to help. Having someone working behind the scenes, monitoring audio levels or helping with guest management is very useful. With Riverside, you can easily invite someone to join in Producer mode, or assign a remote guest to control your slides for you.
- Don’t crowd your presentation slides. Follow the 5/5/5 rule to express information clearly in digestible portions.
- Give examples . This is a great way to explain your presentation's ideas and ensure the audience understands.
- Refer to your audience. Listeners like to know they are acknowledged, and it’s a great way to keep their attention levels up. You could ask the viewer to think about an aspect of their life or a rhetorical question.
- Use images and graphics. Visual content that isn’t text can be much more eye-catching. Some people are visual rather than auditory learners. This means they can learn more from Venn diagrams and graphs than simply listening to narration.
FAQS on Video Presentations
How do you make a video presentation entertaining?
There are a lot of things you can do to make an entertaining video presentation. On the visual side of things, try to vary your slideshow with different types of media. Break up text with images and videos. Add animations and transitions to give the sense that your presentation is moving along.
As the narrator, using a confident tone of voice can capture attention. Adding in jokes and questions from time to time is also a great way to surprise the viewer.
What should a video presentation have?
A good video presentation consists of a few key things. A slideshow, audio narration, video footage of the narrator and a message. You should tie the message to the aim of your video. It might be a message to spread brand awareness or inform people on a certain topic.
Oftentimes a video presentation needs a script too. This will keep things running smoothly, as the narrator will know exactly what to say. You can add contact information or further resources at the end of your presentation, so that viewers have a place to find out more.
What are the different types of video presentations?
There are many different types of video presentations. By getting creative, you can make a presentation on almost any topic. Some of the most popular types of presentation include:
- employee training
- investor pitching
- educational, and
- informational.
Presentations can also have different purposes. They can be made to persuade, spread awareness, or teach new skills to viewers. Knowing your purpose is essential for creating an effective video presentation.
Kendall Breitman
leads Riverside's community. She has over ten years of experience in television and video production for places like NBC and Bloomberg News. You’ll find Kendall on our webinar, where she shares her expert insights on content production, branding, and more.
Table of contents:
Try Riverside today
Record in studio quality without the studio. Transcribe, clip, and edit within seconds.

Keep reading
.webp)
Riverside resources
Screen recording software.
Capture screen recordings in full HD with constant frame rate MP4s for easy editing.

Video Capture Software
HD video capture software with powerful editing tools and automatic constant frame rate recordings.
Start creating with Riverside

Podcast guides
© 2023 RiversideFM, Inc.
How to make a show-stopping video presentation in 5 simple steps
Learn how to make a show-stopping video presentation to engage your audience, using Dropbox Capture to record your screen, voice, and camera simultaneously.
Whether you’re a teacher, student, business professional, or even a YouTube content creator—for many of us, delivering presentations quickly becomes a standard part of everyday life.
But what happens if you can’t be there to deliver your presentation in person, need a key point to land perfectly, or you need your audience to watch it asynchronously in their own time? Have no fear, video presentations can be a great solution to all these challenges.
In this guide, we’ll cover everything there is to know about creating your own high quality video presentations, so your audience can benefit from your content whenever they need it.
Jump to section
- What is a video presentation
What makes a good presentation video?
What tools do you need to make a video presentation, how to make a video presentation.
- Making a video presentation in PowerPoint
- Making a video presentation in Keynote
Starting from the top: What is a video presentation?
A video presentation is a method of communication through which information is delivered partially or entirely through video. In other words, it’s the process of using video to deliver a message or presentation.
Common formats for video presentations might include pre-recorded slide presentations, instructional videos, sales material, inspirational talks, entertainment, or anything you can think of.
While the reaction to a video presentation will be subjective, there are a few general qualities that can be beneficial to keep in mind:
- Make your video valuable —have a clear intended outcome for the viewer and be sure to reach it
- Make sure your audio and video are clear —you want your audience to focus on your message, not your video quality
- Bring your key points to life —use stories, questions, and examples to illustrate key concepts and engage viewers
- Establish expectations —use your introduction to set clear expectations, either with an agenda or teasing where the session is heading
- Don’t rely on slides —if the slides added all the value, you could just send your audience a PDF. Ask yourself: what are you adding to the content by presenting it?
- Keep an eye on time —don’t make your video presentation longer than it needs to be.
- Mix it up —break the monotony and change pace at appropriate intervals
- Don’t start over for the sake of perfection —if you make a mistake during recording, you can always edit it out later
Before you can start creating your own video presentations, you’ll first need a few basic tools.
Hardware for a video presentation
Let’s start with the basics, your tech. In most cases, you’ll have everything you need if you have a standard laptop or desktop computer.
Here’s what you’ll need to start making video presentations:
- A laptop or PC —you’ll need something to make the presentation recording on
- A microphone —to record your voice-over, either built-in or USB
- A camera —if you want to include video of yourself, either as a built-in webcam or a USB camera
Video recording software
With your tech set up, you’ll need software to record your presentation. Depending on your needs, this might be something to record your screen, record your voice, or record yourself with your camera.
With Dropbox Capture , you can do all three at the same time .
Dropbox Capture is video and screen recording technology, designed to make it easy to quickly capture whatever you need. All without needing advanced editing skills or specialist equipment.
With Capture, it’s easy to:
- Record your screen, webcam, and microphone simultaneously
- Create GIFs
- Draw on or annotate recordings
- Automatically generate closed captions
- Share in just a few clicks
While presentation applications like PowerPoint and Keynote have some built-in screen and presentation recording capabilities, they only allow you to record the presentation.
Whereas with Dropbox Capture, you’re free to jump between windows and applications throughout your presentation recording—giving you greater freedom on what you present.
File storage and sharing tools
Ultimately, you’re going to want to make your video presentation available for viewers somewhere.
With Dropbox cloud storage , this is as easy as copying a link , with full control over access and permissions for your files.
We’ll now cover all the steps to create an impactful video presentation, starting from the very beginning—your plan.
1. Plan your topic, examples, and intended audience
You likely already have an idea of what you’ll want to cover in your video presentation, but it can help to formally get this down on paper:
- Presentation aim —what do you want your audience to understand by the end of the video?
- Approach —broadly, what will you cover to help them understand this concept?
- Resources —what examples will you be able to share to illustrate the key concepts?
To help with the planning process, Dropbox Paper has a number of pre-built templates to get your creative juices flowing, like the brainstorming template .
2. Create your presentation slides and your video presentation storyboard
If you haven’t already done so, it’s time to create your slides.
While doing this, you should also think about the overall storyboard of your video presentation—what are the key beats, how will you present them, and what slides do you need?
A storyboard is a visual tool, used by video producers to map out the narrative flow of a video and the visuals that will accompany it. In many cases, your presentation will almost act as a storyboard, but it might help to get this down on paper first.
You can learn more about the storyboarding process in our in-depth guide to storyboards .
3. Record your video presentation
With your storyboard and presentation ready, it’s time to go about creating your recording.
You can record your screen first, then later record a voice-over or video narration and edit the two together. Or with Dropbox Capture , you can record your screen, webcam, and microphone simultaneously. Using Dropbox Capture makes it easy to create your pre-recorded video lesson in one take. Perfect, if you don’t have access to advanced video editing software.
To record with Dropbox Capture , it’s a simple as the following steps:
- Open Dropbox Capture
- Click Screen recording & camera
- Choose which part of your screen you’d like to capture
- Click the Record icon to start recording, click it again to stop recording
- Click the Pause icon in the side panel while recording to pause or resume recording
- Click the Draw icon in the side panel while recording to draw on your recording
4. Edit your video presentation
If you’re already happy with your recording, there is no further editing required.
In any other cases, you can use video editing software to apply finishing touches to your video as you see fit. These edits might include:
- Editing your screen recording and voice-over together (if you have separate files)—with Dropbox Capture you can record your microphone and camera simultaneously, without the need to use editing software
- Cut and delete unwanted sections of video—like an awkward pause or a dog barking, with Dropbox Capture you can do this directly within the app, no editing software required!
- Remove awkward filler words—clean up those pesky “ums” and “ahs”, with Dropbox Capture you can do this automatically, directly in the app
- Adding text overlays to emphasize key points of video sections
- Additional flair and visual elements
- Adding background music to create an atmosphere
5. Share your video presentation
With your video presentation finished, you’ll need a way for your viewers to access it.
If you're using Dropbox Capture, sharing your presentation couldn’t be easier, simply click the Share button and the sharing link will automatically copy to your clipboard.
If you’re not using Capture, Dropbox cloud storage makes it easy to share your video files with anyone and see who’s viewed your video presentation. All you need to do is copy a link to the file.
If you want to send a copy of the full video, complete with its cumbersome file size, Dropbox Transfer makes it easy to send large files securely.
How to record a video presentation in PowerPoint
It’s worth keeping in mind that, when recording directly within PowerPoint, you can only record your slides and your editing options will be limited. The best way to give yourself complete control over what you record—and how you edit it afterwards—is with a purpose-built screen recording app like Dropbox Capture .
If you’d still prefer to record directly in PowerPoint, you can do this by following these steps:
- Open PowerPoint and open your presentation file
- Navigate to the slide you’d like to start recording from
- Select Record in the top-right corner of the PowerPoint window
- Click the red Record button, wait for the countdown, then start your presentation
With your presentation recorded, you can then save it to your Dropbox cloud storage , making it easy to share your video files with anyone and see who’s viewed your video presentation.
How to record a video presentation in Keynote
If you’re a Mac user and would prefer to record directly in Keynote, here’s how to do it:
- Open Keynote and open your presentation file
- Select Record Slideshow from the Play menu at the top of the screen
With your Keynote presentation recorded, you can then save it to your Dropbox cloud storage and share it simply by copying the link.
Again, your control over what you record and how the final edit turns out will be limited when recording directly within the Keynote app. To give yourself complete control over how your video presentation turns out, a purpose-built screen recording app like Dropbox Capture will be more suitable.
Elevate your video presentations with Dropbox Capture
It’s never been so simple to create an engaging and memorable video presentation, with Dropbox.
With Dropbox Capture , it’s never been easier to get your message across with video recordings of your presentations. So you can clearly say what you mean and nail the delivery, every single time.
Capture your audience’s attention.
Try Dropbox Capture
Make a video presentation that turns heads
Browse our video presentation templates to get started, how to make an engaging video presentation, start with a professional template.
There’s no reason to design a presentation from scratch. Use one of Vimeo’s eye-catching templates to start creating.
Add images from our stock library
Browse our library of images and video clips to find elements to add to your presentation — or upload your own.
Customize your presentation from start to finish
Use Vimeo’s video presentation software to add text, create transitions between slides, and add narration or music to your presentation.
Save and share your presentation video
Share your creation directly from Vimeo Create to your social media channels. Or download it and present from your computer.

Design a corporate video presentation that wows
Video breathes new life to presentations with audio, imagery, and interesting subjects. Vimeo Create helps you design your video presentation from start to finish, but here are a few tips to create a top-notch presentation.
Prioritize your audio
A video presentation relies on clear and reliable audio. Invest in a quality microphone that translates well through digital content. Record in a quiet space that’s void of outside noises, like wind, pets, or other environmental noises that can affect audio. Test your microphone in different spots to find its best distance from the subject for the clearest results.
Frame subjects well
Help your video subjects — even if that’s just yourself — look their best with the right framing techniques. Find an angle that’s attractive on screen, such as placing the camera slightly to the left or right of your subject.
Make it consistent
Each frame of your presentation should look like it belongs there. Try to keep a consistent theme throughout each video clip or slide. Audio and ambience should remain similar along the way, as should the video’s coloring, branding, and messaging.
Make your own video presentation for free
Learn more about virtual events, find the right plan for you..
Explore plans and see all that Vimeo can help you accomplish. Start a free trial, or get started with our free plan.
Everything you need to make, manage, and share brilliant videos
Quickly create, edit, and share content regardless of your budget or expertise.
Stream and host for hundreds of thousands of viewers at 4k, 8k HDR, and with Dolby Vision.
Customize your video player, manage security permissions, and find content quickly.
Automatically create chapters, apply your brand kit, and optimize for SEO.
Presentation video frequently asked questions
What is a video presentation used for.
A video presentation uses visual media to show something to viewers. Marketers frequently use video presentations for product tutorials, brand awareness campaigns, or demos of digital software. Brands might also use video presentations to onboard new or train current employees.
How can I make a good video presentation?
A good video presentation holds the interest of viewers from start to finish. Inject a little humor, use real people from your company, and use different forms of media to keep things engaging. Start with a professional premade template from Vimeo for inspiration.
How do I make a video presentation?
The easiest way to make a video presentation is with Vimeo Create’s presentation video maker. Browse our templates, choose one to start with, and customize it to your liking. Then, download it to your device or share it to your website or social media channels.
Ready to get started?
Create video presentations that demand attention.
Trusted by 9+ million people and over 10,000 companies
Create video presentations that demand attention with the Biteable video presentation maker. Deliver critical information with pitch-perfect video templates, one-click branding, and a seamless video creation experience for your best presentation yet.
How to make animated videos in minutes, start a free 7-day trial of biteable., pick an animated video template or build your own with pre-made animated scenes., customize your video: add or remove scenes , include animated text, upload your own pictures and video clips. you can even add a voice over, download your masterpiece or share it far and wide with a single, trackable link ., a video presentation maker that rises above the rest, on-point templates.
Get started with brandable templates, ready-made scenes, and best-in-class animations.
Smart editing
A done-for-you editing experience takes the hard work out of the equation.
Branding made easy
Automatically apply your company colors and logo to your entire presentation.
Getting started
Mark video presentation off your to-do list with biteable.
If you can make a PowerPoint, you can make a video presentation with Biteable.
Choose from a full library of brandable templates and scenes, all designed with a professional audience in mind. Build out your video presentation with animated text, characters, and icons — all with the click of a button. Polish it off with a premium music track.
Need to add your own media? No problem. Seamlessly add video clips and pictures for a polished look in minutes. Better yet, record new footage, add a voice-over, or capture your screen without leaving the app.
Biteable’s all-in-one video presentation maker does the hard work for you. All you have to do is go be the star of the meeting.
Create videos that drive action
Activate your audience with impactful, on-brand videos. Create them simply and collaboratively with Biteable.
Make a video presentation for
Asynchronous meetings.
Create video presentations and send them to your team with a single link.
Live meetings
Whether you meet on Zoom or in person, a video presentation beats a PowerPoint any day.
Video reports
A performance report is boring, but a video presentation report is bold and memorable.
Making a video presentation: FAQs
Your answers to the most frequently asked questions about making a video presentation.
How do I make a video presentation for free?
It’s hard to make a video presentation for free, because free video makers have limited features that usually aren’t geared toward professional presentations. Your best bet is making a presentation during a free trial with a leading video presentation maker. Most people quickly realize purchasing a subscription is worth the money.
How do I make a video out of a presentation?
Not all online video makers are geared toward making a video out of a presentation, so it’s important to use one that focuses on making videos for a professional setting. Look for features like: templates and scenes geared toward the business world; video branding capabilities; an easy-to-use workflow.
How do I make a narration video presentation?
There are three ways to make a narration video presentation.
- Record narration separately and sync it to your presentation.
- Upload first-person video footage. Merge it with your presentation.
- Use a video presentation maker with in-app voice-over and recording features. (This is the easiest way to make a narration video presentation.)
How do I make an animated presentation?
Making an animated presentation from scratch is difficult unless you have advanced skills. Your best bet is to find a video presentation maker with a library of animations you can add to your presentation. Look for an online video maker that offers unique animations geared toward a professional setting.

“Biteable gives us the speed and quality to create videos that allows our 3-person team to play at the level of a 60-person team.”
- Tara Aiken, Regis Corporation
4 must-have tips for making video presentations
Creating a video presentation is easy with Biteable. And it’s even easier if you follow these best practices.
Have a goal in mind
Every great video presentation starts with a goal. What are you trying to accomplish? Maybe you want to share a new idea with your colleagues. Maybe you want to report on important company metrics. Or maybe you want to do something else entirely.
It’s incredibly difficult to make a video presentation that moves the needle until you define exactly what your presentation aims to achieve. Figure that part out and the rest becomes much easier.
Choose a proven template
Now that you know what your presentation aims to achieve you can pick a template that fits. You can create your video presentation from scratch, but using a template as a starting point gives you guide rails for tempo and pacing, plus a proven structure designed by pros.
Biteable video presentation maker has plenty of template options geared toward a professional setting, plus hundreds of extra video scenes and animations to build out your video presentation as much or as little as you like.
Use animations that underscore your message
One of the biggest advantages of video presentations over something static like a PowerPoint is the presence of motion. Without even realizing it, your audience will remember the information better simply because video is a multimedia experience that combines movement, sound, and visuals. To make the most impact, choose your animations wisely and use movement in a way that underscores your key points.
Are you presenting on the massive growth your marketing team achieved? Use a graph showing upward movement to drive the point home. Do you have one key point you’re trying to make? Use animation to circle your text or arrows that point at your most important information.
(All of this is easy to do with the video scenes available in Biteable.)
Keep it short and sweet
The length of your video presentation matters. Too short and you won’t be able to convey enough information. Too long and your audience will tune out.
There’s no one-size-fits-all solution when it comes to video presentation length. But in general, 1-2 minutes is the sweet spot for making a video presentation that holds attention while still getting all the important information across.
You’d be surprised how many details you can share in this amount of time. A 15-minute live presentation can easily be condensed into one or two minutes if you hone your message to focus on the key details.
Brand your video
This is probably one of the most important — and most overlooked — parts of creating a successful video presentation. You’d never create a PowerPoint with erratic, off-brand colors. Making a video presentation is no different.
It’s a subtle change, but it gives off a big signal that you are polished and professional, and that you and your video presentation mean business.
Take advantage of the unique branding feature in the Biteable video presentation maker to easily apply your colors and logo to your entire presentation.
"> "> Make a presentation video today
60 Effective PowerPoint Presentation Tips & Tricks (Giant List)
Here's a PowerPoint presentation tips and tricks guide that takes you through how to make a good PowerPoint presentation.

The best PowerPoint presentations shouldn’t be remembered. Instead, they should fall into the background to support you and the message you’re trying to get across.
Unlike good PowerPoint presentations , bad PowerPoint presentations are a distraction. You may remember them, but not in a good way.
You’ve seen them before. They might have millions of lines of text. Or a disjointed flow to the slides. Even worse, some slides feature ugly photos and poor design that detract from the message you’re trying to get across. That can even hurt your credibility as a professional or speaker.

This article will take you from finding your initial topic to learning how to make a great PowerPoint presentation. Our guide covers everything in between so that you learn how to present a PowerPoint like a pro.
These Microsoft PowerPoint presentation tips and guidelines are organized into sections. So cut straight to the advice you need and come back when you’re ready for the next steps.
Guide to Making Great Presentations (Free eBook Download)

Also, download our Free eBook: The Complete Guide to Making Great Presentations . It’s the deepest resource for learning effective presentation skills for a PPT.
This eBook covers the complete presentation process. It takes the PowerPoint tips and tricks you learn in this article further. Learn how to write your presentation, design it like a pro, and prepare it to present powerfully. It’s another great source for presentation design tips.
Master PowerPoint (Free Course): 15 Essential Tips
This article is full of helpful tips so you can build a powerful presentation. You can also find more PowerPoint tips in this video lesson:
To learn even more about how to make a PowerPoint look good, review the huge list of tips below.
What Makes a PowerPoint Presentation Effective?
Knowing how to use PowerPoint and work within it quickly is helpful. But more important is making a good presentation that hits all your goals. A great PowerPoint presentation is:
- Prepared to Win . Research, plan, and prepare your presentation professionally. It helps you deliver an effective message to your target audience.
- Designed Correctly . Your visual points should stand out without overwhelming your audience. A good PowerPoint visual shouldn’t complicate your message.
- Practiced to Perfection . Rehearse your timing and delivery so that your points land as practiced with a live audience.
- Delivered With Poise . Present with a relaxed inner calm and confident outward projection. Give your audience warmth, excitement, and energy.
- Free From Mistakes . Avoid typos, cheesy clip art, and mistakes like reading directly from your slides.
Consider this your all-inclusive guide to how to make a good presentation. We’ll look at preparing your presentation and explore how to design it in PowerPoint. Plus, we’ll cover how to practice and nail your delivery successfully come presentation time.
We’ll also address what not to do in these tips for PowerPoint presentations—so you can sidestep any big mistakes. Now let’s dig into these tips for effective PowerPoint presentations.
Killer Presentation Preparation Tips to Get Started Right
Before even opening PowerPoint, start by addressing these things. These Microsoft PowerPoint tips and tricks will ensure that you’re prepared for your presentation:
1. Know Your Stuff
Your presentation isn’t about your slides alone. It’s about the message you want to get across. Before filling in stats, facts and figures, think about the narrative that’ll be discussed, why, and in what order.
2. Write It Out
Start in a Word or Google doc, and storyboard or script the entire presentation. This will give you an idea of how the information presented will flow and how viewers will see it in sequence. Learn the complete writing process .
3. Highlight What’s Most Important
A presentation covers the most crucial pieces only. Whatever you’ve been working on that led to this—a paper, a work project, a new product design—doesn’t need to be shared in its entirety. Pick key points and put the rest in an “Appendix” to refer to during the Q&A session at the end.
4. Know Your Audience
How you talk to a room full of medical professionals should be different from the way you address a room full of young entrepreneurs. Everything, in fact, is different: your topic selection, the language you use, the examples you give to illustrate points. The little bits of humor you include should be tailored specifically with your target audience in mind.
Understand your audience’s needs to create a successful PowerPoint presentation. Customize your content to meet their specific requirements.
5. Rehearse! (Yes, Already)
It’s never too early to get used to the rhythm of your presentation and take note of points you want to emphasize. While saying it out loud, you’ll start to develop a “feel” for the material. You’ll notice that some things work well, while others don’t and might need to be worked around.
6. Rewrite After You Rehearse
As you’re rehearsing your presentation, you’re bound to stumble over sections that don’t quite flow naturally. Instead of reworking your delivery, it might be time to consider the content and rewrite the areas that served as stumbling blocks.
“Editing is hard. ‘It’s good enough,’ is a phrase wannabes use. Leaders take editing seriously.” – Anthony Trendl
The most important part of creating a great presentation is the writing stage. The second most important stage is rewriting.
7. Share With a Friend
If the stakes are high for your presentation, it’s never too early to get feedback from those that you trust. Here’s an article that helps you collaborate as a team on a PowerPoint presentation. Get PowerPoint design tips from those that you trust when you collaborate.
Simple Tips to Design Your PowerPoint Presentation Better
Second only to you (the information you bring and how you present it) is your PowerPoint slides. If not designed well, a PowerPoint can be disengaging or distracting (regardless of the content quality). Here are some presentation design tips to make sure this doesn’t happen to you:
8. Keep Your Slides Simple
This is one of the most important PowerPoint presentation tips to follow when designing your slides. Keep in mind that less is more (effective.) A cluttered slide is distracting. It causes confusion for an audience: Which part of the slide should I focus on? Should I read the slide or pay attention to the presenter?
A simple, visually appealing slide will engage your audience, keeping them on track with your main points. Here’s an example of a simple slide that serves its purpose perfectly:

Minimalist slide templates like Nook can help you resist the urge to clutter your slides.
9. Limit Words on Your Slides
Piggybacking on the last point, less is more effective. If possible, avoid bullets altogether. Otherwise cut them to just a few simple words. The audience should be listening, not reading.
10. Use High-Quality Photos and Graphics
One of the most important tips for quality PowerPoint presentations is to use high-quality photos and graphics.
Earlier in this tutorial, you saw Envato Elements, an all-you-can-download service with PPT tips inside of templates. Those pre-built designs are a beginner’s best friend. They’re even better when paired with Elements’ unlimited library of stock photos .
People are more likely to take you seriously if your presentation is visually appealing. Users view attractive design as more usable. Similarly, they’ll view a more attractive PowerPoint as more effective.
11. Use Accurate and Relevant Charts and Graphs
Charts and graphs can also be distracting if they’re not used right. Make sure your information design is simple and clean so that the audience doesn’t spend the entire time trying to decipher what your X axis says. Learn more about PPT data presentation .
12. Use High-Quality, Fresh Templates
Have you seen the old PowerPoint template that looks like worn paper and uses ink splashes? Yeah, so has your audience. Templates can be distracting if they’re too basic or if the design feels dated. You need one with great design options.
Costs are always a concern. But when you use Envato Elements, you’ve got everything you need to create a great PowerPoint presentation . That’s thanks to the incredible all-you-can-download subscription package.
The best PowerPoint tips and tricks can hardly compare to the value of using a template while building your presentation.
On Envato Elements, there are thousands of PowerPoint design templates that are ready to use. Instead of designing a presentation from scratch, start with a template! Just add your specifics to the placeholders.

Templates like Galaxi are impressively designed and waiting for your slide specifics.
The best PowerPoint design tips save you time. And there’s no tip more powerful than this one: use a pre-built template . It helps you master how to present a PowerPoint without spending all your time in the app.
13. Choose Appropriate Fonts
Fonts are an important part of engaging your audience. Fonts and typography choices have a subconscious effect on viewers. They can characterize your company’s presentation and brand either positively or negatively. Make sure that you’re choosing fonts that are professional and modern.
14. Choose Color Well
Like font choice, colors cause specific subconscious reactions from viewers. Choosing an outdated color combination for your presentation will render it ineffective.
Below is an example of the Popsicle PowerPoint template , which has a modern presentation color choice:

The Popsicle PowerPoint template highlights how harmonized color palettes can create beautiful slides.
15. Clean + Simple Formatting Makes All the Difference!
We’ve got a full tutorial on how to make a good presentation slide . Give it a read through and review the accompanying video. Just remember, less is more. The focus is you and your message , not your slides.
16. Make Sure All Objects Are Aligned
A simple way to create a well-designed presentation is to make sure all items on a slide are intentionally aligned. To do this, hold down Shift and select all the objects you want to include. Then choose Arrange in the options bar and apply Alignment Type .
17. Limit Punctuation
This isn’t the place for exclamation points. Emphasize your points (while speaking). Don’t enlist punctuation to do this for you. (Leave these at home!!!)
18. Avoid Over-Formatting Your Points
This PowerPoint presentation tip is simple. There’s no need to have every word of every bullet point capitalized, or to have all your bullet points in title case. If possible, drop bullets altogether. Again, the simpler, the better!
Limit your text formatting, including reducing the use of bullets, underline, and other effects. Compare the before example on the left to the revised version on the right.

19. Combine Information With Graphics in PowerPoint
One of the most powerful presentation skills for PPT is using infographics. With the right type of visuals, slides come to life and reduce the text in favor of graphics.
Infographics help combine information with graphics. It’s easier to explain complex ideas when you use visual formats that are intuitive.
Practice Presentation Tips: Rehearse, Rehearse, Rehearse!
Delivery is probably more important than the actual content. Here’s how to become more aware of your own unique ticks, and how to present like a polished pro:
20. I’ll Say It Again, Rehearse!
Just do it. Again and again. Experiment with pauses, gestures, and body language. Practice around one hour for every minute of your speech.
21. Practice With a Timer
Consistency is key to an effective PowerPoint presentation. The timing should be similar (ideally the same) each time you rehearse. This one will especially pay off when it’s time to present in front of your audience.
22. Slow It Down
Many of the best speakers today intentionally speak slowly. You’ll have the chance to emphasize, appear more thoughtful, and make your information easier to digest.
23. Pause More Often
Like the prior tip, pausing more often allows your main points to be emphasized and gives time for information to sink in. You need to let key points breathe a little before rushing into the next section.
24. Record Yourself
Use your phone’s voice recorder. Assess and critique yourself. Consider:
- Are your pauses too short or too long?
- Are you speaking slowly enough? Too slow?
- When you’re nervous, does your voice get high like the mice in Cinderella?

It’s always weird to hear your own voice recorded; don’t stress it. Use this as a time to adjust.
25. Choose Three Focal Points in the Room
If you stare at the same spot (or even creepier, the same person) the entire time, your presentation will be ineffective (and awkward.) People will be distracted by you, wondering what you’re staring at.
Try this: pick three points in the room (typically: left, center, right). Take time to direct your delivery toward each physical focal point in the room. Also, focus on the center when making your primary points.
26. Vary Your Sentence Length
This makes you sound more interesting, and it’s easier for your audience to follow. Think short and punchy. Or go long and complex for dramatic effect.
27. Modulate!
Don’t speak in monotone for your whole presentation. Be conscious of raising and lowering your voice tone. Otherwise, people will tune you out, and you’ll come across like the teacher in Charlie Brown.
28. Practice in Front of a Mirror
What you look like is as important as how you sound. Pretend you’re having a normal conversation, and allow your hands to move with your speech to emphasize your points. Just don’t get carried away! (I’m thinking Brene Brown or President Obama , not your Aunt Jamie after a few gin and tonics.)
29. Use “Present Mode” When Rehearsing
When you finally are ready to hit the Present button in PowerPoint, make sure you use the Present Mode option. This allows you (and only you) to view extra notes about each slide—just in case you forget something!
30. Practice With New Audiences
If possible, try doing a few real live test runs as a webinar or even at a local Toastmasters organization to get some feedback from a live audience.
31. Engage the Audience by Asking Questions
There’s no reason that a presentation should be one-sided. Why not invert the format and ask your audience a question?
To learn how to create a slide that kicks off a Q&A, use this article . These PowerPoint design tips help you create an engaging and exciting discussion.
Helpful Tips to Step Up and Deliver Come Presentation Time
When the actual day arrives, there are only a few last PowerPoint presentation tips and guidelines to keep in mind:
32. Take a Deep Breath
Deep breathing is proven to relieve stress. It’s simple, and it’ll help you remain calm and in the moment, even up to the last minute before starting.
33. Lighten Up Your Mood
Tell yourself a joke or watch a funny video clip. Do this before the presentation, of course. Research concludes that happy people are more productive. More productive is more focused and able to perform better.
34. Remind Yourself to Take It Slow
When we’re stressed or nervous (or both), we tend to speak faster. Consciously, take yet another deep breath and remind yourself to take it slow!
35. Read the Room
Every presentation room has a temperature. It’s your job as a speaker to gauge it and tailor your presentation to it.
Here’s a great example. Layoffs are coming at a company, and you’re asked to speak to an audience. Even if the audience isn’t personally affected by the actions, you’ve got to consider the morale of the workforce.

Skilled speakers have a knack for reading the energy of the room and adjusting their presentation on the fly.
The last thing that group will want to hear is how strong the economy is and why the company is the best place to work. That doesn’t mean that you’ve got to align to their uncertainty, but don’t go too far against the grain while presenting.
Robert Kennedy III is a master of bringing energy and aligning a speech to the audience. Here’s his advice for adjusting:
“It can be hard to wake up a “dead” crowd but go for it. Most of all, don’t take their energy personally. Focus on serving them with every bit of your fiber then leave empty.”
36. Fake It ‘Til You Make It!
Go forward with confidence. If you act confident, you’ll start to feel more confident. Move slowly with grace, speak clearly, smile, wear something nice. You’ll appear confident to all attendees (no matter how you feel internally).
PowerPoint Presentation Tips and Tricks to Help Avoid Mistakes (What Not to Do)
Most importantly, focus on what you can do to make your presentation better. There are a few important things not to do that we’ve got to address. Here are a handful of PowerPoint presentation tips and tricks to help you avoid missteps.
37. Stop With the Sound Effects
Sound effects are distracting and outdated. In most cases, avoid them. Add audio or music to your presentation to inject interest or highlight an important point, but it’s something to take extra care with. If you insert audio, then make sure your use really connects with your audience and has a fresh approach. Otherwise, it’s best to leave it out.
38. Don’t Use Flashy Slide Transitions
Again, this is distracting and outdated. Use transitions and subtle animations in your PowerPoint presentation. But you need to take care and do it right .
39. Beware of Clip Art
This PowerPoint presentation tip shouldn’t even have to be said. But please, please don’t use clip art. Use professional graphics instead.
40. Don’t Be Afraid to Be Afraid
The fear of public speaking is a real one. Many beginners think that if they’re feeling nervous that a presentation won’t go well or succeed. That might lead them to cancel the presentation.
Here’s a tip from expert Sandra Zimmer, who leads The Self-Expression Center on conquering your fears before you take the stage:
“Get out of your head and into your body. I do this through a grounding exercise that really works to calm nerves and bring you present in the moment.”
If you think that public speaking fears aren’t normal, you might never give your award-winning presentation. So don’t be afraid to be afraid, and acknowledge it’s part of the process!
41. Don’t Read Directly During Your PowerPoint Presentation
If you spend your entire presentation looking at the screen or your note cards, you’re sure to lose your audience’s attention. They’ll disengage from what you’re saying, and your presentation will fall flat.
Reading from your paper or screen also makes it look like you’re not prepared. Many people do it, but no one should. As a general rule, only present something you know well and have, at least mostly, memorized the main points of.
42. Don’t Miss Out on PowerPoint Customizations
Many new PowerPoint users often make significant mistakes when using Envato Elements designs.
The best way to see how to make a good presentation PPT is to start with designs from others. That means using a template, but that doesn’t mean you can’t customize them!

Don’t forget that PowerPoint templates are infinitely customizable. Think of them as guides with built-in presentation design tips.
To see more presentation tips that show you what not to do, make sure to check out our guide .
Work in PowerPoint More Effectively (Tips & Tricks to Level Up Your PPT Skills)
These PowerPoint tips will help you get the most out of the application to level up your next presentation. Let’s dive in.
43. Use the Visual Guides
When you’re designing your next PowerPoint presentation, it helps to create a sense of visual rhythm. Slides that have objects aligned and centered are more likely to resonate with an audience.
44. Use a Few Animations (Tastefully)
Animations in effective PowerPoint presentations are a slippery slope. We’ve all sat through presentations where there were so many objects in motion that it was easy to lose focus on the key ideas in the presentation.
But that’s why animations get an unfairly bad reputation. Use animations to create motion and hold an audience’s attention. Use them sparingly and on key elements on your slide, and you’ll capture that attention properly.
45. Stage Key Content With Animations
You just learned that animations should avoid being distracting. But there’s an important principle to using animations properly. It’s called staging content.
Staging content means that the content appears step by step. There’s nothing worse than overwhelming an audience with all your content at once. But when you stage content, bring it on step by step.
Take it from presentation pro Suzannah Baum :
“If you’re sharing a slide with lots of different points on it, using the animation to reveal those points one at a time is a way to keep the presenter’s content flowing smoothly.”
For more animation presentation tips and tricks, follow our guide .
46. Add a Video to Your PowerPoint
When you’re sharing a big idea in your presentation, it helps to share your perspective from a few different angles. Adding a video to supplement your content can do just that. Luckily, it’s easy to add and embed a YouTube video in your next PowerPoint presentation.
47. Add Charts & Graphs
Charts and graphs can help you tell stories with data. It’s easy for an audience to zone out when you throw a big data table or set of statistics at them.
instead, convert those to charts and graphs. Try out our tutorial to learn how to edit those graphs.
48. Build Your Own Infographics With SmartArt
Earlier in this tutorial, we gave you one of my favorite PowerPoint design tips: use infographic templates.
Here’s another. One of my favorite PowerPoint features is SmartArt, which allows you to build infographics right inside the app.
You don’t have to use another graphic design app like Photoshop or Illustrator to add visuals. Instead, try out SmartArt to help you build graphics that are easy to update.
49. Use Presenter View
Remember that when you use the PowerPoint, you’ re the presentation. The slides are just there to reinforce what you’ve got to say and support your speaking points.
That’s why I always recommend using Presenter view. More often than not, you’re going to have several displays. Presenter view shows your content on your screen, while your presentation is displayed on another screen.
50. Track Your PowerPoint Changes
One of my favorite PowerPoint design tips is to collaborate. Those who know you best will suggest compelling changes that are sure to help you succeed.
As you start collaborating on your presentation, it helps to keep track of proposed and included PowerPoint changes. Use this article to track changes made by others.
10 More Advanced PowerPoint Tips & Tricks
Really need to wow an audience with a good PowerPoint presentation? Give these tips a try to make an unforgettable impression:
51. Engage With an Interactive Quiz
A good PowerPoint presentation gets your audience involved. One of the best PowerPoint tricks is to do that with a quiz. By engaging audiences, a quiz makes your slides memorable.

By adding trivia, you’ll see how to present a PowerPoint in a way that people will love. Channel your inner game-show host today. MIDTEST is a good PowerPoint presentation with quiz slides.
52. Illustrate With Custom Image Masks
One of the top PowerPoint tips is to illustrate your slides. But you can go beyond simple, rectangular images on each slide.

The Burte template is full of PowerPoint tricks , including custom image masks. Image masks shape photos into unique works of art. And thanks to premium templates, you can style photos just like this. Masks overlay your photos onto geometric shapes, instantly elevating your style.
53. Print Handouts With Extra Notes
Wonder how to give a good presentation PPT that audiences will remember? Give them a piece of it to take home.
PowerPoint makes it easy to print handouts with room for notes on the page. This way, audiences can keep copies of your slides, along with their own notes. This is the perfect way to ensure everyone engages with and retains your content.
54. Make Bulk Edits With Master Slides
When you think about how to present a PowerPoint, consider your branding. That means keeping your logo front and center in the eyes of an audience. But if you’re working with a lengthy slide deck, this could seem daunting.
That’s where master slides come in. They’re common in premium layouts, and they’re a leading example of presentation skills for PPT. Master slides let you make bulk edits fast.
55. Shrink File Sizes for Sharing
Many of the top presentation tips involve making your slides more accessible. Often, that involves sharing them with audiences online.
You’ll often find that email clients and cloud services limit the size of files that you share. This can be a problem with large PPT slide decks. But there are a few quick steps you can take to reduce PPT file size. Cut graphics, scale down photos, and more.
56. Map Processes With Flowcharts
As you consider how to do a good PowerPoint presentation, think of ease of understanding. After all, you’re trying to explain something to your audience.

The Flowcharts in Infographics template seamlessly illustrates ideas and processes. A flowchart maps out a process in a visual way. Instead of resorting to endless narration, try a quick illustration like this. It saves you time and effort, and your audience is sure to thank you.
57. Use Brand-Specific Colors
Using presentation skills for PPT helps form an association between your message and branding. There’s no better way to do that than with your brand colors.
PowerPoint makes it easy to change color themes, adding your brand colors and logo to each slide. This is one of the top PowerPoint tricks for marketing presentations.
58. Build Social Media Posts in PPT
A good PowerPoint presentation doesn’t have to be shared through a projector. Use the app and templates to build amazing illustrations to use anywhere.

A template like Soffee helps you learn how to present a PowerPoint easily with a pre-built design.
Try using PowerPoint to create social media posts. It helps you engage with your audience, with no need to design custom layouts from scratch.
59. Be Industry-Specific
One of the top presentation tips in 2024 is to be industry-specific. That means avoiding generic layouts and choosing something more customized.
This offers two key advantages. First, you save time by having layouts built for you. Second, you gain design inspiration for your specific topic. Themed templates are truly the best of both worlds.

The Medical and Health template is a good PowerPoint presentation with a set theme.
60. Design for Online (Virtual) Sharing
Last but not least in our list of PowerPoint tips comes virtual presenting. More and more often, slides will be shared with online audiences around the globe.
Why not design your slides for that very purpose? And then learn how to share flawlessly with a global team? It’s one of the top presentation tips for 2024. Embrace it today.
More Great PowerPoint Tutorial Resources
We’ve built a resource for Microsoft PowerPoint that you’re sure to want to try. It includes countless PowerPoint tips and tricks. It’s called How to Use PowerPoint (Ultimate Tutorial Guide) and has all the PowerPoint design tips you need.
Discover More Top PowerPoint Template Designs From Envato Elements for 2024
You’ve just seen our favorite powerful PowerPoint presentation tips and guidelines to help you improve your speaking. We’ve also mentioned Envato Elements, an incredible all-you-can-download source for top PowerPoint designs .
Here are five of the best PowerPoint templates that you can use to create your best presentation yet:
1. Galaxi PowerPoint Template
Blast off to success with the help of this PowerPoint template! Think of the pre-built slide designs as pro PowerPoint design tips. They’re built by professional graphic designers. All the popular and modern slide styles that are perfect for your next presentation. Use Galaxi’s five styles and 30 designs to create a great presentation.
2. Masmax PowerPoint Template

We selected templates for this article that match the PowerPoint tips and tricks provided. Masmax fits the bill perfectly across its 234 unique slide designs. These slide designs are sure to align with the latest in design expectations.
3. STYLE Multipurpose PowerPoint Template V50

Style is subjective, but we can all agree that this template is stunning! The light and airy slide designs are built with fashion-focused designs in mind. But that doesn’t mean that it’s not perfect for most presentations. When learning to present a PowerPoint, remember that templates can be customized to suit your purpose.
4. Peachme Creative PowerPoint Template

Peachme has image-focused slides with splashy designs. The slides are colorful and perfect for a modern presentation. Don’t worry about remembering all the PowerPoint design tips because they’re included in the pre-built slides. Use Peachme’s designs for your presentation today.
5. Buizi Office Building Rent PowerPoint Template

Buizi markets itself as a real estate focused template. It’s ideal for that purpose because of the minimal, image-focused slide designs. But that also makes it a perfect choice for presentations in many fields.
We’ve just scratched the surface of PowerPoint design tips with these five options. Here are many more, bundled inside of the best roundups on Envato Tuts+:
How to Build a Good PowerPoint Presentation Quickly (In 2024)
You’ve already seen effective presentation skills PPT techniques. But you may be wondering exactly how to do a good PowerPoint presentation. It only takes a few clicks. Let’s learn how in just five steps.
For this mini-tutorial, we’ll use the Enjoy PowerPoint Template from Envato Elements. You’ll see that it’s a beautiful template that helps you learn how to present a PowerPoint by giving you every object and layout you need.

Let’s get started:
1. Choose Your Slides
As you can see, a template like Enjoy has dozens of unique slides inside. The key to how to give a good presentation PPT is to choose only the slides that you need.

One of the best PowerPoint tricks is to start by selecting slides you wish to use from your template.
In PowerPoint, scroll through the sidebar on the left to view different slide layouts. Right-click and choose Delete to remove unwanted designs. Plus, you can click and drag slide thumbnails to reorder them in the deck.
2. Add Text
Consider how to do a good PowerPoint presentation without investing a ton of time. That’s where premium templates come in.

One of our top presentation tips when working with a PPT is to lean on the pre-built text boxes for your content.
To add custom text, simply click and select the contents of any text box on your slide. Then, type in your own words. Repeat as needed throughout your slide deck.
3. Customize Fonts
With text selected, it’s easy to customize fonts on each slide. Find the Font section on PowerPoint’s Home tab. From there, you’ve got a variety of dropdown options.

Another of our top tips for presentation tricks is to use a custom font setting in your template.
Click to change the font, font size, and more. You can also use the buttons on the left to add bolds, italics, and more.
Need more custom font styles? As an Envato Elements subscriber, you’ve got instant access to thousands of custom fonts . Use them in your presentation with ease.
4. Insert Images
Slides like this one contain an image placeholder. That’s another advantage found only with premium templates. These make adding images a breeze.

Add images to your PPTX template for more visually interesting slides.
To get started, find an image file stored on your computer. Then, drag and drop it over the placeholder. PowerPoint will import it, sized and scaled for a perfect fit.
5. Change Colors
One of the top effective presentation skills is changing shape colors. This helps you control the look and feel of each slide.

With a shape selected, find the Shape Format tab on PowerPoint’s ribbon. Then, click on the Shape Fill dropdown. You’ll see a color chooser menu appear. Click on any thumbnail to apply it to the shape or browse through the Gradient and Texture options.
Start Putting These PowerPoint Presentation Tips & Tricks Into Use Today!
Learning to write, design, and present a PowerPoint presentation is an invaluable skill, no matter where you use it. If you’re a good communicator of important messages, you’ll never go hungry.
Luckily, improving PowerPoint presentations isn’t as hard as it seems. Follow these tips for PowerPoint presentations to design and deliver with greater confidence.
Remember: Less is more (effective) . Use PowerPoint presentation templates for better design and more effective visual impact. And you can customize a PPT template quickly , with the right workflow.
Related Articles


Microsoft 365 Life Hacks > Presentations > Six tips for recording a presentation
Six tips for recording a presentation
Your latest presentation is filled with crucial information and key concepts your colleagues need to remember. Record and archive it for easy reference and absorption.

How to record your presentation
Whether you’re recording a presentation for work, a webinar or school, both you and your colleagues will greatly appreciate having it available to reference. You can absorb information at your pace, ensuring that you retain pertinent information, without having to rely solely on your notes. While the method of recording depends on the virtual meeting platform or whether its in person, here are some guidelines on how to record you presentation:

Tell your story with captivating presentations
Powerpoint empowers you to develop well-designed content across all your devices
1. Choose the right equipment
High-quality recording equipment is essential for producing professional-looking and sounding presentations. Laptops are equipped with microphone and a high-resolution webcam, but it’s always a good idea to consider investing in higher quality recording equipment.
2. Test Your equipment
Before starting your presentation, it’s crucial to test your recording equipment to ensure everything is working properly. Check the audio levels, video quality, and any additional accessories you may be using, such as lighting or a green screen. Conducting a test run will help identify any technical issues that need to be addressed. Review the virtual meeting platform you are using to ensure that the recording feature is enabled, so you won’t have to search for it when the presentation time rolls around.
3. Optimize your environment
Choose a quiet, well-lit environment for recording your presentation. Minimize background noise and distractions to ensure clear audio and video quality. Consider using a neutral background or a virtual background to maintain a professional appearance. Natural lighting is ideal, but if that’s not possible, invest in good quality lighting equipment to ensure your face is well-lit and visible.
4. Organize your presentation contents
Organize your presentation materials in a logical order to facilitate smooth delivery. Create an outline or script to guide your presentation, making sure to include key points, transitions, and visual aids. Practice your presentation multiple times to become familiar with the contents and ensure a confident delivery. If you have multiple presenters, solidify the speaking order and designate one person to facilitate the presentation.
5. Engage with Your Audience
Even though you’re recording your presentation, it’s essential to engage with your audience as if they were present in the room with you. Encourage interaction by asking questions, prompting viewers to think critically, and inviting them to share their thoughts or experiences in the comments section. Respond to comments and questions promptly to foster a sense of community and connection with your audience.
6. Monitor Your Time
Keep track of time during your presentation to ensure that you stay within the allotted timeframe. Plan your presentation carefully, allocating sufficient time to cover each topic or section. If you find yourself running out of time, prioritize the most critical points and consider saving less crucial information for a follow-up or supplementary material.
For more ways to improve presentation skills, like calming presentation anxiety and connecting with a virtual audience , learn more presentation tips .
Get started with Microsoft 365
It’s the Office you know, plus the tools to help you work better together, so you can get more done—anytime, anywhere.
Topics in this article
More articles like this one.

How to introduce yourself in a presentation
Gain your audience’s attention at the onset of a presentation. Craft an impressionable introduction to establish tone, presentation topic, and more.

How to add citations to your presentation
Conduct research and appropriately credit work for your presentation. Understand the importance of citing sources and how to add them to your presentation.

How to work on a group presentation
Group presentations can go smoothly with these essential tips on how to deliver a compelling one.

How to create a sales presentation
Engage your audience and get them interested in your product with this guide to creating a sales presentation.
Everything you need to achieve more in less time
Get powerful productivity and security apps with Microsoft 365

Explore Other Categories
Copilot tutorial: Create a presentation with a prompt

Note: This feature is available to customers with a Copilot for Microsoft 365 (work) license.
Duration: 1 minute 14 seconds
Discover how Copilot in PowerPoint effortlessly creates captivating presentations in just a few prompts and access the full power of Microsoft Designer to bring your ideas to life with professional graphics.
Try in PowerPoint
See more videos

Kickstart a presentation

Create a branded presentation from a file

Summarize a presentation
Browse all Copilot videos

Need more help?
Want more options.
Explore subscription benefits, browse training courses, learn how to secure your device, and more.

Microsoft 365 subscription benefits

Microsoft 365 training

Microsoft security

Accessibility center
Communities help you ask and answer questions, give feedback, and hear from experts with rich knowledge.

Ask the Microsoft Community

Microsoft Tech Community

Windows Insiders
Microsoft 365 Insiders
Was this information helpful?
Thank you for your feedback.
Turn Sales Presentations Into Moneymakers: Examples and Tips
Senior Marketing Manager at Loom

In a perfect world, every sales presentation you give provides immediate value and closes deals fast. In reality, it’s not always that easy.
Prospects are too busy to meet. They might not see the product value right away. Your presentation may not fully demonstrate how your product solves their precise pain point. Or, they simply fail to make a decision.
Elevating your sales presentations above the rest can make a tremendous difference.
Sometimes, something as simple as a distinct presentation tool like sales video software can streamline your process and help you reach new sales milestones. You can improve your sales funnel with the right solution as part of an effective sales presentation strategy that increases revenue.
Learn how to implement the key components of a successful sales presentation strategy and how to optimize the process for better results.
What should a sales presentation include?

Sales presentations come in many different styles. You have ample flexibility in how you make your pitch based on your industry and target customers. But no matter who you’re presenting to or in what setting, you need three ingredients:
Authentic presenter: Sales presentations should feel human—not rehearsed, bland, or robotic. Your chances of driving more sales consistently will skyrocket if you connect with your prospects and leads personally and authentically.
Visual assets: During the presentation, you can demonstrate your product’s value proposition through a slideshow, video, and visuals or graphs highlighting relevant data. You can also add social proof and other visual elements that boost credibility and immediately capture your audience’s attention.
Optimal presentation method: Different scenarios call for different presentation modes. For example, if you’re time zones apart from your prospects or in-person meetings just aren’t an option, live videos can work. Or if busy schedules are an issue, async video messaging may provide the flexibility your sales team needs.
Once your sales team fashions its sales strategy and presentation method, it's time to start building.
Making stand-out sales presentations in 2024 and beyond
When Steve Jobs first presented the iPod , he didn't say, “Get rid of your case of CDs and replace it with an iPod.” He thought bigger and said, “Your entire music library fits in your pocket.” Way more captivating than just the straightforward explanation, right?
Jobs knew the three key components of stellar sales presentations. To wholly capture your prospects’ attention, you have to understand:
Who your audience is
What they want or need
How to interject your solution into the buyer’s story
The customer-centric answers to these questions provide the substance you need to create head-turning presentations, and that’s important, especially in today’s economic climate, where consumers want more personalization .
There’s a lot of noise between notifications, commercials, and global competition targeting consumers. You can create memorable connections when you and your sales reps provide highly relevant presentations. It’s not enough to deliver an average, generalized sales pitch anymore.
Remember these tips when incorporating those key components into your sales presentation:
1. Know your audience
Start by studying your target audience and its segments. What are the different needs and pain points that drive your prospects to buy?
Everyone is unique, and if you can pinpoint those motivations, you can provide value right where they need it most.
2. Make it interesting: Craft a compelling narrative
Companies often make the mistake of talking about themselves. They claim to be the best or recount how their business started. While there’s a place for those details, brands can chase leads away when they don’t prioritize their specific needs.
Instead, you can tell a compelling story that focuses on the customer.
A classic story that always captures attention looks like the hero’s journey:
• A hero: The customer
• Has a problem: The pain point
• But then meets a guide: The company
• That presents a roadmap: How to solve the problem
• And leads to a positive solution: The product or service
When your prospects hear this story and see themselves as the main character, they’ll get curious about what you’re selling.
3. Utilize persuasive visuals
Visually dynamic content not only draws your audience in, it also provides the personal element they crave. When your prospect sees a picture or personalized video depicting their use case or ideal solution, they can better imagine themselves using your product or service.
Your sales representatives can use charts, images, and graphics to make a point or demonstrate how a product works. Add crucial context with a video recording tool like Loom to walk through the product or share key features or highlights.
4. Incorporate testimonials and data
Sales presentations offer much more credibility when you include testimonials about successful experiences. Customer stories and data that back up your claims add third-party confirmation that your solution benefits your potential buyer.
Strengthen your case by adding a section highlighting endorsements like experiences, statistics, and stories to your sales deck.
5. Implement strong closing techniques
Believe it or not, companies sometimes forget to prompt an actual decision at the end of their presentations. Even if a prospect is interested in your solution, never assume they know the next step. Life and work are full of distractions, and you often need to nudge prospects to make the decision.
Next steps can range from making a purchase to scheduling a meeting or sharing more information. Whatever your call to action (CTA) is, make sure it’s crystal clear. If you can, it’s also helpful to get at least a soft commitment from the prospect right away to boost the chances that they’ll follow through.
Asynchronous videos offer an excellent solution for sales presentations by stating a clear CTA.
You can send a personalized sales video and include an automatic CTA at the end of the video. At that moment, the viewer can follow through on the ask and move closer to the sale.
Now that you’ve elevated your sales presentation with a comprehensive, dynamic pitch, it’s time to build your value proposition into an engaging sales experience.
Practical ways to structure sales presentations
The best sales presentations are the ones that feel like natural conversations or interactions.
Your prospective customer has a problem or goal. If you’ve got a solution that meets their needs, your job is simple. Communicate the value of your solution clearly and your prospect will leave the meeting satisfied and one step closer to converting.
The key is to put their needs at the center of the presentation. The following sales presentation techniques can help your team create an effective sales experience:
Introduce who is presenting
First, your sales representatives should introduce themselves. It should feel like any conversation that puts the other person first:
“Hi, [prospect name], my name is [sales rep name], and I'm the [role] of [company]. Thanks for taking the time to chat with me about [pain point]. I’d love to hear more about [pain point].”
The open-ended statement at the end invites your prospect to articulate what they’re looking for in a product, or how they’re currently dissatisfied. It’s a treasure trove of relevant and personalized information.
Remember: You are the guide in this story.
As you’re talking to a prospect, who is the hero, you guide them to the right decision. Actively listen, and ask questions based on what your prospect is saying. Your goal is to find out if your solution is the right fit and get closer to a commitment by the end of the meeting.
Tell the customer’s story
As mentioned before, the hero’s journey should depict the customer. Your team should use the narrative as the outline and backbone of the pitch.
For example, imagine a company that sells an accounting SaaS to family-run restaurants. A story might look like the following sales presentation template:
You (the hero) run a restaurant in your community because you’re passionate about food, relationships, and family.
But when the doors close at the end of the day, you sit down with a pile of bills, tax documents, and payroll tasks, and you forget why you love your business in the first place (the problem).
Don’t let finances turn your passion into a chore or make it difficult to keep the doors open. Instead, [accounting software] can automate your process (the roadmap), so you’re back in control. You can save hours away from the office and instead spend that time making customers happy.
[Company] (the guide) helps you streamline accounting with its cloud app (the solution). The software is made specifically for family businesses, so it’s built for you with the time-saving features and affordability you need in an accounting tool to focus on your restaurant.
Learn how [company] can [pain point’s solution] by [call to action].
You can use a narrative structure like the one above to illustrate a buyer journey that guides your customers to a clear next step, once they understand how your product or service fits into their own story.
Show the solution, share testimonials, and add credibility
There’s nothing like actually showing the value of your product. Your friend can say they have the best car, but you probably won’t believe it until they let you drive it.
Your sales team can harness point-of-view experiences through video and visuals to demonstrate value, so audiences can experience the product themselves.
If you are selling an app, you can do a walkthrough or feature a specific use case via video messaging. If you sell a service or physical product, your sales rep can provide a visually captivating presentation deck or record themselves using the product.
Another way to establish credibility is by including testimonials and reviews.
A 2024 survey by BrightLocal found that 50% of consumers trust reviews as much as getting a recommendation from a personal friend or family member. That’s huge when you think of the power of word-of-mouth marketing. Use personal stories, quotes, and reviews in your sales presentation to increase trust and get you closer to a sale.
Use the ideal presentation tool
Today, sales teams maintain a tech stack that compliments their sales process. Such tools include slideshows or pitch decks, live video meeting apps, and asynchronous video tools. What you decide to use will influence your success throughout the sales pipeline .
Slide deck presentation tools like PowerPoint, Google Slides, Prezi, and Beautiful.ai offer fun, creative, and practical ways to communicate an offering visually. They are also effective aids and evergreen assets throughout the sales process.
When you need to capture product features live or distribute a sales pitch to prospects around the globe, video recording and editing tools are a game changer.
For example, Loom streamlines point-of-view (POV) experiences when you record your screen and webcam simultaneously to showcase your product in minutes.

Live vs. async video for your sales presentation
When creating video messaging, your sales teams can choose between live and recorded formats. Both are essential in the sales process and have their own advantages.
Pros and cons of live videos
Live videos made with tools like Zoom, Microsoft Teams, and Google Meet help you meet with prospects and leads in real time. These apps have integrations to help record meetings, produce transcripts, and offer automatic scheduling. You can also use live video apps to reach large groups within a target audience for webinars and events to provide value and promote a product.
While live videos are an important element of the sales process, they also have limitations.
Potential buyers may hesitate to meet with a rep or risk losing time on a solution that might not be a good fit. Plus, prospects may be in different time zones or have busy schedules and obstacles that make meetings difficult.
Pros and cons of async videos
Asynchronous videos help solve these live format challenges. For example, you can record a video with Loom in just a few minutes. You share your screen with a slideshow or product walkthrough and simultaneously record on your webcam.
When you share the video through a link, email, or embed on a targeted landing page, the viewer can see the presentation 24/7, no matter their time zone or busy schedule. The personal POV video experience provides a human connection and touch in your sales pitch.
Viewers also experience interactive elements when they engage with the video through comments, replies, and emojis. You can include a CTA that clearly outlines the viewer's next step. Your sales reps can also get analytics and metrics from dashboard functionality.
For example, you can find out who has seen your video, so you can send a follow-up video to those viewers and consistently measure improvements or changes to your content.
Async video messaging provides a streamlined yet personalized approach to selling that your prospects can access 24/7.
Pro tip: Tools like Loom integrate with Salesforce. If a contact doesn’t exist in your CRM, Loom will create one and tag it so you can easily identify where the information came from in your pipeline. Salesforce users also get access to Loom’s powerful reports and dashboards.
Sales presentation examples
What do good sales presentations look like in action? You can learn by example through the following success stories:
Intercom adopts video messages for sales

Intercom, the customer service platform, needed a way to make sales prospecting more unique and personal through an affordable strategy. The company wanted to harness these improvements to drive more conversions and revenue, specifically from cold email outreach.
“The trick was to find this balance without increasing costs and sacrificing team efficiency,” said Bucky Henry, Intercom’s Sales Manager.
If Intercom could drive more sales through email and eliminate most sales calls, its long-term sales growth would improve.
Intercom chose async videos with Loom. The team recorded and edited personal videos with graphics that motivated potential customers to take action. The sales team would then share those finished videos immediately with instant link creation. Along with reaching out to prospects, Intercom also used Loom to train sales reps and adopt new processes quickly.
After Intercom implemented Loom video messaging, it saw a 19% increase in reply rates for cold emails and earned $120K from the outreach.
Improving a slide deck gets this salesperson his biggest deal yet

When strategic adviser Andy Raskin stumbled upon Zuora’s sales presentation deck , he couldn’t believe it. It was “the greatest sales deck he had ever seen,” Raskin recounted about Zuora in his viral article. Eventually, a friend of his, Tim, approached him. Tim had a sales job at a new company, which had raised over $60 million. Tim won some small accounts, but his luck ran dry with enterprise prospects.
Raskin shared the presentation, and Tim gleaned key principles he could apply to his own sales presentation, including:
Naming a relevant shift or change in the industry
Emphasizing that some people will win or lose depending on their decision
Providing a picture of what winning could look like
Showing how remarkable features can make the solution possible
Proving that the company has a track record of making the solution happen
Tim applied these principles to his slide presentation and modeled them after Zuora’s examples. Several weeks later, he signed the largest deal in the company’s history.
Help Scout reinvents its sales presentation pitch

Unfortunately, some platforms present and walk through all their features before positioning their need and value. Prospects view each feature back-to-back while wondering whether they even need the solution.
April Dunford, author of Sales Pitch and Obviously Awesome , wasn’t going to let that happen when she stepped in to help build the sales pitch for Help Scout and make its presentations more effective.
The challenge: Help Scout needed a pitch to differentiate its solution from other platforms and drive action.
The solution: Dunford would write a script to change Help Scout’s narrative.
On Lenny’s Podcast, Dunford shapes the tone for the sales introduction by painting Help Scout as a growth driver rather than a customer support cost:
“Help Scout says, ‘Hey, digital business, we work with a lot of companies like you, and I’m going to show you the product. But before we get there, one of the things we think is interesting is that digital businesses look at customer service differently. They look at it as a growth driver rather than a cost center. And so most of the folks we work with see delivering a really amazing experience as a key part of customer service. Would you agree with that
“‘Yeah, we would.’ They have a little conversation and then they say, ‘Great… Most of the folks we work with start with a shared inbox, and that’s great… The problem is if you’re growing and you probably are, then you’re going to outgrow that because you’re going to need prioritizations, assignments, helpdesk stuff.
“‘And so then your option is to go to help desk software… The problem is…it was designed for businesses that want to take the cost out of customer service. So it’s going to do some things that are weird. It’s going assign your customers a ticket number, and it’s going to try to drive them to low-cost channels.
“‘So can we agree that in a perfect world for digital business like yours, we’d want something as easy to use as a helpdesk but had all the bells and whistles so we wouldn’t have to migrate to something else. And on top of that, was built from the ground up to deliver amazing customer service. Do we agree we want that?’”

This pitch would then prepare the prospects to fully understand the unique proposition. Help Scout would provide the customer support features they need, like a helpdesk, but also become a growth driver for the company during customer interactions.
If the customer says yes, the representative could continue showing specific features.
The results: Dunford states, “As you might imagine, [this sales pitch is] a lot more effective at actually getting clients to get their head around, ‘What is this thing? Why is it different? Why should I pick you?’ And it just works way better in a sales situation.”
Dunford used three steps to shape the Help Scout pitch:
The pitch emphasized highly relevant insights into the market.
The presentation painted the pros and cons of alternative solutions.
The sales offer described a picture of a perfect world.
Through these simple steps, Help Scout successfully positioned its unique offering during sales presentations.
Record sales presentations in minutes with Loom

With intentional thought and a bit of effort, you can elevate your sales presentations and stand out from the rest. Embracing screen capture and video recording tools like Loom can take your sales strategy to the next level.
Loom equips sales teams to capture and distribute video messaging in minutes. No matter the time zone or schedule, you can present your product’s value and close deals. The Loom app makes recording easy with the click of a button on your Chrome screen recorder , desktop app, or phone. Thanks to Live Rewind, if one of your sales reps makes a mistake, they can easily rewind the video and re-record that section to save time and eliminate pressure.
Your sales team can share their screens and themselves simultaneously. Prospects get an authentic and personal experience while they take in slides, videos, demos, walkthroughs, and more. You can also identify specific prospects with the “request email to view feature” so you can nurture each relationship and analyze your sales effectiveness.
Accelerate video creation with Loom’s AI add-on, which includes filler-word removal, auto titles and summaries, and AI message creation. You can easily record in the moment and automate editing and video sharing for an efficient sales process.
Teams can also harness personal video messaging to sell products directly to their target prospect—or an entire audience—by embedding videos on a landing page or social media.
Record your first sales presentation with Loom today in under five minutes.
Jun 28, 2024
Featured In:
Share this article:.
Jeong Lee works in Marketing at Loom.
IMAGES
VIDEO
COMMENTS
On the File menu, select Save to ensure all your recent work has been saved in PowerPoint presentation format (.pptx). Select File > Export > Create a Video. (Or, on the Recording tab of the ribbon, select Export to Video .) In the first drop-down box under the Create a Video heading, select the video quality you want, which pertains to the ...
Step 1: On the File menu, select Save to make sure you have saved all your recent work in PowerPoint presentation format (.pptx). Step 2: On the File menu, select Save As. Step 3: Select the folder location where you want to store your PowerPoint Show file. Step 4: In the Save as type box, choose PowerPoint Show (*.ppsx).
Join 400,000+ professionals in our courses here 👉 https://link.xelplus.com/yt-d-all-coursesLearn how to create a video using PowerPoint. I'll first show you...
Head on to the recording studio. Access the "Present and record" option on the editor's top-right side or click on the three-dot menu to select it among recommended actions. Select "Go to recording studio" and set up your camera and microphone. Start recording with your notes in Presenter's View and have the options to pause and ...
Record new layer: Pick this for recording your video as a new layer on top of an existing recording. 2. Click Record at the bottom of the Record panel. 3. Drag over the area of your screen you wish to record. Click Start Recording. Press Space to start recording the full screen. 4. Click Stop to finish recording.
What Makes a Good Video Presentation? A good video presentation will capture your audience's attention until the very end. When it comes to creating a video presentation, there is no definite checklist as to what constitutes a good video presentation. But there are some things you can do to make sure that yours is good enough to keep the viewer engaged.
Learn how to publish your own video using Microsoft PowerPoint with narration, annotations, animations, and timings. As full disclosure, I work at Microsoft ...
To create a presentation video in Descript: Hit New project. Import any media (images, infographics, short video clips, GIFs, or sounds) you want to include in your presentation. Drop your visuals into the script and edit them into a sequence, or work scene by scene by adding a / at the beginning of each slide.
Drag and drop your media onto the timeline side-by-side to create a slideshow video. Step 2. Edit your video presentation. To trim the length of your video, click on the video on the timeline so it's highlighted green. Move the handles to the left of the timeline to trim the video length.
Tip #3 - Voiceovers can become your best friends. The whole point behind a video presentation is not to create a boring one-person video speaking in front of the camera. Use voiceovers effectively to introduce charts, data feedback, etc., with your voice connecting the points of the entire presentation.
Record. Now comes the fun part - recording your presentation! This is easy to do in Prezi Video. After you're done adding and editing your content, press "next step" and then press the red button at the bottom of the screen. You can always pause the recording to collect your thoughts and trim the video once you're done.
Personalize Your Video Presentation. Design a compelling presentation by customizing the scenes to match them with your project purpose. Use the flexible editing tools of video maker to modify the text, alter style and colors, upload your media, and pick a dynamic transition. Move to the 'Music' section and add a background tune or a voiceover.
To turn a PowerPoint presentation into a video, first, open your presentation with the PowerPoint app on your Windows or Mac computer. In the top-left corner of PowerPoint, click the "File" option. From the sidebar that opens after clicking the "File" option, select "Export." In the "Export" menu, click "Create a Video."
Choose the option Create a Video at the very bottom of the right-hand side of the screen. 3. Find the Create a Video tab if you want to see the available video quality options. 4. Click on the downward-pointing arrow next to the Computer & HD Displays option and choose from the three available options.
Here's just some of the ways you can make your message sing. 1. Start with a bold statement. A bold statement can capture your audience's attention right from the get-go. Your statement should offer something slightly unusual and maybe even a little controversial. Something to make people sit up and take notice. 2.
How to record video presentations with PowerPoint. Step 1: Open PowerPoint and select ' New', then choose to create a 'Blank Presentation ' or select one of the templates for a premade design. Step 2: To start creating slides: Go to 'Home' > 'Slides' and click on ' New Slides' to choose the layout for each new slide you add.
Step 1: From PowerPoint, open the slide with which you want to start your presentation. Step 2: Select Record from the upper right hand corner of the PowerPoint window. Step 3: Make sure your recording and voice settings are set properly, then click the round Record button. Begin your presentation.
Inspiration. Recommended videos See how other users use Prezi Video to engage their audiences. Reusable presentations Browse some of our favorite presentations and copy them to use as templates. Reusable infographics Customize the content in these infographics to create your own works of art. Presentation templates Get a big head start when creating your own videos, presentations, or infographics.
Choose which part of your screen you'd like to capture. Click the Record icon to start recording, click it again to stop recording. Click the Pause icon in the side panel while recording to pause or resume recording. Click the Draw icon in the side panel while recording to draw on your recording. 4.
Design a corporate video presentation that wows. Video breathes new life to presentations with audio, imagery, and interesting subjects. Vimeo Create helps you design your video presentation from start to finish, but here are a few tips to create a top-notch presentation. Prioritize your audio. A video presentation relies on clear and reliable ...
Start by writing an outline that includes the following: 1. Introduction of your topic: Hook your audience with an exciting story, fact, or anecdote about your topic. 2. Agenda or overview: Provide a slide of the talking points you will be sharing with your audience so they can see the full breadth of the presentation.
Create a Prezi account and open Prezi Video in your dashboard. Choose a professionally-designed video templates or select quick record to get started. Upload your own images, GIFS, and videos, or quickly select from free Unsplash and GIPHY visuals right in Prezi Video. Add your presenter notes and finalize your presentation.
There are three ways to make a narration video presentation. Record narration separately and sync it to your presentation. Upload first-person video footage. Merge it with your presentation. Use a video presentation maker with in-app voice-over and recording features. (This is the easiest way to make a narration video presentation.)
Here's a PowerPoint presentation tips and tricks guide that takes you through how to make a good PowerPoint presentation. License; Pricing; Get unlimited downloads. Learn Learn / Marketing / Presentation Templates / Tips ... Luckily, it's easy to add and embed a YouTube video in your next PowerPoint presentation. 47. Add Charts & Graphs.
Create an outline or script to guide your presentation, making sure to include key points, transitions, and visual aids. Practice your presentation multiple times to become familiar with the contents and ensure a confident delivery. If you have multiple presenters, solidify the speaking order and designate one person to facilitate the ...
Create compelling presentations easily with our video guide on Copilot in PowerPoint, powered by Microsoft Designer, to turn ideas into stunning visuals in a few prompts. ... See more videos. Kickstart a presentation. Create a branded presentation from a file. Summarize a presentation. Browse all Copilot videos. Need more help? Want more ...
Or, they simply fail to make a decision. Elevating your sales presentations above the rest can make a tremendous difference. Sometimes, something as simple as a distinct presentation tool like sales video software can streamline your process and help you reach new sales milestones. You can improve your sales funnel with the right solution as ...
Let me close with this. I know I'm not a young man. To state the obvious. Well, I know. Crowd: "Joe, Joe, Joe, Joe, Joe, Joe." I don't — folks, I don't walk as easy as I used to.
67 million to one. That's the odds of making two holes-in-one in a single round, according to the National Hole-In-One Registry. On Friday, Frank Bensel Jr. made two in a row.