- Washington State University
- Bridge Banners

Making Posters with PowerPoint
- CougPrints Plus

Things to consider before beginning
What size is the poster.
PowerPoint places a limit on the dimensions of slides; if you plan on printing a poster that has dimensions larger than 56″ you will need to create it with another piece of software like Photoshop or InDesign.
How much does a poster cost?
Get an estimate using the price calculator .
Where are the images coming from?
Images copied from the web are low resolution (72 dpi) and are not good quality for a printed poster. Minimum image resolution should be 150 dpi at actual printing size for best results.
What is the deadline?
Posters are printed Monday through Friday with a standard 24-hour turnaround time. Plan ahead to avoid high volume times for quicker turnaround.
Start with a template
Choose from a variety of styles and sizes. Download a template .
Create a new poster
Open a new document in PowerPoint.
- Go to Design –> Slide Size
- Choose Custom Slide Size
- Set Width and Height (max. 56″)
- Choose the Landscape (horizontal) or Portrait orientation.
- Click OK .
- If a message pops up telling you that “ The current page size exceeds the printable area of the paper in the printer ” just click OK .
Basic design tips
Academic posters are a summary of what you did, how you did it, and what you learned. Most are divided into four parts:
- Introduction (what you did)
- Design or methods (how you did it)
- Conclusion (what you learned)
Space is limited. Choose your words and graphics carefully.
Don’t forget to SPELL CHECK your poster before submitting for print!
Design your file at full size (100%). If your poster is 36″ wide x 24″ tall then set your slide dimensions to 36″ x 24″.
Present information the way you would normally read —left to right, top to bottom.
Use columns and line breaks to divide the poster into smaller sections. Use bullets instead of long paragraphs to summarize information.
Maintain a good contrast between the background color and the text. Consider using a light color background and a dark text. A gradient color fill background, especially black, will print poorly and is not recommended.
Someone standing 3–4 feet away should be able to read everything on your poster. Here are some suggested fonts and sizes:
Sans serif: Lucida Sans, Lucida Grande ; Serif: Palatino, Book Antiqua
- Title: 72 point
- Headings/section titles: 40 point
- Body text: 24 point
- Captions: 18 point
Limit yourself to 2–3 types of fonts in order to create consistency and unity.
A picture is worth 1,000 words. Poster content should be 60% images, 40% text . Use graphs, charts, tables, and photos to summarize and present data.
High resolution images ( 150 dpi or higher ) are required for printing high quality posters.
Color mode for best results is CMYK .
Insert images directly into PowerPoint . Don’t cut and paste, or copy and paste.
Copy and paste Excel charts and graphs into PowerPoint.
To adjust an image and retain proper proportion, hold the shift key on your keyboard, click, and drag the corners to scale . Enlarging images in PowerPoint is not recommended.
Saving to PDF
CougPrints Plus requires a PDF file set to your custom page size . To save a PowerPoint poster to PDF, follow the steps outlined in Saving PowerPoint Presentations as PDF Files .
Printing your poster
Order your poster online from CougPrints Plus by filling in the submission form and uploading your PDF file. Pick up and pay for posters at CougPrints Plus in the CUB.
Place your poster order!
How to Create a Research Poster
- Poster Basics
- Design Tips
- Logos & Images
What is a Research Poster?
Posters are widely used in the academic community, and most conferences include poster presentations in their program. Research posters summarize information or research concisely and attractively to help publicize it and generate discussion.
The poster is usually a mixture of a brief text mixed with tables, graphs, pictures, and other presentation formats. At a conference, the researcher stands by the poster display while other participants can come and view the presentation and interact with the author.
What Makes a Good Poster?
- Important information should be readable from about 10 feet away
- Title is short and draws interest
- Word count of about 300 to 800 words
- Text is clear and to the point
- Use of bullets, numbering, and headlines make it easy to read
- Effective use of graphics, color and fonts
- Consistent and clean layout
- Includes acknowledgments, your name and institutional affiliation
A Sample of a Well Designed Poster
View this poster example in a web browser .

Image credit: Poster Session Tips by [email protected], via Penn State
Where do I begin?
Answer these three questions:.
- What is the most important/interesting/astounding finding from my research project?
- How can I visually share my research with conference attendees? Should I use charts, graphs, photos, images?
- What kind of information can I convey during my talk that will complement my poster?
What software can I use to make a poster?
A popular, easy-to-use option. It is part of Microsoft Office package and is available on the library computers in rooms LC337 and LC336. ( Advice for creating a poster with PowerPoint ).
Adobe Illustrator, Photoshop, and InDesign
Feature-rich professional software that is good for posters including lots of high-resolution images, but they are more complex and expensive. NYU Faculty, Staff, and Students can access and download the Adobe Creative Suite .
Open Source Alternatives
- OpenOffice is the free alternative to MS Office (Impress is its PowerPoint alternative).
- Inkscape and Gimp are alternatives to Adobe products.
- For charts and diagrams try Gliffy or Lovely Charts .
- A complete list of free graphics software .
A Sample of a Poorly Designed Poster
View this bad poster example in a browser.

Image Credit: Critique by Better Posters
- Next: Design Tips >>
- Last Updated: Jul 11, 2023 5:09 PM
- URL: https://guides.nyu.edu/posters
How to create beautiful and effective academic posters in PowerPoint
- Written by: Emily Pinch
- Categories: PowerPoint design
- Comments: 3

It’s time to show the world your research, how exciting! After all your hard work, all those hours in the lab, you can finally present your findings and talk to fellow researchers about your work! Except… you’ve left it a little late to create your poster. So, you dig out the trusty old PowerPoint template passed down for generations and fill in the gaps with your own findings. But be honest with yourself, how old even is that template? Instead of presenting the exciting poster you dreamed of, you’ve got an uninspiring wall of text which leaves your audience a little lost on what you actually discovered. Your academic posters should be keeping pace with the rate science is moving, not trailing behind! It’s time to upgrade your template and create beautiful and effective academic posters in PowerPoint.
Why use PowerPoint for academic posters?
PowerPoint is the go-to tool for creating academic research posters. If you weren’t already aware, we love PowerPoint, and for good reason! It’s easy-to-use, quick to edit and accessible to many, making poster creation a breeze. We’re going to take you through a whole host of PowerPoint poster creation tips from shaping your content into a clear and concise message, making the most of our free pre-designed poster templates to help you build effective and beautiful research posters!
Download our free templates here:
Academic research poster template – Portrait
Academic research poster template – Landscape
Tips on your content – make your poster effective
Let’s step into your audience’s shoes for a moment and consider the problem with the typical ‘wall-of-text’ poster. The reality is poster sessions attendees have very little time to see a LOT of posters. Time is of the essence and your audience are a moving target, so you’ve got to grab their attention, and fast! You can’t assume your audience will be happy to stand and read your poster for ten minutes.
Your research poster should be a conversation starter, not a wall of impenetrable text. A poster is simply a visual abstract, representing a concise and accessible summary of your research. Its purpose is to drive attention to your research, not show every detail. Think of it more like a billboard, designed to transmit key information quickly as your audience moves past.

- Cut the jargon – Consider your target audience, sure you may have attendees that are specialists in your field, but you also want your poster to be accessible to people who are new to your research. Cut the jargon and specialist terms and use plain language as much as possible to make your poster easy to understand.
- Organise your story – Separate your content into sections using headers and ensure your poster tells a flowing story that includes: Background, Question, Methods, Results, Conclusion.
- Condense your content – Decide what your audience needs to know, then consider what is just nice to know. Then get rid of the nice to know. Be ruthless and keep your content concise and clear. Aim for a maximum of 250 words, possibly <150 if you’re feeling brave! If you’re concerned about the lack of detail on your poster, you can link to a full version of your paper using a QR code – we’ll explain how to do this further on.
- Summarise your key finding – Most important of all, what did you find out from your research? Why should people care? Consider what the punchline of your research is and translate it into conversational plain English. Determine what key image or graph will support this finding and help transmit your message clearly so that your audience can quickly understand the value of your research without standing and staring at your poster for an eternity.
Layout Creating an effective academic poster is all about making it easy for your audience to quickly understand the content. A clear and logical layout is fundamental to achieving this. Consider the hierarchy of your information. You want your audience to read the most important information first – in case they don’t make it to the bottom of the poster. So, place your key finding and a supporting graph or graphic right at the top of the poster. To ensure the rest of your poster is easy to read, consider the flow of your content. In the West, we read top to bottom, left to right so make sure your content follows this flow. You could number your sections or use arrows to guide the reader and use bullet points rather than long paragraphs of text. You can read more about hierarchy here

We’ve created 4 academic poster PowerPoint template layouts to help get you started!
Data Your research will inevitably contain graphs and data, and whilst you may want to show them all off on your poster (because they took ages to make!) you need to decide which are the most important.
- Be selective – Display only essential data on your poster. Whilst pictures and graphs do help break up text, you don’t want to overload your audience with information so only include the most important graphs.
- Simplify – Simplify your graphs and, if necessary, re-label them so scientists outside of your field will understand the basics.
- Summary figure – Pick a single graphic to support your key finding and help your audience understand your punchline – fast.
- Formatting – Apply the colour scheme and fonts of your template to any imported graphs for consistency across your poster. You can find pre-designed graphs in the sticker sheet for each of our templates!
Tips on the template – make your poster beautiful
Your content is ready to go, now it’s time to make your poster beautiful! To give you a head start, we’ve created 4 different landscape and portrait academic poster PowerPoint templates each with their own unique design style! Pick your favourite and fill in the sections with your content. We’ve helped get you started with placeholders for headings, graphs, references etc. on each template but these are editable so you can customise your poster to work best for you.
Each template also has its own matching ‘ sticker sheet ’. Just copy and paste any of the elements you’d like to use on the sticker sheet on to your poster
Now, let’s run through some top tips to make sure you get the most out of these templates!
Guides are important to help align and balance your poster design. Some key things to remember are to keep the border clear and maintain the gaps (gutters) between sections to give your content space to breathe.
If you want to create your own guides, this article shows you how easy it is with our free PowerPoint add-in BrightSlide .
White space Don’t underestimate the power of what’s NOT on your poster. White space is essential for making a beautiful and effective poster. Your poster should roughly consist of 20-30% text, 30-40% figures and 40% space. Yep, you heard me, 40% ! White, or ‘negative’ space is all about creating areas of contrast, with clear focal points to draw your attention to the important parts, and create a flow and hierarchy across your poster. Learn more about the power of white space

Try to avoid using photos in the background, it can clutter the poster and make it difficult for your audience to read the text or understand the graphs.
Colours We’ve predesigned our poster templates with carefully selected colour schemes to make them simply beautiful! But we’ve got some tips on how to best apply the set colour scheme to your content. Each template has a colour palette of 6-8 colours. We recommend using a bright colour as your accent colour to draw attention to key information on your poster. It’s important to use this accent colour in moderation to ensure it holds its attention-grabbing function! Make sure you apply the colour scheme to all the text, images and figures you’re using to keep your poster design consistent

If you have to use specific colours, or fancy creating your own colour palette, here are some top tips:
- Use 3-5 colours – 2-3 shades of a primary colour, an accent colour that stands out, a background colour and a couple of text colours (one light one dark).
- Use the eyedropper tool – Find an image with colours you love and use the eyedropper tool in PowerPoint to extract the colours. To use the colour, draw a shape on a PowerPoint slide, select it, head to Shape Format > Shape Fill > Eyedropper and click on the colour from the image.

- Use a colour contrast checker for accessibility – Poor colour contrast can mean your poster becomes less accessible to a whole range of people. Luckily, while this is a common error, it’s also a very simple thing to fix. Check out the free colour contrast checker in our brilliant PowerPoint add-in, BrightSlide .
- Update your colour theme in PowerPoint – The best way to handle colours in PowerPoint is to set your template correctly and use a colour theme. Then it’s easy to use the same colours over and over again. Once you’ve chosen your colours, read this article to learn how to change the theme colours in PowerPoint .
Fonts Less is more when it comes to fonts, we recommend picking just one or two fonts . Using a second font can help to clearly distinguish your body text from your titles and headings, but this can also be achieved by making your titles and headings bold . Our poster templates have pre-set fonts but if you’re striking out on your own, here are some other fonts we recommend:

Read more about our recommended presentation fonts.
Font size is also important. Your poster needs to be readable from a meter away, and your title and headings need to stand out. For A0 posters, try sticking to these font sizes:
- Titles – 90pt
- Headings – 60pt
- Body text – 36pt
Check your font sizes by zooming in to your poster 100% and stand a meter away from your screen to test if you can easily read the body text and distinguish the headings.
Graphs We’ve created some pre-designed graphs, tables and diagrams in the sticker sheet to copy and paste on to your poster and insert your own data.
However, we recognise that you may not be using Microsoft Office to create your charts and graphs. In this case, we recommend exporting the graph from whatever software you’re using (Origin, for example) as an EMF image , and pasting that into your poster template. You can then ungroup the image and format the elements of the chart to match your poster template fonts and colours. Don’t forget to regroup the graph afterwards to make it easier to move and resize!

To make the most of your graphs and data, focus your audience’s attention on key information by using PowerPoint shapes or arrows. Edit the line colour, fill colour, and transparency to highlight important trends or values on your graphs.

If you’re using Office 365, you’ll be able to access PowerPoint’s native presentation icons, and we have a blog post showing you how to insert these PowerPoint icons . Whilst PowerPoint has a LOT of icons to choose from, you may be looking for something more specific for your research. If you’re in the environmental sciences, the IAN image library is a great free library of graphics. Another great generalist website to find free illustrations and icons is Freepik .
If you’re really after something custom or specific, Adobe Illustrator is a powerful tool for creating illustrations. Though it’s a paid software, there are lots of free resources out there to help you create exactly what you need. If Adobe Illustrator isn’t the right choice for you, PowerPoint can be used to create surprisingly sophisticated illustrations as this post explains.
QR codes Adding a QR code to your poster is a quick way to provide your audience with access to your full paper or a digital copy of your poster. This allows the attendees to walk away with as much information as they like. You can be more confident condensing your content for your poster, safe in the knowledge that your audience can still access your full paper through your custom QR code. You can head to Canva or qrcodemonkey to create a QR code. If you want to link to multiple files or locations, it may be worth using Linktree which allows you to connect your audience to multiple locations through a single link from your QR code. You can then add that QR code to your academic poster in PowerPoint before exporting the it ready to share.
Finishing up I hope your poster is coming together nicely now! But… you’re not quite finished yet. Here are a few tips to make sure you, and your poster, are ready to go!
- Is the layout clear and easy to follow?
- Did you understand the key finding quickly?
- Can you double check my spelling and grammar, please!
It’s important not to miss out this feedback phase, and do it sooner rather than later, so you can implement any changes in good time! Trialling your poster will give you more confidence to present at your poster session too.

- The final check! – It’s a good idea to test print your poster before printing it full size. Print your poster A4, or A3 if possible. Check everything looks how you want it to, that the resolution of your graphs and images is up to scratch (300dpi is recommended), that there is enough space in the margins, and nothing is cut off and do a final proofread of all the text.
- Be prepared to present – Your poster won’t do all the talking for you, it serves as a conversation starter, so you’ll have to be prepared to talk about your research. Don’t panic! We’ve got LOADS of presentation tips to help you prepare.
Download all the free academic poster PowerPoint templates to get started!
We’d love to see the academic posters you make in PowerPoint using these templates, please send them to us or share them on twitter and tag us @BrightCarbon .

Emily Pinch
Senior consultant; group visualisation lead, related articles, mastering high-impact conference presentations.
- PowerPoint design / Visual communication
Conference presentations are really hard to get right compared to day-to-day presentations. How do you tackle bigger stages, bigger rooms, bigger audiences and higher stakes?

Insights from a presentation templates expert
- PowerPoint design / Industry insights
A PowerPoint template is the foundation on which polished and professional presentations are built. We interview BrightCarbon’s new Templates Lead, Gemma Leamy, and pick her brains on the ideal process for creating robust PowerPoint templates.

115 PowerPoint Christmas cards to download and share!
- PowerPoint design
- Comments: 45
It's Christmas! After a late night with too much eggnog and brandy snaps we set ourselves a challenge to see who could come up with the wildest PowerPoint Christmas card! So it's the day after the night before, and through blurry eyes we can reveal our efforts...

A really fantastic set of resources and advice. I’ve been running seminars for our PGRs on this topic for a few years. It’s both reassuring to see that I’m not the only one saying PowerPoint will do the job and it’s made me revisit my own support content to review and update my advice! Many thanks Jon
I would like to learn more on how to create an academic poster
Thankyou your information was invaluable
Leave a Reply Cancel reply
Save my name and email in this browser for the next time I comment.
Join the BrightCarbon mailing list for monthly invites and resources
There is absolutely no doubt that the BrightCarbon presentation was a quantum leap beyond anything else at the conference with respect to the clarity of the presentation. Curtis Waycaster Smith & Nephew

How-To Geek
How to make a poster using microsoft powerpoint.
Microsoft PowerPoint isn't just for presentations--you can make posters with it, as well. Here's how.
Quick Links
Define the poster dimensions, design your poster.
Microsoft PowerPoint isn't just for presentations---it also provides all of the creative tools you need to design a beautiful poster. Just set the dimensions, design the poster, and print it out. Here's how to make a poster using PowerPoint.
Posters come in all sizes, but the first thing you need to know is PowerPoint's slide limit is 56-inches x 56-inches, so you'll need to plan accordingly. It's also important to note that you want to set your poster dimensions before you start designing your poster. Otherwise, you might end up having to rework parts of your design due to the size change.
Related: How to Reduce the File Size of a PowerPoint Presentation
Here are some of the standard poster sizes to get you started:
- Small poster: 11" x 17"
- Medium poster: 18" x 24"
- Large posters: 24" x 36" or 27" x 39"
Once you've decided on your poster size, set the dimensions in PowerPoint. To do this, open PowerPoint and navigate to the "Design" tab.
In the "Customize" group, select "Slide Size."
Select "Custom Slide Size" from the dropdown menu.
The "Slide Size" window will appear. Input the width and height specifications to match your required size. Keep in mind that if your height is larger in size than your width, the orientation of the slide will automatically change to "Portrait."
When you're finished, select "OK."
Once selected, a new window will appear giving you two scaling options: Maximize or Ensure Fit. If your slide already has content on it, you'll want to select "Ensure Fit."
Your slide will now be resized.
Your poster design is going to depend completely on you. You'll want to pay attention to the background of the poster, text and image arrangement, font size and style, etc. Essentially, you should treat this part exactly as if you were just creating another slide for a presentation.
Because the design and process of this step is going to differ for everyone, we'd like to offer some of our previous guides to get you started in the design process:
- Insert a picture or other object.
- Use an image as a background.
- Insert an image inside text.
- Get a picture behind text.
- Make a border or frame.
Once your design is ready, all that's left to do is print it out and hang it up!
Related: How to Troubleshoot Printing Issues in Microsoft Word
Home Blog Design How to Design a Winning Poster Presentation: Quick Guide with Examples & Templates
How to Design a Winning Poster Presentation: Quick Guide with Examples & Templates

How are research posters like High School science fair projects? Quite similar, in fact.
Both are visual representations of a research project shared with peers, colleagues and academic faculty. But there’s a big difference: it’s all in professionalism and attention to detail. You can be sure that the students that thrived in science fairs are now creating fantastic research posters, but what is that extra element most people miss when designing a poster presentation?
This guide will teach tips and tricks for creating poster presentations for conferences, symposia, and more. Learn in-depth poster structure and design techniques to help create academic posters that have a lasting impact.
Let’s get started.
Table of Contents
- What is a Research Poster?
Why are Poster Presentations important?
Overall dimensions and orientation, separation into columns and sections, scientific, academic, or something else, a handout with supplemental and contact information, cohesiveness, design and readability, storytelling.
- Font Characteristics
- Color Pairing
- Data Visualization Dimensions
- Alignment, Margins, and White Space
Scientific/Academic Conference Poster Presentation
Digital research poster presentations, slidemodel poster presentation templates, how to make a research poster presentation step-by-step, considerations for printing poster presentations, how to present a research poster presentation, final words, what is a research poster .
Research posters are visual overviews of the most relevant information extracted from a research paper or analysis. They are essential communication formats for sharing findings with peers and interested people in the field. Research posters can also effectively present material for other areas besides the sciences and STEM—for example, business and law.
You’ll be creating research posters regularly as an academic researcher, scientist, or grad student. You’ll have to present them at numerous functions and events. For example:
- Conference presentations
- Informational events
- Community centers
The research poster presentation is a comprehensive way to share data, information, and research results. Before the pandemic, the majority of research events were in person. During lockdown and beyond, virtual conferences and summits became the norm. Many researchers now create poster presentations that work in printed and digital formats.

Let’s look at why it’s crucial to spend time creating poster presentations for your research projects, research, analysis, and study papers.

Research posters represent you and your sponsor’s research
Research papers and accompanying poster presentations are potent tools for representation and communication in your field of study. Well-performing poster presentations help scientists, researchers, and analysts grow their careers through grants and sponsorships.
When presenting a poster presentation for a sponsored research project, you’re representing the company that sponsored you. Your professionalism, demeanor, and capacity for creating impactful poster presentations call attention to other interested sponsors, spreading your impact in the field.
Research posters demonstrate expertise and growth
Presenting research posters at conferences, summits, and graduate grading events shows your expertise and knowledge in your field of study. The way your poster presentation looks and delivers, plus your performance while presenting the work, is judged by your viewers regardless of whether it’s an officially judged panel.
Recurring visitors to research conferences and symposia will see you and your poster presentations evolve. Improve your impact by creating a great poster presentation every time by paying attention to detail in the poster design and in your oral presentation. Practice your public speaking skills alongside the design techniques for even more impact.
Poster presentations create and maintain collaborations
Every time you participate in a research poster conference, you create meaningful connections with people in your field, industry or community. Not only do research posters showcase information about current data in different areas, but they also bring people together with similar interests. Countless collaboration projects between different research teams started after discussing poster details during coffee breaks.
An effective research poster template deepens your peer’s understanding of a topic by highlighting research, data, and conclusions. This information can help other researchers and analysts with their work. As a research poster presenter, you’re given the opportunity for both teaching and learning while sharing ideas with peers and colleagues.
Anatomy of a Winning Poster Presentation
Do you want your research poster to perform well? Following the standard layout and adding a few personal touches will help attendees know how to read your poster and get the most out of your information.

The overall size of your research poster ultimately depends on the dimensions of the provided space at the conference or research poster gallery. The poster orientation can be horizontal or vertical, with horizontal being the most common. In general, research posters measure 48 x 36 inches or are an A0 paper size.
A virtual poster can be the same proportions as the printed research poster, but you have more leeway regarding the dimensions. Virtual research posters should fit on a screen with no need to scroll, with 1080p resolution as a standard these days. A horizontal presentation size is ideal for that.
A research poster presentation has a standard layout of 2–5 columns with 2–3 sections each. Typical structures say to separate the content into four sections; 1. A horizontal header 2. Introduction column, 3. Research/Work/Data column, and 4. Conclusion column. Each unit includes topics that relate to your poster’s objective. Here’s a generalized outline for a poster presentation:
- Condensed Abstract
- Objectives/Purpose
- Methodology
- Recommendations
- Implications
- Acknowledgments
- Contact Information
The overview content you include in the units depends on your poster presentations’ theme, topic, industry, or field of research. A scientific or academic poster will include sections like hypothesis, methodology, and materials. A marketing analysis poster will include performance metrics and competitor analysis results.
There’s no way a poster can hold all the information included in your research paper or analysis report. The poster is an overview that invites the audience to want to find out more. That’s where supplement material comes in. Create a printed PDF handout or card with a QR code (created using a QR code generator ). Send the audience to the best online location for reading or downloading the complete paper.
What Makes a Poster Presentation Good and Effective?
For your poster presentation to be effective and well-received, it needs to cover all the bases and be inviting to find out more. Stick to the standard layout suggestions and give it a unique look and feel. We’ve put together some of the most critical research poster-creation tips in the list below. Your poster presentation will perform as long as you check all the boxes.
The information you choose to include in the sections of your poster presentation needs to be cohesive. Train your editing eye and do a few revisions before presenting. The best way to look at it is to think of The Big Picture. Don’t get stuck on the details; your attendees won’t always know the background behind your research topic or why it’s important.
Be cohesive in how you word the titles, the length of the sections, the highlighting of the most important data, and how your oral presentation complements the printed—or virtual—poster.
The most important characteristic of your poster presentation is its readability and clarity. You need a poster presentation with a balanced design that’s easy to read at a distance of 1.5 meters or 4 feet. The font size and spacing must be clear and neat. All the content must suggest a visual flow for the viewer to follow.
That said, you don’t need to be a designer to add something special to your poster presentation. Once you have the standard—and recognized—columns and sections, add your special touch. These can be anything from colorful boxes for the section titles to an interesting but subtle background, images that catch the eye, and charts that inspire a more extended look.
Storytelling is a presenting technique involving writing techniques to make information flow. Firstly, storytelling helps give your poster presentation a great introduction and an impactful conclusion.
Think of storytelling as the invitation to listen or read more, as the glue that connects sections, making them flow from one to another. Storytelling is using stories in the oral presentation, for example, what your lab partner said when you discovered something interesting. If it makes your audience smile and nod, you’ve hit the mark. Storytelling is like giving a research presentation a dose of your personality, and it can help turning your data into opening stories .
Design Tips For Creating an Effective Research Poster Presentation
The section above briefly mentioned how important design is to your poster presentation’s effectiveness. We’ll look deeper into what you need to know when designing a poster presentation.
1. Font Characteristics
The typeface and size you choose are of great importance. Not only does the text need to be readable from two meters away, but it also needs to look and sit well on the poster. Stay away from calligraphic script typefaces, novelty typefaces, or typefaces with uniquely shaped letters.
Stick to the classics like a sans serif Helvetica, Lato, Open Sans, or Verdana. Avoid serif typefaces as they can be difficult to read from far away. Here are some standard text sizes to have on hand.
- Title: 85 pt
- Authors: 65 pt
- Headings: 36 pt
- Body Text: 24 pt
- Captions: 18 pt

If you feel too prone to use serif typefaces, work with a font pairing tool that helps you find a suitable solution – and intend those serif fonts for heading sections only. As a rule, never use more than 3 different typefaces in your design. To make it more dynamic, you can work with the same font using light, bold, and italic weights to put emphasis on the required areas.
2. Color Pairing
Using colors in your poster presentation design is a great way to grab the viewer’s attention. A color’s purpose is to help the viewer follow the data flow in your presentation, not distract. Don’t let the color take more importance than the information on your poster.

Choose one main color for the title and headlines and a similar color for the data visualizations. If you want to use more than one color, don’t create too much contrast between them. Try different tonalities of the same color and keep things balanced visually. Your color palette should have at most one main color and two accent colors.
Black text over a white background is standard practice for printed poster presentations, but for virtual presentations, try a very light gray instead of white and a very dark gray instead of black. Additionally, use variations of light color backgrounds and dark color text. Make sure it’s easy to read from two meters away or on a screen, depending on the context. We recommend ditching full white or full black tone usage as it hurts eyesight in the long term due to its intense contrast difference with the light ambiance.
3. Data Visualization Dimensions
Just like the text, your charts, graphs, and data visualizations must be easy to read and understand. Generally, if a person is interested in your research and has already read some of the text from two meters away, they’ll come closer to look at the charts and graphs.

Fit data visualizations inside columns or let them span over two columns. Remove any unnecessary borders, lines, or labels to make them easier to read at a glance. Use a flat design without shadows or 3D characteristics. The text in legends and captions should stay within the chart size and not overflow into the margins. Use a unified text size of 18px for all your data visualizations.
4. Alignment, Margins, and White Space
Finally, the last design tip for creating an impressive and memorable poster presentation is to be mindful of the layout’s alignment, margins, and white space. Create text boxes to help keep everything aligned. They allow you to resize, adapt, and align the content along a margin or grid.
Take advantage of the white space created by borders and margins between sections. Don’t crowd them with a busy background or unattractive color.

Calculate margins considering a print format. It is a good practice in case the poster presentation ends up becoming in physical format, as you won’t need to downscale your entire design (affecting text readability in the process) to preserve information.
There are different tools that you can use to make a poster presentation. Presenters who are familiar with Microsoft Office prefer to use PowerPoint. You can learn how to make a poster in PowerPoint here.
Poster Presentation Examples
Before you start creating a poster presentation, look at some examples of real research posters. Get inspired and get creative.
Research poster presentations printed and mounted on a board look like the one in the image below. The presenter stands to the side, ready to share the information with visitors as they walk up to the panels.

With more and more conferences staying virtual or hybrid, the digital poster presentation is here to stay. Take a look at examples from a poster session at the OHSU School of Medicine .
Use SlideModel templates to help you create a winning poster presentation with PowerPoint and Google Slides. These poster PPT templates will get you off on the right foot. Mix and match tables and data visualizations from other poster slide templates to create your ideal layout according to the standard guidelines.
If you need a quick method to create a presentation deck to talk about your research poster at conferences, check out our Slides AI presentation maker. A tool in which you add the topic, curate the outline, select a design, and let AI do the work for you.
1. One-pager Scientific Poster Template for PowerPoint
A PowerPoint template tailored to make your poster presentations an easy-to-craft process. Meet our One-Pager Scientific Poster Slide Template, entirely editable to your preferences and with ample room to accommodate graphs, data charts, and much more.
Use This Template
2. Eisenhower Matrix Slides Template for PowerPoint
An Eisenhower Matrix is a powerful tool to represent priorities, classifying work according to urgency and importance. Presenters can use this 2×2 matrix in poster presentations to expose the effort required for the research process, as it also helps to communicate strategy planning.
3. OSMG Framework PowerPoint Template
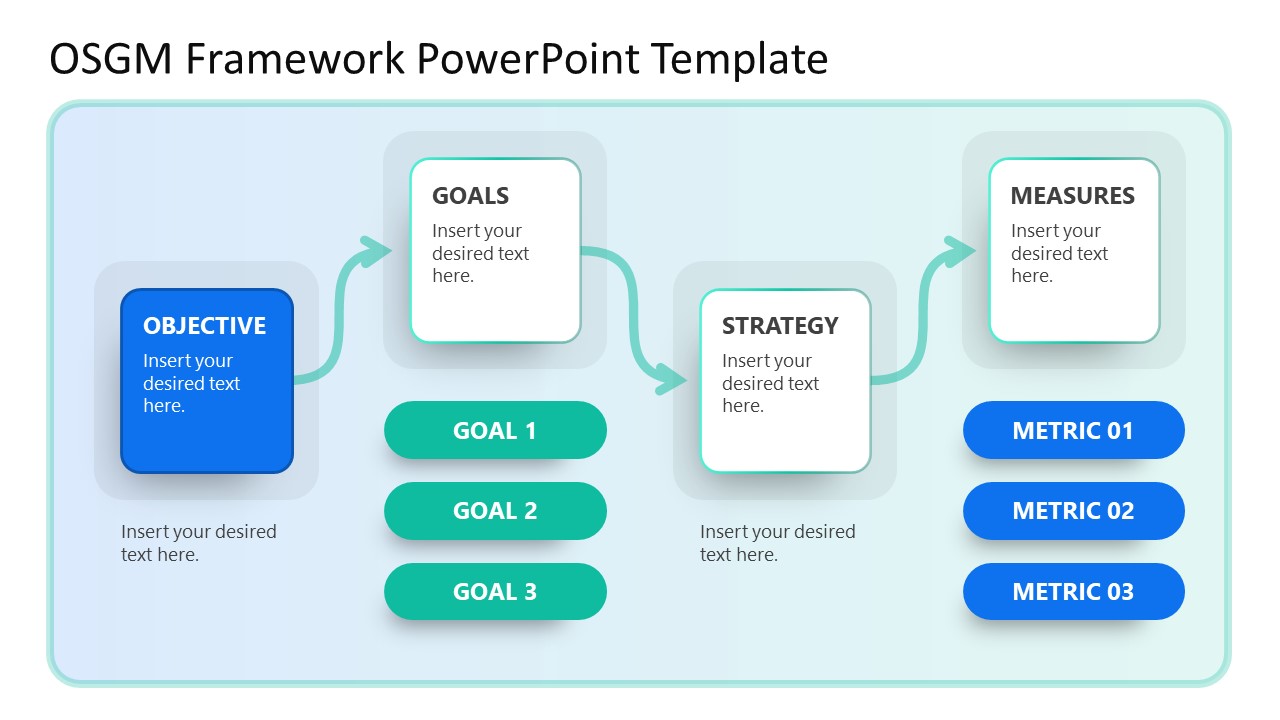
Finally, we recommend presenters check our OSMG Framework PowerPoint template, as it is an ideal tool for representing a business plan: its goals, strategies, and measures for success. Expose complex processes in a simplified manner by adding this template to your poster presentation.
Remember these three words when making your research poster presentation: develop, design, and present. These are the three main actions toward a successful poster presentation.

The section below will take you on a step-by-step journey to create your next poster presentation.
Step 1: Define the purpose and audience of your poster presentation
Before making a poster presentation design, you’ll need to plan first. Here are some questions to answer at this point:
- Are they in your field?
- Do they know about your research topic?
- What can they get from your research?
- Will you print it?
- Is it for a virtual conference?
Step 2: Make an outline
With a clear purpose and strategy, it’s time to collect the most important information from your research paper, analysis, or documentation. Make a content dump and then select the most interesting information. Use the content to draft an outline.
Outlines help formulate the overall structure better than going straight into designing the poster. Mimic the standard poster structure in your outline using section headlines as separators. Go further and separate the content into the columns they’ll be placed in.
Step 3: Write the content
Write or rewrite the content for the sections in your poster presentation. Use the text in your research paper as a base, but summarize it to be more succinct in what you share.
Don’t forget to write a catchy title that presents the problem and your findings in a clear way. Likewise, craft the headlines for the sections in a similar tone as the title, creating consistency in the message. Include subtle transitions between sections to help follow the flow of information in order.
Avoid copying/pasting entire sections of the research paper on which the poster is based. Opt for the storytelling approach, so the delivered message results are interesting for your audience.
Step 4: Put it all together visually
This entire guide on how to design a research poster presentation is the perfect resource to help you with this step. Follow all the tips and guidelines and have an unforgettable poster presentation.
Moving on, here’s how to design a research poster presentation with PowerPoint Templates . Open a new project and size it to the standard 48 x 36 inches. Using the outline, map out the sections on the empty canvas. Add a text box for each title, headline, and body text. Piece by piece, add the content into their corresponding text box.

Transform the text information visually, make bullet points, and place the content in tables and timelines. Make your text visual to avoid chunky text blocks that no one will have time to read. Make sure all text sizes are coherent for all headings, body texts, image captions, etc. Double-check for spacing and text box formatting.
Next, add or create data visualizations, images, or diagrams. Align everything into columns and sections, making sure there’s no overflow. Add captions and legends to the visualizations, and check the color contrast with colleagues and friends. Ask for feedback and progress to the last step.
Step 5: Last touches
Time to check the final touches on your poster presentation design. Here’s a checklist to help finalize your research poster before sending it to printers or the virtual summit rep.
- Check the resolution of all visual elements in your poster design. Zoom to 100 or 200% to see if the images pixelate. Avoid this problem by using vector design elements and high-resolution images.
- Ensure that charts and graphs are easy to read and don’t look crowded.
- Analyze the visual hierarchy. Is there a visual flow through the title, introduction, data, and conclusion?
- Take a step back and check if it’s legible from a distance. Is there enough white space for the content to breathe?
- Does the design look inviting and interesting?
An often neglected topic arises when we need to print our designs for any exhibition purpose. Since A0 is a hard-to-manage format for most printers, these poster presentations result in heftier charges for the user. Instead, you can opt to work your design in two A1 sheets, which also becomes more manageable for transportation. Create seamless borders for the section on which the poster sheets should meet, or work with a white background.
Paper weight options should be over 200 gsm to avoid unwanted damage during the printing process due to heavy ink usage. If possible, laminate your print or stick it to photographic paper – this shall protect your work from spills.
Finally, always run a test print. Gray tints may not be printed as clearly as you see them on screen (this is due to the RGB to CMYK conversion process). Other differences can be appreciated when working with ink jet plotters vs. laser printers. Give yourself enough room to maneuver last-minute design changes.
Presenting a research poster is a big step in the poster presentation cycle. Your poster presentation might or might not be judged by faculty or peers. But knowing what judges look for will help you prepare for the design and oral presentation, regardless of whether you receive a grade for your work or if it’s business related. Likewise, the same principles apply when presenting at an in-person or virtual summit.
The opening statement
Part of presenting a research poster is welcoming the viewer to your small personal area in the sea of poster presentations. You’ll need an opening statement to pitch your research poster and get the viewers’ attention.
Draft a 2 to 3-sentence pitch that covers the most important points:
- What the research is
- Why was it conducted
- What the results say
From that opening statement, you’re ready to continue with the oral presentation for the benefit of your attendees.
The oral presentation
During the oral presentation, share the information on the poster while conversing with the interested public. Practice many times before the event. Structure the oral presentation as conversation points, and use the poster’s visual flow as support. Make eye contact with your audience as you speak, but don’t make them uncomfortable.
Pro Tip: In a conference or summit, if people show up to your poster area after you’ve started presenting it to another group, finish and then address the new visitors.
QA Sessions
When you’ve finished the oral presentation, offer the audience a chance to ask questions. You can tell them before starting the presentation that you’ll be holding a QA session at the end. Doing so will prevent interruptions as you’re speaking.
If presenting to one or two people, be flexible and answer questions as you review all the sections on your poster.
Supplemental Material
If your audience is interested in learning more, you can offer another content type, further imprinting the information in their minds. Some ideas include; printed copies of your research paper, links to a website, a digital experience of your poster, a thesis PDF, or data spreadsheets.
Your audience will want to contact you for further conversations; include contact details in your supplemental material. If you don’t offer anything else, at least have business cards.
Even though conferences have changed, the research poster’s importance hasn’t diminished. Now, instead of simply creating a printed poster presentation, you can also make it for digital platforms. The final output will depend on the conference and its requirements.
This guide covered all the essential information you need to know for creating impactful poster presentations, from design, structure and layout tips to oral presentation techniques to engage your audience better .
Before your next poster session, bookmark and review this guide to help you design a winning poster presentation every time.

Like this article? Please share
Cool Presentation Ideas, Design, Design Inspiration Filed under Design
Related Articles

Filed under PowerPoint Tutorials • May 21st, 2024
How to Edit Background Graphics in PowerPoint
You don’t have to stick with template designs that don’t appeal to your intended message. Learn how to edit background graphics in PowerPoint to become a master user.

Filed under Google Slides Tutorials • April 23rd, 2024
How to Align Objects in Google Slides
Optimize your layouts by learning how to align objects in Google Slides presentations. Step-by-step guide with screenshots.

Filed under Design • January 11th, 2024
How to Use Figma for Presentations
The powerful UI/UX prototyping software can also help us to craft high-end presentation slides. Learn how to use Figma as a presentation software here!
Leave a Reply
Learn more about how the Cal Poly Humboldt Library can help support your research and learning needs.
Stay updated at Campus Ready .

- Cal Poly Humboldt Library
- Research Guides
Creating a Research Poster
- Creating your poster step by step
- Getting Started
- Citing Images
- Creative Commons Images
- Printing options
- More Resources
Preparing your poster
There are three components to your poster session:
- Your poster
All three components should complement one another, not repeat each other.
Poster: Your poster should be an outline of your research with interesting commentary about what you learned along the way.
You: You should prepare a 10-30 second elevator pitch and a 1-2 minute lightning talk about your research. This should be a unique experience or insight you had about your research that adds depth of understanding to what the attendee can read on your poster.
Handout: Best practices for handouts - Your handout should be double-sided. The first side of the paper should include a picture of your poster (this can be in black and white or color). The second side of the handout should include your literature review, cited references, further information about your topic and your contact information.
Creating your poster by answering 3 questions:
- What is the most important and/or interesting finding from my research project?
- How can I visually share my research with conference attendees? Should I use charts, graphs, images, or a wordcloud?
- What kind of information do I need to share during my lightning talk that will complement my poster?
- *Title (at least 72 pt font).
- Research question or hypothesis (all text should be at least 24 pt font).
- Methodology. What is the research process that you used? Explain how you did your research.
- Your interview questions.
- Observations. What did you see? Why is this important?
- *Findings. What did you learn? Summarize your conclusions.
- Pull out themes in the literature and list in bullet points.
- Consider a brief narrative of what you learned - what was the most interesting/surprising part of your project?
- Interesting quotes from your research.
- Turn your data into charts or tables.
- Use images (visit the "Images" tab in the guide for more information). Take your own or legally use others.
- Recommendations and/or next steps for future research.
- You can include your list of citations on your poster or in your handout.
- *Make sure your name, and Cal Poly Humboldt University is on your poster.
*Required. Everything else is optional - you decide what is important to put on your poster. These are just suggestions. Use the tabs in this guide for more tips on how to create your poster.
Poster Sizes
You can create your poster from scratch by using PowerPoint or a similar design program.
Resize the slide to fit your needs before you begin adding any content. Standard poster sizes range from 40" by 30" and 48" by 36" but you should check with the conference organizers. If you don't resize your design at the beginning, when it is printed the image quality will be poor and pixelated if it is sized up to poster dimensions.
The standard poster sizes for ideaFest are 36" x 48" and 24" by 36".
To resize in PowerPoint, go to "File" then "Page Setup..." and enter your dimensions in the boxes for "width" and "height". Make sure to select "OK" to save your changes.
To resize in Google Slides, go to "File" then "Page setup" and select the "Custom" option in the drop down menu. Enter the dimensions for your poster size and then select "Apply" to save your changes.
Step Four: Final checklist
Final checklist for submitting your poster for printing:.
- Proofread your poster for spelling and grammar mistakes. Ask a peer to read your poster, they will catch the mistakes that you miss. Print your poster on an 8 1/2" by 11" sheet of paper - it is easier to read for mistakes and to judge your design.
- Make sure you followed Step 3 and resized your PPT slide correctly.
- Does your poster have flow? Did you "chunk" information into easily read pieces of information?
- Do your visualizations (e.g. charts, graphs, tag clouds, etc.) tell a story? Are they properly labeled and readable?
- Make sure that your images we not resized in PPT. You should use the original size of the image or try an image editor (e.g. Photoshop). Did you cite your image?
- Is your name, department, and affiliation on your poster?
- Did you want to include acknowlegments on your poster? This may be appropriate if your advisor and a graduate student provided leadership during the research process.
- Most importantly- Save your PPT slide to PDF before you send to the printer in order to avoid any printing mishaps. You should also double-check the properties to make sure it is still sized correctly in PDF.
- << Previous: Getting Started
- Next: Images >>
How to design a great science poster in PowerPoint
On this page I'll explain how to use PowerPoint to get a great science poster design. Good to mention beforehand: this is a tutorial about using PowerPoint for your design. If you want to learn how to create a concept/idea for a science poster or visual, you can find this knowhow in the Science Poster Design Guide . After that, you can for example use a tool such as PowerPoint to create the final design.
1. Create a poster file

- Open PowerPoint. In the top bar go to File > New Presentation.
- A new file opens. Delete all the content boxes on the blank page.
- Save your file as a regular PowerPoint file.
2. Resize to A0: 841 x 1189 mm

- Go to top bar 2 (the one with ‘Home, Insert, Draw’) > Design.
- Select Slide Size (image 1).
- Click Page Setup > Fill in: Width - 841 mm, Height: 1189 mm (image 2). Click OK.
3. Add your colour palette

- Go to top bar 2 > Design.
- Go to Format Background (image 1).
- At Fill, select Solid fill (image 2).
- Click the icon next to Colour (in the Format Background menu).
- From the popup menu select 'More Colours'.
- From the new popup menu, select 'CMYK' Sliders in the dropdown box (image 3).
- Fill in the CMYK values of colour 1 of your colour palette. If you have a colour palette from for example coolors.co , they provide you with the CMYK values of each colour. If you don’t have the CMYK colours, you can get them through various tools, such as color-hex.com .
- Drag the colour in the left bottom corner to the empty colour rectangles (image 4). Repeat step 8 and 9 for all your colour palette colours.
4. Background colour (optional)

- If you want to give your background a colour, go to top bar 2 > Design > Format Background.
- At 'Fill' select 'Solid fill' (image 1).
- Click on the icon next to 'Colour'.
- In the popup window, select 'More Colours...'.
- In the new popup window, you see your colour palette, or you can select another (suitable) colour in the CMYK sliders (image 2).
- Select your colour and click 'OK'.
5. Add background shapes (optional)

- If you also use shapes as a background (such as a top bar or a rectangle with text in it), go to top bar 2 > Insert.
- Click the Shapes icon.
- Select your shape from the popup menu.
- In the poster draw the shape (by clicking on the poster and dragging).
- Give the shape the right size (by scaling with your mouse).
- Select the shape
- Go to top bar 2 > Shape Format
- Go to the Shape Fill icon and click on the dropdown button next to it.
- Select the colour.
- If you want to change the border colour (or don’t want to show a border), go to the icon next to Shape Fill, called Shape Outline.
- Click on the dropdown button next to it.
- Select No Outline or a colour.
- Select the shape.
- Go to top bar 2 > Shape Format.
- Go to the Edit Shape icon and click on it. Select Edit Points.
6. Add your texts

- Go to the top bar, select Insert > Text Box (image 1).
- Place the text box on the right place in the poster (image 2).
- Write or copy and paste your own text in it.
- Go to the lightgrey top bar (with font and font size, etc. in it).
- From the font dropdown box, select the font of your liking (image 3).
- From the font size dropdown box, select (or write) the font size of your liking (image 4).
- In the Font Colour dropdown box, select the colour you want for your text (image 5).
- For other texts on your poster: Select the text box of the previous steps, and copy and paste it, to create a new text box.
- Repeat step 2-7 for this text box.
- Selecting your text box, go to the Line Space icon in top bar 2 (Home tab) (image 6).
- Click on Line Spacing Options In the popup menu.
- At Line Spacing, select Exactly (image 7).
- Next to ‘At:’, fill in the spacing. Experiment with different values. It always has to be a value that is larger then the font size used in the text box.
- Select text box.
- Go to top bar 2 > Home.
- Click on one of the text alignment icons: you can choose ‘Align to left’, ‘Centre text’, Align to right’ and ‘Justify text' (image 8).
7. Add and make your images

- Go to top bar 2 > Insert.
- Select the Insert Picture icon (image 1).
- Select your choice, mostly it will be ‘Picture from File'.
- Select your picture in the popup menu and click 'Insert'.
- If your images are vector images, you can adjust the color of it.
- Choose one of the following icons: Shapes, Icons, SmartArt (image 2).
- Choose your shape, icon or illustration and insert it in your poster. The colours are adjustable.
8. Draw your images (optional)

- If you want to draw your own images in PowerPoint, go to top bar 2 > Draw.
- Select one of the drawing pencils and start drawing (image 1).
- When you have drawn a shape or a line, you can go to top bar 2 > Shape Format, and adjust the colour (image 2).
9. Insert your charts

- If you use charts on your poster, go to top bar 2 > Insert.
- Select the Chart icon and choose a suitable chart design from the drop down menu (image 1).
- When selecting a chart, Excel automatically opens.
- Fill in the right values in Excel (image 2).
- Now it’s time to adjust the design of the chart. Go back to PowerPoint. By clicking on elements in the chart, you can adjust the design of it (image 3).
- Repeat the previous steps for all your charts.
10. Export to PDF (including bleed )

- PowerPoint does not have the bleed ability, so you have to integrate the bleed (most of the time 3 mm at each side) into the custom size. In top bar 2, go to Design.
- Select the icon Slide Size.
- Add 6 mm to both width and height (image 1).
- The popup window asks you if you want to scale the content, choose 'Don’t Scale'.
- Check if there are elements on the poster that you need to make larger (because they don’t cover the bleed area). If applicable: make them larger
- Go in the top bar to File > Export.
- Choose PDF.
- Click 'Save'.
You are done, congratulations with your science poster!
Infographics Illustration Data Visualization General Design
About Buy here
Follow Science Poster Design Guide
LinkedIn Twitter Instagram

Research Posters: Creation, Design, & Best Practices
- Getting Started on your Poster
- Poster Templates and Examples
- Designing an Effective Poster
Making a Poster with Powerpoint
- Handouts for Your Poster
- Printing your Poster @ UTM / Off-campus
There are several software packages and tools out there from which you can make a research poster. The most commonly used program is Powerpoint, available as part of the Microsoft Office Suite of programs. You can also access Powerpoint online with a Microsoft account.
While intended as slideshow program, a Powerpoint slide can easily be resized to fit any print poster dimensions. A poster created in Powerpoint can also be saved as a pdf file, locking in the contents from outside editing, and allowing for easier printing on poster plotter printer.
- How to Create a Poster in Microsoft Powerpoint (Youtube Video)
- Converting your Poster from Powerpoint to PDF (from Phd Posters)
- Google Search "posters powerpoint videos"
- << Previous: Designing an Effective Poster
- Next: Handouts for Your Poster >>
- Last Updated: Nov 10, 2023 11:50 AM
- URL: https://guides.library.utoronto.ca/posters
University Library, University of Illinois at Urbana-Champaign

Research Posters
- Elements of a poster
CREATING YOUR POSTER
Color scheme choices.
- WHAT TO INCLUDE IN YOUR POSTER
- More helpful tips
- Visualizations & images
- Illinois logo
- Archiving - Grad Students
- More Resources
- Oral Presentations
- 2024 Undergraduate Research Symposium This link opens in a new window
You have two choices when creating a research poster:
- You can create your poster from scratch by using PowerPoint, Adobe InDesign, or a similar design program.
- You can use one of the University of Illinois Research Poster Templates .
Sizing your Poster
- If you are presenting for the Undergraduate Research Symposium , resize your slide to width 48 inches by height 36 inches.
- If you are presenting at a professional conference , your instructions should indicate the size limits of your poster. Standard U.S. conference poster size is 48" by 36".
IMPORTANT: You must change the size of your slide before you start working on your poster. This will ensure that your images and text do not become pixilated when the poster is printed. See below for specific instructions.
How to correctly size your poster in PowerPoint:
- Select the "Design" tab
- Click "Slide Size"
- Select "Page Setup"
- Under the "Slides sized for:" dropdown menu, select "Custom"
- Set the "Width" and "Height" to what is needed for your poster
- Click "OK"

How to correctly size your poster in Adobe InDesign:
When a new document is created in Adobe InDesign, a dialogue box prompts you to enter dimensions:

- Change the dimension metric to inches from the drop down box.
- Margins are intentional space from an object to the edge of the poster, intended not to be trimmed. You can set this to 0 inches on all sides unless you have a specific plan to use margins in your design.
- Bleed shows the printer where to trim white space that occurs when printing color onto white poster paper. If you are printing your poster, include at least a 0.25 inch bleed on each side; remember not to place any content in the bleed as it will be trimmed by the printer.
- Slug is a space for the creator to leave any notes for the printer. You can set this to 0 inches unless you have notes.
If you ever want to change your poster dimensions after starting the poster, you can do so through the Document Setup Menu .
Using multiple font styles can really make your poster stand out and look professional. Consult this graphic to understand different font styles, what fonts work best together, and what fonts to avoid.
Sticking to a color scheme can help your poster look professional. Consistent use of color can help your viewer understand how information is organized on your poster. Not sure where to start with color?
- Pick colors from an image (including a custom one you're planning to use on your poster)
- Use Illinois branding colors
Not sure what to do with the hex code from a brand guide or color palette generator?
- Adobe InDesign
Always check that your text is accessible on background colors using WebAIM's free contrast checker.
If printing your poster, it's a good idea to do a small-scale test print of your poster before getting it printed. Colors often appear brighter and more vibrant on a screen than when printed. There still might be some variation in color depending on the color scale the printer uses, but it will be a closer match on paper than what you see on screen.
- << Previous: Examples
- Next: Visualizations & images >>
- Last Updated: May 13, 2024 2:05 PM
- URL: https://guides.library.illinois.edu/poster
Create an Academic Research Poster
Here's an example of a poster the library made with the criteria for an academic poster . You can click on the image of the poster to download it as a PDF file.
This poster was created with PowerPoint. It is a 36 x 48 inch poster.
You will need to change the slide size to match the poster size. Here's a quick tutorial on how to make the PowerPoint slide size change .
All of your information will go on that one slide. With the poster being so large it is easy to misjudge the size of the text and images. Use the display board tips to help guide you in creating your poster. Zoom in on the information you have added to make sure there are no misspellings.
Creating an Online Virtual Poster
Free resources you can use to create an online poster:
- Adobe Express
- DesignCap
Ask your instructor what the requirements are for your class. This may be a good resource for online classes.
Quick Links
- Areas of Study
- Net Partner
- Transcript Request
- Safety Data Sheets
- SWCC Shoppe
Information for...
- Future Students
- Current Students
- Parents & Counselors
- Alumni & Community
- Faculty & Staff
Got any suggestions?
We want to hear from you! Send us a message and help improve Slidesgo
Top searches
Trending searches

memorial day
12 templates

holy spirit
36 templates

environmental science

21 templates

american history
74 templates

13 templates
Research Poster Presentation templates
Posters are great for showing a certain amount of information at a glance in a short time. they're meant to be seen by many people that just walk by. what about showing a summary of a research or a paper with this selection of google slides & powerpoint templates, you'll have a printable design ready to pique everyone's interest..

It seems that you like this template!
Pastel brutalist research poster.
This kind of templates for research posters are becoming quite popular here, so, in order to increase the variety, let's try combining two different elements: pastel colors and the brutalist style. The former is a good option whenever you want a more "calming "approach. The latter... sometimes does the opposite!...

Medical Anatomy Poster
Download the "Medical Anatomy Poster" presentation for PowerPoint or Google Slides. Healthcare goes beyond curing patients and combating illnesses. Raising awareness about diseases, informing people about prevention methods, discussing some good practices, or even talking about a balanced diet—there are many topics related to medicine that you could be sharing...

Elegant Research Poster
Elegance is your main characteristic! And if this is what you want to convey in your creations... Your wishes will come true! So, you are looking for a research poster to transmit the class and elegance that you give to your project. Well, this is the design you need. The...

Breastfeeding Research Poster
Breastfeeding is not only a natural, beautiful thing to do for your baby, but it also has numerous health benefits for both mother and child. Breastmilk contains all the necessary nutrients and antibodies your baby needs to thrive, while also protecting against illnesses and allergies. Condensing all this information is...

Premium template
Unlock this template and gain unlimited access
Simple Brutalist Style Research Poster
Impactful, creative, innovative. Want these adjectives to describe your research poster? Then this template is the perfect one you’re looking for. In addition to a ground-breaking design, it includes editable resources so that your research data can be displayed in a visual, synthetized way that everyone can understand —both scientists...

Cystic Fibrosis in Children Case Report
Download the Cystic Fibrosis in Children Case Report presentation for PowerPoint or Google Slides. A clinical case is more than just a set of symptoms and a diagnosis. It is a unique story of a patient, their experiences, and their journey towards healing. Each case is an opportunity for healthcare...

3D Style Research Poster
Wow, this poster is going to amaze everyone! We've created a poster design for you to include everything about your latest research and present it to those who want to know what you've discovered. We have organized the poster with sections so that you can include an introduction, the basis...

Minimalist Geometric Style Research Poster
A good research post helps you show all the information concisely and clearly. We know that you have been working on a research project for a while now and finally it’s time to make a presentation. Take this minimalist geometric style post! It has already all the structure built up...

Download the Medical Anatomy Poster presentation for PowerPoint or Google Slides. Healthcare goes beyond curing patients and combating illnesses. Raising awareness about diseases, informing people about prevention methods, discussing some good practices, or even talking about a balanced diet—there are many topics related to medicine that you could be sharing...

Academic Conference Poster
Are you ready to present your research at an academic conference? Make sure you do it in style with this amazing academic conference poster template! Showcase your data, results, and conclusions in a clear and eye-catching design. This template features a cream color scheme with a modern style, giving your...

Anatomy Poster for Education
Download the Anatomy Poster for Education presentation for PowerPoint or Google Slides. The education sector constantly demands dynamic and effective ways to present information. This template is created with that very purpose in mind. Offering the best resources, it allows educators or students to efficiently manage their presentations and engage...

Elegant Academic Research Poster
A well-designed research poster should seamlessly blend academic content with elegant aesthetics. Research posters should feature an organized layout, legible typography, and relevant visuals. The goal is to present the research material in a clear and concise manner. How about this printable design? With a balanced content and this arrangement,...

Documentary Journalist Portfolio
Download the Documentary Journalist Portfolio presentation for PowerPoint or Google Slides. When a potential client or employer flips through the pages of your portfolio, they're not just looking at your work; they're trying to get a sense of who you are as a person. That's why it's crucial to curate...

Anatomy Poster for High School
Download the Anatomy Poster for High School presentation for PowerPoint or Google Slides. High school students are approaching adulthood, and therefore, this template’s design reflects the mature nature of their education. Customize the well-defined sections, integrate multimedia and interactive elements and allow space for research or group projects—the possibilities of...

Earthquake & Inner Earth Movements Research Poster
We have designed for you the perfect printable template to present your research on earthquakes and inner Earth movements. In it you will find the structure, images, graphs and icons to explain in detail your hypothesis, objectives, methodology, analysis and conclusions. It is designed in earth tones and contains different...

Formal Style Research Poster for University
Science has so many branches and fields of study. Did you find the one you feel the most comfortable in? Did you finish a research that took you quite some time? Do you love research posters? It seems that you've found what you were looking for! Let the design of...

Collage Style Research Poster
Some degrees require you to design a research poster after your final research. It’s only natural, since these kinds of structures are visual, simple and help convey lots of information in little space. And they also are a reflection of the person’s creativity! With this design you can express your...
- Page 1 of 4
Great presentations, faster
Slidesgo for Google Slides :
The easy way to wow
2024 DoM Evans Days Abstract Submission Guidelines!
Abstract Submission dates: May 30th – June 27th
Poster submission dates: July 30th – September 9th
Poster presentation date: October 10 th
Please note: By submitting an abstract, you are committing to submit a poster through ePosterboards online platform.
Abstract Submission Guidelines
Instructions for Completing the Online Abstracts Form
- Section/Department
- Your Mentor
- Research Collaborators
- Preferred email and phone number
- Home mailing address
- Recent Headshot
- Include a brief bio of yourself (where did you go to school, research interest, etc.)
- Is this research Basic Science or Clinical?
Once step one is complete and reviewed you will then be able to submit your abstract(s). Abstract submission will be open on Thursday, May 30; it must be submitted by Thursday, June 27 by 11:59pm EST .
- Objective: Research rationale, objectives and/or hypothesis are well defined and clearly stated.
- Methods: Research methods are appropriate for the study objectives/hypothesis and describe what was done concisely.
- Results: Results are clearly presented and directly address the objectives and convincingly support or refute them.
- Conclusions: Conclusions are supported by the data, indicate the novelty and/or impact of the research and address the limitations and/or future directions.
- Image Size: No larger than 2in high x 4in wide for publication purposes.
- The abstracts receipt deadline Thursday, June 27, by 11:59pm will remain firm and any abstracts received after the deadline will not be accepted.
- Everyone is encouraged to submit an abstract and all will be considered for presentation on Evans Day. However, previous winners of the trainee Evans Days Oral Presentation & Poster Awards within the past three years will not be eligible for an award this year unless the subject of the abstract is completely different than the previous award-winning submission.
Submission Rules
- Abstracts submission portal will open on Thursday, May 30, and will close after Thursday, June 27 at 11:59 PM, EST.
- Character Count: Abstracts are limited to 1470 characters, not including spaces. Image size should be no larger than 2in high x 4in wide for publication purposes.
- Make abstracts as informative as possible, including a brief statement of the purpose of the study or why it was done, the methods used, the results observed, and the author(s)’ conclusions based upon the results. Actual data should be summarized. It is inadequate to state “the results will be discussed” or “the data will be presented.” Abstracts must be written in English.
- You will be asked to partition your abstract into four section: Objective, Methods, Results and Conclusions. The total limit for all four sections combined is 1470 characters.
- NO REVISIONS to abstracts will be allowed after the deadline.
- Authorship on multiple abstracts permitted (1 st authorship is permitted on one abstract only).
- All Department of Medicine faculty, fellows, housestaff, post-docs, and graduate students may submit abstracts.
- Submissions are accepted from any BUMC member but ONLY DOM Trainees, Students, and Post docs will be eligible for competitive awards.
- Work done at another institution can be accepted as long as It was done in collaboration with a DOM faculty member.
- Upon completion of your submission you will receive an email confirmation.
- Please be prepared to submit a poster in PDF or Powerpoint format to accompany your abstract. We will reach out to you once the abstract submission deadline has closed with more information on how to prepare your poster. The deadline for poster submissions will be September 9 th .
If you have any questions please feel free to reach out to Christine Choi at [email protected] .
View all posts
IMAGES
VIDEO
COMMENTS
Create a new poster. Open a new document in PowerPoint. Choose the Landscape (horizontal) or Portrait orientation. Click OK. If a message pops up telling you that " The current page size exceeds the printable area of the paper in the printer " just click OK.
Research posters summarize information or research concisely and attractively to help publicize it and generate discussion. The poster is usually a mixture of a brief text mixed with tables, graphs, pictures, and other presentation formats. At a conference, the researcher stands by the poster display while other participants can come and view ...
Smith Institute for Applied Research at Johnson C. Smith University provides information on how to format standard research posters. The video provides basic...
In this video I show you a simple 8 step process for making an academic poster for a conference, specifically in PowerPoint.Step 1 - 0:07 SIZEStep 2 - 1:21 C...
How to use PowerPoint to quickly create impressive scientific posters for conferences. Download free templates: https://www.simplifiedsciencepublishing.com/p...
In PowerPoint, head to File > Save As > Browse, choose where you want to save your PDF, then name your poster and from the Save as type drop down menu choose PDF. The final check! - It's a good idea to test print your poster before printing it full size. Print your poster A4, or A3 if possible.
Medium poster: 18" x 24". Large posters: 24" x 36" or 27" x 39". Once you've decided on your poster size, set the dimensions in PowerPoint. To do this, open PowerPoint and navigate to the "Design" tab. In the "Customize" group, select "Slide Size." Select "Custom Slide Size" from the dropdown menu.
Step 3: Write the content. Write or rewrite the content for the sections in your poster presentation. Use the text in your research paper as a base, but summarize it to be more succinct in what you share. Don't forget to write a catchy title that presents the problem and your findings in a clear way.
Poster: Your poster should be an outline of your research with interesting commentary about what you learned along the way. ... You can create your poster from scratch by using PowerPoint or a similar design program. Resize the slide to fit your needs before you begin adding any content. Standard poster sizes range from 40" by 30" and 48" by 36 ...
Go to the top bar, select Insert > Text Box (image 1). Place the text box on the right place in the poster (image 2). Write or copy and paste your own text in it. Go to the lightgrey top bar (with font and font size, etc. in it). From the font dropdown box, select the font of your liking (image 3).
You can also access Powerpoint online with a Microsoft account. While intended as slideshow program, a Powerpoint slide can easily be resized to fit any print poster dimensions. A poster created in Powerpoint can also be saved as a pdf file, locking in the contents from outside editing, and allowing for easier printing on poster plotter printer.
How to correctly size your poster in PowerPoint: Select the "Design" tab. Click "Slide Size". Select "Page Setup". Under the "Slides sized for:" dropdown menu, select "Custom". Set the "Width" and "Height" to what is needed for your poster. Click "OK". How to correctly size your poster in Adobe InDesign: When a new document is created in Adobe ...
Follow these steps to make a professional scientific poster for presenting your research.SHOW NOTES00:19 How to set the slide size in PowerPoint00:44 How to ...
Practice a 1- to 2-minute pitch until you feel comfortable. The poster and your pitch must be aimed at the audience that will be present. The clearer and more rational your poster layout, the easier it will then be for you to make a strong pitch. —Srinivas.
Use one of the University of Tennessee Research Poster templates or a Eureka poster template from the Office of Undergraduate Research. Contact your department for discipline-specific templates. Create your poster from scratch by using PowerPoint or a similar design program. IMPORTANT: Change the size of your slide before working on the poster ...
18 Creative Research Poster Templates (Word, PowerPoint) Learning how to create a research poster template is important as these are widely used in conferences, presentations, and more, especially in the academic community. A research or scientific poster template summarizes the research or information in a concise and attractive way to ...
This poster was created with PowerPoint. It is a 36 x 48 inch poster. You will need to change the slide size to match the poster size. Here's a quick tutorial on how to make the PowerPoint slide size change. All of your information will go on that one slide. With the poster being so large it is easy to misjudge the size of the text and images.
Download the Anatomy Poster for High School presentation for PowerPoint or Google Slides. High school students are approaching adulthood, and therefore, this template's design reflects the mature nature of their education. Customize the well-defined sections, integrate multimedia and interactive elements and allow space for research or group ...
How to create a traditional research poster for an academic conference using PowerPoint.
This free PowerPoint poster template is designed for a standard 4x4 foot poster presentation. This scientific poster template is a good size for limited available spaces without compromising room for content. This research poster template can be printed at the following sizes: 48x48 (Standard), 36x36, 24x24, 42x42.
17. In the gray box in the center of the page, select the following settings: "Choose image format" as "JPG"; "Quality (DPI)" as "300 - Above Medium"; and "Image Color" as "Colored". Once you have selected all of these, click on the "Choose File" button to select your PDF poster. 18.
This is a quick tour through how to make a research poster as a single PowerPoint slide. Get started by inserting the various components and then pasting in ...
Methods: Research methods are appropriate for the study objectives/hypothesis and describe what was done concisely. Results: Results are clearly presented and directly address the objectives and convincingly support or refute them. ... Please be prepared to submit a poster in PDF or Powerpoint format to accompany your abstract. We will reach ...
How do you make a scientific research poster for your upcoming academic conference? When you attend the poster session with your research poster, you want it...