
Beginning a presentation: how to create a gorgeous second slide

In a previous post I gave you great tips and advice on how to start your presentation with a powerful first slide . Now that you’re able to craft a great opening slide, you need to know what to do next: your second slide!
Let’s start diving into the second slide with a very common question:
Should your second slide be The Agenda?
I can hear a chorus of angelic voices shouting “nooooooooooo,” can you? The Agenda is not a necessary evil . It’s an evil we can dispense of for many reasons.
First of all, if your talk is so complex that it requires a slide to explain how it flows, maybe you really need to simplify it. Moreover the agenda slide shifts the focus from you … to a bulleted list , setting the mood for a slow, boring, badly delivered presentation.
Doesn’t your audience need an agenda?
By all means they do need an agenda! The best talks are the ones where the audience gets to know the exact structure beforehand . It makes them feel like they’re in control of what’s happening. It calms them down when the presentation is slow and boring and it energizes them when the talk is entertaining. Knowing the structure of a talk makes it easier to follow along . For instance, your audience will think that your first two points were great and eagerly await the third if you tell them it’s coming.
So how do we deliver the agenda to our audience? The answer is easy. We make a pause, look them in the eye and spend 20 to 40 seconds explaining how our talk is structured: we are going to tell 3 stories, we have 2 important themes, we are going to talk about topic x by performing 3 experiments together with the audience.
You don’t need a slide . This is the moment you are making an agreement with your audience about how you are going to spend the next few minutes together. It’s best that you step forward, look at them with an open and honest gaze, and tell them how you’re going to use their time.
This is also a great time to tell your audience how much time you will spend talking and when you want to field questions.
In the meantime your perfectly crafted first slide remains on screen. It’s gorgeous isn’t it? It deserves a little more screen time.
Great. But how about the second slide?
If it’s not the agenda what do you feature there?
There’s not one single answer, but if your conferences are like my conferences I would use the second slide to reinforce a point made before . Let me elaborate on that.
At the beginning of a presentation you share two facts with your audience: who you are and what you’re going to talk about . I suggest that the second slide of your presentation reinforce either of these two points.
If you’re at a conference where there is a skilled M.C. that has clearly talked about your bio and has introduced you properly, you can use the second slide to reinforce the topic you are going to talk about.
One thing you can do is to reveal – if it’s not known – what your relationship is to the topic (you’re the world expert, you became the world expert but you were ignorant about it only 1 year ago, etc.), so as to reinforce both your bio and the theme of your presentation.
You should do this also in a less formal setting if everybody doesn’t know who you are. In this case place a nice picture of yourself in the second slide and give not only a brief bio to your audience (and when I say brief it means you are allowed to use between 10 and 20 words), but also – as above – your relationship with the topic.
Regarding your portrait, when I talk about a nice picture I mean – whenever possible – something shot by a professional. If you can’t afford a photographer, you can shoot great pictures with smartphones nowadays. So go out on a sunny morning wearing something not too flashy (avoid any clothing that has brands on it), choose some neutral background and have a friend take a few head shots of you .
To summarize
No agenda : agendas are for G20 meetings, not for entertaining and informative talks.
Reveal your structure : by verbalizing the structure of your talk your audience becomes your accomplice
Introduce yourself : don’t let your audience discover who you are at the end of the presentation. Tell them beforehand, but be quick.
Reinforce the topic : if everyone knows who you are, reinforce the topic. Answer the question, why am I going to talk about x?
Pin It on Pinterest
You’re using an older browser version. Update to the latest version of Google Chrome , Safari , Mozilla Firefox , or Microsoft Edge for the best site experience.
- eLearning Blog
- eLearning Basics
- Instructional Design
- Corporate Training
- Course Selling
- Manufacturing
- Products iSpring Suite iSpring Learn
- Use Cases Onboarding Compliance Training Induction Training Product Training Channel Partner Training Sales Training Microlearning Mobile Learning
- Company About Us Case Studies Customers Partnership Course Development Contact Us
- Knowledge Hub Knowledge Hub Academy Webinars Articles Guides Experts on iSpring
- Language EN English Français Deutsch Español Italiano Nederlands Português Polski 中文 日本語 العربية Indonesia
- Shopping Cart
How to Structure a PowerPoint Presentation

Table of Contents

This is the main part of your presentation, which should keep the promises you made in the introduction. This is where you explain your topic and present all your information.
Depending on the nature of your presentation, divide it into segments/points. Arrange your points in a logical order and then provide information to support each of them. There are many different ways to organize your key points, for example:
- Number your points according to their priority (1, 2, 3, …)
- Place the points in a time frame (past, present, future)
- Use narration (tell a story from beginning to end)
- Present the points with a problem-solution dynamic (state a problem, describe its impact, offer ways to solve the issue)
A good conclusion summarizes the key points you made or highlights what the audience should have learned. It clarifies the general purpose of your presentation and reinforces the reason for viewing it. Here are the slides you may want to include:
- Summary. List what goals your audience have achieved, what knowledge they got, and how this information can help them in the future.
- Conclusion. Here you can thank your audience for viewing the presentation.
Tips for Structuring a Presentation in PowerPoint
Now that you know which parts a typical presentation should consist of, let’s see how to structure it in PowerPoint.
1. Combine slides into sections
When working with a large PowerPoint presentation (PPT), you can create sections that can be collapsed and expanded. This will help you keep presentation slides organized and facilitate navigation in editing mode. To do that, follow these steps:

- To shift a section, right-click on its name and use the Move Section Up and Move Section Down options.
- To collapse or expand a certain section, click on the collapse icon to the left of the section name. You can also minimize and maximize all sections at once by right-clicking on the section name and choosing Collapse All or Expand All .
As well, you can access these settings by choosing Slide Sorter under the VIEW tab.

This kind of segmentation is a great way to overview the logical flow of your slides all at once and see if there are any changes required. For example, you may decide to break one slide into two or three, or the other way around.
2. Use the Outline View
One other way to structure a PowerPoint presentation in the editing mode is to use Outline View . You can choose it from the VIEW tab.

This view doesn’t display sections, but it shows the title and main text of each slide, which can give you a quick overview of the presentation contents. Here you can go through the entire text and edit it instantly. You can also work with text (on the left) and slides (on the right) simultaneously, as the latter is shown on the right side of your screen.
Note that, to be displayed in an outline, text needs to be typed in a text placeholder, not a text box . A text placeholder is a box with the words “Click to add text” or “Click to add title”, and it appears when you choose a standard layout.
You can also use Outline View to promote bullet text to titles and the other way around. To do that, right-click on a relevant title or text and select the Promote or Demote options.

Be attentive about demoting a title, as this will delete the original slide and move its title and text to the adjacent slide.
PowerPoint only allows users to promote and demote text, not entire slides. Therefore, there’s no possibility to change the hierarchical order of slides.
3. Create a table of contents
All the aforementioned tips help you organize a presentation when formatting it. However, it’s crucial that your viewers can easily navigate through entire presentation too. One sure way to provide them with this opportunity is to create an interactive and structured table of contents.
Though there’s no native automatic outline in PowerPoint, it can be created manually:

- Press Ctrl+A to select all the names, and Ctrl+C to copy them.
- Then Press Ctrl+V to paste the copied titles on the desired slide. In case there are too many titles and they don’t fit onto a single page, you can divide the table of contents into two columns or place it on two slides.

You’ll need to repeat this procedure to link all the chapters to corresponding slides. For more information, read this step-by-step guide on how to add a hyperlink in PowerPoint .
Now all the chapters can be accessed from a single table of contents, which is very convenient. However, you will also need to link them back to that unifying page. You can do this by inserting an Action Button on every slide of your presentation in Slide Master mode:

Now there is a single page from which all the other pages can be easily accessed. As well, it’s possible to go back to the table of contents at any time with the intuitive Home button.
Depending on the size of your presentation, the time it takes to create an interactive outline may vary, as you will need to add hyperlinks to every chapter manually. Be aware that if you rename a slide or simply delete it, these changes will not be automatically registered in the table of contents. For example, if you delete a slide, its title will still be displayed in the table of contents, but clicking on it won’t lead the viewer to another point in the presentation.
This is what our sample presentation looks like:

A Better Way to Structure a PowerPoint Presentation
Creating a table of contents manually might be fine for a small presentation, but if you have 122 slides, it would require too much time and energy to do so. That’s why, instead of manually creating a table of contents, we took advantage of iSpring Suite and simply enabled the automatic outline.
iSpring Suite
Fully-stocked eLearning authoring toolkit for PowerPoint. No training required to start!

Note: iSpring Suite turns slides into HTML5 format, so your audience can view them online, right in their browsers.

As you can see, the new presentation has a pop-up outline and a navigation panel, which make it possible to move to any slide at any time without leaving the slide show mode.
How to set up navigation
To create navigation in your presentation, follow these simple steps:
- Get a free trial of iSpring Suite.

- When you’ve configured the Slide Properties settings, click on Save & Close in the upper-left corner.
How to configure an outline
Whereas PowerPoint requires the outline to be designed manually, iSpring Suite has already prepared it for you. At the same time, you don’t have to stick with the standard outline template, as you can easily customize the player’s final look and feel:

We recommend leaving Enable Search marked, as this will allow viewers to search for any content at any time, including the texts on the slides. This is especially useful for large presentations with a lot of text.
If you have previously arranged slides into multiple levels in the Slide Properties, then leave Multilevel outline marked. That way, the outline will display the nesting structure of the presentation, facilitating navigation. You can learn more about the other outline options here .

- When you have finished configuring the player, click on Apply & Close in the upper-left corner.
- Now you can publish your enhanced presentation either to HTML5, to make it easily accessible via browser on any device, or MP4 video format. If you’re going to upload your presentation to an LMS, you can publish it to any eLearning format: SCORM, AICC, Tin Can, or cmi5.
While a standard PowerPoint slideshow is straightforward and limited, iSpring Suite saves viewers from having to follow a strict slide order. An interactive and searchable outline allows non-linear navigation, where any information can be accessed at any time at a glance.
Also read : → How to Convert PowerPoint to MP4 Video
Also read : → How To Record Presentations With Audio
Another perk
iSpring Suite comes with Content Library , which provides a great collection of presentation templates and allows you to create professional-looking presentations in a matter of minutes. Each template includes basic course elements: a title slide, a table of contents, chapters, a timeline, and info slides. Organize them in the order you prefer, populate them with your texts and images, and your presentation is ready to go.

We hope this article will help you develop an ideal structure for your PowerPoint presentation and do this quickly and easily. Captivate your audience with a powerful and persuasive presentation!
Do you have any other insights on how to simplify PowerPoint slides design? Please share them in the comment section. We’d like to hear from you.
Fast course authoring toolkit
Create online courses and assessments in record time.

Content creator:
Helen Colman
She enjoys combining in-depth research with expert knowledge of the industry. If you have eLearning insights that you’d like to share, please get in touch .
You might also like this

Subscribe to our blog
Stay tuned to get our latest eLearning tips and tricks!
By clicking “Subscribe”, you agree to our Privacy Policy . All emails include an unsubscribe link, so that you can opt-out at any time.
We use cookies to give you the best possible experience on our website and also for analytics and marketing purposes. You can enable or disable optional cookies as desired. See our Cookie Policy for more details.
Manage your cookies
Essential cookies are always on. You can turn off other cookies if you wish.
Essential cookies
Analytics cookies
Social media cookies
Improve your practice.
Enhance your soft skills with a range of award-winning courses.
How to Structure your Presentation, with Examples
August 3, 2018 - Dom Barnard
For many people the thought of delivering a presentation is a daunting task and brings about a great deal of nerves . However, if you take some time to understand how effective presentations are structured and then apply this structure to your own presentation, you’ll appear much more confident and relaxed.
Here is our complete guide for structuring your presentation, with examples at the end of the article to demonstrate these points.
Why is structuring a presentation so important?
If you’ve ever sat through a great presentation, you’ll have left feeling either inspired or informed on a given topic. This isn’t because the speaker was the most knowledgeable or motivating person in the world. Instead, it’s because they know how to structure presentations – they have crafted their message in a logical and simple way that has allowed the audience can keep up with them and take away key messages.
Research has supported this, with studies showing that audiences retain structured information 40% more accurately than unstructured information.
In fact, not only is structuring a presentation important for the benefit of the audience’s understanding, it’s also important for you as the speaker. A good structure helps you remain calm, stay on topic, and avoid any awkward silences.
What will affect your presentation structure?
Generally speaking, there is a natural flow that any decent presentation will follow which we will go into shortly. However, you should be aware that all presentation structures will be different in their own unique way and this will be due to a number of factors, including:
- Whether you need to deliver any demonstrations
- How knowledgeable the audience already is on the given subject
- How much interaction you want from the audience
- Any time constraints there are for your talk
- What setting you are in
- Your ability to use any kinds of visual assistance
Before choosing the presentation’s structure answer these questions first:
- What is your presentation’s aim?
- Who are the audience?
- What are the main points your audience should remember afterwards?
When reading the points below, think critically about what things may cause your presentation structure to be slightly different. You can add in certain elements and add more focus to certain moments if that works better for your speech.

What is the typical presentation structure?
This is the usual flow of a presentation, which covers all the vital sections and is a good starting point for yours. It allows your audience to easily follow along and sets out a solid structure you can add your content to.
1. Greet the audience and introduce yourself
Before you start delivering your talk, introduce yourself to the audience and clarify who you are and your relevant expertise. This does not need to be long or incredibly detailed, but will help build an immediate relationship between you and the audience. It gives you the chance to briefly clarify your expertise and why you are worth listening to. This will help establish your ethos so the audience will trust you more and think you’re credible.
Read our tips on How to Start a Presentation Effectively
2. Introduction
In the introduction you need to explain the subject and purpose of your presentation whilst gaining the audience’s interest and confidence. It’s sometimes helpful to think of your introduction as funnel-shaped to help filter down your topic:
- Introduce your general topic
- Explain your topic area
- State the issues/challenges in this area you will be exploring
- State your presentation’s purpose – this is the basis of your presentation so ensure that you provide a statement explaining how the topic will be treated, for example, “I will argue that…” or maybe you will “compare”, “analyse”, “evaluate”, “describe” etc.
- Provide a statement of what you’re hoping the outcome of the presentation will be, for example, “I’m hoping this will be provide you with…”
- Show a preview of the organisation of your presentation
In this section also explain:
- The length of the talk.
- Signal whether you want audience interaction – some presenters prefer the audience to ask questions throughout whereas others allocate a specific section for this.
- If it applies, inform the audience whether to take notes or whether you will be providing handouts.
The way you structure your introduction can depend on the amount of time you have been given to present: a sales pitch may consist of a quick presentation so you may begin with your conclusion and then provide the evidence. Conversely, a speaker presenting their idea for change in the world would be better suited to start with the evidence and then conclude what this means for the audience.
Keep in mind that the main aim of the introduction is to grab the audience’s attention and connect with them.
3. The main body of your talk
The main body of your talk needs to meet the promises you made in the introduction. Depending on the nature of your presentation, clearly segment the different topics you will be discussing, and then work your way through them one at a time – it’s important for everything to be organised logically for the audience to fully understand. There are many different ways to organise your main points, such as, by priority, theme, chronologically etc.
- Main points should be addressed one by one with supporting evidence and examples.
- Before moving on to the next point you should provide a mini-summary.
- Links should be clearly stated between ideas and you must make it clear when you’re moving onto the next point.
- Allow time for people to take relevant notes and stick to the topics you have prepared beforehand rather than straying too far off topic.
When planning your presentation write a list of main points you want to make and ask yourself “What I am telling the audience? What should they understand from this?” refining your answers this way will help you produce clear messages.
4. Conclusion
In presentations the conclusion is frequently underdeveloped and lacks purpose which is a shame as it’s the best place to reinforce your messages. Typically, your presentation has a specific goal – that could be to convert a number of the audience members into customers, lead to a certain number of enquiries to make people knowledgeable on specific key points, or to motivate them towards a shared goal.
Regardless of what that goal is, be sure to summarise your main points and their implications. This clarifies the overall purpose of your talk and reinforces your reason for being there.
Follow these steps:
- Signal that it’s nearly the end of your presentation, for example, “As we wrap up/as we wind down the talk…”
- Restate the topic and purpose of your presentation – “In this speech I wanted to compare…”
- Summarise the main points, including their implications and conclusions
- Indicate what is next/a call to action/a thought-provoking takeaway
- Move on to the last section
5. Thank the audience and invite questions
Conclude your talk by thanking the audience for their time and invite them to ask any questions they may have. As mentioned earlier, personal circumstances will affect the structure of your presentation.
Many presenters prefer to make the Q&A session the key part of their talk and try to speed through the main body of the presentation. This is totally fine, but it is still best to focus on delivering some sort of initial presentation to set the tone and topics for discussion in the Q&A.

Other common presentation structures
The above was a description of a basic presentation, here are some more specific presentation layouts:
Demonstration
Use the demonstration structure when you have something useful to show. This is usually used when you want to show how a product works. Steve Jobs frequently used this technique in his presentations.
- Explain why the product is valuable.
- Describe why the product is necessary.
- Explain what problems it can solve for the audience.
- Demonstrate the product to support what you’ve been saying.
- Make suggestions of other things it can do to make the audience curious.
Problem-solution
This structure is particularly useful in persuading the audience.
- Briefly frame the issue.
- Go into the issue in detail showing why it ‘s such a problem. Use logos and pathos for this – the logical and emotional appeals.
- Provide the solution and explain why this would also help the audience.
- Call to action – something you want the audience to do which is straightforward and pertinent to the solution.
Storytelling
As well as incorporating stories in your presentation , you can organise your whole presentation as a story. There are lots of different type of story structures you can use – a popular choice is the monomyth – the hero’s journey. In a monomyth, a hero goes on a difficult journey or takes on a challenge – they move from the familiar into the unknown. After facing obstacles and ultimately succeeding the hero returns home, transformed and with newfound wisdom.
Storytelling for Business Success webinar , where well-know storyteller Javier Bernad shares strategies for crafting compelling narratives.
Another popular choice for using a story to structure your presentation is in media ras (in the middle of thing). In this type of story you launch right into the action by providing a snippet/teaser of what’s happening and then you start explaining the events that led to that event. This is engaging because you’re starting your story at the most exciting part which will make the audience curious – they’ll want to know how you got there.
- Great storytelling: Examples from Alibaba Founder, Jack Ma
Remaining method
The remaining method structure is good for situations where you’re presenting your perspective on a controversial topic which has split people’s opinions.
- Go into the issue in detail showing why it’s such a problem – use logos and pathos.
- Rebut your opponents’ solutions – explain why their solutions could be useful because the audience will see this as fair and will therefore think you’re trustworthy, and then explain why you think these solutions are not valid.
- After you’ve presented all the alternatives provide your solution, the remaining solution. This is very persuasive because it looks like the winning idea, especially with the audience believing that you’re fair and trustworthy.
Transitions
When delivering presentations it’s important for your words and ideas to flow so your audience can understand how everything links together and why it’s all relevant. This can be done using speech transitions which are words and phrases that allow you to smoothly move from one point to another so that your speech flows and your presentation is unified.
Transitions can be one word, a phrase or a full sentence – there are many different forms, here are some examples:
Moving from the introduction to the first point
Signify to the audience that you will now begin discussing the first main point:
- Now that you’re aware of the overview, let’s begin with…
- First, let’s begin with…
- I will first cover…
- My first point covers…
- To get started, let’s look at…
Shifting between similar points
Move from one point to a similar one:
- In the same way…
- Likewise…
- Equally…
- This is similar to…
- Similarly…
Internal summaries
Internal summarising consists of summarising before moving on to the next point. You must inform the audience:
- What part of the presentation you covered – “In the first part of this speech we’ve covered…”
- What the key points were – “Precisely how…”
- How this links in with the overall presentation – “So that’s the context…”
- What you’re moving on to – “Now I’d like to move on to the second part of presentation which looks at…”
Physical movement
You can move your body and your standing location when you transition to another point. The audience find it easier to follow your presentation and movement will increase their interest.
A common technique for incorporating movement into your presentation is to:
- Start your introduction by standing in the centre of the stage.
- For your first point you stand on the left side of the stage.
- You discuss your second point from the centre again.
- You stand on the right side of the stage for your third point.
- The conclusion occurs in the centre.
Key slides for your presentation
Slides are a useful tool for most presentations: they can greatly assist in the delivery of your message and help the audience follow along with what you are saying. Key slides include:
- An intro slide outlining your ideas
- A summary slide with core points to remember
- High quality image slides to supplement what you are saying
There are some presenters who choose not to use slides at all, though this is more of a rarity. Slides can be a powerful tool if used properly, but the problem is that many fail to do just that. Here are some golden rules to follow when using slides in a presentation:
- Don’t over fill them – your slides are there to assist your speech, rather than be the focal point. They should have as little information as possible, to avoid distracting people from your talk.
- A picture says a thousand words – instead of filling a slide with text, instead, focus on one or two images or diagrams to help support and explain the point you are discussing at that time.
- Make them readable – depending on the size of your audience, some may not be able to see small text or images, so make everything large enough to fill the space.
- Don’t rush through slides – give the audience enough time to digest each slide.
Guy Kawasaki, an entrepreneur and author, suggests that slideshows should follow a 10-20-30 rule :
- There should be a maximum of 10 slides – people rarely remember more than one concept afterwards so there’s no point overwhelming them with unnecessary information.
- The presentation should last no longer than 20 minutes as this will leave time for questions and discussion.
- The font size should be a minimum of 30pt because the audience reads faster than you talk so less information on the slides means that there is less chance of the audience being distracted.
Here are some additional resources for slide design:
- 7 design tips for effective, beautiful PowerPoint presentations
- 11 design tips for beautiful presentations
- 10 tips on how to make slides that communicate your idea
Group Presentations
Group presentations are structured in the same way as presentations with one speaker but usually require more rehearsal and practices. Clean transitioning between speakers is very important in producing a presentation that flows well. One way of doing this consists of:
- Briefly recap on what you covered in your section: “So that was a brief introduction on what health anxiety is and how it can affect somebody”
- Introduce the next speaker in the team and explain what they will discuss: “Now Elnaz will talk about the prevalence of health anxiety.”
- Then end by looking at the next speaker, gesturing towards them and saying their name: “Elnaz”.
- The next speaker should acknowledge this with a quick: “Thank you Joe.”
From this example you can see how the different sections of the presentations link which makes it easier for the audience to follow and remain engaged.
Example of great presentation structure and delivery
Having examples of great presentations will help inspire your own structures, here are a few such examples, each unique and inspiring in their own way.
How Google Works – by Eric Schmidt
This presentation by ex-Google CEO Eric Schmidt demonstrates some of the most important lessons he and his team have learnt with regards to working with some of the most talented individuals they hired. The simplistic yet cohesive style of all of the slides is something to be appreciated. They are relatively straightforward, yet add power and clarity to the narrative of the presentation.
Start with why – by Simon Sinek
Since being released in 2009, this presentation has been viewed almost four million times all around the world. The message itself is very powerful, however, it’s not an idea that hasn’t been heard before. What makes this presentation so powerful is the simple message he is getting across, and the straightforward and understandable manner in which he delivers it. Also note that he doesn’t use any slides, just a whiteboard where he creates a simple diagram of his opinion.
The Wisdom of a Third Grade Dropout – by Rick Rigsby
Here’s an example of a presentation given by a relatively unknown individual looking to inspire the next generation of graduates. Rick’s presentation is unique in many ways compared to the two above. Notably, he uses no visual prompts and includes a great deal of humour.
However, what is similar is the structure he uses. He first introduces his message that the wisest man he knew was a third-grade dropout. He then proceeds to deliver his main body of argument, and in the end, concludes with his message. This powerful speech keeps the viewer engaged throughout, through a mixture of heart-warming sentiment, powerful life advice and engaging humour.
As you can see from the examples above, and as it has been expressed throughout, a great presentation structure means analysing the core message of your presentation. Decide on a key message you want to impart the audience with, and then craft an engaging way of delivering it.
By preparing a solid structure, and practising your talk beforehand, you can walk into the presentation with confidence and deliver a meaningful message to an interested audience.
It’s important for a presentation to be well-structured so it can have the most impact on your audience. An unstructured presentation can be difficult to follow and even frustrating to listen to. The heart of your speech are your main points supported by evidence and your transitions should assist the movement between points and clarify how everything is linked.
Research suggests that the audience remember the first and last things you say so your introduction and conclusion are vital for reinforcing your points. Essentially, ensure you spend the time structuring your presentation and addressing all of the sections.

- Get started with computers
- Learn Microsoft Office
- Apply for a job
- Improve my work skills
- Design nice-looking docs
- Getting Started
- Smartphones & Tablets
- Typing Tutorial
- Online Learning
- Basic Internet Skills
- Online Safety
- Social Media
- Zoom Basics
- Google Docs
- Google Sheets
- Career Planning
- Resume Writing
- Cover Letters
- Job Search and Networking
- Business Communication
- Entrepreneurship 101
- Careers without College
- Job Hunt for Today
- 3D Printing
- Freelancing 101
- Personal Finance
- Sharing Economy
- Decision-Making
- Graphic Design
- Photography
- Image Editing
- Learning WordPress
- Language Learning
- Critical Thinking
- For Educators
- Translations
- Staff Picks
- English expand_more expand_less
PowerPoint 2010 - Slide Basics
Powerpoint 2010 -, slide basics, powerpoint 2010 slide basics.

PowerPoint 2010: Slide Basics
Lesson 2: slide basics.
/en/powerpoint2010/getting-started-with-powerpoint/content/
Introduction

PowerPoint includes all of the features you need to produce professional-looking presentations. When you create a PowerPoint presentation, it is made up of a series of slides . The slides contain the information you want to communicate with your audience. This information can include text, pictures, charts, video, and sound. Before you begin adding information to slides, you'll need to know the basics of working with slides. In this lesson, you will learn how to insert new slides, modify a layout , and change your presentation view .
Slide basics
Every PowerPoint presentation is composed of a series of slides . To begin creating a slide show, you'll need to know the basics of working with slides. You'll need to feel comfortable with tasks such as inserting a new slide, changing the layout of a slide, arranging existing slides, changing slide view , and adding notes to a slide.
Optional: You can download this example for extra practice.
About slides
Slides contain placeholders , which are areas on the slide that are enclosed by dotted borders. Placeholders can contain many different items, including text, pictures, and charts. Some placeholders have placeholder text , or text you can replace. They also have thumbnail-sized icons that represent specific commands such as Insert Picture , Insert Chart , and Insert ClipArt . In PowerPoint, hover over each icon to see the type of content you can insert in a placeholder.

About slide layouts
Placeholders are arranged in different layouts that can be applied to existing slides or chosen when you insert a new slide . A slide layout arranges your content using different types of placeholders, depending on what information you might want to include in your presentation.
In the example above, the layout is called Title and Content and includes title and content placeholders. While each layout has a descriptive name, you can also tell from the image of the layout how the placeholders will be arranged.

Customizing slide layouts
To change the layout of an existing slide:.

To delete a placeholder:
You can easily customize your layout by deleting unwanted—or extra—placeholders from any slide.
- Press Backspace or Delete on your keyboard. The placeholder will be removed from the slide.
To add a text box:
Text boxes allow you to add to your current layout, so you can place text wherever you want on your slide.

Explore our Text Basics lesson to learn more about inserting and using text boxes in PowerPoint 2010.
To use a blank slide:
For more control over your content, you may prefer a blank slide—a slide without placeholders—over one of the existing layouts. Blank slides can be customized by adding your own text boxes, pictures, charts, and more.

Working with slides
To insert a new slide:.

- A new slide will be added your presentation.
To instantly add a slide that uses the same layout as the one you have selected, click the top half of the New Slide command.
To copy and paste a slide:
- On the Slides tab in the left pane, select the slide you want to copy.

To select multiple slides, press and hold Ctrl on your keyboard and click the slides you want to select.
To duplicate a slide:
An alternative to copying and pasting, duplicating slides copies the selected slide and—in one step—pastes it directly underneath. This feature does not allow you to choose the location of the copied slide, nor does it offer Paste Options for advanced users, so it's more convenient for quickly inserting similar slides.
- Select the slide you want to duplicate.
- Click the New Slide command.

To delete a slide:
- Select the slide you want to delete.
- Press the Delete or Backspace key on your keyboard.
To move a slide:
- Select the slide you want to move.

- Release the mouse button. The slide will appear in the new location.
Managing slides and presentations
As you add slides to your presentation, PowerPoint offers a variety of views and tools to help you organize and prepare your slide show.
About slide views
It's important to be able to access the different slide views and use them for various tasks. The slide view commands are located on the bottom-right of the PowerPoint window in Normal view.

Normal view : This is the default view where you create and edit your slides. You can also move slides in the Slides tab in the pane on the left.

Slide Sorter view : In this view, miniature slides are arranged on the screen. You can drag and drop slides to easily reorder them and to see more slides at one time. This is a good view to use to confirm that you have all the needed slides and that none have been deleted.

Reading view : This view fills most of the computer screen with a preview of your presentation. Unlike Slide Show view, it includes easily accessible buttons for navigation, located at the bottom-right.

Slide Show view : This view completely fills the computer screen and is what the audience will see when they view the presentation. Slide Show view has an additional menu that appears when you hover over it, allowing you to navigate slides and access other features you can use during a presentation.

Use the keys on your keyboard—including the arrow keys, Page Up and Page Down keys, spacebar, and Enter key—to move through the slides in Slide Show view. Press the Esc key to end the slide show.
To view an outline of your presentation:
The Outline tab shows your slide text in outline form. This allows you to quickly edit your slide text and view the contents of multiple slides at once.

- An outline of your slide text appears.

To organize slides into sections:
You can organize your slides into sections to make your presentation easier to navigate. Sections can be collapsed or expanded in the left pane and named for easy reference. In this example, we will add two sections: one for dogs that are available for adoption, and another for cats and other pets.
- Select the slide you want to begin your first section.
- From the Home tab, click the Section command.

- Repeat to add as many sections as you want.

Adding notes to slides
PowerPoint gives you the ability to add notes to your slides—often called speaker notes —to help you deliver or prepare for your presentation. You can enter and view your speaker notes using the Notes pane or the Notes Page view.
To use the Notes pane:
- Locate the Notes pane at the bottom of the screen, directly below the Slide pane.

To use Notes Page view:
- Go to the View tab.

- Open an existing PowerPoint presentation . If you want, you can use this example .
- Change the layout of a slide. If you are using the example, change the layout of slide 3 to Section Header .
- Add a new blank slide, then insert a text box .
- Copy and paste a slide, then move it to a new location.
- View your presentation in Normal view, Slide Sorter view, Reading view, and Slide Show view.
- View an outline of your presentation in the left pane.
- Divide your presentation into at least two sections , and try collapsing and expanding them. If you are using the example, create one section for dogs and another for cats and other pets.
- Experiment with adding speaker notes to your presentation using the Notes pane and the Notes Page view .
/en/powerpoint2010/text-basics/content/
- Stream Your Favorite Sports
- Where to Watch WNBA Games
The Definition of a Slide (or Slides) in a PowerPoint Presentation
- Brock University
Presentation software such as PowerPoint generates a series of slides to accompany a human presenter or to be recorded as a stand-alone presentation. A slide is a single screen of a presentation, and every presentation is composed of several slides. Depending on the subject matter, the best presentations may consist of 10 to 12 slides to get a message across, but more may be needed for complex subjects.
Slides keep an audience's attention during a presentation and provide additional supporting information in textual or graphic format.
Selecting Slide Formats in PowerPoint
When you open a new PowerPoint presentation file, you are presented with a large selection of slide templates that you can choose from to set the tone for your presentation. Each template has a series of related slides in the same theme, color, and font choice for different purposes. You can choose a template and use only the additional slides that work for your presentation.
The first slide of a presentation is usually a title or introductory slide. It typically consists of text only, but it can include graphic elements or images as well. Subsequent slides are chosen based on the information to be transmitted. Some slides contain images, or charts and graphs.
Transitions Between Slides
Slides follow one after another during a presentation, either at a set time or when the presenter advances the slides manually. PowerPoint includes a large number of transitions you can apply to slides. A transition controls the appearance of one slide as it transitions to the next. Transitions include one slide morphing into another, a fade of one to another, and all sorts of special effects such as page curls or animated motion.
Although transitions add extra interest to a slide presentation, overdoing them by applying a different spectacular effect to each slide tends to look unprofessional and may even distract the audience from what the speaker is saying, so use transitions judiciously.
Enhancing a Slide
Slides can have sound effects attached to them. The sound effects list includes cash register, crowd laughing, drum roll, whoosh, typewriter and many more.
Adding motion to an element on a slide – a line of text or an image – is called animation. PowerPoint comes with a large selection of stock animations you can use to generate movement on a slide. For example, you can choose a headline and have it zoom in from the margin, spin around 360 degrees, flip in one letter at a time, bounce into position or one of many other stock animation effects .
As with transitions, don't use so many special effects that the audience is distracted from the content of the slide.
Get the Latest Tech News Delivered Every Day
- The 8 Best Slideshow Apps of 2024
- What Is an Animation in Presentation Software?
- How to Use Google Duet in Slides
- Different Ways to View Slides in PowerPoint
- The 8 Best Google Drive Add-ons for 2024
- 10 Free PowerPoint Game Templates
- Beyond the Basics in PowerPoint
- The 10 Most Common PowerPoint Terms
- Tips for Memorial PowerPoint Presentations
- How to Hide and Unhide a Slide in PowerPoint
- Create a Wedding PowerPoint Presentation
- How to Use Google Slide Animations and Transitions
- PowerPoint Master Slide
- An Introduction to PowerPoint
- Make the Most of PowerPoint's Slide Transition Options
- Converting PowerPoint Slides to Word Documents
Want to create or adapt books like this? Learn more about how Pressbooks supports open publishing practices.
Unit 1 Use a Theme Template and Slide Layouts to Create a Presentation
2 Getting to Know PowerPoint
Topics include:, powerpoint 2010, powerpoint help system, the powerpoint window.
PowerPoint 2010 is a complete presentation graphics program that allows you to produce professional looking presentations.
Slides can be created and displayed as a slide show on your computer, video projector, or on the Internet. Information from a PowerPoint presentation can be printed in a handout form or as transparencies.
PowerPoint allows for data to be entered and edited quickly and efficiently. To make changes to the presentation you can edit a slide rather than recreate the presentation. You can also import information from spreadsheets, databases, and word-processing files.
Open PowerPoint by clicking the Start button on the Windows Taskbar, point to Programs, go to Microsoft Office and then click Microsoft Office PowerPoint 2010.
The PowerPoint window contains many elements that are similar to other Microsoft Office programs. These elements include the Office button, Quick Access toolbar, Title bar, Tabs, scroll bars and a Status bar.
Quick access toolbar contains buttons for commonly-used commands.
Title bar indicates the software, the name of the presentation that is open, minimize, maximize, and close buttons.
Tabs contain commands that are pided into related tasks called groups.
Ribbon is the area containing the tabs.
Outline/Slides tab displays the presentation text in the form of an outline. Outline tab is used to organize and develop the content of your presentation. This tab enables you to move slides and text by dragging selected material. Slide tab displays the slides of your presentation as small images. This view allows easy navigation through slides.
Slide pane contains the current slide in your presentation. You can use the vertical scroll bar to view other slides in the presentation.
Notes pane is located below the slide pane and is used to type reference notes. The notes can be printed, then referenced when making the presentation.
View area is located at the right hand bottom of the screen. It contains buttons that allow the ability to switch between PowerPoint views. The first view button allows you to view slides in normal view, the second is called the slide sorter view, the third is called the reader view and the fourth is called the slide show view. This area also contains the zoom feature.
Status bar is located at the bottom of the PowerPoint window, it shows messages and information about the view, such as the slide number and the current theme template used.
Type a topic in the search textbox and click on search. A list of topics that match key words in your topic will display in the Search Results task pane. Click on the topic that interests you.
Presentation Software Copyright © 2013 by bpayne is licensed under a Creative Commons Attribution 4.0 International License , except where otherwise noted.
Share This Book
The big SlideLizard presentation glossary > Title Slide
Title Slide
Term explanation • category powerpoint.

Definition and meaning
The title slide is the first slide of a presentation. It usually contains a title and a subtitle.
Of all the slides in a presentation, the first slide is one of the most important, as the title slide generally sets the tone. But there's also a lot that can go wrong here. Check out our blog post for tips and ideas for title slides.
Other glossary terms
A webinar is a seminar that takes place in a specific digital location at a specific time. It's a seminar that combines live and online formats.
TOK Presentation
The Theory of knowledge (TOK) presentation is an essential part of the International Baccalaureate Diploma Program (IB). The TOK presentation assesses a student's ability to apply theoretical thinking to real-life situations.
mLearning means mobile learning, which comes from "Mobile Telephone". You can access the learning material over your mobile phone anywhere, which makes learning mobile.
The big SlideLizard presentation glossary
The SlideLizard presentation glossary is a large collection of explanations and definitions of terms in the area of presentations, communication, speaking, events, PowerPoint and education.
Top blog articles More posts

Christmas party & Corona: ideas for your company party in 2022

LIZ - the artificial intelligence in PowerPoint

Get started with Live Polls, Q&A and slides
for your PowerPoint Presentations
Be the first to know!
The latest SlideLizard news, articles, and resources, sent straight to your inbox.
- or follow us on -
We use cookies to personalize content and analyze traffic to our website. You can choose to accept only cookies that are necessary for the website to function or to also allow tracking cookies. For more information, please see our privacy policy .
Cookie Settings
Necessary cookies are required for the proper functioning of the website. These cookies ensure basic functionalities and security features of the website.
Analytical cookies are used to understand how visitors interact with the website. These cookies help provide information about the number of visitors, etc.
Anatomy of a PowerPoint Presentation
The basic building block of a PowerPoint presentation is the slide a block of content the size of a computer screen that typically contains a title, some text, and perhaps a picture or chart. A PowerPoint presentation typically contains many slides.
Figure 1 illustrates a PowerPoint presentation made up of 30 slides. The default (Normal) view includes notes attached to the current slide, and a navigation panel on the left side that allows you to switch between a text outline and slide thumbnails.
Figure 1. PowerPoint's Normal view includes most of the information you need to assemble a presentation.

A fully loaded slide (see Figure 2 ) includes at most six parts:
Figure 2. All the components of a PowerPoint slide are shown here, with slide thumbnails in place of a text outline.

The title, which usually sits at the top of the slide.
Body text, the main part of the slide. More often than not, the text on a slide consists of a series of bulleted or numbered items. However, you can enter any kind of text in this part of a slide bullets and numbers are not required.
Some slides contain content in addition to text. You can add charts, tables, pictures, diagrams, and video clips to help illuminate your presentation.
Text and content sit inside resizable and movable containers called placeholders, which you can see if you click the text or graphic in the slide pane. PowerPoint help screens sometimes refer to the placeholder and the text or content it contains as a "text object" or a "graphic object."
If you choose to display the date and time, these items appear at the lower-left corner by default.
The footer, another optional element, appears by default at the bottom of the slide, in the middle.
Finally, you can choose to display a slide number; its default position is in the lower-right corner.
Most presentations begin with a title slide, which typically includes the title of the presentation, the speaker's name, and other introductory details. If you're planning a presentation as a class project, you might include the class name and number Sociology 101, for instance; for a presentation to a business or civic group, you might include your name and the name of the organization you represent. Other slides in a presentation can also be title slides you might use a title slide to introduce different portions of a long presentation, for example but in most cases, you'll have just one title slide in a presentation, and it will serve as the first slide.
Don't be confused by the terminology. A title slide is, in most cases, a slide that introduces a presentation. A slide title, on the other hand, is usually the first line on a slide.
Critical PowerPoint Shortcuts – Claim Your FREE Training Module and Get Your Time Back!
PowerPoint title slide explained (it’s not what you think it is)
- PowerPoint Tutorials
- November 29, 2023
What is a title slide in PowerPoint, and is it the same thing that you think it is? This is a tricky topic if you are an analyst, associate, or keeper of your team’s PowerPoint presentation, when it comes to managing the headers and footers in your presentation.
That’s because the Header and Footer dialog box (pictured below), has the following option that will throw you for a loop.

If you don’t understand what PowerPoint considers as the title slide of your presentation, it is easy to accidentally mess up the headers and footers in your presentation, creating an embarrassing disaster that you will be stuck trying to troubleshoot and fix.
This can be the same issue you find in your client decks, so it’s good to know how to fix this.
Table of Contents
What is a title slide.
A title slide in PowerPoint (as humans think of it as) is either the slide that is named “title slide” in your presentation, or the slide that looks like a title slide. Common elements include a large title, a subtitle, some kind of graphical element, etc.

This is where you type the title and subtitle of your presentation, add your name, your presentation topic, the date and time, or whatever other elements you want to display on the first slide of your presentation. Typically, this is the slide you put up first to let your audience know they are attending the correct meeting.
Unfortunately, this is not how PowerPoint defines it. Read the next section to see why your instincts might lead you astray.
What PowerPoint considers your title slide
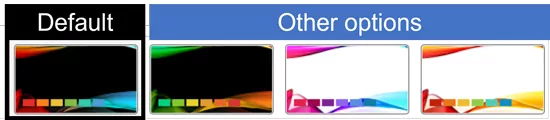
The title slide in PowerPoint (as PowerPoint thinks of it as) is simply the first slide layout of your presentation. This is true whether it is named “title slide” or whether it looks like a title slide. PowerPoint is just a program. So, whatever the first slide layout is in your presentation is, is what PowerPoint defines your title slide as.

Notice in the picture above, that there is a different slide in the first position of otherwise the same exact PowerPoint template. In both cases, the first slide is what PowerPoint uses as the title slide when determining where to place your headers and footers.
The problem with example 2 in the picture above, is that if you select “don’t’ show on title slide” in the Header and Footer dialog box, then none of your slide numbers, date and time, and/or your footers will display on the Title and Content layout in your presentation. I guarantee this is not what you want.
Arranging a layout so it becomes your title slide
If the wrong slide is in the first position of your PowerPoint presentation, you will need to navigate to the Slide Master view to fix it. In short, all you need to do is move your actual title slide into the first position on your slide master, so that both you and PowerPoint are on the same page.

To rearrange a slide to be your title slide in PowerPoint, simply:
- Click the View tab
- Select Slide Master View
- Click and drag your desired Title Slide into the first position
By dragging your preferred slide into the first position on your Slide Master, automatically designates it as the Title Slide in PowerPoint. That means you won’t have any header or footer issues moving forward.
NOTE: For help adding and troubleshooting slide numbers in PowerPoint (which can be tricky), see our guide on adding slide numbers to PowerPoint .
Title slide examples
If you are looking for inspiration for your own presentations, below are three different examples from the default PowerPoint templates that come with the Microsoft Office Suite. All these templates include color variations too, giving you a variety of options to work with.

To find these default PowerPoint templates (or themes) and their color variations, simply:
- Click the Design tab
- Select a Theme
- Choose a Variant of that theme
The variant options represent different color combinations and/or design elements of the base theme you chose, giving you a different look and feel for your title slide, divider slides, and the other content container slides in your presentation.
PowerPoint Template Help: If you don’t want to use the default PowerPoint templates, you can buy a professional PowerPoint template online ( see my guide here ). Alternatively, if you are willing to invest the time, you can create your own PowerPoint template from scratch ( see my guide here ).
1. Integral template
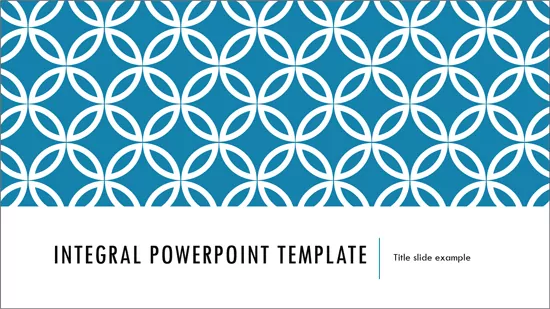
The integral template focuses on a blue and white design element at the top, with the title and subtitle of your presentation at the bottom of the slide. That said, you can add any other elements you like. This template also includes seven other color options including green, red, yellow, solid colors etc.

2. Circuit Template
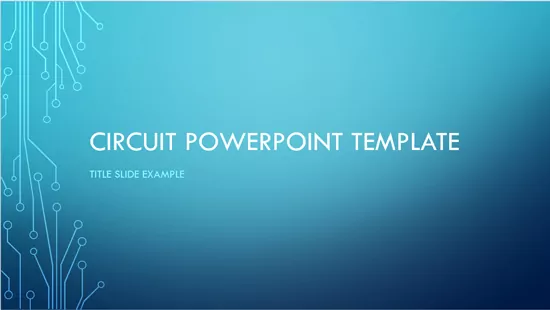
The Circuit PowerPoint template includes a blue gradient background, with some circuit like design elements on the left side. The left side of your title slide is a great place to add your own company branding, or elements from your industry. This template includes three variations, including green, red, and black.

3. Vapor Trail Template
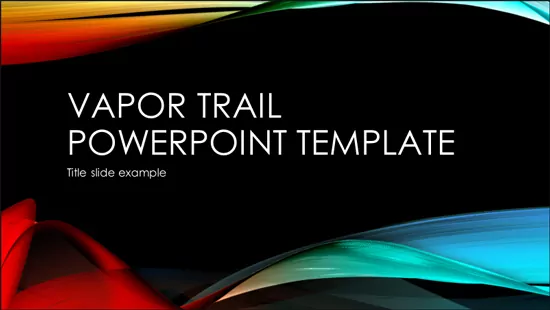
The Vapor Trail PowerPoint template is a bit more artsy than the other two. This includes wavey colored lines, giving it a more modern and artistic look and feel. Like the other templates, the default title slide only includes a title and subtitle, but you can add any other elements you need for your own presentation. The Vapor Trail template also includes three additional colors: green, pink, and orange.
You now know more about what a title slide is than most professionals (even those that have been using PowerPoint for years). This is a nuance of PowerPoint that specifically relates back to getting your headers and footers to properly display throughout your PowerPoint presentation. So, if you are an investment banking analyst, associate, or that is constantly updating large decks, this is something you will want to properly nail dwon.
If you enjoyed this article and want to learn more about our PowerPoint training seminars, courses, and other useful Powerpoint tutorials that will get you to Happy Hour, visit us here .
🔒 Unlock the PowerPoint Shortcuts Trusted by Industry Leaders KKR, American Express, HSBC, and More!
Join over 114,880 professionals from diverse fields including consulting, investment banking, advertising, marketing, sales, and business development who have supercharged their PowerPoint game with our proven methods.
✅ Customize compelling presentations effortlessly.
✅ Master time-saving techniques for faster deck creation.
✅ Boost your career prospects with top-notch PowerPoint skills.
Get FREE access to the Critical PowerPoint Shortcuts module of our premium training course by entering your name and email below.
DISCLAIMER: PC Users Only!
We respect your privacy and will keep your info safe and confidential.
About The Author

Popular Tutorials
- How to Strikethrough Text (l̶i̶k̶e̶ ̶t̶h̶i̶s̶) in Word, Excel & PowerPoint
- How to Make Animated Fireworks in PowerPoint (Step-by-Step)
- Strikethrough Shortcut (l̶i̶k̶e̶ ̶t̶h̶i̶s̶) for Word, Excel & PowerPoint
- How to Create a Flash Card Memory Game in PowerPoint (Like Jeopardy)
- Keyboard Shortcuts Not Working: Solved
PowerPoint Tutorial Categories
- Strategies & Opinions
- Shortcuts & Hacks
- Presentation Design
- Pictures, Icons, Videos, Etc.
- New Features
- Miscellaneous
- Charts & Data Viz
We help busy professionals save hours and gain peace of mind, with corporate workshops, self-paced courses and tutorials for PowerPoint and Word.
Work With Us
- Corporate Training
- Presentation & Template Design
- Courses & Downloads
- PowerPoint Articles
- Word Articles
- Productivity Resources
Find a Tutorial
- Free Training
- For Businesses
We help busy office workers save hours and gain peace of mind, with tips, training and tutorials for Microsoft PowerPoint and Word.
Master Critical PowerPoint Shortcuts – Secure Your FREE Training Module and Save Valuable Time!
⌛ Master time-saving expert techniques.
🔥 Create powerful presentations.
🚀 Propel your career to new heights.
We value your privacy – we keep your info safe.
Discover PowerPoint Hacks Loved by Industry Giants - KKR, AmEx, HSBC!
Over 114,880 professionals in finance, marketing and sales have revolutionized their PPT skills with our proven methods.
Gain FREE access to a full module of our premium PowerPoint training program – Get started today!
We hate spam too and promise to keep your information safe.
You are currently viewing a placeholder content from Facebook . To access the actual content, click the button below. Please note that doing so will share data with third-party providers.
- Directories
Structuring your presentation
Having worked out your key message and main points, the next stage is to structure the content of your presentation. Just like other forms of academic writing, a presentation can be divided into three parts: an introduction detailing the purpose and structure of the talk; a body covering the main points; and a conclusion summarising and highlighting the significance of your talk. A template for your talk is given in the Presentations structure document.
Introduction
You may wish to capture the audience's interest and attention with a story or commentary on a current development that raises an important question / problem / dilemma. Or, you may first wish to frame your talk with brief context / background, and then swiftly transition into a concise explantion of the issue / problem or debate that your key message addresses. In either case, the next step in your introduction is to clearly state the purpose or key message of the talk, for example using the following prompts.
- 'Today I would like to talk about a highly contested issue...'
- 'This question is central to understanding...'
- 'I will make the case that...'
If necessary, limit the scope of the presentation:
- 'Although there are several theories, this talk will only focus on two ...'
- 'focuses only on the private sector as opposed to the public sector ...'
- 'Implementation, rather than policy formation, will be considered ...'
Signpost the structure/approach of the talk:
- 'My case is based on three main points. Firstly...The second point is that...This will then lead me to...Finally...'
This part of the talk provides the support for your main message. You should discuss each of your main points in a clear and logical order. As you do, be sure to explain how these points relate to each other and your key message:
- 'Turning to the next point...'
- 'Another important consideration is that...'
- 'Having examined...I'd now like to talk about...'
All necessary concepts and terms need to be defined and explained before being used. Examples can be used to effectively illustrate your points.
Signpost that you have reached the end of the talk:
- 'In conclusion...'
- 'I'd like to finish by...'
Summarise the key points covered. In the process, remind the audience of the significance of the topic, the aims of your talk and demonstrate how you have met the aims. Thank the audience for their attention and invite them to comment or ask questions.
Acknowledging others ideas
As with all academic work, if you use other people's ideas, images, data etc, then you must appropriately acknowledge it in your presentation. You do this through your spoken words or supply references on your visual aids. In text references can be kept brief to enable the audience to read. You should also include a reference list slide at the end of your presentation. See referencing resources for more information.
Working with visual aids >>
Presentations
Working with visual aids
Delivering the presentation
Reference Documents
- Simple presentation template (DOCX, 64.34 KB)
- Detailed presentation template (DOCX, 66.58 KB)
Use contact details to request an alternative file format.
- ANU Library Academic Skills
- +61 2 6125 2972
30 Presentation Terms & What They Mean
Delivering a captivating presentation is an art that requires more than just confidence and oratory skills. From the design of your slides to the way you carry yourself on stage, every little detail contributes to the overall effectiveness of your presentation. For those who wish to master this art, getting familiar with the associated terminology is a great place to start.
In this article, we’ll explore “30 Presentation Terms & What They Mean,” shedding light on the key terms and concepts in the world of presentations. Whether you’re a professional looking to refine your skills, a student aiming to ace your next presentation, or just someone curious about the subject, this guide is sure to provide you with valuable insights.
Dive in as we explore everything from slide decks and speaker notes to body language and Q&A sessions.
Each term is elaborated in depth, giving you a comprehensive understanding of their meanings and applications. This knowledge will not only make you more comfortable with presentations but will also empower you to deliver them more effectively.
How Does Unlimited PowerPoint Templates Sound?
Download thousands of PowerPoint templates, and many other design elements, with a monthly Envato Elements membership. It starts at $16 per month, and gives you unlimited access to a growing library of over 2,000,000 presentation templates, fonts, photos, graphics, and more.

Maximus Template

Mystify Presentation

Pitch Deck Templates
Startup pitch deck.
Explore PowerPoint Templates
Table of Contents
- Speaker Notes
- White Space
- Aspect Ratio
- Grid System
- Master Slide
- Infographic
- Data Visualization
- Call-to-Action (CTA)
- Color Palette
- Negative Space
- Storyboarding
- Bullet Points
- Eye Contact
- Body Language
- Q&A Session
1. Slide Deck
A slide deck, in its most basic sense, is a collection of slides that are presented in sequence to support a speech or presentation. The slides typically contain key points, graphics, and other visual aids that make the presentation more engaging and easier to understand.
Beyond merely displaying information, a well-crafted slide deck can tell a story, create an emotional connection, or illustrate complex concepts in a digestible way. Its design elements, including the choice of colors, fonts, and images, play a significant role in how the presentation is received by the audience.
2. Speaker Notes
Speaker notes are a feature in presentation software that allows presenters to add notes or cues to their slides. These notes are only visible to the presenter during the presentation. They can include additional information, reminders, prompts, or even the full script of the speech.
While the audience sees the slide deck, the speaker can use these notes as a guide to ensure they cover all necessary points without memorizing the entire speech. It’s essential to use speaker notes strategically – they should aid the presentation, not become a script that hinders natural delivery.
A template is a pre-designed layout for a slide deck. It typically includes a set design, color scheme, typefaces, and placeholders for content like text, images, and graphs. Templates can significantly reduce the time and effort required to create a professional-looking presentation.
While templates can be incredibly helpful, it’s important to choose one that aligns with the theme, purpose, and audience of the presentation. Customizing the template to match your brand or topic can further enhance its effectiveness.
4. Transition
In the realm of presentations, a transition refers to the visual effect that occurs when you move from one slide to the next. Simple transitions include fade-ins and fade-outs, while more complex ones might involve 3D effects, wipes, or spins.
Transitions can add a touch of professionalism and dynamism to a presentation when used correctly. However, overuse or choosing flashy transitions can be distracting and detract from the content. The key is to use transitions that complement the presentation’s tone and pace without overshadowing the message.
5. Animation
Animation is the process of making objects or text in your slide deck appear to move. This can involve anything from making bullet points appear one by one, to having graphics fly in or out, to creating a simulation of a complex process. Animation can add interest, emphasize points, and guide the audience’s attention throughout the presentation.
While animations can make a presentation more engaging, they must be used judiciously. Excessive or overly complex animations can distract the audience, complicate the message, and look unprofessional. As with transitions, animations should support the content, not detract from it.
6. Multimedia
Multimedia refers to the combination of different types of media — such as text, images, audio, video, and animation — within a single presentation. Incorporating multimedia elements can make a presentation more engaging, cater to different learning styles, and aid in explaining complex ideas.
However, it’s important to ensure that multimedia elements are relevant, high-quality, and appropriately scaled for the presentation. Additionally, depending on the presentation venue, technical considerations such as file sizes, internet speed, and audio quality need to be taken into account when using multimedia.
7. White Space
In the context of presentation design, white space (or negative space) refers to the unmarked portions of a slide, which are free of text, images, or other visual elements. Despite its name, white space doesn’t necessarily have to be white — it’s any area of a slide not filled with content.
White space can give a slide a clean, balanced look and can help draw attention to the most important elements. It can also reduce cognitive load, making it easier for the audience to process information. Good use of white space is often a key difference between professional and amateur designs.
8. Aspect Ratio
Aspect ratio is the proportional relationship between a slide’s width and height. It’s typically expressed as two numbers separated by a colon, such as 4:3 or 16:9. The first number represents the width, and the second represents the height.
The choice of aspect ratio can affect how content fits on the screen and how the presentation appears on different displays. For instance, a 16:9 aspect ratio is often used for widescreen displays, while a 4:3 ratio may be more suitable for traditional computer monitors and projectors.
9. Grid System
The grid system is a framework used to align and layout design elements in a slide. It’s comprised of horizontal and vertical lines that divide the slide into equal sections or grids.
The grid system aids in creating visual harmony, balance, and consistency across slides. It can guide the placement of text, images, and other elements, ensuring that they’re evenly spaced and aligned. It’s an important tool for maintaining a professional and organized appearance in a presentation.
10. Readability
Readability refers to how easy it is for an audience to read and understand the text on your slides. It involves factors such as font size, typeface, line length, spacing, and contrast with the background.
Ensuring good readability is crucial in presentations. If your audience can’t easily read and understand your text, they’ll be more likely to disengage. Large fonts, simple language, high-contrast color schemes, and ample white space can enhance readability.
11. Infographic
An infographic is a visual representation of information, data, or knowledge. They’re used in presentations to communicate complex data in a clear, concise, and engaging way. Infographics can include charts, graphs, icons, pictures, and text.
While infographics can effectively communicate complex ideas, they must be designed carefully. Too much information, confusing visuals, or a lack of a clear hierarchy can make an infographic difficult to understand. It’s important to keep the design simple and focus on the key message.
To embed in a presentation context means to incorporate external content, such as a video, a document, or a website, directly into a slide. When an object is embedded, it becomes part of the presentation file and can be viewed or played without leaving the presentation.
Embedding can be a useful tool to incorporate interactive or supplementary content into a presentation. However, it’s important to remember that it can increase the file size of the presentation and may require an internet connection or specific software to function correctly.
13. Palette
A palette, in terms of presentations, refers to the set of colors chosen to be used throughout the slide deck. This can include primary colors for backgrounds and text, as well as secondary colors for accents and highlights.
The right color palette can help convey the mood of a presentation, reinforce branding, and increase visual interest. It’s important to choose colors that work well together and provide enough contrast for readability. Tools like color wheel or color scheme generators can be helpful in choosing a harmonious palette.
14. Vector Graphics
Vector graphics are digital images created using mathematical formulas rather than pixels. This means they can be scaled up or down without losing quality, making them ideal for presentations that may be viewed on different screen sizes.
Vector graphics often have smaller file sizes than their pixel-based counterparts (raster graphics), which can help keep your presentation file manageable. Common types of vector graphics include logos, icons, and illustrations.
15. Mood Board
A mood board is a collection of images, text, colors, and other design elements that serve as visual inspiration for a presentation. It helps establish the aesthetic, mood, or theme of the presentation before the design process begins.
Creating a mood board can be a valuable step in the presentation design process. It can help you visualize how different elements will work together, communicate your design ideas to others, and maintain consistency across your slides.
16. Hierarchy
In design, hierarchy refers to the arrangement of elements in a way that implies importance. In presentations, visual hierarchy helps guide the viewer’s eye to the most important elements first.
Hierarchy can be created through the use of size, color, contrast, alignment, and whitespace. Effective use of hierarchy can make your slides easier to understand and keep your audience focused on the key points.
17. Stock Photos
Stock photos are professionally taken photographs that are bought and sold on a royalty-free basis. They can be used in presentations to add visual interest, convey emotions, or illustrate specific concepts.
While stock photos can enhance a presentation, it’s important to use them judiciously and choose images that align with your presentation’s tone and content. Overuse of generic or irrelevant stock photos can make a presentation feel impersonal or unprofessional.
18. Sans Serif
Sans serif refers to a category of typefaces that do not have small lines or strokes attached to the ends of larger strokes. Sans serif fonts are often used in presentations because they’re typically easier to read on screens than serif fonts, which have these small lines.
Some popular sans serif fonts for presentations include Helvetica, Arial, and Calibri. When choosing a font for your slides, readability should be a primary consideration.
19. Hyperlink
A hyperlink, or link, is a clickable element in a slide that directs the viewer to another slide in the deck, a different document, or a web page. Hyperlinks can be used in presentations to provide additional information or to navigate to specific slides.
While hyperlinks can be useful, they should be used sparingly and appropriately. Links that direct the viewer away from the presentation can be distracting and disrupt the flow of your talk.
PDF stands for Portable Document Format. It’s a file format that preserves the fonts, images, graphics, and layout of any source document, regardless of the computer or software used to create it. Presentations are often saved and shared as PDFs to ensure they look the same on any device.
While a PDF version of your presentation will maintain its appearance, it won’t include interactive elements like animations, transitions, and hyperlinks. Therefore, it’s best used for distributing slide handouts or when the presentation software used to create the deck isn’t available.
21. Raster Graphics
Raster graphics are digital images composed of individual pixels. These pixels, each a single point with its own color, come together to form the full image. Photographs are the most common type of raster graphics.
While raster graphics can provide detailed and vibrant images, they don’t scale well. Enlarging a raster image can lead to pixelation, where the individual pixels become visible and the image appears blurry. For this reason, raster images in presentations should be used at their original size or smaller.
22. Typeface
A typeface, often referred to as a font, is a set of characters with the same design. This includes letters, numbers, punctuation marks, and sometimes symbols. Typefaces can have different styles and weights, such as bold or italic.
The choice of typeface can significantly impact the readability and mood of a presentation. For example, serif typefaces can convey tradition and authority, while sans serif typefaces can appear modern and clean. The key is to choose a typeface that aligns with the purpose and audience of your presentation.
23. Visual Content
Visual content refers to the graphics, images, charts, infographics, animations, and other non-text elements in a presentation. These elements can help capture the audience’s attention, enhance understanding, and make the presentation more memorable.
While visual content can enhance a presentation, it’s important not to overload slides with too many visual elements, as this can confuse or overwhelm the audience. All visual content should be relevant, clear, and support the overall message of the presentation.
24. Call to Action
A call to action (CTA) in a presentation is a prompt that encourages the audience to take a specific action. This could be anything from visiting a website, signing up for a newsletter, participating in a discussion, or implementing a suggested strategy.
A strong CTA aligns with the goals of the presentation and is clear and compelling. It often comes at the end of the presentation, providing the audience with a next step or a way to apply what they’ve learned.
25. Thumbnails
In presentations, thumbnails are small versions of the slides that are used to navigate through the deck during the design process. They provide an overview of the presentation’s flow and can help identify inconsistencies in design.
Thumbnails are typically displayed in the sidebar of presentation software. They allow you to easily move, delete, or duplicate slides, and can provide a visual check for overall consistency and flow.
26. Aspect Ratio
27. interactive elements.
Interactive elements are components in a presentation that the audience can interact with. These could include hyperlinks, embedded quizzes, interactive infographics, or multimedia elements like audio and video.
Interactive elements can make a presentation more engaging and memorable. However, they require careful planning and should always be tested before the presentation to ensure they work as intended.
28. Placeholders
In the context of presentations, placeholders are boxes that are included in a slide layout to hold specific types of content, such as text, images, or charts. They guide the placement of content and can help ensure consistency across slides.
Placeholders can be especially useful when working with templates, as they provide a predefined layout to follow. However, they should be used flexibly – not every placeholder needs to be used, and additional elements can be added if necessary.
29. Master Slide
The master slide is the top slide in a hierarchy of slides that stores information about the theme and slide layouts of a presentation. Changes made to the master slide, such as modifying the background, fonts, or color scheme, are applied to all other slides in the presentation.
Master slides can help ensure consistency across a presentation and save time when making global changes. However, it’s important to note that individual slides can still be modified independently if necessary.
In presentations, a layout refers to the arrangement of elements on a slide. This includes the placement of text, images, shapes, and other elements, as well as the use of space and alignment.
Choosing the right layout can make your slides look organized and professional, guide the viewer’s eye, and enhance your message. Most presentation software offers a variety of pre-defined layouts, but these can usually be modified to better suit your content and design preferences.

Reuse (import) slides from another presentation
You can add one or more slides to your presentation from another, without having to open the other file.
(By default, a copied slide inherits the design of the slide you're inserting it after in the destination presentation. However, you can choose to keep the formatting of the slide you're copying instead.)
When you import a slide from one presentation to another, it is simply a copy of the original. Changes you make to the copy do not affect the original slide in the other presentation.
Open the presentation that you want to add a slide to.
In the slide thumbnail pane on the left, click where you want to add a slide.

On the Home tab of the ribbon, in the Slides group, click the arrow below New Slide , and then select Reuse Slides .

In the Reuse Slides pane, click Open a PowerPoint File .

In the Browse dialog box, locate and click the presentation file that contains the slide that you want, and then click Open .
If you want the slide that you are adding to the destination presentation to maintain the formatting of the original presentation, select the Keep source formatting check box before you add the slide to the destination presentation. (When this check box is not selected, the copied slides inherit the styling of the slide they're inserted after.) Then, in the Reuse Slides pane, do one of the following:
To add a single slide, click the slide.
To add all of the slides, right-click any slide, and then select Insert All Slides .

Open an existing presentation or create a new presentation that you want to insert slides into.
In Normal view, in the navigation pane, click the slide that you want to insert the other slides after.
On the Home tab, under Slides , click the arrow next to New Slide , and then click Reuse Slides .

In the dialog box, find the presentation that you want to insert, and select it. Click OK .
Note: In PowerPoint for the web, you can insert reused slides from other presentations only one at a time.
Open the presentation that you want to insert slides to.
In the slide thumbnail pane on the left, click the slide you want to add slide after.

Import slides from another presentation to the current one
In the thumbnail pane on the left, select the slide after which you want to insert the imported slides.
On the Home tab, select Reuse Slides .

The Reuse Slides pane opens on the right. Your recent presentations are shown.
Select a presentation from the list to see the individual slides in it.
Click a slide thumbnail to copy it into the current presentation.
By default, an imported slide keeps the colors and formatting of the presentation it comes from.
When you're done importing slides from the selected presentation, you can close the pane or search for other slides to import.

More details
A search box at the top of the Reuse Slides pane lets you search for any presentation, whether it's stored on your computer's hard drive or on SharePoint or OneDrive for work or school.
A Browse button under the search box lets you explore your folders for what you want.
By default, a slide you import keeps the formatting of the presentation it comes from. But three formatting options are available. When a slide is inserted, it appears in the thumbnail pane on the left and a (Ctrl) pop-up menu appears on the thumbnail. Click it to see three Paste options:
Copy and paste your slides
Use Slide Libraries to share and reuse PowerPoint slides
Add, rearrange, duplicate, and delete slides in PowerPoint

Need more help?
Want more options.
Explore subscription benefits, browse training courses, learn how to secure your device, and more.

Microsoft 365 subscription benefits

Microsoft 365 training

Microsoft security

Accessibility center
Communities help you ask and answer questions, give feedback, and hear from experts with rich knowledge.

Ask the Microsoft Community

Microsoft Tech Community

Windows Insiders
Microsoft 365 Insiders
Was this information helpful?
Thank you for your feedback.
7 slides you should have in your PowerPoint presentation
We really hope you enjoyed: “7 Slides you should have in your PowerPoint Presentation”. This list is by no means exhaustive but if more presenters added just some of these techniques to their presentations the world would be a lot less cluttered with death-by-PowerPoint and we’d have more alive audiences. Now that’s an idea worth spreading!
Along the way we have discovered and developed strategies to give our client’s presentations the WOW FACTOR . This page has been made so we can share some of what we have learnt with you, to help you with your presentations. This is by no means an exhaustive tips list but it is a good start to get you on your way with designing.
We are sure you will be impressed so to hire us please contact us as we are always happy to help your company with our amazing presentation design skills!
1. Logo Animation
Your logo or brand is a critical part of your communication. So why put it in the corner of your slides? Your logo or brand should be displayed front and centre at the start of your presentation and well animated to convey the essence of your brand. Your logo style and colors should then be reflected in the presentation template you are using.
Take a look at these examples:
2. Problem & Solution
From the outset you want to engage the audience by asking them a question. The question should stimulate the audience into thinking – yes why is that so – why does that happen – how can we solve that? Once the issue is defined – offer your solution.
Here’s a great example of this:
This client posed several of these types of questions at the start of the presentation and then revealed the answer – thus defining the need for their service!

3. Timeline
How long have you been doing what you’re doing? What services do you offer & over what period have you been doing this? Audiences love to see a visual representation of the time you’ve invested in your solution. Timeline slides can be animated or interactive – touch a year on the timeline ribbon to go to that year.
Here’s a few examples:
4. Interaction
Presentations are getting shorter. Have you heard of the 10, 20 ,30 rule of presenting? Average pitch decks are now just 10-15 slides so how can you get more interaction with your audience in the same time? Interactivity that’s how! Your presentation should have a buttons which link to different sections of your presentations.
Below is an example of one presentation which has over 1800 slides! The client never presents them all just uses interaction as a way of presenting. And with the increase usage of touchscreen laptops this will make for a very interactive sales meeting.
5. Multi-Lingual
If you are communicating to a multilingual audience then please consider getting some of your text translated into the relevant language. There’s nothing that an audience loves more than if you’ve considered them in your pitch. The onscreen text should be in both languages so that you can refer to the subject while they read the highlights.
Here’s some creative Arabic examples which work well:
6. Infographics
Still using bullet points? Come on – be bulletproof! There’s enough bullets in the world and nothing says amateur than reading a screen full of bullets. We recommend replacing the bullets with infographics and if possible animating the.
Here’s some recent examples:
7. Amazing Factoids
Take something normal about your offering and make it amazing with an onscreen amazing factoid animation.
Checkout these examples:
Tell Us What You Need - Only Takes 2 Minutes!
Fill in the brief form for a FREE quote

Explore all our presentation design services
Presentation design, audience engagement, presentation training, data visualization, master powerpoint animator, visual presentation, advance public speaking, kids training.
How-To Geek
6 ways to create more interactive powerpoint presentations.
Engage your audience with cool, actionable features.
Quick Links
- Add a QR code
- Embed Microsoft Forms (Education or Business Only)
- Embed a Live Web Page
- Add Links and Menus
- Add Clickable Images to Give More Info
- Add a Countdown Timer
We've all been to a presentation where the speaker bores you to death with a mundane PowerPoint presentation. Actually, the speaker could have kept you much more engaged by adding some interactive features to their slideshow. Let's look into some of these options.
1. Add a QR code
Adding a QR code can be particularly useful if you want to direct your audience to an online form, website, or video.
Some websites have in-built ways to create a QR code. For example, on Microsoft Forms , when you click "Collect Responses," you'll see the QR code option via the icon highlighted in the screenshot below. You can either right-click the QR code to copy and paste it into your presentation, or click "Download" to add it to your device gallery to insert the QR code as a picture.
In fact, you can easily add a QR code to take your viewer to any website. On Microsoft Edge, right-click anywhere on a web page where there isn't already a link, and left-click "Create QR Code For This Page."
You can also create QR codes in other browsers, such as Chrome.
You can then copy or download the QR code to use wherever you like in your presentation.
2. Embed Microsoft Forms (Education or Business Only)
If you plan to send your PPT presentation to others—for example, if you're a trainer sending step-by-step instruction presentation, a teacher sending an independent learning task to your students, or a campaigner for your local councilor sending a persuasive PPT to constituents—you might want to embed a quiz, questionnaire, pole, or feedback survey in your presentation.
In PowerPoint, open the "Insert" tab on the ribbon, and in the Forms group, click "Forms". If you cannot see this option, you can add new buttons to the ribbon .
As at April 2024, this feature is only available for those using their work or school account. We're using a Microsoft 365 Personal account in the screenshot below, which is why the Forms icon is grayed out.
Then, a sidebar will appear on the right-hand side of your screen, where you can either choose a form you have already created or opt to craft a new form.
Now, you can share your PPT presentation with others , who can click the fields and submit their responses when they view the presentation.
3. Embed a Live Web Page
You could always screenshot a web page and paste that into your PPT, but that's not a very interactive addition to your presentation. Instead, you can embed a live web page into your PPT so that people with access to your presentation can interact actively with its contents.
To do this, we will need to add an add-in to our PPT account .
Add-ins are not always reliable or secure. Before installing an add-in to your Microsoft account, check that the author is a reputable company, and type the add-in's name into a search engine to read reviews and other users' experiences.
To embed a web page, add the Web Viewer add-in ( this is an add-in created by Microsoft ).
Go to the relevant slide and open the Web Viewer add-in. Then, copy and paste the secure URL into the field box, and remove https:// from the start of the address. In our example, we will add a selector wheel to our slide. Click "Preview" to see a sample of the web page's appearance in your presentation.
This is how ours will look.
When you or someone with access to your presentation views the slideshow, this web page will be live and interactive.
4. Add Links and Menus
As well as moving from one slide to the next through a keyboard action or mouse click, you can create links within your presentation to direct the audience to specific locations.
To create a link, right-click the outline of the clickable object, and click "Link."
In the Insert Hyperlink dialog box, click "Place In This Document," choose the landing destination, and click "OK."
What's more, to make it clear that an object is clickable, you can use action buttons. Open the "Insert" tab on the ribbon, click "Shape," and then choose an appropriate action button. Usefully, PPT will automatically prompt you to add a link to these shapes.
You might also want a menu that displays on every slide. Once you have created the menu, add the links using the method outlined above. Then, select all the items, press Ctrl+C (copy), and then use Ctrl+V to paste them in your other slides.
5. Add Clickable Images to Give More Info
Through PowerPoint's animations, you can give your viewer the power to choose what they see and when they see it. This works nicely whether you're planning to send your presentation to others to run through independently or whether you're presenting in front of a group and want your audience to decide which action they want to take.
Start by creating the objects that will be clickable (trigger) and the items that will appear (pop-up).
Then, select all the pop-ups together. When you click "Animations" on the ribbon and choose an appropriate animation for the effect you want to achieve, this will be applied to all objects you have selected.
The next step is to rename the triggers in your presentation. To do this, open the "Home" tab, and in the Editing group, click "Select", and then "Selection Pane."
With the Selection Pane open, select each trigger on your slide individually, and rename them in the Selection Pane, so that they can be easily linked to in the next step.
Finally, go back to the first pop-up. Open the "Animations" tab, and in the Advanced Animation group, click the "Trigger" drop-down arrow. Then, you can set the item to appear when a trigger is clicked in your presentation.
If you want your item to disappear when the trigger is clicked again, select the pop-up, click "Add Animation" in the Advanced Animation group, choose an Exit animation, and follow the same step to link that animation to the trigger button.
6. Add a Countdown Timer
A great way to get your audience to engage with your PPT presentation is to keep them on edge by adding a countdown timer. Whether you're leading a presentation and want to let your audience stop to discuss a topic, or running an online quiz with time-limit questions, having a countdown timer means your audience will keep their eye on your slide throughout.
To do this, you need to animate text boxes or shapes containing your countdown numbers. Choose and format a shape and type the highest number that your countdown clock will need. In our case, we're creating a 10-second timer.
Now, with your shape selected, open the "Animations" tab on the ribbon and click the animation drop-down arrow. Then, in the Exit menu, click "Disappear."
Open the Animation Pane, and click the drop-down arrow next to the animation you've just added. From there, choose "Timing."
Make sure "On Click" is selected in the Start menu, and change the Delay option to "1 second," before clicking "OK."
Then, with this shape still selected, press Ctrl+C (copy), and then Ctrl+V (paste). In the second box, type 9 . With the Animation Pane still open and this second shape selected, click the drop-down arrow and choose "Timing" again. Change the Start option to "After Previous," and make sure the Delay option is 1 second. Then, click "OK."
We can now use this second shape as our template, as when we copy and paste it again, the animations will also duplicate. With this second shape selected, press Ctrl+C and Ctrl+V, type 8 into the box, and continue to do the same until you get to 0 .
Next, remove the animations from the "0" box, as you don't want this to disappear. To do this, click the shape, and in the Animation Pane drop-down, click "Remove."
You now need to layer them in order. Right-click the box containing number 1, and click "Bring To Front." You will now see that box on the top. Do the same with the other numbers in ascending order.
Finally, you need to align the objects together. Click anywhere on your slide and press Ctrl+A. Then, in the Home tab on the ribbon, click "Arrange." First click "Align Center," and then bring the menu up again, so that you can click "Align Middle."
Press Ctrl+A again to select your timer, and you can then move your timer or copy and paste it elsewhere.
Press F5 to see the presentation in action, and when you get to the slide containing the timer, click anywhere on the slide to see your countdown timer in action!
Now that your PPT presentation is more interactive, make sure you've avoided these eight common presentational mistakes before you present your slides.
What is the Difference between a Presentation and a Slide?
By: Author Shrot Katewa

People often use the terms “Presentation” and “Slide” interchangeably. But, do these terms mean one and the same thing? If not, what exactly is the difference between a Presentation and a Slide?
The main difference between a presentation and a slide is that a slide is just a single page of a presentation document whereas a presentation is an actual process of sharing and presenting the information present on the slides.
There are several other similar terms that are used when referring to presentations. In this article, we’ll take a look at some of these terms and clear the confusion around it!
Difference between a Presentation and a Slide?
Hopefully, you have already understood the main difference between a presentation and a slide. Let’s look at the two in further detail, and understand the nuances.
What is a Slide?
A slide, as we may have already understood, is a single page of a presentation.

In the above image, as you may notice, all the individual pages that we get within a presentation is referred to as “ Slides “. You may even notice the numbers on the top left corner of each slide in the normal view much like the page numbers on a word document.
These numbers indicate the slide number within a particular presentation file. Even though they indicate the slide number, these are not visible when giving the presentation in the slide show mode (we’ll talk about slide show a bit later in the article).
In order to create a presentation file, you’ll be required to work on each individual slides.
However, many people tend to make this one big mistake! That is, creating slides by writing content as though they would on a page of a word document. One needs to keep in mind that creating a slide is not just about putting a bunch of words together, rather sharing it in a visually appealing and engaging manner with the audience.
Creating a beautiful slide is an art in itself, and it takes skills and an eye for design to create an aesthetically pleasing slide.
What is a Presentation?

A presentation is a means of communication. It is the process of sharing the information present on the slides! A presentation can also take the form of a demonstration of a product, design, or ideas!
A presentation differs from a slide from the fact that the person giving a presentation ideally uses the slide as a base to build upon the points he/she wants to communicate with the audience.
It is quite common to use slides while giving a presentation in today’s modern world. That said, a presentation goes beyond even having any slides! What I mean is that a presentation can be given even without having any slides.
While a single slide can also be construed as a presentation in a scenario when while giving the presentation, the presenter uses just 1 slide. Although, this is an extremely rare occurrence!
It is important to note that some people are really good at creating an aesthetically pleasing slide, while others are great at presenting or sharing the information present on a slide!
Both of the aforementioned activities require a different set of skills. It is quite common to hire or outsource the activity of creating the slides in order to deliver a successful presentation.
Difference between Slide and Slideshow?
Now that we’ve understood the difference between a slide and a presentation, let’s compare another term that people often get confused with – slide vs. slideshow
While a slide is a single page of the presentation document, a slide show is when multiple slides are put together for the purpose of supplementing the presentation to be delivered.
In a nutshell, when a series of slides, usually comprising of images, are displayed using an electronic display device such as a projector screen, it is known as a slide show.
A slide show can also have some background music (an example would be a slide show given at a friend’s wedding). A slide show may either be controlled (for example when giving a presentation), or it may run in a loop (for example in a company booth at a business conference).
Difference between a Slide and Slide Deck?
Another term that you may hear a lot is a “Slide Deck”. It may also be used in combination with other words such as “Pitch Deck” or a “Presentation Deck”. So, let’s understand what it means.
A slide deck is basically a group of slides together used for giving a presentation.
While this may feel similar in meaning to a slide show, the only major difference is its history!
The term slide deck evolved from the olden days when physical slides were used to give a presentation.

Each slide would have a particular piece of information (just as it does today), and all these slides were physically stacked together in the particular desired order to form a deck; much like a deck of cards.
This was done to ensure that the order of the slides doesn’t get changed. This made the term “Slide Deck” synonymous with a presentation.
Today, with the advent of technology, one cannot imaging using physical slides to give a presentation! Just like the technology for presentations, the terminology also changed from Slide Deck to Slide Show. However, the core principle remains the same.
Difference between PowerPoint and Presentation?
Another pair of terms that people highly used interchangeably is PowerPoint and Presentation. So far, we’ve already understood the terms slide, slide show, slide deck and presentation. So, how does the term PowerPoint fit in this?
PowerPoint is a presentation design software owned and provided by Microsoft to its customers as part of its Office Suite. There are several versions of Microsoft PowerPoint. The software is usually updated with new features in its newest release version.
PowerPoint was first launched by a software company “Forethought Inc.”. The software was initially designed to work only on Macintosh computers only. However, in it’s first major acquisition, Microsoft bought PowerPoint and was first brought to the market in 1990 for Windows.
The software became so popular with the users that a presentation is often referred to as “PowerPoint” or “PPT” (which is the file extension of the PowerPoint files).
So, the key difference between PowerPoint and Presentation is that PowerPoint is basically a tool or software to create digital presentations. A presentation can be given with or without a PowerPoint file.
By the way, the screenshot that you saw earlier in the article that showcases the meaning of slides is from a PowerPoint file.
PowerPoint is not the only presentation design software available to the users. In fact, there are literally hundreds of tools to design a presentation. But, PowerPoint by far is the most commonly used and most successful presentation design software.
How many Slides should a Presentation have?
This is a question that haunts most people who need to give a presentation and create the deck. Is there a good number that you should restrict your slides in a presentation to?
While there is no fixed “one size fits all” approach when it comes to creating presentations and limiting the number of slides in a presentation, ensuring that your presentation doesn’t go beyond 20 slides on average !
In a research published in the Marketing Education Review on the topic of Optimizing Learning by Examining the Use of Presentation Slides , it was cited that blank stares were visible amongst audience members when listeners were overwhelmed with too many slides are text-heavy slides.
Thus, it is important to restrict our presentation to no more than 20 slides. Consider the time available at hand when giving a presentation. A 20-slide presentation can be delivered in about 30 minutes.
According to Guy Kawasaki, an angel investor who reviewed several hundreds of pitch presentations every day, is a strong evangelist of the 10 slide rule (now popularly known as the 10/20/30 rule of PowerPoint)
However, a 10-slide PowerPoint presentation may work well for an investor pitch, it may not suffice for most of the other purposes.
How to Create an Attractive PowerPoint Presentation?
Everyone wants their presentation to look attractive. After all, we all understand the importance of a good first impression !
But, when you don’t necessarily have the required skills, how then can you create an attractive presentation?
Fortunately, we wrote a detailed post on how anyone could make their presentation attractive even if they are a complete beginner! Be sure to check out the article!
7 EASY tips that ALWAYS make your PPT presentation attractive (even for beginners)
The tips shared in that article are absolute GOLD! I’m not sure why people are not giving these such simple tips to others.
If you are not comfortable using even the tips mentioned in the article, and you feel like you need some time to gain the skills, then I would recommend hiring a good design agency who will ensure that your presentation turns out to be an attractive one!
A simple guide to slideshows
Learn what slideshows are, how they’re used, common features, and how to choose a slideshow maker. Get started creating your own slideshows today with Microsoft PowerPoint.
What is a slideshow?
What are slideshows used for.

Meetings and presentations
Slideshows are most frequently used to create professional presentations for business meetings, conferences, and educational purposes. A slideshow program allows people to organize content, include visuals, and enhance the overall impact of their message.

Visual storytelling
Because slideshows sequentially display engaging visuals, text, and other multimedia, they’re a strong way to tell a cohesive and compelling narrative from start to finish.

Content creation
Slideshows give content creators a versatile and efficient way to organize information, increase visual appeal, and communicate effectively across different contexts.

Photo and video sharing
Slideshow makers are popular for creating photo and video presentations, especially for events like weddings, birthdays, and vacations. People can add transitions, music, and captions to fully bring the photo-sharing experience to life.

Training and tutorials
Slideshows help break down complex information into digestible chunks with the support of visuals and text, making them ideal for instructional materials, tutorials, and training modules.

Collaborative projects
In collaborative settings, teams use slideshow makers to create joint presentations or reports. The best slideshow makers enable multiple contributors to add their content simultaneously, which helps ensure a cohesive and unified presentation.
What are the features of a slideshow creator?
Slideshow creators vary in what they offer but ideally include:
A library of templates, themes, and images.
If you’re not a designer, this feature is huge. Simply browse the options available in your slideshow maker library to create a polished, professionally designed presentation in a flash. Be sure to confirm that access to the library is free and the images are approved for unrestricted usage.
Audio and video compatibility.
Keeping your audience engaged is key to any successful slideshow presentation. To mix things up, being able to add a multimedia element—like a song or a video clip—will help people stay focused and interested.
Presentation tools.
Handy presenter tools go a long way toward making your slideshow experience seamless. For example, straightforward slide navigation, slideshow keyboard shortcuts, pen and highlighter markup, and adjustable resolution settings.
AI assistance.
With AI revolutionizing content creation, using a slideshow maker that has AI capabilities will enhance efficiency and innovation. Depending on the slideshow app you have, creating an entire slideshow could be as easy as a quick prompt, like “Make a presentation about the benefits of sustainable fashion that has 15 slides.”
Animations.
Like audio and video, animations give your audience a bit of sensory surprise that can capture their attention.
Slide transitions.
Add some pizzazz to how you change slides with visual effects like fading, wiping, and zooming.
Screen recording.
Being able to record your screen in a slideshow maker is helpful when giving an instructional talk, software demonstration, and other types of presentations that require visual aids.
A place to put speaker notes.
Having somewhere to jot a few notes down will help remind you of everything you want to cover as you present.
Different viewing options.
Looking at different views—for example, a presenter view, an audience view, and a high-level view of slide order—is useful when organizing your slideshow’s structure and understanding and preparing for what you’ll see versus what your audience will see.
How do I choose the right slideshow maker?
When choosing a slideshow maker, keep the following questions in mind to make sure you get the most for your money:
Is it scalable with your business?
As your organization grows and changes, it’s important to have flexible technology that adapts to new needs. Having certain features—such as cloud-based collaboration, compatibility with other work apps, and a mobile app—will help ensure that no matter how your business changes, the slideshow maker is up to the task. This also applies to pricing plans. Consider choosing a slideshow app that has a subscription plan (so the software is always up to date), volume-based pricing, or enterprise-level pricing.
Does it have a variety of visual elements?
It’s pretty much a given that a slideshow maker will allow you to add images, but think outside the JPEG box—what other visual elements are available to you? Features like preset themes, free templates, SmartArt, a built-in clip art library, shape tools, background styles, 3D models, and charts and graphs provide diverse ways to switch up how a slideshow looks without relying solely on adding your own images.
Is it easy to use?
You could have the most feature-rich slideshow maker on the market, but if it isn’t easy to use, you probably won’t use it. Or you will, but you’ll be frustrated, waste valuable time, and have difficulty convincing people you work with to use it. As you research slideshow makers, look for videos that show the apps’ interfaces in action to help you decide if they’re intuitive and will have a shorter learning curve.
Does it have collaboration and sharing options?
Because making a slideshow is often a collaborative effort, it’s worthwhile to find a slideshow creator that was designed with this in mind. Pick one that offers editing controls and commenting, as well as the ability to work on a slideshow at the same time as someone else. Having a cloud-based slideshow maker will be key here. You’ll not only save yourself time but also keep things simple by not having multiple versions of the same slideshow.
Explore more about slideshows and slideshow makers
Copilot in powerpoint.
Transform how you make slideshows with the versatile AI in Copilot for PowerPoint.
Improve your presenting skills
Practice presenting with an AI speaker coach to get feedback on body language, repetition, and pronunciation.
Six slideshow tips and tricks
Read up on tips about how to finesse your slideshows to give your most confident presentations.
Get free PowerPoint templates
Show your style with PowerPoint templates in more than 40 categories.
How to make a branded slideshow
Create a cohesive visual identity for your brand that goes beyond adding a logo to every slide.
Try a photo album template
Relive your favorite memories with photo album templates designed for all your unforgettable moments.
The benefits of visual aids in slideshows
Discover why using visual aids helps communicate ideas and messaging more effectively.
Slideshows that reach all learners
Explore the different ways that people learn and how to include all learning styles in your presentations.
Frequently asked questions
How do i make a good slideshow.
Making a good slideshow in PowerPoint is easy:
Plan what you’d like to include in your slideshow.
Launch your slideshow creator.
Choose the theme you’d like.
Import media.
Add text, music, and transitions.
Record, save, and share your slideshow.
Learn more about how to make a slideshow .
How do I add music to a slideshow?
To add music to a slideshow, first make sure that you’re using a slideshow maker with music compatibility. In PowerPoint, follow these steps:
Open your PowerPoint presentation and select the slide where you want to add music.
Click on the Insert tab in the ribbon menu.
Click on the Audio button and select Audio on My PC.
Browse to the folder on your computer where the audio file is located and select it.
Click on the Insert button.
How do I record a slideshow?
The steps for recording a slideshow in PowerPoint will vary depending on the version that you own. Get help with slideshow recording based on your version.
What types of files can I add to a slideshow?
File compatibility in PowerPoint includes the use of JPEGs, PNGs, TIFFs, GIFs, PDFs, MP3s, WAVs, MIDIs, MPEG-4 Videos, and Windows Media Videos.
How do I share my slideshow?
To share your PowerPoint slideshow, follow these steps:
Open your presentation and click Share at the top right of your screen.
If your presentation isn't already stored on OneDrive, select where to save your presentation to the cloud.
Choose a permission level, like Anyone with a link , or maybe just people in your company. You can also control if people can edit or just view the doc.
Select Apply.
Enter names and a message.
Select Send.
Follow Microsoft
IMAGES
VIDEO
COMMENTS
In this case place a nice picture of yourself in the second slide and give not only a brief bio to your audience (and when I say brief it means you are allowed to use between 10 and 20 words), but also - as above - your relationship with the topic. Regarding your portrait, when I talk about a nice picture I mean - whenever possible ...
2. Use the Outline View. One other way to structure a PowerPoint presentation in the editing mode is to use Outline View. You can choose it from the VIEW tab. This view doesn't display sections, but it shows the title and main text of each slide, which can give you a quick overview of the presentation contents.
You discuss your second point from the centre again. You stand on the right side of the stage for your third point. The conclusion occurs in the centre. Key slides for your presentation. Slides are a useful tool for most presentations: they can greatly assist in the delivery of your message and help the audience follow along with what you are ...
Slide basics. Every PowerPoint presentation is composed of a series of slides. To begin creating a slide show, you'll need to know the basics of working with slides. You'll need to feel comfortable with tasks such as inserting a new slide, changing the layout of a slide, arranging existing slides, changing slide view, and adding notes to a slide.
Step-1: Select the Slide first. At first, you have to go to the slide you want to change the layout of and then click on the 'Layout' button in the 'Slides' section of the 'Home' tab. This will open a drop-down menu of all the slide layouts in your presentation. Step-2: Click on Layout and Select a Different Layout.
Slide Pane: Each page of a presentation is called a slide. New presentations open with a Title slide in Normal view. The Slide Pane is where you'll add the text, images, and other screen-show elements that are a part of your presentation. Slides Tab: This area toggles between Slides view and Outline view. Slides view shows a tiny picture of all ...
A slide is a single screen of a presentation, and every presentation is composed of several slides. Depending on the subject matter, the best presentations may consist of 10 to 12 slides to get a message across, but more may be needed for complex subjects. Slides keep an audience's attention during a presentation and provide additional ...
To add a slide from another presentation, see Reuse (import) slides from another presentation. Another way to see all your slides at once and rearrange them is to use the Slide Sorter view. Learn more here: Switch to different views in PowerPoint. See Also. Organize your PowerPoint slide into sections. Design in PowerPoint. Apply a slide layout
PowerPoint 2010 is a complete presentation graphics program that allows you to produce professional looking presentations. ... The first view button allows you to view slides in normal view, the second is called the slide sorter view, the third is called the reader view and the fourth is called the slide show view. This area also contains the ...
Title Slide Term explanation • Category PowerPoint Definition and meaning. The title slide is the first slide of a presentation. It usually contains a title and a subtitle. Of all the slides in a presentation, the first slide is one of the most important, as the title slide generally sets the tone. But there's also a lot that can go wrong here.
Figure 1. PowerPoint's Normal view includes most of the information you need to assemble a presentation. [View full size image] A fully loaded slide (see Figure 2) includes at most six parts: Figure 2. All the components of a PowerPoint slide are shown here, with slide thumbnails in place of a text outline.
A title slide in PowerPoint (as humans think of it as) is either the slide that is named "title slide" in your presentation, or the slide that looks like a title slide. Common elements include a large title, a subtitle, some kind of graphical element, etc. This is where you type the title and subtitle of your presentation, add your name ...
Slide layouts contain formatting, positioning, and placeholder boxes for all of the content that appears on a slide. Placeholders are the dotted-line containers on slide layouts that hold such content as titles, body text, tables, charts, SmartArt graphics, pictures, clip art, videos, and sounds. Slide layouts also contain the colors, fonts ...
Presentation template. Having worked out your key message and main points, the next stage is to structure the content of your presentation. Just like other forms of academic writing, a presentation can be divided into three parts: an introduction detailing the purpose and structure of the talk; a body covering the main points; and a conclusion ...
To create this shape, you can follow the below steps -. On the menu bar, click on "Insert" and then click on "Shapes". Under the basic shapes option, select the trapezium shape. Next, create the shape on your slide. Make sure that the size of the trapezium is good enough to cover about ⅔ parts of the slide.
Pecha Kucha, chit-chat in Japanese, is a unique presentation style. These presentations are known for telling stories through images rather than text and are typically brief. They use the 20x20 rule, where each presentation consists of 20 slides, and each slide is displayed for only 20 seconds, automatically progressing to the next one.
3. Template. A template is a pre-designed layout for a slide deck. It typically includes a set design, color scheme, typefaces, and placeholders for content like text, images, and graphs. Templates can significantly reduce the time and effort required to create a professional-looking presentation.
Open the presentation that you want to add a slide to. In the slide thumbnail pane on the left, click where you want to add a slide. On the Home tab of the ribbon, in the Slides group, click the arrow below New Slide, and then select Reuse Slides. In the Reuse Slides pane, click Open a PowerPoint File. In the Browse dialog box, locate and click ...
PechaKucha ( Japanese: ぺちゃくちゃ, IPA: [petɕa kɯ̥tɕa], [1] chit-chat) is a storytelling format in which a presenter shows 20 slides for 20 seconds of commentary each. At a PechaKucha Night, individuals gather at a venue to share personal presentations about their work. The PechaKucha format can be used, for example, in business ...
1. Logo Animation. Your logo or brand is a critical part of your communication. So why put it in the corner of your slides? Your logo or brand should be displayed front and centre at the start of your presentation and well animated to convey the essence of your brand. Your logo style and colors should then be reflected in the presentation ...
A slide is a single page of a presentation.Collectively, a group of slides may be known as a slide deck.A slide show is an exposition of a series of slides or images in an electronic device or in a projection screen.. Before the advent of the personal computer, a presentation slide could be a 35 mm slide viewed with a slide projector or a transparency viewed with an overhead projector.
Then, with this shape still selected, press Ctrl+C (copy), and then Ctrl+V (paste). In the second box, type 9. With the Animation Pane still open and this second shape selected, click the drop-down arrow and choose "Timing" again. Change the Start option to "After Previous," and make sure the Delay option is 1 second.
The main difference between a presentation and a slide is that a slide is just a single page of a presentation document whereas a presentation is an actual process of sharing and presenting the information present on the slides. There are several other similar terms that are used when referring to presentations.
People should absorb your point in three seconds, max." The three-second rule will dramatically improve your slides by making it easier for your audience to grasp--and retain--the key message ...
To add music to a slideshow, first make sure that you're using a slideshow maker with music compatibility. In PowerPoint, follow these steps: Open your PowerPoint presentation and select the slide where you want to add music. Click on the Insert tab in the ribbon menu. Click on the Audio button and select Audio on My PC.